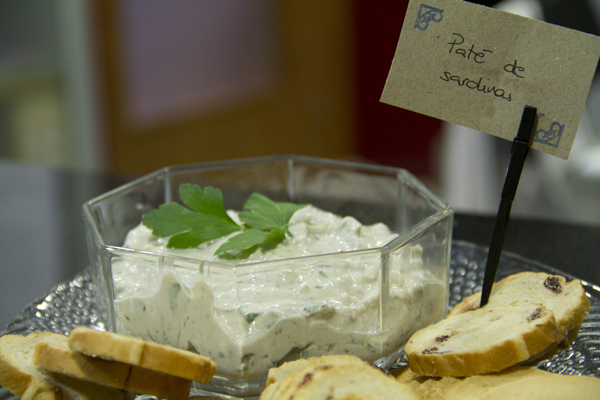
Paté de sardinas

Es una de esas recetas que se hace casi sin pensar, con pocos ingredientes y todos de lo más normalito. Una forma fácil de tomar un aperitivo que sabes exactamente de qué está hecho y que seguro soprenderá a más de uno. Nosotros lo hicimos como parte de un amplio menú de merienda tipo buffet para un cumpleaños. Se puede presentar ya untado, montado en unas tartaletas o, si lo preferimos, en un bonito cuenco para que cada uno se sirva a su antojo.

 Pics and Cakes

¿Qué necesitamos?

  • 1 lata pequeña de sardinas en aceite de oliva

  • 70 g de queso crema

  • ¼ de cebolleta

  • 60 ml de zumo de limón

  • Perejil picado

  • Sal y pimienta negra

¿Cómo lo hacemos?

  • Escurrimos las sardinas y, con ayuda de un cuchillo fino, les retiramos la espina central (si son sardinillas, es posible que no haga falta).

  • Picamos la cebolleta en trocitos pequeños.

  • Ponemos en un bol todos los ingredientes y los mezclamos machacándolos con un tenedor (si queremos que se noten los trozos) o con la batidora (si preferimos un paté más fino y suave).

  • Dejamos refrigerar en la nevera al menos una hora para que se unan sabores y espese.

Consejos:

  • Se puede hacer el día anterior, así cogerá más cuerpo y además adelantaremos trabajo en la cocina.

  • Para aquellos que les guste, pueden sustituir el perejil por cilantro.

*[English version]   SARDINE PÂTÉ * **Ingredients:

  • 1 small tin of sardines in olive oil

  • 70 g cream cheese

  • ¼ spring onion

  • 60 ml fresh lemon juice

  • Chopped parsley

  • Salt and black pepper

  • Drain sardines and remove the central bone with a sharp knive.

  • Finely chop the spring onion.

  • Put all the ingredients together into a bowl and mix smashing them with a fork (if you want to feel the ingredients) or with a mixer (if you prefer a thinner and smoother pâté).

  • Leave cool in the fridge for at least 1 hour. It will unify flavours and become thicker.

Tips:

  • You can prepare it the day before. It will be tastier and you’ll save time in the kitchen.

  • If you like, you can use coriander instead of parsley.


7 de diciembre de 2012 · 2 min · Palstelera

Sardine pâté

This is one of those recipes that comes together almost without thinking, with just a few totally everyday ingredients. An easy way to put out an appetizer where you know exactly what’s in it and that’s bound to surprise more than one guest. We made it as part of a big buffet-style spread for a birthday. You can serve it already spread, piped into little tartlets, or, if you prefer, in a pretty bowl so everyone can help themselves.

Pics and Cakes

What do we need?

  • 1 small tin of sardines in olive oil

  • 70 g (2.5 oz) cream cheese

  • ¼ spring onion

  • 60 ml (¼ cup) lemon juice

  • Chopped parsley

  • Salt and black pepper

How do we make it?

  • Drain the sardines and, with the help of a thin knife, remove the central bone (if they’re baby sardines, you probably won’t need to).

  • Finely chop the spring onion.

  • Put all the ingredients in a bowl and mix, mashing them with a fork (if you want to feel the chunks) or with a blender (if you’d rather have a smoother, finer pâté).

  • Refrigerate for at least an hour so the flavors meld and it thickens up.

Tips:

  • You can make it the day before — it’ll firm up nicely and you’ll get a head start on the kitchen work.

  • For those who like it, you can swap the parsley for cilantro.

*[English version] SARDINE PÂTÉ

  • **Ingredients:
  • 1 small tin of sardines in olive oil

  • 70 g cream cheese

  • ¼ spring onion

  • 60 ml fresh lemon juice

  • Chopped parsley

  • Salt and black pepper

  • Drain sardines and remove the central bone with a sharp knive.

  • Finely chop the spring onion.

  • Put all the ingredients together into a bowl and mix smashing them with a fork (if you want to feel the ingredients) or with a mixer (if you prefer a thinner and smoother pâté).

  • Leave cool in the fridge for at least 1 hour. It will unify flavours and become thicker.

Tips:

  • You can prepare it the day before. It will be tastier and you’ll save time in the kitchen.

  • If you like, you can use coriander instead of parsley.


Comments

cris (2013-01-02 18:27:57):

This pâté is sooooo good! and super easy to make! we made it for New Year’s Eve and it was a hit. Don’t go thinking you’re about to eat a tin of sardines — between the onion, the bit of lemon and the cheese, it’s a super tasty mousse!!

Thanks so much to you both

xx

Palstelera (2013-01-05 00:16:37):

So glad you made it for New Year’s Eve and that you all enjoyed it… :-D

7 de diciembre de 2012 · 3 min · Palstelera

Cherry tomato and cheese quiche

I’m sure you’ve all tried — and many of you have made — the classic quiche lorraine (we’ve got ours ready and we’ll be posting it soon). Today we’re sharing a variation we absolutely loved, easy to make and seriously tasty.

Pics and Cakes

What do we need?

For the shortcrust pastry:

  • 200 g (1 ⅔ cups) flour

  • 100 g (7 tbsp) cold butter

  • 1 egg

  • A pinch of salt

  • A pinch of sugar

For the filling:

  • A dozen cherry tomatoes

  • 100 g (3.5 oz) emmental cheese

  • 50 g (1.75 oz) goat cheese log

  • 200 ml (¾ cup + 1 tbsp) heavy cream

  • 4 medium eggs

  • Oregano, salt and pepper.

How do we make it?

  • First, make the shortcrust pastry. Here you can see how we did it.

  • While the pastry is resting, preheat the oven to 180-200°C (355-390°F).

  • Once the dough is ready, roll it out, place it in a tart pan and bake for about 15 minutes. We do this before adding the filling so the base doesn’t end up raw. To stop it from puffing up, prick it with a fork or weigh it down with dried chickpeas.

  • Cut the tomatoes in half, chop the emmental and slice the goat cheese log into rounds.

  • Beat the eggs and mix with the cream. Add salt and pepper.

  • Stir in the emmental and the oregano.

  • When the pastry is partly baked, take it out of the oven and pour in the mixture. Spread it evenly across the pan.

  • Add the halved cherry tomatoes and the goat cheese on top.

  • Put it back in the oven and bake for another 30 minutes or so.

Tips:

  • You can use any kind of cheese for the filling.

  • If you’re feeling lazy and don’t fancy making the shortcrust pastry, you can buy it at any supermarket, either refrigerated or frozen. If you go for frozen, take it out about 15 minutes before you want to use it so you can work with it — otherwise it’ll crack.

Pics and Cakes


Comments

silvia (2012-11-29 22:13:25):

man… I wish I had an oven so I could follow these recipes… well, the no-bake ones except for the sweet ones, you already know I’m a fan, like that pineapple salad… yum yum

16 de noviembre de 2012 · 2 min · Cesmm

Quiche de quesos y tomates cherry

Seguro que todos habéis probado, y más de uno habrá preparado, la quiche lorraine (nosotros la tenemos lista para publicar próximamente). Hoy os presentamos una variante que nos encantó y que además de fácil de preparar está bien rica.

  Pics and Cakes

¿Qué necesitamos?

Para la masa quebrada:

  • 200 gr de harina

  • 1oo gr de mantequilla fría

  • 1 huevo

  • Una pizca de sal

  • Una pizca de azúcar

Para el relleno:

  • Una docena de tomates cherrys

  • 100 gr de queso emmental

  • 50 gr de rulo de queso de cabra

  • 200 ml de nata

  • 4 huevos medianos

  • Orégano, sal y pimienta.

¿Cómo lo hacemos?

  • Lo primero es hacer la masa quebrada. Aquí podéis ver cómo la hicimos nosotros.

  • Mientras preparamos la masa vamos precalentando el horno a 180-200º C.

  • Cuando la masa esté lista, la estiramos, la ponemos en un molde y horneamos unos 15 minutos. Esto lo hacemos, antes de poner el relleno para que al hornear el conjunto la masa no se quede cruda. Para que no se levante, pinchamos con un tenedor o ponemos garbanzos para que hagan peso.

  •  Vamos partiendo los tomates a la mitad, picando el queso emmental y cortando el rulo de queso de cabra en rodajas.

  • Batimos los huevos y mezclamos con la nata. Añadimos la sal y la pimienta.

  • Incorporamos el queso emmental y el orégano.

  • Cuando la masa esté un poco cocida la retiramos del horno e incorporamos la mezcla. Distribuimos bien por todo el molde.

  • Añadimos los tomates cherry partidos por la mitad y el queso de cabra.

  • Volvemos a poner en el horno y dejamos hornear otra vez en torno a media hora.

Consejos:

  • Puedes utilizar cualquier tipo de queso para el relleno.

  • Si estáis perezosos y no os apetece hacer la masa quebrada se puede comprar en cualquier supermercado refrigerada y congelada. Si la compráis congelada sacad del congelador unos 15 minutos antes de querer utilizarla para poder trabajar con ella, sino se romperá.

Pics and Cakes

[English version] QUICHE OF CHERRY TOMATOES AND CHEESE* *Shortbread pastry:

  • 200 g flour

  • 1oo g cold butter

  • 1 egg

  • A pinch of salt

  • A pinch of sugar

* * Filling:

  • A dozen of cherry tomatoes

  • 100 g emmental cheese

  • 50 g goat cheese

  • 200 ml cream

  • 4 eggs

  • Oregano, salt and pepper

*  *

* *

  • *Prepare the shortbread pastry. You can see here our recipe. *

  • Preheat oven at 180-200º C.

  • Roll out the pastry and place into a baking pan. Bake for 15 minutes. If we bake directly with the filling on it, the pastry will be underdone. To avoid the pastry to ‘grow’ in the oven, you can place a baking paper and fill up with baking beans. You can also pierce the pastry with a fork.

  • * Cut tomatoes into halves. Chop emmental cheese and slice goat cheese. *

  • *Whisk eggs and cream. Add salt and pepper. *

  • *Add emmental cheese and oregano. *

  • Take out the baked pastry from oven and fill evenly with the mix.

  • *Add cherry tomatoes and goat cheese. *

  • Bake in oven around 30 minutes until the cream is firm but smooth.

* *

* *

Tips:

- You can use any cheese you like.

*- If you are lazy or have no time to prepare your own shortbread pastry, you can buy it ready to roll in the supermarket. *


16 de noviembre de 2012 · 3 min · Cesmm

Caramelised Garlic Tart

And then we say the poor Brits have nothing in their cuisine beyond fish & chips and porridge… I tried this recipe at my aunt’s house in Edinburgh and it was honestly a surprise. A savoury tart whose main ingredient is garlic but which, contrary to what you might think, isn’t sharp or strong-tasting at all. It’s creamy, smooth and light on the palate. Hope you enjoy it…

Pics and Cakes

What do we need?

  • 1 sheet of puff pastry

  • 3 heads of garlic (cloves separated and peeled)

  • 1 tablespoon olive oil

  • 1 tablespoon balsamic vinegar of Modena

  • 220 ml (¾ cup + 2 tbsp) water

  • 1 teaspoon icing sugar

  • 1 tablespoon chopped rosemary

  • 1 tablespoon chopped thyme, plus a few whole leaves for garnish

  • 120 g (4 oz) soft goat’s cheese

  • 120 g (4 oz) hard, mature goat’s cheese

  • 2 eggs

  • 100 ml (scant ½ cup) heavy cream

  • 100 ml (scant ½ cup) crème fraîche (can be replaced with heavy cream)

  • Salt and pepper

How do we make it?

  • Roll out the sheet of puff pastry over a round, shallow tart tin so it covers the bottom and the sides. Prick the dough with a fork, place a sheet of baking paper on top and add two handfuls of raw chickpeas (this stops the dough from puffing up while baking). Let it rest in the fridge.

  • Preheat the oven to 180°C (355°F). Bake the pastry case for about 20 minutes. Remove the paper and chickpeas and bake for another 5-10 minutes. Take it out of the oven and set aside. Leave the oven on.

  • While the pastry is baking, make the caramelised garlic. Put the garlic cloves in a pan and cover with water. Bring to a boil and blanch for 3 minutes. Drain well.

  • Dry the pan and put the garlic cloves back in with the olive oil. Fry over high heat for 2 minutes. Add the balsamic vinegar and water and bring to a boil. Let it simmer gently for 10 minutes.

  • Add the sugar, rosemary, thyme and salt. Keep cooking over medium heat for another 10 minutes, or until almost all the liquid has evaporated and the garlic cloves are coated in a kind of dark syrup.

  • To assemble the tart, break up both types of cheese and scatter them over the baked pastry case. Then spoon the caramelised garlic and syrup over the whole surface.

  • In a bowl, whisk the eggs, creams, salt and pepper. Pour this mixture into the tart, trying to fill the gaps left between the cheese and the garlic but without completely covering the ingredients (you should still be able to see them).

  • Lower the temperature to 160°C (320°F). Bake for 35-45 minutes or until you see the filling has set and the top has turned golden.

  • Remove from the tin and serve with a little thyme sprinkled on top.

Tips:

  • To unmould the tart easily once it’s done, you can use a loose-bottomed tin, or otherwise place baking paper before lining it with the puff pastry to prevent sticking.

  • It’s delicious served with a salad. Why not with a rocket and mango salad?

The recipe is from this website: http://britishfood.about.com/od/adrecipes/r/caramelisedgarlictart.htm

*[English version] CARAMELISED GARLIC TART

  • **Ingredients:
  • 1 puff pastry sheet

  • 3 medium heads of garlic (cloves separated and peeled)

  • 1 tbsp olive oil

  • 1 tsp balsamic vinegar

  • 220ml water

  • ¾ tbsp fine sugar

  • 1 tsp chopped rosemary

  • 1 tsp chopped thyme, plus a few whole sprigs to finish

  • 120g soft, creamy goat’s cheese

  • 120g hard, mature goat’s cheese

  • 2 free-range eggs

  • 100ml heavy/double cream

  • 100ml crème fraîche

  • salt and black pepper

  • Have ready a shallow, loose-bottomed, 28cm fluted tart tin. Roll out the puff pastry into a circle that will line the bottom and sides of the tin, plus a little extra. Line the tin with the pastry. Place a large circle of greaseproof paper on the bottom and fill up with baking beans. Leave to rest in the fridge.

  • Preheat the oven to 180°C. Place the tart case in the oven and bake blind for 20 minutes. Remove the beans and paper, then bake for a further 5-10 minutes, or until the pastry is golden. Set aside. Leave the oven on.

  • While the tart case is baking, make the caramelized garlic. Put the cloves in a small saucepan and cover with plenty of water. Bring to a simmer and blanch for 3 minutes, then drain well.

  • Dry the saucepan, return the cloves to it and add the olive oil. Fry the garlic cloves on a high heat for 2 minutes. Add the balsamic vinegar and water and bring to the boil, then simmer gently for 10 minutes.

  • Add the sugar, rosemary, chopped thyme and ¼ teaspoon salt. Continue simmering on a medium flame for 10 minutes, or until most of the liquid has evaporated and the garlic cloves are coated in a dark caramel syrup. Set aside.

  • To assemble the tart, break both types of goat’s cheese into pieces and scatter in the pastry case. Spoon the garlic cloves and syrup evenly over the cheese.

  • In a jug whisk together the eggs, creams, ½ teaspoon salt and some black pepper. Pour this custard over the tart filling to fill the gaps, making sure that you can still see the garlic and cheese over the surface.

  • Reduce the oven temperature to 160°C and place the tart inside. Bake for 35-45 minutes, or until the tart filling has set and the top is golden brown. Remove from the oven and leave to cool a little.

  • Then take out of tin, trim the pastry edge if needed, lay a few sprigs of thyme on top and serve warm.

    Tips:- To take it out of tin in an easy way you can use a quiche pan with the bottom removable or you can just place some oven paper on the tin before rolling out the pastry. - Serve with salad. Why not with mango and rocket salad? Recipe from this website: http://britishfood.about.com/od/adrecipes/r/caramelisedgarlictart.htm


Comments

Sergio (2012-11-16 00:32:29):

Wow!!

This looks incredible. Who would have thought — what a surprise from the Brits.

Palstelera (2012-11-22 19:05:14):

Poor things, we really do underestimate them on the food front…

9 de noviembre de 2012 · 5 min · Palstelera

Tarta de ajos caramelizados

Para que luego digamos que los pobres británicos no tienen nada en su gastronomía aparte de los fish&chips y el porridge… Esta receta la probé en casa de mi tía, en Edimburgo y la verdad es que fue sorprendente. Una tarta salada cuyo ingrediente principal es el ajo pero que, lejos de lo que podáis pensar, ni pica ni tiene un sabor fuerte. Es cremosa, suave y ligera al gusto. Espero que la disfrutéis…

 Pics and Cakes

¿Qué necesitamos?

  • 1 lámina de hojaldre

  • 3 cabezas de ajo (los dientes separados y pelados)

  • 1 cucharada de aceite de oliva

  • 1 cucharada de vinagre balsámico de Módena

  • 220 ml agua

  • 1 cucharadita de azúcar glas

  • 1 cucharada de romero picado

  • 1 cucharada de tomillo picado y unas cuantas hojitas para decorar

  • 120 g queso cremoso de cabra

  • 120 g queso curado de cabra

  • 2 huevos

  • 100 ml nata

  • 100ml crème fraîche (se puede sustituir por nata)

  • Sal y pimienta

¿Cómo lo hacemos?

  • Extendemos la lámina de hojaldre sobre un molde redondo y bajo para que cubra el fondo y las paredes. Pinchamos la masa con un tenedor y ponemos sobre ella una hoja de papel de horno y dos puñados de garbanzos crudos encima (esto ayudará a que al hornear la masa no se infle). Dejamos reposar en la nevera.

  • Precaletnamos el horno a 180ºC. Horneamos la masa unos 20 minutos. Quitamos el papel y los garbanzos y horneamos otros 5-10 minutos. Lo sacamos del horno y reservamos. Dejamos el horno encendido.

  • Mientras el hojaldre se hornea, vamos haciendo los ajos caramelizados. Ponemos los dientes de ajo en una sartén y los cubrimos con agua. Los llevamos a ebullición y los escaldamos durante 3 minutos. Escurrimos bien.

  • Secamos la sartén y volvemos a poner los dientes de ajo con el aceite de oliva. Los freímos a fuego fuerte durante 2 minutos. Añadimos el vinagre balsámico y el agua y lo llevamos a ebullición. Dejamos cocer suavemente durante 10 minutos.

  • Añadimos el azúcar, romero, tomillo y la sal. Seguimos cocinando a fuego medio durante otros 10 minutos o hasta que se haya evaporado prácticamente todo el líquido y los dientes de ajo estén recubiertos por una especie de sirope oscuro.

  • Para montar lo tarta, troceamos los dos tipos de queso y los esparcimos sobre el hojaldre horneado. Después, echamos con una cuchara nuestros ajos caramelizados y el sirope por toda la superficie.

  • En un bol batimos los huevos, las natas, sal y pimienta. Añadimos esta creama a la tarta, tratando de rellenar los huecos que quedan entre el queso y los ajos pero sin cubrir del todo los ingredientes (que se sigan viendo).

  • Bajamos la temperatura a 160ºC. Horneamos durante 35-45 minutos o hasta que veamos que el relleno esta firme y que la parte superior se ha dorado.

  • Lo sacamos del molde y servimos con un poquito de tomillo espolvoreado por encima.

Consejos:

  • Para poder desmoldar la tarta sin problema una vez hecha, podéis utilizar un molde desmoldable o si no poner papel de horno antes de cubrirlo con la lámina de hojaldre para evitar que se pegue.

  • Si lo servis acompañado de una ensalada, estará riquísimo. ¿Y por qué no con una ensalada de rúcula y mango?

La receta es de esta web: http://britishfood.about.com/od/adrecipes/r/caramelisedgarlictart.htm

*[English version] CARAMELISED GARLIC TART * **Ingredients:

  • 1 puff pastry sheet

  • 3 medium heads of garlic (cloves separated and peeled)

  • 1 tbsp olive oil

  • 1 tsp balsamic vinegar

  • 220ml water

  • ¾ tbsp fine sugar

  • 1 tsp chopped rosemary

  • 1 tsp chopped thyme, plus a few whole sprigs to finish

  • 120g soft, creamy goat’s cheese

  • 120g hard, mature goat’s cheese

  • 2 free-range eggs

  • 100ml heavy/double cream

  • 100ml crème fraîche

  • salt and black pepper


  • Have ready a shallow, loose-bottomed, 28cm fluted tart tin. Roll out the puff pastry into a circle that will line the bottom and sides of the tin, plus a little extra. Line the tin with the pastry. Place a large circle of greaseproof paper on the bottom and fill up with baking beans. Leave to rest in the fridge.

  • Preheat the oven to 180°C. Place the tart case in the oven and bake blind for 20 minutes. Remove the beans and paper, then bake for a further 5-10 minutes, or until the pastry is golden. Set aside. Leave the oven on.

  • While the tart case is baking, make the caramelized garlic. Put the cloves in a small saucepan and cover with plenty of water. Bring to a simmer and blanch for 3 minutes, then drain well.

  • Dry the saucepan, return the cloves to it and add the olive oil. Fry the garlic cloves on a high heat for 2 minutes. Add the balsamic vinegar and water and bring to the boil, then simmer gently for 10 minutes.

  • Add the sugar, rosemary, chopped thyme and ¼ teaspoon salt. Continue simmering on a medium flame for 10 minutes, or until most of the liquid has evaporated and the garlic cloves are coated in a dark caramel syrup. Set aside.

  • To assemble the tart, break both types of goat’s cheese into pieces and scatter in the pastry case. Spoon the garlic cloves and syrup evenly over the cheese.

  • In a jug whisk together the eggs, creams, ½ teaspoon salt and some black pepper. Pour this custard over the tart filling to fill the gaps, making sure that you can still see the garlic and cheese over the surface.

  • Reduce the oven temperature to 160°C and place the tart inside. Bake for 35-45 minutes, or until the tart filling has set and the top is golden brown. Remove from the oven and leave to cool a little.

  • Then take out of tin, trim the pastry edge if needed, lay a few sprigs of thyme on top and serve warm.

  Tips:- To take it out of tin in an easy way you can use a quiche pan with the bottom removable or you can just place some oven paper on the tin before rolling out the pastry. - Serve with salad. Why not with mango and rocket salad? Recipe from this website: http://britishfood.about.com/od/adrecipes/r/caramelisedgarlictart.htm


9 de noviembre de 2012 · 5 min · Palstelera

Medias lunas rellenas

¿Sabíais que croissant en francés significa media luna? Literalmente, significa ‘creciente’ que es la fase de la luna a la que comúnmente denominamos media luna. Pues bien, con esa misma forma pero con una masa totalmente distinta y un relleno salado, os presentamos este fácil plato. La receta la rescatamos de una revista navideña de Thermomix y nos pareció una buena idea para ofrecer una merienda en casa o para llevárselos de viaje y comerlos durante un alto en el camino. Para aquellos reacios a los artilugios complicados y a los robots de cocina, tranquilos, que nosotros lo hicimos con nuestras propias manitas y quedaron estupendos.

Pics and Cakes

¿Qué necesitamos?

  •       400-500 g harina de repostería
  •       250 g queso quark
  •       250 g mantequilla fría
  •       1/2 cucharadita de sal -       1 sobre de levadura
  •       1 huevo batido (para pintar)

Para el relleno:

  •       100 g jamón de york
  •       200 g queso emmental
  •       2 tomates
  •       Orégano seco


¿Cómo lo hacemos?

  • Cortamos la mantequilla en trocitos y mezclamos con el resto de ingredientes. Primero empezamos a remover con un tenedor y luego terminamos de amasarlo con las manos.

  • Hacemos una bola con la masa, la envolvemos en film transparente y la dejamos reposar en la nevera durante 30 minutos.

  • Precalentamos el horno a 180ºC.

  • Dividimos la masa en dos partes y estiramos cada una de ellas con ayuda del rodillo hasta formar un círculo de masa fina (3 mm aproximadamente).

  • Cortamos con un cuchillo con el cortapizzas 8 porciones triangulares (como si fuera una pizza).

  • Ponemos en cada porción un poco de jamón de york y queso y las enrollamos empezando por la parte ancha y acabando por el pico para darle forma de croissant.

  • Cortamos la mozzarella y el tomate en rodajas y luego éstas a la mitad. Lo utilizamos para rellenar las porciones resultantes del segundo círculo de masa añadiéndoles un poco de orégano. Los enrollamos de la misma manera.

  • Colocamos todos los croissants en una bandeja de horno forrada con papel de hornear y la pintamos con huevo batido.

  • Horneamos durante 20 minutos aproximadamente.


Consejos:

  • Podéis variar el relleno a vuestro gusto. De hecho, la receta original era sólo con jamón y queso y nosotros introdujimos la variedad de tomate-mozzarella y nos gustó incluso más.
  • La masa no es especialmente salada así que ¿por qué no probar con un relleno dulce?


Pics and Cakes


[English version]  FILLED CROISSANTS **Ingredients:-400-500 g flour

  • 250 g quark cheese

  • 250 g butter

  • 1/2 tsp salt

  • 1 package baking powder

  • 1 egg  

  • Dice the butter and mix with the rest of ingredients. First stir well by using a fork and then use your hands.

  • Make a ball with the dough, wrap it in cling film and place in the fridge for 30 min.

  • Preheat oven at 180ºC

  • Divide the dough into two pieces and roll out to two thin circles (3 mm).

  • Cut each circle into 8 portions (like pizza slices).

  • Put some york ham and cheese over each slice and roll it from the biggest side to the narrowest to create the croissant shape.

  • Slice mozzarella and tomato and then cut into halves. Use them and oregano to fill the second circle of dough. Roll it in the same way.

  • Place the croissants on a baking tray covered by baking paper. Glaze croissants with egg.

  • Bake for 20 min approximately.

  Tips:- You can vary the filling. The original recipe was done with ham and cheese and we decided to create the mozarella-tomato flavour and we liked it even more! - The dough itself is not really salty. So why not a sweet filling?


25 de julio de 2012 · 4 min · Palstelera

Stuffed Crescent Rolls

Did you know that croissant in French means crescent moon? Literally, it means ‘waxing,’ which is the phase of the moon we commonly call a crescent. Well, with that same shape but a completely different dough and a savory filling, we present this easy dish. We rescued the recipe from a Thermomix Christmas magazine and thought it would be a great idea to offer as an afternoon snack at home or to pack along on a trip and enjoy during a roadside stop. For those of you who are wary of complicated gadgets and kitchen robots, don’t worry — we made these with our own little hands and they turned out wonderfully.

Pics and Cakes

What do we need?

  •   400-500 g (3.25-4 cups) pastry flour
    
  •   250 g (1 cup) quark cheese
    
  •   250 g (1 cup / 2 sticks) cold butter
    
  •   1/2 teaspoon salt
    
  •   1 packet baking powder
    
  •   1 beaten egg (for glazing)
    

For the filling:

  •   100 g (3.5 oz) cooked ham
    
  •   200 g (7 oz) Emmental cheese
    
  •   2 tomatoes
    
  •   Dried oregano
    

How do we make it?

  • Cut the butter into small pieces and mix with the rest of the ingredients. Start by stirring with a fork and then finish kneading with your hands.

  • Form the dough into a ball, wrap it in cling film and let it rest in the fridge for 30 minutes.

  • Preheat the oven to 180°C (355°F).

  • Divide the dough in two and roll out each piece with a rolling pin into a thin circle (about 3 mm / 1/8 inch).

  • Using a knife or pizza cutter, cut 8 triangular portions (just like a pizza).

  • Place a bit of cooked ham and cheese on each portion and roll them up starting from the wide end and finishing at the tip to give them that croissant shape.

  • Slice the mozzarella and tomato into rounds and then cut those in half. Use them to fill the portions from the second circle of dough, adding a bit of oregano. Roll them up the same way.

  • Place all the croissants on a baking tray lined with parchment paper and brush them with beaten egg.

  • Bake for about 20 minutes.

Tips:

  • You can vary the filling however you like. In fact, the original recipe was just ham and cheese, and we introduced the tomato-mozzarella variety and liked it even more.
  • The dough isn’t particularly salty, so why not try a sweet filling?

Pics and Cakes

[English version] FILLED CROISSANTS **Ingredients:-400-500 g flour

  • 250 g quark cheese

  • 250 g butter

  • 1/2 tsp salt

  • 1 package baking powder

  • 1 egg

  • Dice the butter and mix with the rest of ingredients. First stir well by using a fork and then use your hands.

  • Make a ball with the dough, wrap it in cling film and place in the fridge for 30 min.

  • Preheat oven at 180ºC

  • Divide the dough into two pieces and roll out to two thin circles (3 mm).

  • Cut each circle into 8 portions (like pizza slices).

  • Put some york ham and cheese over each slice and roll it from the biggest side to the narrowest to create the croissant shape.

  • Slice mozzarella and tomato and then cut into halves. Use them and oregano to fill the second circle of dough. Roll it in the same way.

  • Place the croissants on a baking tray covered by baking paper. Glaze croissants with egg.

  • Bake for 20 min approximately.

    Tips:- You can vary the filling. The original recipe was done with ham and cheese and we decided to create the mozarella-tomato flavour and we liked it even more! - The dough itself is not really salty. So why not a sweet filling?


25 de julio de 2012 · 4 min · Palstelera

Risotto my way

Hace ya algún tiempo que hice mi primer risotto. Creo que lo aprendí de Arguiñano, cuando mi madre y yo lo veíamos a la hora de comer. Me suena que otra vez seguí la receta de la Wii, de no sé qué videojuego. El caso es que he ido modificando, adaptando e improvisando sobre la base fundamental para hacer un buen risotto: no dejar de remover.

Pics and Cakes

**¿Qué necesitamos? **

(para dos personas)

-       1 taza y media de arroz de grano corto

  •       Agua templada
  •       2 dientes de ajo
  •       Un cuarto de cebolla grande
  •       Setas/champiñones
  •       100 gramos de queso azul -       Sal


¿Cómo lo hacemos?

  • Ponemos un chorrito de aceite en una cazuela.

  • Cortamos el queso azul en cuadraditos. Picamos los ajos y la cebolla en trozos pequeños.

  • Agregamos el ajo y la cebolla y bajamos un poco el fuego para que no se nos quemen. Cuando estén un poco hechos, agregamos las setas cortadas en trozos de tamaño medio.

  • Dejamos que se haga todo junto durante unos minutos y agregamos un poco de sal.

  • Una vez hecho el sofrito, añadimos el arroz y mezclamos todo bien para que el arroz coja sabor.

  • Ahora lo normal sería agregar el doble de agua que arroz y dejarlo cocer. Nosotros vamos a agregar un poco de agua, media taza si hemos echado taza y media de arroz.

  • Mientras removemos agregamos sal y un poco de queso azul. Cuando esté todo bien mezclado y haya reducido el agua bajamos un  poco el fuego.

  • Sin dejar de remover vamos añadiendo más agua (toda la que nos pida nuestro risotto) y queso azul.

  • Cuando comprobemos que el arroz está cocido, apagamos el fuego, tapamos y dejamos reposar el tiempo que tardamos en cortar unas finas tiras de queso azul para decorar el plato.


Consejos:

  • Nosotros hemos utilizado un queso azul, pero también se puede utilizar cualquier otro. Si no te gusta el queso fuerte, con uno curado espesará más y no tendrá apenas sabor a queso.
  • Para decorar el plato también se puede añadir avellana, nueces o almendras.
  • Si no tenéis setas se puede cambiar por champiñones.


Pics and Cakes


[English version] RISOTTO MY WAY **Ingredients:- 1 ½ medium-grain rice

  • 3 cups warm water

  • 2 cloves of onion

  • ¼ large onion

  • Mushrooms

  • 100 g blue cheese

  • Salt 

  • Add a splash of olive oil in a sauce pan.

  • Dice blue cheese and chop garlic and onion.

  • Add garlic and onion to the sauce pan and fry slowly to avoid burning. When they have softened, add the mushrooms (if they are too big, you can cut them into medium-size pieces).

  • Cook slowly for some minutes and add a pinch of salt.

  • When ready, add the rice and keep stirring while everything is cooking and flavors are melting.

  • Usually we add 2 parts of water to 1 part of rice. For risotto recipe we will be adding all the water needed progressively.

  • While stirring, add some salt and part of blue cheese. Stir well and turn down the heat to a simmer.

  • Keep stirring and adding the water and blue cheese, allowing each ladle to be absorbed before adding the next.

  • When rice is cooked and soft, place a lid on the pan and allow to sit. Slice some blue cheese for decoration.

   Tips:- You can use any kind of cheese. Blue cheese has quite a strong flavour but you can substitute it by any other softer.

  • For decoration, you can add some walnuts, almonds or nuts.
  • You can use mushrooms (champignons) or any other wild mushrooms.

22 de julio de 2012 · 3 min · Cesmm

Risotto My Way

It’s been a while since I made my first risotto. I think I learned it from Arguiñano, back when my mom and I used to watch him at lunchtime. I have a feeling I also followed the recipe from some Wii video game once. Anyway, I’ve been tweaking, adapting and improvising on top of the fundamental rule for a good risotto: never stop stirring.

Pics and Cakes

What do we need?

(serves two)

  •   1 ½ cups short-grain rice
    
  •   Warm water
    
  •   2 cloves of garlic
    
  •   A quarter of a large onion
    
  •   Wild mushrooms / button mushrooms
    
  •   100 g (3.5 oz) blue cheese
    
  •   Salt
    

How do we make it?

  • Add a splash of olive oil to a saucepan.

  • Dice the blue cheese into small cubes. Finely chop the garlic and onion.

  • Add the garlic and onion to the pan and turn the heat down a bit so they don’t burn. Once they’ve softened a little, add the mushrooms cut into medium-sized pieces.

  • Let everything cook together for a few minutes and add a pinch of salt.

  • Once the sofrito is ready, add the rice and stir well so the rice soaks up the flavor.

  • Now, the usual thing would be to add twice as much water as rice and let it cook. We’re going to add just a bit of water — about half a cup (120 ml / 4 fl oz) if we used a cup and a half of rice.

  • While stirring, add salt and a bit of blue cheese. Once everything is well mixed and the water has reduced, lower the heat a little.

  • Without stopping stirring, keep adding more water (as much as your risotto asks for) and blue cheese.

  • When you see the rice is cooked, turn off the heat, cover, and let it rest for as long as it takes you to slice some thin strips of blue cheese to decorate the plate.

Tips:

  • We used blue cheese, but you can use any other kind. If you don’t like strong cheese, an aged cheese will thicken it more and barely taste of cheese.
  • For decoration you can also add hazelnuts, walnuts or almonds.
  • If you don’t have wild mushrooms, you can swap them for button mushrooms.

Pics and Cakes

[English version] RISOTTO MY WAY **Ingredients:- 1 ½ medium-grain rice

  • 3 cups warm water

  • 2 cloves of onion

  • ¼ large onion

  • Mushrooms

  • 100 g blue cheese

  • Salt

  • Add a splash of olive oil in a sauce pan.

  • Dice blue cheese and chop garlic and onion.

  • Add garlic and onion to the sauce pan and fry slowly to avoid burning. When they have softened, add the mushrooms (if they are too big, you can cut them into medium-size pieces).

  • Cook slowly for some minutes and add a pinch of salt.

  • When ready, add the rice and keep stirring while everything is cooking and flavors are melting.

  • Usually we add 2 parts of water to 1 part of rice. For risotto recipe we will be adding all the water needed progressively.

  • While stirring, add some salt and part of blue cheese. Stir well and turn down the heat to a simmer.

  • Keep stirring and adding the water and blue cheese, allowing each ladle to be absorbed before adding the next.

  • When rice is cooked and soft, place a lid on the pan and allow to sit. Slice some blue cheese for decoration.

    Tips:- You can use any kind of cheese. Blue cheese has quite a strong flavour but you can substitute it by any other softer.

  • For decoration, you can add some walnuts, almonds or nuts.

  • You can use mushrooms (champignons) or any other wild mushrooms.


22 de julio de 2012 · 3 min · Cesmm