Cherry tomato and cheese quiche

I’m sure you’ve all tried — and many of you have made — the classic quiche lorraine (we’ve got ours ready and we’ll be posting it soon). Today we’re sharing a variation we absolutely loved, easy to make and seriously tasty.

Pics and Cakes

What do we need?

For the shortcrust pastry:

  • 200 g (1 ⅔ cups) flour

  • 100 g (7 tbsp) cold butter

  • 1 egg

  • A pinch of salt

  • A pinch of sugar

For the filling:

  • A dozen cherry tomatoes

  • 100 g (3.5 oz) emmental cheese

  • 50 g (1.75 oz) goat cheese log

  • 200 ml (¾ cup + 1 tbsp) heavy cream

  • 4 medium eggs

  • Oregano, salt and pepper.

How do we make it?

  • First, make the shortcrust pastry. Here you can see how we did it.

  • While the pastry is resting, preheat the oven to 180-200°C (355-390°F).

  • Once the dough is ready, roll it out, place it in a tart pan and bake for about 15 minutes. We do this before adding the filling so the base doesn’t end up raw. To stop it from puffing up, prick it with a fork or weigh it down with dried chickpeas.

  • Cut the tomatoes in half, chop the emmental and slice the goat cheese log into rounds.

  • Beat the eggs and mix with the cream. Add salt and pepper.

  • Stir in the emmental and the oregano.

  • When the pastry is partly baked, take it out of the oven and pour in the mixture. Spread it evenly across the pan.

  • Add the halved cherry tomatoes and the goat cheese on top.

  • Put it back in the oven and bake for another 30 minutes or so.

Tips:

  • You can use any kind of cheese for the filling.

  • If you’re feeling lazy and don’t fancy making the shortcrust pastry, you can buy it at any supermarket, either refrigerated or frozen. If you go for frozen, take it out about 15 minutes before you want to use it so you can work with it — otherwise it’ll crack.

Pics and Cakes


Comments

silvia (2012-11-29 22:13:25):

man… I wish I had an oven so I could follow these recipes… well, the no-bake ones except for the sweet ones, you already know I’m a fan, like that pineapple salad… yum yum

16 de noviembre de 2012 · 2 min · Cesmm

Quiche de quesos y tomates cherry

Seguro que todos habéis probado, y más de uno habrá preparado, la quiche lorraine (nosotros la tenemos lista para publicar próximamente). Hoy os presentamos una variante que nos encantó y que además de fácil de preparar está bien rica.

  Pics and Cakes

¿Qué necesitamos?

Para la masa quebrada:

  • 200 gr de harina

  • 1oo gr de mantequilla fría

  • 1 huevo

  • Una pizca de sal

  • Una pizca de azúcar

Para el relleno:

  • Una docena de tomates cherrys

  • 100 gr de queso emmental

  • 50 gr de rulo de queso de cabra

  • 200 ml de nata

  • 4 huevos medianos

  • Orégano, sal y pimienta.

¿Cómo lo hacemos?

  • Lo primero es hacer la masa quebrada. Aquí podéis ver cómo la hicimos nosotros.

  • Mientras preparamos la masa vamos precalentando el horno a 180-200º C.

  • Cuando la masa esté lista, la estiramos, la ponemos en un molde y horneamos unos 15 minutos. Esto lo hacemos, antes de poner el relleno para que al hornear el conjunto la masa no se quede cruda. Para que no se levante, pinchamos con un tenedor o ponemos garbanzos para que hagan peso.

  •  Vamos partiendo los tomates a la mitad, picando el queso emmental y cortando el rulo de queso de cabra en rodajas.

  • Batimos los huevos y mezclamos con la nata. Añadimos la sal y la pimienta.

  • Incorporamos el queso emmental y el orégano.

  • Cuando la masa esté un poco cocida la retiramos del horno e incorporamos la mezcla. Distribuimos bien por todo el molde.

  • Añadimos los tomates cherry partidos por la mitad y el queso de cabra.

  • Volvemos a poner en el horno y dejamos hornear otra vez en torno a media hora.

Consejos:

  • Puedes utilizar cualquier tipo de queso para el relleno.

  • Si estáis perezosos y no os apetece hacer la masa quebrada se puede comprar en cualquier supermercado refrigerada y congelada. Si la compráis congelada sacad del congelador unos 15 minutos antes de querer utilizarla para poder trabajar con ella, sino se romperá.

Pics and Cakes

[English version] QUICHE OF CHERRY TOMATOES AND CHEESE* *Shortbread pastry:

  • 200 g flour

  • 1oo g cold butter

  • 1 egg

  • A pinch of salt

  • A pinch of sugar

* * Filling:

  • A dozen of cherry tomatoes

  • 100 g emmental cheese

  • 50 g goat cheese

  • 200 ml cream

  • 4 eggs

  • Oregano, salt and pepper

*  *

* *

  • *Prepare the shortbread pastry. You can see here our recipe. *

  • Preheat oven at 180-200º C.

  • Roll out the pastry and place into a baking pan. Bake for 15 minutes. If we bake directly with the filling on it, the pastry will be underdone. To avoid the pastry to ‘grow’ in the oven, you can place a baking paper and fill up with baking beans. You can also pierce the pastry with a fork.

  • * Cut tomatoes into halves. Chop emmental cheese and slice goat cheese. *

  • *Whisk eggs and cream. Add salt and pepper. *

  • *Add emmental cheese and oregano. *

  • Take out the baked pastry from oven and fill evenly with the mix.

  • *Add cherry tomatoes and goat cheese. *

  • Bake in oven around 30 minutes until the cream is firm but smooth.

* *

* *

Tips:

- You can use any cheese you like.

*- If you are lazy or have no time to prepare your own shortbread pastry, you can buy it ready to roll in the supermarket. *


16 de noviembre de 2012 · 3 min · Cesmm

Milk Bread Buns

We were putting together a surprise afternoon snack where we wanted everything to be absolutely homemade, so we couldn’t even allow ourselves to buy the bread. One of the things we wanted to make was little savory sandwiches and, once again, we turned to the La Receta de la Felicidad blog to follow their steps and make some great milk bread buns. Honestly, we thought it would be pretty complicated, but how wrong we were…

Pics and Cakes

What do we need?

(16 buns)

  •   500 g (about 4 cups) bread flour
    
  •   25 g (about 1 oz) fresh yeast (or two sachets of dry baker's yeast)
    
  •   250 ml (1 cup) milk
    
  •   70 g (about 5 tbsp) butter, softened (i.e. nice and soft)
    
  •   40 g (about 3 tbsp) sugar
    
  •   1 egg
    
  •   2 tablespoons of honey
    
  •   A pinch of salt
    

How do we do it?

  • Mix the flour and yeast in a large bowl and add the egg and milk.

  • Add the sugar, honey and salt, and mix well using a spoon or fork.

  • Add the butter, and knead for 10-15 minutes, until you get a soft, pliable, slightly shiny dough.

  • Form the dough into a ball by turning it and folding it inwards, and let it rest in a lightly floured bowl, covered with a cloth, for about two hours so it doubles in volume.

  • Take the dough out of the bowl and lightly press it down with your fingers to ‘deflate’ it.

  • Cut the dough into 16 portions, and shape them into buns.

  • To do this, we have two methods. The first one is to take each piece of dough and roll it on itself, as if the bun were swallowing itself up. (Since my explanation leaves a lot to be desired, you can watch it in this video). The second method is to roll out each piece of dough into a rectangular shape. On one of the ends, make three or four cuts with a sharp knife to create some fringes. Finally, roll up the dough starting from the side opposite the fringes, so that when you finish, the fringes end up on the outside and give that distinctive look of milk buns.

  • Brush the buns with a little milk, let them rest on a baking tray lined with parchment paper for about 20 minutes, and meanwhile preheat the oven to 180°C (355°F).

  • Bake the buns for 10-12 minutes, and let them cool to room temperature on a wire rack.

Tips:

  • If you let the dough rest longer, nothing happens except that it might grow out of control (like what happened to us, when we discovered a mutant dough trying to escape from the bowl).
  • To shape the buns, we used the two methods we found at La Receta de la Felicidad, since we made two batches of dough and one of them (despite following the same steps) came out stickier, so the first method was easier for us.
  • The flavor in my opinion isn’t exactly the same as store-bought milk buns, but they are delicious, very fluffy, and you can fill them with both sweet and savory fillings.

Pics and Cakes

*[English version] MILK BREAD BUNS ** *Ingredients:

- 500 g strong bread flour - 25 g fresh yeast (or two sachets dry yeast) - 250 ml milk - 70 g butter, room temperature - 40 g sugar - 1 egg - 2 tbs honey - A pinch of salt

  • Combine flour and yeast in a bowl. Add the egg, honey, milk, sugar and salt and mix well.

  • Add butter and use a large spoon or fork to mix everything together.

  • Take the dough out of the bowl and knead. You will feel the dough become elastic after kneading for about 5 minutes. Knead the dough for 5-10 minutes more or until the dough is soft, pliable, smooth and slightly shiny-

  • Put the dough into a lightly floured bowl and cover with a cloth. Let the dough rise in a warm place until its size doubles (aprox. two hours)

  • Take the dough out of the bowl, deflate it by touching lightly.

  • Cut the dough into 16 pieces, and roll each of them into an oval shape. Or alternatively, roll out each piece of dough forming a rectangle 1 cm thick. Cut 1/3 the length of the rectangle into 4/5 strips of equal width and roll up the dough similar to a Swiss roll.

  • Preheat oven to 180ºC and let the milk buns rest for 20 minutes.

  • Glaze the buns with some milk, and bake them for 10-12 minutes. Let them cool on a wire rack

  • Tips:**- Nothing wrong if you leave the dough more time covered with a cloth, it will just rise even more! * - We made the bun shape following the two different methods. For sticky doughs is easier the first method (just forming the oval shape). *- You won’t achieve exactly the same flavor than the milk buns of the supermarket but it is absolutely delicious, spongy and can be filled with sweet or savory ingredients. *


Comments

marmota zampona (2012-09-12 08:16:25):

we’ll make them. thanks

8 de septiembre de 2012 · 4 min · Palstelera

Panes de leche

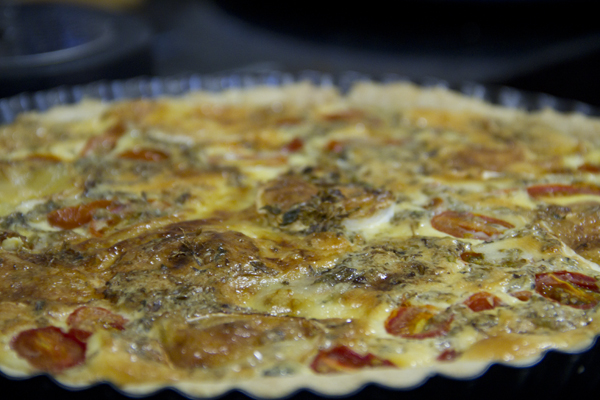
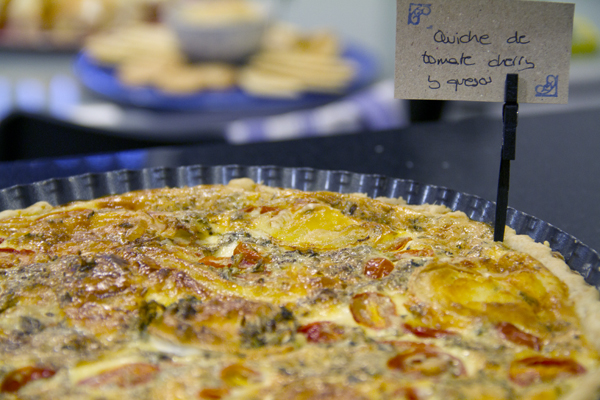
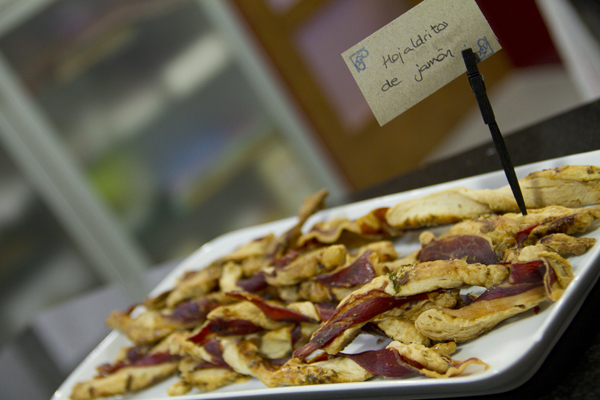
Estábamos preparando una merienda sorpresa en la que queríamos que todo fuese absolutamente casero, así que no podíamos permitirnos comprar ni siquiera el pan. Una de las cosas que queríamos hacer eran pequeños bocadillitos salados y, una vez más, recurrimos al blog de La Receta de la Felicidad para seguir sus pasos y hacer unos estupendos panes de leche. Lo cierto es que pensábamos que sería bastante complicado pero qué equivocados estábamos…

Pics and Cakes

¿Qué necesitamos?

(16 panecillos)

  •       500 g de harina de fuerza
  •       25 g de levadura fresca (o dos sobres de levadura seca de panadería)
  •       250 ml de leche
  •       70 g de mantequilla, en pomada (o sea, blandita)
  •       40 g de azúcar
  •       1 huevo
  •       2 cucharadas de miel
  •       1 pizca de sal

¿Cómo lo hacemos?

  • Mezclamos la harina con la levadura en un bol grande y añadimos el huevo y la leche.

  • Agregamos azúcar, miel y sal, mezclamos bien con la ayuda de una cuchara o tenedor.

  • Agregamos la mantequilla, y amasamos 10-15 minutos, hasta que obtengamos una masa suave, plegable, y ligeramente brillante

  • Formamos una bola con la masa, girándola y doblándola hacia el interior, y la dejamos reposar en un bol ligeramente enharinado, tapada con un paño, durante unas dos horas para que duplique su volumen.

  • Sacamos la masa del bol, y la aplastamos un poco con los dedos para ‘desinflarla’.

  • Cortamos la masa en 16 porciones, y les damos forma de panecillo.

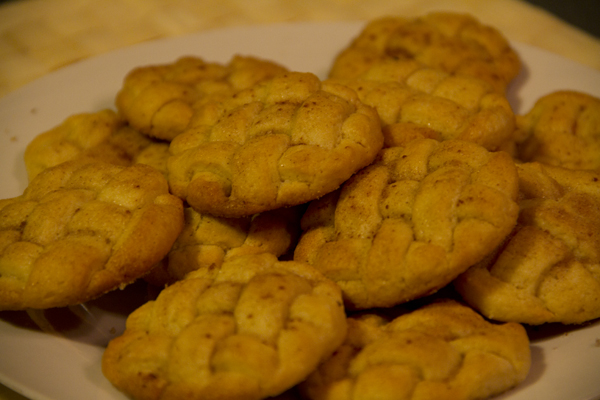
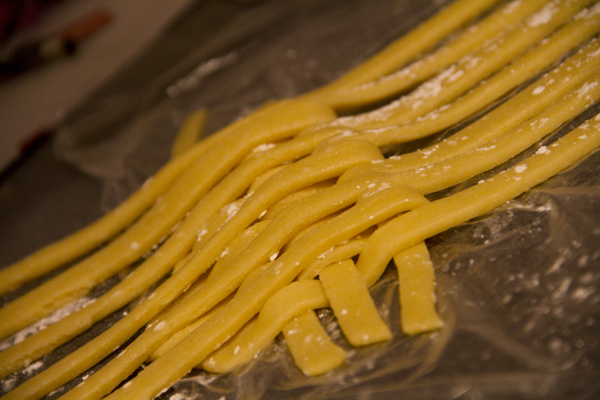
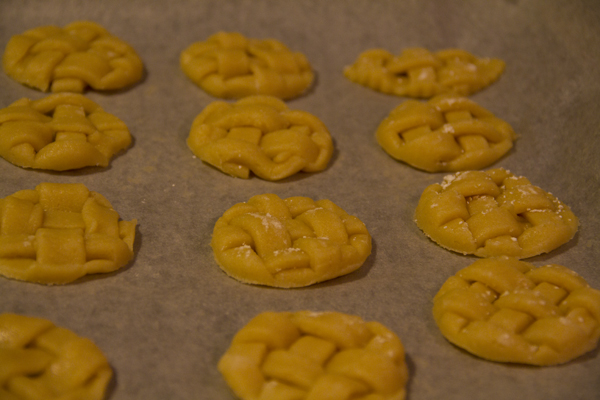
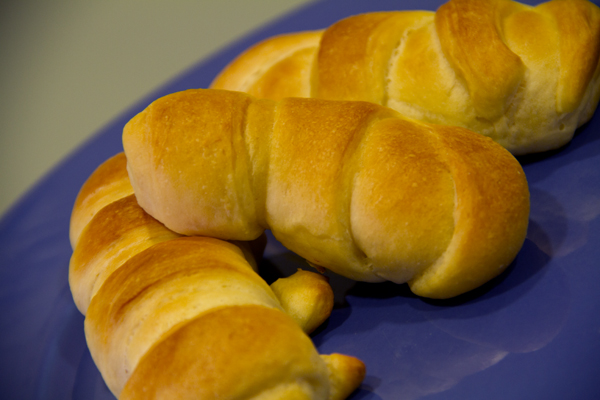
  • Para ello, tenemos dos métodos. El primero consiste en coger cada porción de masa e ir enrollando la masa sobre sí misma como si el propio bollo se auto-engullese. (Como mi explicación deja mucho que desear podéis verlo en este vídeo). El segundo método consistiría en estirar cada porción de masa hasta tener una forma rectangular. En uno de los extremos, hacemos tres o cuatro cortes con un cuchillo afilado para crear unos flecos. Por último enrollamos la masa empezando por el lado contrario a los flecos para que al acabar sean éstos los que queden hacia afuera y den ese aspecto tan característico de los panes de leche.

  • Pincelamos los panecillos con un poco de leche, los dejamos reposar sobre una bandeja de horno forrada de papel de hornear unos 20 min, y mientras precalentamos el horno a 180 ºC.

  • Horneamos los panecillos entre 10-12 minutos, y dejamos enfriar a temperatura ambiente sobre una rejilla.

Consejos:

  • Si dejáis reposar más tiempo la masa, no pasa nada excepto que puede crecer desmesuradamente (como nos pasó a nosotros que descubrimos una masa mutante tratando de escaparse del cuenco).
  • Para formar los panecillos, seguimos los dos métodos que encontramos en La Receta de la Felicidad, ya que hicimos dos medidas de masa y una de ellas (pese a seguir los mismos pasos) nos quedó más pegajosa así que nos resultó más fácil el primer método.
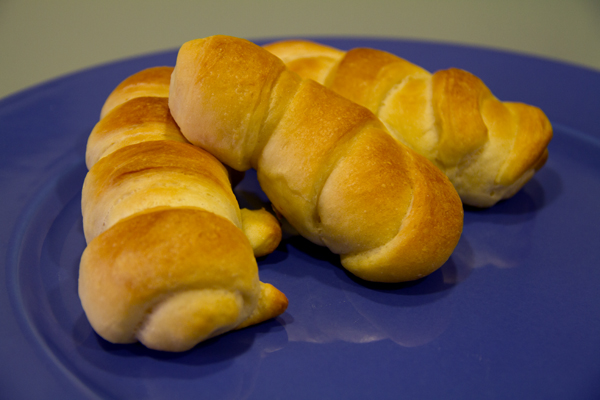
  • El sabor conseguido en mi opinión no es exactamente igual que el de los panes de leche comprados pero es están deliciosos, son muy esponjosos y los podéis rellenar tanto de dulce como de salado.

Pics and Cakes

*[English version] MILK BREAD BUNS ** *Ingredients:

- 500 g strong bread flour - 25 g fresh yeast (or two sachets dry yeast) - 250 ml milk - 70 g butter, room temperature - 40 g sugar - 1 egg - 2 tbs honey - A pinch of salt

* *

  • Combine flour and yeast in a bowl. Add the egg, honey, milk, sugar and salt and mix well.

  • Add butter and use a large spoon or fork to mix everything together.

  • Take the dough out of the bowl and knead. You will feel the dough become elastic after kneading for about 5 minutes. Knead the dough for 5-10 minutes more or until the dough is soft, pliable, smooth and slightly shiny-

  • Put the dough into a lightly floured bowl and cover with a cloth. Let the dough rise in a warm place until its size doubles (aprox. two hours)

  • Take the dough out of the bowl, deflate it by touching lightly.

  • Cut the dough into 16 pieces, and roll each of them into an oval shape. Or alternatively, roll out each piece of dough forming a rectangle 1 cm thick. Cut 1/3 the length of the rectangle into 4/5 strips of equal width and roll up the dough similar to a Swiss roll.

  • Preheat oven to 180ºC and let the milk buns rest for 20 minutes.

  • Glaze the buns with some milk, and bake them for 10-12 minutes. Let them cool on a wire rack

* *

*  Tips:**- Nothing wrong if you leave the dough more time covered with a cloth, it will just rise even more! * - We made the bun shape following the two different methods. For sticky doughs is easier the first method (just forming the oval shape). *- You won’t achieve exactly the same flavor than the milk buns of the supermarket but it is absolutely delicious, spongy and can be filled with sweet or savory ingredients. *


8 de septiembre de 2012 · 4 min · Palstelera

Galletas de masa quebrada

En una de mis visitas habituales al blog de La Receta de la Felicidad, encontré esta receta de galletas exprés. En mi caso no fueron tan exprés ya que decidí hacer yo misma la masa quebrada en vez de comprarla. En cualquier caso, la idea del trenzado de galletas sorprende por lo sencilla que es y lo bonita que queda, así que no tenéis excusa para no probarla.

 Pics and Cakes

¿Qué necesitamos?

-       1 lámina de masa quebrada*

  •       1 cucharada de mantequilla
  •       Azúcar y canela

*Si en vez de comprarla preferis hacer vosotros mismos la masa quebrada también necesitaréis:

  •       200 g de harina
  •       100 g de mantequilla fría
  •       1 huevo
  •       Una pizca de sal
  •       Una pizca de azúcar

  Pics and Cakes

¿Cómo lo hacemos?

Masa quebrada:

  • Ponemos todos los ingredientes en un cuenco. La mantequilla tiene que estar muy fría y cortada en trocitos.

  • Empezamos a amasar con las manos hasta tener una masa homogénea, hacemos una bola con ella y la envolvemos en papel film transparente. Dejamos reposar una hora en la nevera.

  • Pasado el tiempo de espera estiramos la masa con el rodillo hasta dejarla bastante finita (5 mm aproximadamente). Podemos hacerlo ayudándonos de un par de papeles de horno o incluso film transparente.

Galletas:

  • Precalentamos el horno a 200ºC.

  • Con la masa estirada, cortamos tiras de 1 cm con un cuchillo bien afilado.

  • Procedemos a trenzar la masa. Para ello, pondremos la mitad de las tiras juntas en posición vertical. Luego iremos colocando una a una las otras tiras en horizontal haciéndolas pasar por las tiras verticales alternando arriba y abajo (como una imagen vale más que mil palabras, echadle un vistazo a la foto).

  • Con un cortapastas redondo (o de la forma deseada) vamos cortando las galletas de nuestra masa recién trenzada.

  • Las pincelamos con mantequilla derretida y añadimos azúcar y canela (sin temor a excedernos ya que la masa quebrada no es dulce).

  • Colocamos las galletas sobre una bandeja cubierta con papel de hornear y las horneamos durante 10 minutos.

Consejos:

  • Podéis echarle cualquier especia o saborizante que consideréis. En mi caso utilicé un azúcar glas aromatizada con canela y manzana.
  • Para que no pierdan demasiado su forma la masa quebrada tiene que estar muy fría y habrá que manosearla lo menos posible (en este caso, es más sencillo hacerlo con masa quebrada comprada).
  • Si las hacéis del tamaño más grande que una tacita de café podréis servirlas de la forma tan original que hace @SandeeA

Pics and Cakes

[English version] SHORTBREAD PASTRY BISCUITS *Ingredients:- 1 sheet of shortbread pastry

  • 1 tbsp of butter

  • Sugar and cinnamon  For the shortbread pastry you will need:- 200 g of white flour- 100 g of butter- 1 egg- A pinch of salt- A pinch of sugar *For the pastry

  • Place all the ingredients into a large bowl. Butter has to be very cold and cut into small pieces.

  • Mix properly until getting a uniform dough, make a bowl and cover with cling film. Leave in the fridge for 1 hour.

  • *Roll out the dough (5 mm thick). You can use a couple of baking papers or cling film to make the task easier. *

For the biscuits:

  • * Preheat oven at 200ºC*

  • Cut 1 cm-wide stripes with a sharpen knife. Create the pattern by putting half of the stripes into vertical positions. Then use the other stripes (one by one) to cross the first ones in horizontal position as shown in the picture.

  • Cut out rounds.

  • Brush tops with melt butter and sprinkle sugar and cinnamon.

  • Place into oven tray covered by baking paper sheet.

  • Bake for 10 minutes.

    Tips:- You can add any other spices or flavours. I used apple-cinnamon flavoured sugar.

  • To avoid the pastry loses its shape, keep it always very cold!
  • You can cut out rounds a bit bigger than small cups and use the same serving suggestion than @SandeeA
30 de agosto de 2012 · 3 min · Palstelera

Shortcrust Pastry Cookies

On one of my regular visits to the La Receta de la Felicidad blog, I came across this recipe for express cookies. In my case they weren’t quite so express since I decided to make the shortcrust pastry myself instead of buying it. In any case, the idea of the woven cookies is striking for how simple it is and how pretty they look, so you have no excuse not to try them.

Pics and Cakes

What do we need?

  •   1 sheet of shortcrust pastry*
    
  •   1 tablespoon of butter
    
  •   Sugar and cinnamon
    

*If instead of buying it you’d rather make the shortcrust pastry yourselves, you’ll also need:

  •   200 g (1.5 cups) of flour
    
  •   100 g (7 tbsp) of cold butter
    
  •   1 egg
    
  •   A pinch of salt
    
  •   A pinch of sugar
    

Pics and Cakes

How do we make it?

Shortcrust pastry:

  • Put all the ingredients in a bowl. The butter has to be very cold and cut into small pieces.

  • Start kneading with your hands until you have a smooth dough, shape it into a ball and wrap it in plastic wrap. Let it rest in the fridge for an hour.

  • Once the waiting time is up, roll out the dough with a rolling pin until it’s quite thin (about 5 mm / 1/4 inch). You can do this with the help of a couple of sheets of baking paper or even plastic wrap.

Cookies:

  • Preheat the oven to 200°C (390°F).

  • With the dough rolled out, cut strips of 1 cm (about 1/2 inch) with a sharp knife.

  • Now we weave the dough. To do this, place half of the strips together in a vertical position. Then place the other strips one by one horizontally, passing them through the vertical strips alternating over and under (since a picture is worth a thousand words, take a look at the photo).

  • With a round cookie cutter (or any shape you like), cut out the cookies from the freshly woven dough.

  • Brush them with melted butter and sprinkle with sugar and cinnamon (don’t be shy with the amount, since shortcrust pastry isn’t sweet).

  • Place the cookies on a tray lined with baking paper and bake them for 10 minutes.

Tips:

  • You can add any spice or flavoring you like. In my case I used a powdered sugar flavored with cinnamon and apple.
  • So they don’t lose their shape too much, the shortcrust pastry has to be very cold and you should handle it as little as possible (in this case, it’s easier with store-bought shortcrust pastry).
  • If you make them a bit bigger than a coffee cup, you can serve them in the original way that @SandeeA does.

Pics and Cakes

30 de agosto de 2012 · 3 min · Palstelera

Ham Puff Pastry Twists

Knowing how little my dad cares for innovation in food (what he calls “chuminás” — fancy nonsense), whenever we put together appetizers for birthdays or special celebrations we always have to play the card of foods he considers “essentials”. So for my last birthday we went looking for appetizers he might actually like, and over at Directo al Paladar we found this one.

Pics and Cakes

What do we need?

  •   1 sheet of refrigerated puff pastry
    
  •   100 grams (3.5 oz) of serrano ham
    
  •   Oregano
    
  •   1 egg
    

How do we make it?

  • Preheat the oven to 200°C (390°F).

  • Cut the puff pastry sheet into strips roughly 1.5 cm (0.6 in) wide and 10 cm (4 in) long.

  • Brush them with beaten egg so they brown nicely in the oven, sprinkle oregano on top, and flip them over.

  • Cut the ham into strips the same length as the pastry and lay them on top.

  • Twist the sticks with the ham one by one. To do this, grab each strip by the ends and turn in opposite directions. Pop them in the oven for about 15 minutes.

Tips:

  • Every oven is its own beast, so temperature and time may vary. We recommend keeping a close eye on them, especially at the start, so the heat stays high but the pastry doesn’t get scorched.
  • The first time we made these we threw in two new versions: some with just oregano, and others with aged cheese. They were all delicious. That said, the serrano ham ones don’t need it, but for the others add a pinch of salt and you’ll see how much better they get.

Pics and Cakes

9 de agosto de 2012 · 2 min · Cesmm

Hojaldritos de jamón

Conocedor de lo poco amigo que es mi padre de la innovación en la comida (lo que él llama “chuminás”) cuando hacemos aperitivos para los cumpleaños o celebraciones especiales siempre tenemos que jugar la baza de alimentos que él considera de “primera necesidad”. Por eso para mi último cumpleaños buscamos aperitivos que le pudiesen gustar y en Directo al Paladar encontramos esto.

Pics and Cakes

¿Qué necesitamos?

-       1 lámina de hojaldre refrigerada

  •       100 gramos de jamón serrano
  •       Orégano
  •       1 huevo

¿Cómo lo hacemos?

  • Precalentamos el horno a 200ºC

  • Cortamos la lámina de hojaldre en tiras de aproximadamente de 1,5 cm de ancho y 10 cm de largo.

  • Pintamos con huevo para que se doren en el horno y espolvoreamos orégano encima y le damos la vuelta.

  • Hacemos tiras de jamón de la misma longitud que el hojaldre y lo ponemos encima.

  • Retorcemos los palitos con el jamón de uno en uno. Para ello cogemos cada tira por los extremos y giramos en direcciones opuestas. Los metemos al horno durante aproximadamente 15 minutos.


Consejos:

  • Cada horno es un mundo así que la temperatura y el tiempo pueden variar de unos a otros. Os recomendamos que lo vigiléis sobre todo al principio para que la temperatura sea alta pero que no chamusque el hojaldre.
  • La primera vez que los hicimos introdujimos dos tipos nuevos: unos solamente con orégano y otros con queso curado. Todos estaban buenísimos. Eso sí, al de jamón serrano no hace falta pero a los demás añadidles una pizca de sal y ya veréis cómo mejoran.


Pics and Cakes


[English version] PUFF PASTRY HAM TWISTS **Ingredients:- 1 sheet of puff pastry

  • 100 dry-cured ham

  • Oregano

  • 1 egg 

  • Preheat oven to 200ºC

  • With a large knife cut the puff pastry into strips, about 1,5 cm wide 10 cm long each.

  • Brush the top of the pastry with beaten egg and spread some oregano. Turn upside down.

  • Cut ham into strips (same size than pastry) and put over it.

  • One at a time, grab the ends of each strip and twist opposite direction to form a spiral. Bake for 15 minutes.


   Tips:- Every oven is different, so temperature and baking time may differ from some to others. We advice you to watch it carefully, especially at the beginning because high temperature is needed but not so much to have it burnt.

  • You can substitute ham by other ingredients such as cheese. We tried it and it was delicious! However, we advice you to add some salt to the pastry when using this kind of ingredients and the result will be even tastier!
9 de agosto de 2012 · 2 min · Cesmm