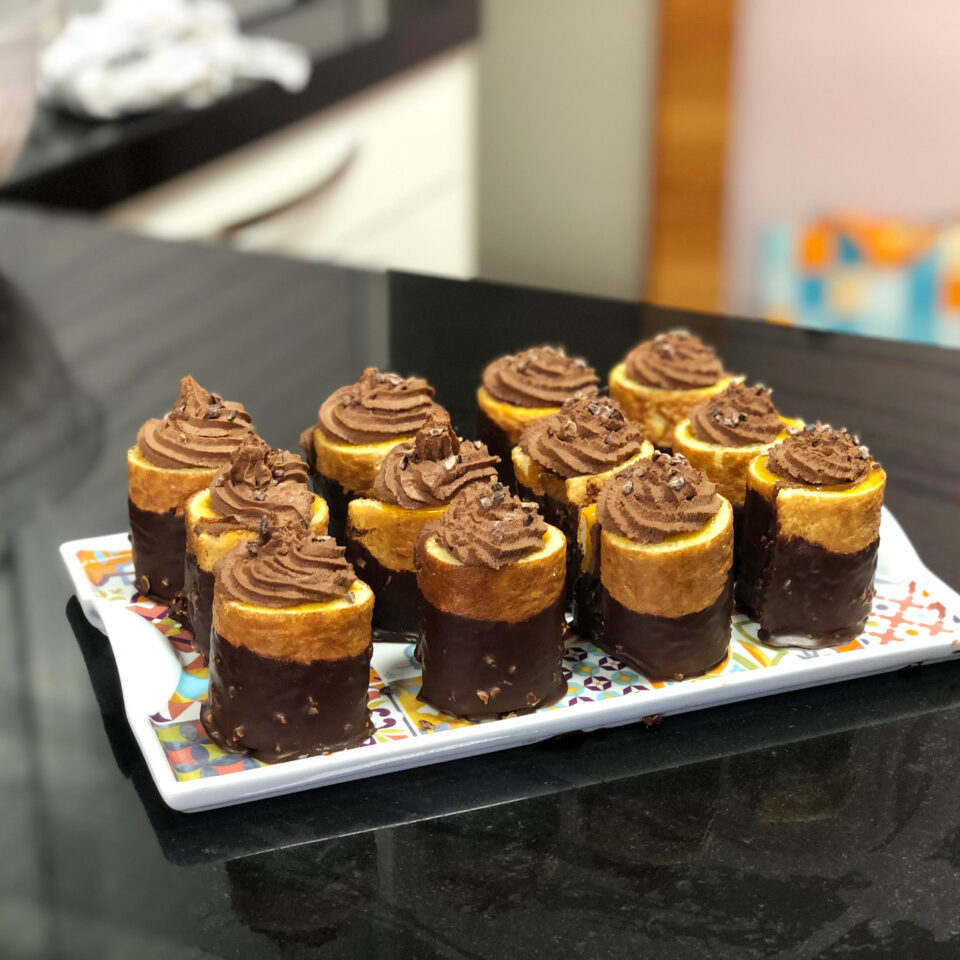
Chocolate and Mango-Passion Roll Cakes

This recipe comes from Ettore Cioccia, who I call "my master" because I've followed several recipes from his blog Bavette and they all turn out amazing. On top of that, I had the luck of attending a pastry course he gave in Madrid and I couldn't have enjoyed it more. So if you feel like making a delicious dessert and spending a good while in the kitchen putting together different components, you can pick any of Ettore's recipes and you'll be guaranteed success. Today I'm sharing my version of his chocolate and mango-passion fruit roll cakes. The only thing I did differently from his recipe was the pionono sponge, since I used the one from another pastry great: Osvaldo Gross.

Pics and Cakes

Ingredients

For the dark chocolate ganache

  • 100 g (3.5 oz) heavy cream (30-35% fat)
  • 100 g (3.5 oz) chocolate (66% cocoa)
  • 210 g (7.4 oz / about 1 cup) cold heavy cream

For the pionono-style sponge

  • 5 eggs
  • 50 g (1.75 oz / about 1/4 cup) sugar
  • 50 g (1.75 oz / about 1/3 cup) flour
  • A pinch of salt
  • One tablespoon of honey (about 25 g / 0.9 oz)

For the exotic jam

  • 265 g (9.3 oz) mango purée
  • 85 g (3 oz) passion fruit purée
  • 70 g (2.5 oz / about 1/3 cup) granulated sugar
  • 13 g (0.5 oz) pectin

For the Ferrero Rocher glaze

  • 250 g (8.8 oz) chocolate (60% cocoa)
  • 50 g (1.75 oz / about 1/4 cup) sunflower oil
  • 70 g (2.5 oz / about 1/2 cup) granulated almonds

Method

Dark chocolate ganache

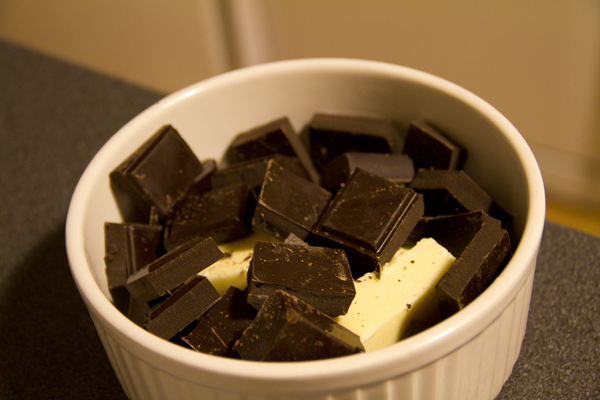
  1. In a small saucepan, bring 100 g (3.5 oz) of cream to a boil. Pour the boiling cream over the chocolate (which we've previously melted in the microwave) in two or three additions, mixing well after each one.
  2. Then add the cold cream and mix until everything is well combined. Cover with cling film pressed against the surface and chill in the fridge for at least 4 hours.

For the pionono-style sponge

  1. Preheat the oven to 190ºC – 200ºC (375ºF – 390ºF).
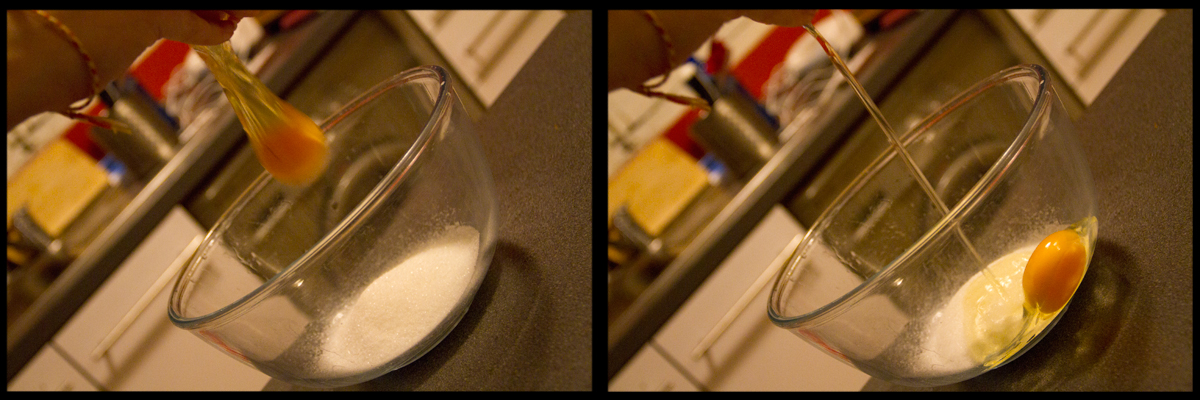
  2. Put the eggs into the bowl of your stand mixer along with the sugar, salt, and honey, and whisk until you reach what's called "ribbon stage" (this is when you can lift a spoonful of batter and drizzle it over the rest, drawing lines on the surface that don't disappear right away). Since it takes a good while, it's best to use a stand mixer.
  3. Sift the flour and fold it in with the mixer at minimum speed. Bump the speed up to maximum for a few seconds.
  4. Using a spatula, fold everything together with gentle, sweeping motions.
  5. Prepare the oven tray with parchment paper greased with butter or margarine.
  6. Pour the batter onto the prepared tray and spread it out so the surface is level (we want a thin sponge, about 4-5 mm / 1/6 inch thick).
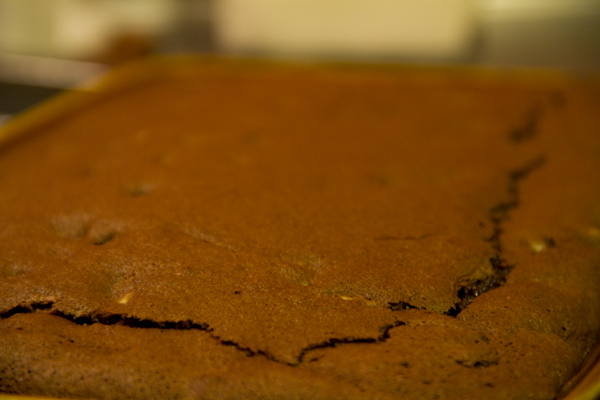
  7. Bake for 8 to 10 minutes until the surface is golden and the bottom is too — you can check by lifting it with the help of the paper (carefully, so you don't burn yourself).

For the exotic jam

  1. Mix the sugar with the pectin.
  2. Gently heat both fruit purées together to about 40ºC (105ºF) and add the sugar-pectin mixture. Bring to a boil for a few seconds.
  3. Remove from the heat and transfer the purée to a clean bowl.
  4. Let it cool to 36ºC (97ºF), stirring frequently.
  5. Finally, spread a thin, even layer of the jam over the sponge sheet. Chill in the fridge until the jam firms up a little.

For the Ferrero Rocher glaze

  1. Melt the chocolate to about 50ºC (120ºF) in the microwave.
  2. Stir in the sunflower oil and mix well.
  3. Add the granulated almonds and mix again so they're evenly distributed.
  4. Let the coating cool down to 35ºC (95ºF).

Assembling the dessert

  1. With electric beaters, whip a little more than half of the chocolate ganache and keep the rest in the fridge. At medium speed, whip just until you get a creamy texture.
  2. Spread a thin, even layer of ganache over the jam we placed on the sponge. Let it firm up in the fridge.
  3. Cut the sponge — with its layers of jam and ganache — into strips. I made mine 5 cm (2 inches) wide.
  4. Roll up each strip with the filling on the inside, being careful not to tear the sponge.
  5. Freeze the rolls for about 10-15 minutes (or you can leave them in the freezer until you need them if you've prepared the recipe ahead).
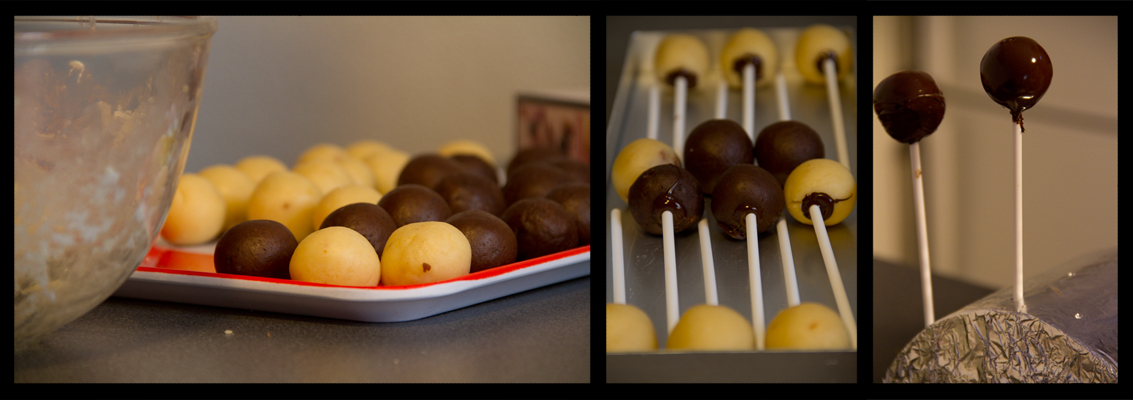
  6. Take the rolls out of the freezer and dip each one into the chocolate coating we prepared, going about halfway up.
  7. Whip the rest of the ganache with electric beaters at medium speed until you get a medium-firm consistency.
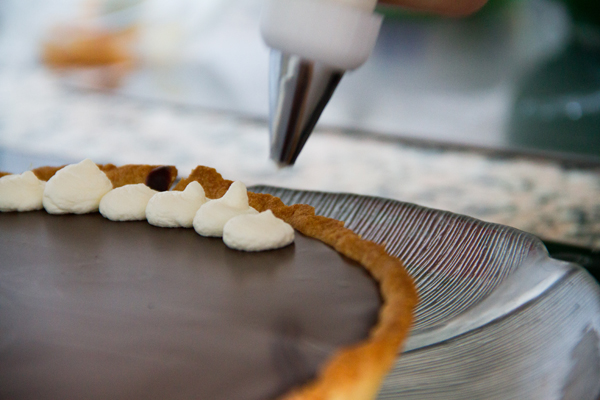
  8. Using a piping bag fitted with a star tip, pipe little chocolate roses on top of each roll. You can decorate with cocoa nibs.
  9. Let them temper a bit and enjoy.

PiC tips

  • Even though I followed the exact proportions, my jam didn't set as much as I'd have liked (no idea why), so if you see it's too runny, you can add a bit more pectin (that's the ingredient that gels it). I'd also suggest not using all of the jam you make — pay attention to the thickness and aim for a thin layer over the sponge base.
  • In his recipe, Ettore Cioccia makes 4 large roll cakes; I preferred bite-sized portions — or rather, two- or three-bite ones ;-). You can adjust this however you like when you cut the sponge.
September 30, 2020 · 5 min · Palstelera

Pure Cocoa Bundt Cake

To kick off the weekend, the holidays, celebrate Madrid's La Paloma festivities… any excuse is a good one to bake this wonderful, fluffy cocoa cake. I got this recipe from Alma Obregón's blog and only made a few small tweaks (Cesmm always tells me I'm incapable of following a recipe to the letter… could it be true?). Made with pure cocoa instead of chocolate, it feels lighter, and the syrup on top is perfect for those who love bitter, not-too-sweet chocolate. Bundt cakes are those ring-shaped cakes with a hole in the middle. Technically, only Nordic Ware® brand cakes are bundt cakes, but the name is generally used for any cake of this shape. If you want to learn more about its history and even when its international day is celebrated, you can read about it here.

bundt

What do we need?

  • 125 g (4.4 oz / 1 stick + 1 tbsp) butter
  • 2 eggs
  • 250 ml (1 cup) milk
  • 360 g (1¾ cups) white sugar
  • 60 g (⅔ cup) unsweetened pure cocoa powder (I use the Valor brand)
  • 260 g (2 cups) all-purpose flour
  • ½ teaspoon baking soda
  • ½ teaspoon baking powder
  • 1 pinch of salt

For the syrup:

  • 40 g (scant ½ cup) unsweetened pure cocoa powder
  • 3 tablespoons white sugar
  • 1 tablespoon cornstarch
  • 3 tablespoons corn syrup
  • 120 ml (½ cup) milk


How do we make it?

  1. Preheat the oven to 180°C (350°F).
  2. Melt the butter in the microwave and once fully melted, add the eggs and the milk and mix well. It's best if the milk is at room temperature so the butter doesn't solidify into little lumps (if it does, it's not a big deal, the cake will be just as delicious).
  3. In another bowl, mix all the dry ingredients together (sifted flour, sugar, baking soda, baking powder, and salt).
  4. Then add the wet mixture to the dry one and stir well with a whisk until you have a smooth, lump-free batter. You don't need to use an electric mixer, a hand whisk works perfectly.
  5. Pour the batter into the previously greased pan (with a baking spray or with butter/margarine/sunflower oil) and bake at 180°C (350°F) for 45-50 minutes. You'll know it's done when a skewer inserted into the cake comes out clean.
  6. Let it rest for at least 20 minutes inside the pan while you prepare the syrup.
  7. For the syrup, mix all the dry ingredients in a small saucepan and then add the rest.
  8. Heat over low heat and stir constantly until it thickens and reaches the desired consistency.
  9. Once the resting time is up, unmold the cake and pour the syrup over the top. Enjoy!

bundt2

Tips:

– You can easily find corn syrup in creative baking shops, which are popping up in more and more places. One of the most common brands is Karo, which is what I used for this recipe.

– As tempting as it is to dig in straight out of the oven, it's really important to let it rest. Otherwise, the cake will fall apart. So, patience…

– It's best to pour the syrup while it's still hot so it runs nicely down the sides of the cake, since it solidifies very quickly (it never goes completely hard, but it sets into a kind of gooey cream).

bundt3

August 12, 2016 · 3 min · Palstelera

Chocolate and Salted Caramel Tart

Even though putting the words ‘caramel’ and ‘salted’ together in the same phrase sounds weird, it’s a delicious combination that I tried for the first time thanks to French delicatessens. So as soon as I saw this recipe on La receta de la felicidad I couldn’t resist giving it a go, and I knew it’d be a guaranteed success. Even those weird beings who aren’t crazy about chocolate end up liking it, thanks to the crunchy bite of the crust and the creaminess of the filling. So what are you waiting for to try it?

Pics and Cakes

What do we need?

For the special shortcrust pastry:

  • 250 g (2 cups) all-purpose flour

  • 30 g (1/4 cup) ground almonds

  • 150 g (2/3 cup) butter

  • 80 g (1/3 cup) sugar

  • 1 egg

  • 1 pinch of salt

  • 1 pinch of powdered vanilla

For the salted caramel sauce:

  • 70 g (1/3 cup) sugar

  • 70 ml (1/3 cup) heavy cream

  • 1 teaspoon butter

  • a pinch of salt

For the chocolate cream:

  • 500 ml (2 cups) heavy cream

  • 350 g (12 oz) dark chocolate

For the whipped cream:

  • 300 ml (1 1/4 cups) heavy whipping cream, very cold (at least 35% fat)

  • 2 heaping tablespoons of powdered sugar

  • Optional: cocoa powder for dusting on top

Pics and Cakes

How do we make it?

  • We start by preparing the crust. Mix the very cold butter, cut into small cubes, with the rest of the ingredients. You can use the dough attachment on your mixer or use a spoon and finish kneading by hand. It’ll come out crumbly and you’ll have to keep squeezing the butter with your hands to incorporate everything well, but don’t despair. Wrap in plastic wrap and chill in the fridge for half an hour.

  • Meanwhile, prepare a 24 to 26 cm (9.5 to 10 in) springform tin by lightly greasing it and placing a sheet of baking paper on the bottom.

  • Roll out the dough on a floured surface or between two sheets of baking paper or plastic wrap (so it doesn’t stick) until it’s about 3 mm (1/8 in) thick.

  • Roll the dough onto the rolling pin and unroll it over the tin. Press it well into the tin, patching any gaps with bits of dough. Trim the edges by running the rolling pin over the top of the tin and pressing down.

  • Put the tin with the dough in the fridge for 30 minutes.

  • Preheat the oven to 180°C (355°F).

  • Cover the bottom of the tart with baking paper and fill with dried chickpeas (just like when making quiches — this keeps the dough from rising in the oven). Bake the crust for about 25 minutes.

  • Take it out and once it’s cooled, unmold and place on a plate or tray.

  • Now we’ll prepare the salted caramel sauce. Have the cream and butter ready beforehand. Put the sugar in a saucepan over medium heat and wait without stirring until it turns into caramel (2 or 3 minutes). Once you have a golden caramel, lower the heat to minimum and add the butter, salt, and cream, stirring constantly until you get a smooth sauce. If any caramel lumps form, keep stirring vigorously over low-medium heat until they fully dissolve.

  • Once it’s cooled a bit, pour the caramel over the tart base and put it in the fridge for half an hour.

  • Next we make the chocolate cream. Bring the cream to a boil in a saucepan while you chop the chocolate. When it boils, remove from the heat and add the chopped chocolate. Let it sit for a few minutes and stir until you get a smooth cream. Once the chocolate cream has cooled a bit, pour it over the tart that you had reserved in the fridge and let it chill overnight.

  • Finally, whip the cream. Beat the very cold cream with the sugar using a whisk until it reaches the desired consistency (be careful not to overdo it or it’ll turn into butter).

  • Put the whipped cream into a piping bag with a round tip and pipe little mounds of cream over the tart. Using a sieve, dust with cocoa powder and keep in the fridge until ready to serve.

Tips:

  • When whipping the cream you can use regular sugar, but store-bought powdered sugar will help keep the consistency longer since it usually contains a small amount of starch.

  • If you don’t want to even turn on the oven, you can swap the shortcrust base for a cookie base. Crush digestive-type cookies, for example, and mix with melted butter. Cover the tin pressing down well so it’s nice and compact, let it chill before pouring the caramel and you’re done.

  • If you don’t have a piping bag or tip, you can use a plastic bag (like a freezer bag) and snip a small hole in the corner.

Pics and Cakes

[English version] CHOCOLATE AND SALTED CARAMEL TART* *

For the crust:

  • *250 g all purpose flour *

  • *30 g powdered almonds *

  • *150 g butter, cold, cut into cubes *

  • *80 g sugar *

  • 1 egg

  • 1 pinch of salt

  • 1 pinch powdered vanilla

For the salted caramel sauce:

  • *70 g sugar *

  • *70 ml heavy cream *

  • 1 teaspoon butter

  • pinch of salt

For the chocolate cream:

  • *500 ml heavy cream *

  • *350 g dark chocolate *

For the whipped cream:

  • 300 ml heavy cream, very cold (1 cup aprox)

  • 2 tablespoons sugar

  • Optional: unsweetened cocoa powder for dusting

* *

  • Prepare the crust. Whizz all the ingredients in a food processor to a dough and finish by hand until getting a homogeneous dough. Wrap the dough and chill for 30 minutes. Roll out the pastry and line a deep 24-26 cm tart tin with it; patch any holes if crumbly. Cover and chill for at least 30 minutes.

  • Preheat oven to 180 ºC. Prick the tart shell all over with a fork or use baking beans and bake about 25 minutes.

  • Transfer to a rack and let cool.

  • Prepare the caramel sauce. Place sugar a small saucepan and bring to a boil over medium heat. Look for the caramel to turn a rich amber colour, then lower the heat and whisk in butter and cream (the mixture will bubble up, so be careful!). Pour caramel into cooled tart shell and let cool slightly; refrigerate 1/2 hour.

  • Prepare the chocolate cream. Chop the chocolate. Bring heavy cream to boil in a small saucepan over medium heat. Put chocolate into a medium bowl and pour in the hot cream. Let sit for a few minutes, then stir until smooth. Pour ganache evenly over tart and refrigerate 24 hours .

  • Before serving, prepare the whipped cream. In a bowl, using an electric mixer, beat the cream with the sugar until firm. Pipe the whipped cream on top of the pie and dust with some cocoa powdered if desired.

Tips:**- If you use confectioners’ sugar when whipping the cream, you’ll get a firmer cream.

- If you don’t want even to switch on the oven you can prepare the crust with biscuits. Just smash the biscuits and mix with melted butter. Cover the tart mold with it, pressing well with your fingers.Refrigerate before pouring the caramel sauce.

- If you don’t have piping bag, you can use a plastic bag instead.


April 16, 2013 · 6 min · Palstelera

Oreo Cookies

Maybe they don’t look exactly like a store-bought Oreo, but the flavor is, simply, incredible. In this case, I’d almost dare to say it’s even better than the original. It might seem a little laborious, but I promise neither the dough nor the cream is hard to make, so I’d encourage you to get started right away.

Pics and Cakes

What do we need?

For the cookies:

  • 230 g (1 cup) butter

  • 150 g (3/4 cup) sugar

  • 1 tablespoon vanilla extract

  • 200 g (7 oz) couverture chocolate

  • 1 egg

  • 210 g (1 2/3 cups) flour

  • 90 g (3/4 cup) cocoa powder

  • 1 teaspoon salt

  • 1/2 tablespoon baking powder

For the cream:

  • 110 g (1/2 cup) butter

  • 200 g (1 2/3 cups) powdered sugar

  • 1 teaspoon vanilla extract

  • 1 tablespoon milk

  • 1 pinch of salt

How do we make it?

  • Beat the butter with the sugar until you get a creamy mixture.

  • Add the melted chocolate and the vanilla extract. Add the egg and stir well.

  • In a separate bowl, mix the cocoa with the flour, the baking powder, and the salt.

  • Pour the flour mixture over the previous chocolate mixture and combine well. Use your hands if necessary.

  • Shape the dough into a cylinder and wrap it in plastic wrap.

  • Let it rest in the fridge for a couple of hours.

  • Take it out, remove the plastic wrap, and slice it into pieces about half a centimeter (1/4 inch) thick.

  • Bake on a tray lined with parchment paper for 12 minutes at 180°C (355°F).

  • Let cool and set aside.

  • For the cream, beat the butter with the sugar.

  • Then add the milk, the vanilla, and the pinch of salt.

  • Beat well until you have a smooth cream.

  • Assemble your Oreo cookies using two cookies and a little cream in the middle to stick them together. Take one cookie, add a bit of filling, and press down with the other so the filling spreads nicely.

Tips:

  • For the chocolate, you can also use a mix of couverture chocolate and 70% dark chocolate. It’s a matter of taste, since some people don’t like such a bitter flavor.

  • If you cut the cookies this way, they’ll come out a bit “rustic” — meaning slightly uneven and more handmade-looking. If you prefer, you can roll out the dough with a rolling pin (placing it between two plastic sheets or two pieces of parchment paper), let it cool that way in the fridge, and then cut it with cookie cutters like when making butter cookies. They’ll come out more uniform and “perfect”.

  • When baking these cookies, you have to be careful not to burn them, because since they’re almost black, the color won’t help you tell when they’re done. So there’s nothing to do but keep a close eye on them.

I got the recipe from these two amazing blogs: El Monstruo de las Galletas and Seasaltwithfood. Pics and Cakes [English version] HOMEMADE OREO COOKIES* *Ingredients: For the cookies:

  • 230 g butter,

  • 150g granulated Sugar

  • 1 tsp Pure Vanilla Extract

  • *200g semisweet Chocolate *

  • 1 egg

  • 210g Unbleached All-Purpose Flour

  • 90g Dutch-Processed Cocoa Powder

  • 1 tsp salt

  • 1/2 tsp Baking Soda

For the cream filling:

  • 110 g unsalted butter, at room temperature

  • 200 g Confectioners’ Sugar

  • 1 tsp Pure Vanilla Extract

  • 1 Tbsp Milk

  • Pinch Salt

    • In a medium bowl, whisk together the butter and granulated sugar until well combined. Whisk in the vanilla and chocolate. Add the egg and whisk until thoroughly incorporated.*
  • In another medium bowl, stir together the flour, cocoa powder, salt, and baking soda until well mixed. Using a wooden spoon or a fork, stir the flour mixture into the chocolate mixture. You may find it easier to switch to mixing it with your hands until the dough comes together.

  • *Transfer the dough to a 15-inch square sheet of parchment or waxed paper. Using your hands, shape the dough into a log about 10 inches long and 2 to 2 1/2 inches in diameter. Place the log at the edge of the paper and roll the paper around the log. With the log fully encased in paper, roll it into a smoother log no more than 2 1/2 inches in diameter. Refrigerate for at least 2 hours or until firm. *

  • Position a rack in the center of the oven and preheat the oven to 180°C. Butter a baking sheet or line it with parchment paper.

  • *Slice the dough log into 1/4-inch-thick slices. Place the slices about 1 inch apart on the prepared baking sheet.Bake for 12 minutes, or until the cookies are firm to the touch. *

    • Using a stand mixer fitted with the paddle attachment or a handheld mixer or even a wooden spoon, beat the butter on low speed for about 30 seconds, or until completely smooth and soft.*
  • *Add the confectioners’ sugar and vanilla and beat until the mixture is perfectly smooth. Add the milk and salt and beat until smooth. *

  • To assemble the sandwich cookies: Scoop about 1 rounded tablespoon of the filling onto the flat side of 1 cookie. Top with a second cookie, flat side down, then press the cookies together to spread the filling toward the edges. Repeat with the remaining cookies.

Tips: - You can use a mixture of different chocolates. I like using dark chocolate for desserts and bitter chocolate (70% cocoa). - You can use another method to shape your cookies. You can roll out the dough with the rolling pin. Place the dough between two plastic sheets or oven paper, roll it out and place in the fridge. Then use the cookie cutter to cut the shapes of your cookies. - When baking, be careful, because you can’t judge by colour given that the dough is almost black. So you’ll have to pay attention and avoid them to get burnt. Pics and Cakes


Comments

zordor (2013-03-12 01:25:14):

What do you mean you’d “dare to say” the flavor is better than the original? It’s infinitely better than the originals, no question whatsoever. I’ve been lucky enough to try this recipe and I have to say without a doubt these are among the best cookies I’ve ever eaten in my life! They’re absolutely amazing!

Esther (2013-03-16 15:46:02):

Hi Pics&Cakes,

I want to make the cookies but I have an existential question: how do I make or where do I get the couverture chocolate? I have Valor drinking chocolate at home, not sure if that works.

Thanks so much!

EPS

Palstelera (2013-03-16 16:14:26):

The important thing is that it’s dark chocolate, not milk. It can be the so-called fondant chocolate, dessert chocolate, or couverture. Almost any of those would work. I don’t really like drinking chocolate for these recipes because the flavor isn’t as intense, in my opinion. Hope that helped.

Esther (2013-03-16 18:29:22):

It helped a ton, yes! In a little bit I’m getting to work… Thanks so much

Palstelera (2013-06-29 13:22:37):

We’re so glad you made them and especially that you liked them. Answering your questions: if they came out a bit soft, it’s true that a little more time in the oven would have made them harder. That said, you did the right thing because since it’s a dark dough it’s hard to tell when they’re at their perfect point and when they’re starting to burn, and I think it’s better to enjoy a soft cookie than a scorched one. :-) In any case, I’m sure they’ll come out perfect the second time. As for the vanilla in the dough… Oops! I forgot to include it so I have to fix the recipe (thanks!). In principle, it goes in along with the chocolate. Lastly, your question about the mixer. Mine is a regular mixer, the kind with detachable beaters. You could even mix it by hand, but with the mixer you save time and effort and you also get a smoother, fluffier mixture.

Hugs and thanks for following us. :-D

setitapili (2013-06-29 09:09:40):

Hi!!! I wanted to write to you to tell you how the cookies turned out… Simply delicious! I took them to work and everyone was blown away… But I had a couple of problems. The cookie part came out a bit soft, maybe a little more time in the oven would have helped, but I didn’t want to leave them too long because they harden a bit more when they cool. Another problem was that I didn’t know they grew in the oven, so they came out a bit big. And one question: the vanilla for the cookie, when do you add it? I didn’t see it in the recipe so I added it in the last step. Another question: I beat the cream with a whisk, but the dough with a regular mixer. Did I do it right? Conclusion: the cookies are amazing!! They’re my first cookies and everyone asked me for the recipe!!! You can be sure I’ll be making them again!!! Spectacular!!!

Palstelera (2013-06-23 01:15:59):

I think I’m late with the answer… but cocoa powder is also easy to find, in any supermarket. I usually use the Valor brand, which is unsweetened. And as for the milk, any kind works. I used semi-skimmed because that’s what I had, and it came out perfect. Let us know how it goes. :-)

setitapili (2013-06-22 09:52:57):

Hi!!! I’m going to get started in the cookie world and this afternoon I want to make this recipe, but I have a couple of questions:

  • what cocoa powder could I use for the dough? The couverture is easier because they sell it as is, but powder, no idea… Another question, for the cream you use a tablespoon of milk, what type of milk? Sure they’re silly questions, but I hope you’ll let me know… I’ll let you know how it went!! Thanks!!!
March 11, 2013 · 8 min · Palstelera

Petal Cake

We’ve had this recipe pending for a few days now, but since in the meantime we published our Whole Kitchen challenges, it had to be pushed back to this week. And well, what better week for a birthday cake… :-D I made the recipe following exactly the one @SandeeA did at La Receta de la Felicidad. So all credit for the explanation this time goes to her. My personal touch was just the little sugar bear.

Pics and Cakes

What do we need?

For the sponge cake (to make a tall cake, we’ll need to bake two sponges like this one, so double the quantities):

  • 250 g (about 1 cup + 2 tbsp) butter, room temperature

  • 250 g (1 ¼ cups) sugar

  • 4 eggs

  • 225 g (1 ¾ cups) all-purpose flour

  • 25 g (about 3 tbsp) cornstarch

  • half a packet of Royal-style baking powder (8 g, about 2 tsp)

For the chocolate buttercream:

  • 750 g (about 1 ⅔ lb) melting chocolate

  • 375 g (about 1 ⅔ cups) butter, room temperature

  • 100 g (about ¾ cup) powdered sugar

How do we make it?

  • Preheat the oven to 180 ºC (355 ºF).

  • Prepare a cake pan by greasing it with butter and dusting it lightly with flour.

  • In a large bowl, using a whisk or a spoon, mix the butter and sugar well until you get a smooth, creamy mixture.

  • Add the eggs one at a time, not adding the next one until the previous one is fully incorporated.

  • Add the flour, cornstarch, and baking powder and mix with a spatula or spoon until everything is well combined.

  • Pour the batter into the prepared pan, spreading it evenly.

  • Bake for 25-30 minutes at 180 ºC (355 ºF).

  • Take it out of the oven and wait a few minutes before unmolding.

  • Repeat these steps to make a second sponge cake just like the first one. (If you have two identical pans, you can make all the batter at once and divide it between both pans.)

  • Slice each sponge into two layers, trying to make them as even as possible.

  • Next, we start preparing the chocolate buttercream. First, we’ll melt the chocolate.

  • Chop it up and place it in a microwave-safe bowl. Heat it in 30-second intervals, stirring each time, until the chocolate is fully liquid. Let it cool for a few minutes.

  • Meanwhile, in another large bowl, beat the butter and sugar at top speed with a whisk until you get a fluffy, pale, smooth mixture (about 5 minutes).

  • Check that the chocolate you melted earlier has cooled down, and add it to the butter mixture. Beat a bit more until fully combined, and then move on to filling and decorating the cake.

  • Place the first sponge layer — the least perfect of the ones you made — on the plate you’ll be serving on, covered with some strips of parchment paper or printer paper, so it doesn’t get stained and you can pull them out easily afterwards.

  • Place a couple of spoonfuls of filling on this sponge layer and spread it evenly — it’s fine if some spills over the sides.

  • Place another sponge layer on top, pressing down gently and making sure it’s well aligned with the layer below. Add another two spoonfuls of filling and proceed as before.

  • Continue the same way with the rest of the layers. On top, place the most perfect sponge, with the bottom side facing up (it’s always the prettiest). If you don’t want the sponge layers to shift, since we’re about to cover and decorate the cake, you can stick a skewer down through the center of the cake, which you’ll remove once you’re done decorating.

  • Cover the cake with a first, very thin layer of chocolate buttercream — this is just to set things in place and hide any imperfections in the sponge layers.

  • Leave the chocolate cake in the fridge for 15 minutes so this layer firms up.

  • Using a piping bag fitted with a medium-sized round tip, pipe dots of buttercream onto the cake, forming a vertical line (4 dots, in my case).

  • Place a spatula on top of each dot and slide it to the right in a single motion (or to the left if you’re left-handed). Wipe the spatula clean and continue doing the same with the rest of the dots, remembering to always wipe the spatula between strokes.

  • Each time you finish a row of dots, grab the piping bag, create a new line of dots, and repeat the pattern across the whole cake. The spot where you finish the last row of petals will have some imperfections, and that should be the “back” of your cake.

  • If you’re not going to eat it the same day, store the chocolate cake preferably outside the fridge so the chocolate buttercream stays creamy, since the fridge tends to harden it.

Tips:

  • To decorate it, you can make a stencil out of a sheet of paper, cutting out the number of years the birthday person is turning, and dust it with powdered sugar.

  • I made this sugar bear out of modeling paste to crown the cake. I’ll do a tutorial soon so you can see how easy it is.

Pics and Cakes

[English version] PETALS CAKE* *Ingredients:

  • *250 g butter, room temperature *

  • *250 g sugar *

  • 4 eggs

  • *225 g all purpose flour *

  • *25 g corstarch *

  • *8 g baking powder *

For the chocolate buttercream:

  • 750 g dark chocolate, melted

  • *375 g butter, room temperature *

  • *100 g confectioners’ sugar *

  • Preheat oven to 180ºC

  • Prepare a cake pan (butter and flour the bottom and the sides of the pan).

  • In a large bowl, place butter and sugar, and mix well.

  • Add eggs one by one.

  • Add flour, cornstarch and baking powder, and beat until combined.

  • Pour batter into pan and bake for 25 minutes.

  • Leave the cake in its pan on a wire rack for 10 minutes and then turn out to cool.

  • Repeat the whole process to make another similar cake.

  • Now we are going to prepare the chocolate buttercream.

  • Using and electric mixer, cream butter and sugar, until light and fluffy (about 5 minutes). Add melted chocolate, that shall be cool, and mix well. Now the buttercream is ready to use.

  • Fill the cake layers with chocolate buttercream, and then frost it with a thin layer of buttercream.

  • Place the cake in the fridge for 15 minutes to set.

  • Place the remaining chocolate buttercream on a piping bag fitted with a medium sized round tip.

  • Create a row of dots (vertical), as shown on the pictures.

  • Using a spatula, spread every dot to the right, in one motion (or to the left if you are left-handed). Clean the spatula between every swipe.

  • Once you have spread one row of dots, add another row of dots and repeat the pattern until the whole cake is covered with “petals”.

  • If you are not going to eat the cake on the same day, please avoid keeping it in the fridge if possible, so that the chocolate buttercream remains creamy.

Tips:

  • You can create a template showing the number of the age that the special person is turning and then sprinkle with confectioners’ sugar.

  • On the top, I placed this sugar bear made by myself. Soon I will post a tutorial about how to make it with gum paste.


November 29, 2012 · 6 min · Palstelera

Baklava

Whole kitchen, for their Sweet Proposal for the month of November, invites us to prepare a Persian classic: Baklava. Apparently this little pastry has its origins in ancient Mesopotamia, although several cultures and civilizations are still fighting over who actually invented it. Persian, Greek or Arab — it’s delicious. This time we’ve made two versions: one with dates and toasted almonds, and another with hazelnuts and chocolate. Filo pastry is a wonder of the kitchen that you really have to try, both for sweet and savory.

Pics and Cakes

What do we need?

  • 1 package of filo pastry

  • 100 g (3.5 oz) butter

For the syrup:

  • 210 ml (scant 1 cup) water

  • 180 g (about 3/4 cup) sugar

  • 30 g (1 tbsp) honey

  • Juice of half a lemon

  • A cinnamon stick

For the filling:

  • 18 dates

  • 50 g (1.75 oz) toasted almonds

  • 50 g (1.75 oz) chocolate (drops or chips)

  • 50 g (1.75 oz) hazelnuts

Pics and Cakes

How do we make it?

  • We start by making the syrup. Put all the ingredients in a saucepan and, over high heat, bring to a boil. Lower the heat a bit and let it simmer for about 15 minutes so it thickens.

  • Preheat the oven to 180°C (355°F).

  • Prepare the filling: pit the dates and cut them into small pieces. Chop the almonds and hazelnuts as well. In one bowl mix the dates with the almonds, and in another mix the hazelnuts with the chocolate.

  • Melt the butter for a few seconds in the microwave.

  • Grease the baking dish you’re going to use with butter and cut all the filo sheets to the size of your tray.

  • Lay down a sheet of filo and, with a brush or your hands, smear it with butter on one side. Add another layer and brush it with butter again. Keep going until you have 8 layers.

  • Spread half of the date-and-almond filling over the filo.

  • Add more filo on top — this time, 4 layers (always brushed with butter so they stay separate after baking).

  • Add the rest of the date-and-almond filling.

  • Make another batch of 8 filo layers (always buttered).

  • With a sharp knife, cut the baklava into squares.

  • Bake for 45 minutes total: the first 20 minutes uncovered, and the next 25 minutes with a sheet of aluminum foil over the baklava so it doesn’t brown too much.

  • As soon as you take it out of the oven, let it rest for 5 minutes, then pour the cold syrup over the hot baklava (this way it’ll stay crispy).

  • For the hazelnut-and-chocolate version you can repeat the same process in another baking dish, or make triangles. To do that, cut the filo into strips of about 5 cm by 20 cm (2 in by 8 in). Brush each layer with butter and stack 4 strips together.

  • Place a teaspoon of filling at one end and fold a corner over to form a triangle with the filling tucked inside. Take the other end and keep folding the triangle over itself. (Since it’s a bit tricky to explain, I found [this video](

{{}}

) where you can easily see how to do it.)

  • Bake them at 180°C (355°F) too, but they’ll be ready in 10–15 minutes.

  • Once out of the oven, you can dust them with powdered sugar.

Tips:

  • Filo pastry dries out very quickly, so whenever you’re not using it, keep it well wrapped in a plastic bag.

  • It’s important to add butter between each layer, but you don’t need to “drown” it either.

  • It’s quite a rich, filling sweet, so it’s better to cut the squares small.

Pics and Cakes

[English version] BAKLAVA* *Ingredients:

  • 1 package of filo pastry

  • 100 g butter

For the syrup:

  • 210 ml water

  • 180 g sugar

  • 30 g honey

  • Juice of 1/2 lemon

  • Cinnammon stick

For the filling:

  • 18 dates

  • 50 g almonds

  • 50 g chocolate (drops or chips)

  • 50 g hazelnuts

  • Combine the syrup ingredients in a medium saucepan and bring to boil. Let the syrup simmer on low heat for about 15 minutes

  • Preheat oven at 180ºC.

  • *Now prepare the filling: pit the dates and chop into small pieces. Chop almonds and hazelnuts. Mix almonds and dates into a bowl and chocolate and hazelnut in other. *

  • Melt the butter in the microwave for a few seconds.

  • Butter the baking pan and cut the filo pastry sheets into the size of the baking pan.

  • *Place a sheet of filo pastry and butter it. Place another sheet over it and butter again. Do it again until having 8 layers. *

  • *Scatter half of the dates-almonds filling. *

  • *Place more filo pastry. This time, only 4 layers but always buttered. It will make to have separate layers once the baklava is baked. *

  • *Add the other half of the filling. *

  • *Create another pack of 8 layers of filo pastry (always buttered). *

  • *With sharp knife cut baklava into small squares. *

  • *Bake for 45 minutes. The first 20 minutes uncovered and then you can cover with aluminium foil to prevent it from browning too much. *

  • When you take it out from oven, let stand for 5 minutes and then pour the cold syrup.

  • For the hazelnut-chocolate version, you can follow the same steps or make small triangles of filo pastry. For the triangles, cut the pastry into stripes (4 x 20 cm aprox.). Butter each stripe and put 4 of them together.

  • *Add a tsp of the filling in one of the sides and proceed to fold into triangle shape. You can see how to do it easily in [this video](

{{}}

).*

  • Bake at 180ºC only for 10-15 minutes.

  • You can powder some confectioners’ sugar when you take them out from oven.

Tips:

*- Filo pastry dries very fast, so when you are not using it, keep it in a plastic bag. *

- It’s important to butter every single sheet (layer) of filo pastry but don’t “over butter” (otherwise, it will be too greasy).

- It’s a filling sweet, so make small squares when cutting the baklava.


Comments

Apfelstrudelkuchen (2012-11-26 00:03:04):

Hi!!

Your baklava-as-triangles version turned out really original!! And with dates it must be amazing.

Hugs,

Mara (2012-11-26 17:34:08):

So good with the chocolate touch. I love the idea of making individual portions, because when you cut it the filo sheets tend to come apart a bit. Since everyone at home liked it so much I’ll make it again, and I’m going to do it your way, in the individual triangle version. This is my version: http://masdulcequesaladopuntocom.blogspot.com.es/

tía pi (2012-11-27 17:48:26):

This Friday I have guests over for dinner — it’s going to be a light meal, so the baklava is going to be a great dessert. I’ll let you know how it goes.

silvia (2012-11-29 22:09:14):

The little chocolate triangles were really tasty… and that’s saying something, because I’m not really one for sweets…

Palstelera (2012-12-07 19:16:00):

Mara, I’m glad you like the little-triangles version… :-)

November 25, 2012 · 6 min · Palstelera

Doughnuts

I think this is hands-down one of the best culinary discoveries I’ve made in my life. As unbelievable as it sounds, the flavor is really close to the store-bought ones — the dough is super fluffy, it doesn’t feel greasy like some bakery doughnuts, and the chocolate glaze is simply magnificent. The only problem is that they’re highly addictive… I’m warning you: once you try them, you’ll want to make them again and again. But hey, I think it’s worth it.

Pics and Cakes

What do we need?

  • 300 g (2.5 cups) bread flour

  • 200 g (1.5 cups) all-purpose flour

  • 80 g (1/3 cup + 1 tbsp) sugar

  • 5 g (1 tsp) salt

  • 20 g (3 tbsp) powdered milk

  • 2 packets of active dry yeast

  • 230 g (1 cup) warm water

  • 1 medium egg

  • 40 g (3 tbsp) shortening or margarine (we use Crisco, which is an odorless and tasteless vegetable fat)

  • 2 teaspoons orange extract

For the sugar glaze:

  • 200 g (1.75 cups) confectioners’ sugar

  • 1 teaspoon butter

  • A splash of lemon juice

  • Water

For the chocolate glaze:

  • 200 g (1.75 cups) confectioners’ sugar

  • 1 teaspoon butter

  • 150 g (5.3 oz) baking chocolate

  • Water

Pics and Cakes

How do we make them?

  • Mix the dry ingredients well: flours, sugar, salt, powdered milk and yeast.

  • Add the water — neither hot nor too cold, at room temperature — along with the beaten egg and the orange extract. Remember: if the water is hot it will “kill the yeast,” and if it’s too cold the dough will take longer to rise. Knead for about 8 minutes.

  • Add the fat and keep kneading until the dough no longer sticks to your hands. You might need to add more flour, but you won’t know until the shortening is fully incorporated. The resulting texture should be smooth and elastic.

  • Form a ball and let it rest for about 45 minutes. It’s fine to let it go longer.

  • After that time, knead it a bit and roll it out to about 1 cm (3/8 inch) thick. If you have a doughnut cutter, perfect. If not, use a round cutter (or a glass) to make the circles, and a smaller one for the inner circle. For the center hole, we just made it with our finger and stretched it a little (the dough is very elastic, so any irregularity won’t show).

  • Let them rest on a tray lined with parchment paper for at least 1 hour so they can rise again.

  • Fry in sunflower oil (if you use olive oil it’ll give them too much flavor). The oil shouldn’t be too hot or they’ll burn right away. As soon as you drop them in the pan they’ll start puffing up. Leave them for a few seconds and flip them so they brown on the other side.

  • Take them out and drain on paper towels, and while they’re still warm, dip them in the sugar glaze. If you’re using the chocolate glaze, they don’t need to be warm.

  • To make the sugar glaze, melt the butter a bit in the microwave and mix it well with the confectioners’ sugar and a splash of lemon. Add a few tablespoons of water until you get a light, whitish slurry.

  • For the chocolate glaze, mix the confectioners’ sugar with a few tablespoons of water (again, you want a light slurry). Melt the chocolate with the butter in the microwave and once melted, add it to the sugar-and-water mixture. If it’s too thick, add a bit more water. If on the other hand it’s too runny, let it cool down.

  • To coat the doughnuts in the sugar glaze, dip them into the bowl so the glaze sticks all over. For the chocolate glaze, only dip one side.

Pics and Cakes

Tips:

  • It looks complicated but it isn’t. You just need time, because respecting the dough’s rising times is really important.

  • It’s important that the yeast is bread yeast (not baking powder) and that the milk is powdered — otherwise your dry ingredient ratios will change and you won’t get the same result.

  • When frying the doughnuts, do them one at a time, or if you have a large pan, 2 or 3 at most. Otherwise you risk burning them.

Pics and Cakes

Pics and Cakes


November 1, 2012 · 5 min · Palstelera

Brownie

Whole Kitchen’s Sweet Proposal for October invites us to make an American classic: brownies

And what a treat, seriously. I’ve made dozens of brownies in my life and I have to confess I almost always pull out a different recipe and they all turn out delicious. The secret is that a brownie is a compact but fluffy cake (sometimes even moist), since it usually doesn’t have any leavening and therefore doesn’t rise. I read somewhere that the brownie was actually discovered thanks to someone forgetting to add the leavening to a chocolate cake. All I can say is… blessed mistake!

Pics and Cakes

What do we need?

  • 200 g (7 oz) baking chocolate

  • 100 g (3.5 oz / 7 tbsp) butter

  • 2 eggs

  • 100 g (1/2 cup) regular sugar

  • 1/2 teaspoon baking soda

  • 1/2 teaspoon salt

  • 80 g (2/3 cup) flour

  • 100 g (3.5 oz / about 1 cup) walnuts

Pics and Cakes

How do we make it?

  • Chop the chocolate and put it in a microwave-safe bowl together with the butter. Melt in 20-30 second intervals, stirring each time so it doesn’t burn.

  • In another large bowl, whisk the eggs with the sugar until you get a foamy mixture.

  • Add the chocolate to this foamy mixture and stir well.

  • Mix the flour with the salt and baking soda. Sift it and add it to the previous mixture.

  • Stir well and add the walnuts.

  • Prepare a baking pan, greasing and flouring it so the cake doesn’t stick, and pour the mixture into it.

  • Put it in the oven (preheated to 180°C / 350°F) and bake for about 30 minutes.

  • It’ll be ready when you see a light brown crust has formed on top. Remember that the toothpick won’t come out perfectly clean since this is a moist cake. The important thing is that it’s not completely liquid.

Pics and Cakes

Tips:

  • Even though brownie batter is pretty dense and it’s usually not necessary, a trick to keep the walnuts from sinking to the bottom of the pan is to coat them in flour or cocoa first.

  • To turn the brownie into a proper dessert, serve it with a scoop of vanilla ice cream and hot chocolate sauce on top.

Pics and Cakes

[English version] BROWNIES* *Ingredients:

  • 200 g chocolate

  • 100 g butter

  • 2 eggs

  • 100 g sugar (sugar or confectioners’ sugar)

  • 1/2 tsp baking soda

  • 1/2 tsp salt

  • 80 g flor

  • *100 g walnuts *

  • Cut chocolate into chunks and put into a microwave bowl with butter. Melt it slowly (stop every 20-30 seconds and stir with a spoon).

  • *In a large bowl, whisk the eggs and the sugar together to get a fluffy mix. *

  • Add chocolate cream and stir well.

  • *Mix flour, salt and baking soda. Sift the flour mix and add to the previous cream. *

  • *Stir well and add walnuts. *

  • *Prepare the baking pan (butter and flour it!) and pour the mixture on it. *

  • *Put into oven (preheated at 180ºC) and bake for 30 minutes. *

  • *It will be ready when you see a brown crust created on the top. If you insert a needle or knife to check the baking, it might not be clean because it’s supposed to be a ‘wet’ cake. *

  • ** Tips:- Normally this tip is not needed with brownies recipe because the dough is very thick. However, when you add nuts to a cake and you don’t want to have all of them at the bottom of your baking pan, you can coat the walnuts in flour or cocoa powder. *- For a perfect dessert result, serve the brownie with a scoop of vanilla ice-cream and hot chocolate sauce over it!

October 25, 2012 · 4 min · Palstelera

Cake Pops

Or pop cakes. Any name works for these little lollipop-shaped treats stuffed with cake. The original idea is to use up the trimmings from a cake you’ve made for something else, or one that didn’t turn out pretty enough — so you don’t feel bad destroying it (literally).

Pics and Cakes

What do we need?

  •   Cake*
    
  •   Cream cheese
    
  •   Chocolate for melting
    
  •   Chocolate sprinkles, colored sprinkles, crushed nuts, colored sugar...
    
  •   Lollipop sticks
    

Buttercream:

  •   250 g (1 cup + 2 tbsp) butter, at room temperature
    
  •   500 g (4 cups) powdered sugar
    
  •   1 tsp vanilla extract
    
  •   1 tbsp water
    
  •   Food coloring
    
  • If you don’t have any cake on hand, you can make a nice fluffy sponge cake with the following ingredients:
  •   4 eggs
    
  •   250 g (1 1/4 cups) sugar
    
  •   1 tsp vanilla extract
    
  •   250 ml (1 cup) milk
    
  •   55 g (4 tbsp) butter
    
  •   250 g (2 cups) all-purpose flour
    
  •   2 tsp baking powder
    
  •   1/4 tsp salt
    

How do we make it?

Making the sponge cake:

  • Beat the eggs with the whisk attachment of the mixer (this step is essential for getting a fluffy texture).

  • Add the sugar and keep beating for another 4 minutes until creamy. Add the vanilla extract and mix well.

  • In another bowl, mix the dry ingredients. Then add the egg-and-sugar cream and beat on low speed until everything is incorporated.

  • Heat the milk and butter in the microwave until the butter melts. Add to the rest of the mixture and stir well.

  • Pour into a greased and floured baking pan.

  • Bake at 170°C (340°F) until a skewer (or knife tip) inserted into the cake comes out clean.

Pics and Cakes

And now on to the cake pops themselves:

  • Once the cake has cooled, cut a piece and set aside roughly the same volume of cream cheese (making cake pops with a whole cake can be madness unless you’ve got a huge party and don’t mind spending the entire day rolling little balls).

  • Take your piece of cake, crumble it with your hands into a bowl and add the cream cheese. Mix well with your hands. (The mixture you get shouldn’t be too dry or too sticky — if either happens, fix it with more cake or more cream cheese.)

  • Now roll small balls with your new mixture. It’s important they come out very smooth, with no cracks visible.

  • Melt a little chocolate in the microwave.

  • Take a ball and stick a lollipop stick into it. Then pull the stick out, dip it in chocolate, drop a bit of melted chocolate inside the hole, and finally push the stick back into the ball for good. (This step matters so the ball doesn’t fall off the stick later.)

  • Repeat until you’ve used up all the mixture and put them in the fridge for half an hour, if possible.

  • Melt the chocolate in the microwave, being careful not to burn it (heat for a few seconds, take it out and stir. Repeat until you get the texture you want).

  • Take your skewered ball and dip it in the chocolate. Pull it out and rotate it so the whole surface gets coated.

  • Let it dry stuck into a piece of styrofoam, a potato or an egg carton (in any case, poke the holes ahead of time with a skewer so you don’t ruin the cake pop’s stick). Repeat with all the balls.

  • Once they’re coated in chocolate, all that’s left is to use your imagination and decorate them with chocolate of another color, sprinkles, colored sugar, chocolate jimmies, etc.

  • Another option is to decorate your cake pops with buttercream. To do that, mix all the buttercream ingredients with the whisk attachment (low speed if you don’t want a powdered-sugar blizzard in your kitchen). You can tint the buttercream with food coloring, transfer it to a piping bag, and pipe little mounds until the ball is fully covered.

Tips:

  • Instead of cream cheese for the mixture, you can use dulce de leche, Nutella, or any other spreadable filling.
  • If you use white chocolate, you can tint it with food coloring — but make sure it’s gel-based or chocolate-specific, never water-based. You can also use the colored chocolate buttons sold at baking shops (candy melts).
  • When melting the chocolate, if you want it runnier so the cake pops are easier to dip, you can add a bit of sunflower oil, butter, or Crisco (vegetable shortening). Never water!
  • If you don’t have sprinkles, jimmies or crushed nuts, you can make colored sugar very easily. Just put a few tablespoons of sugar in a plastic bag, add a couple of drops of food coloring (this one can be liquid), close the bag and shake. You’ll have lovely sugar tinted in whatever color you like.
  • If you’re after inspiration and want to enjoy some real artistry, definitely check out Bakerella’s website.

Pics and Cakes


Comments

Esther (2012-07-28 13:28:38):

Hi!

Just looking at this is making my mouth water! So much so that I think in a few days I’ll be getting to work on it, and I wanted to know where I can buy lollipop sticks in Madrid.

Thanks so much,

EPS

Palstelera (2012-07-28 15:09:13):

I’ll tell you the shops I usually buy from in Madrid, but with how popular all this stuff is getting, I’m sure you can find them in more places too: Decake, in the Estrella neighborhood, La tienda americana, near Plaza de Cristo Rey (Islas Filipinas metro stop), or Comercial Mínguez (downtown area).

I’ve seen that most of them close in August, so hurry up! And I’m waiting for the photos of the result…

Esther (2012-07-28 15:19:44):

Thanks so much!!! I promise photos if they turn out halfway decent, although yours have set the bar pretty high, hehe

July 19, 2012 · 5 min · Palstelera