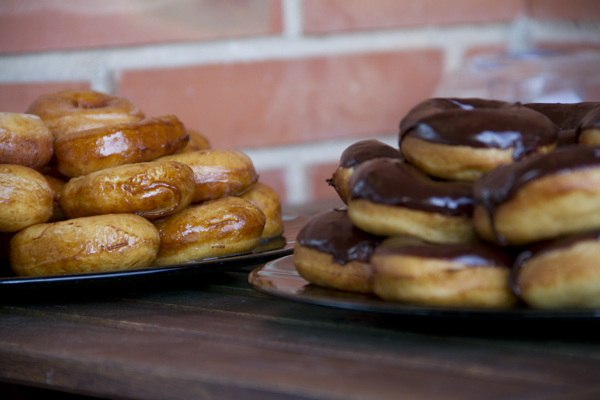
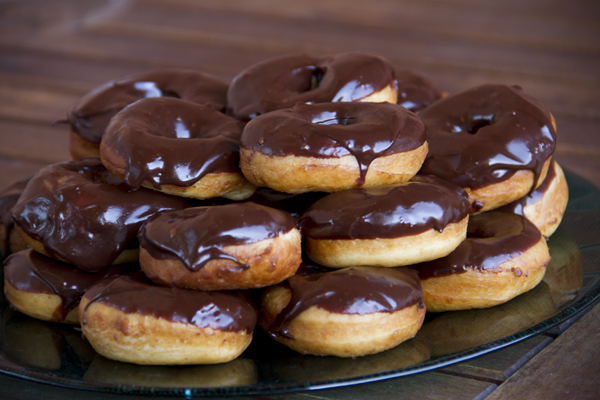
Doughnuts

I think this is hands-down one of the best culinary discoveries I’ve made in my life. As unbelievable as it sounds, the flavor is really close to the store-bought ones — the dough is super fluffy, it doesn’t feel greasy like some bakery doughnuts, and the chocolate glaze is simply magnificent. The only problem is that they’re highly addictive… I’m warning you: once you try them, you’ll want to make them again and again. But hey, I think it’s worth it.

Pics and Cakes

What do we need?

  • 300 g (2.5 cups) bread flour

  • 200 g (1.5 cups) all-purpose flour

  • 80 g (1/3 cup + 1 tbsp) sugar

  • 5 g (1 tsp) salt

  • 20 g (3 tbsp) powdered milk

  • 2 packets of active dry yeast

  • 230 g (1 cup) warm water

  • 1 medium egg

  • 40 g (3 tbsp) shortening or margarine (we use Crisco, which is an odorless and tasteless vegetable fat)

  • 2 teaspoons orange extract

For the sugar glaze:

  • 200 g (1.75 cups) confectioners’ sugar

  • 1 teaspoon butter

  • A splash of lemon juice

  • Water

For the chocolate glaze:

  • 200 g (1.75 cups) confectioners’ sugar

  • 1 teaspoon butter

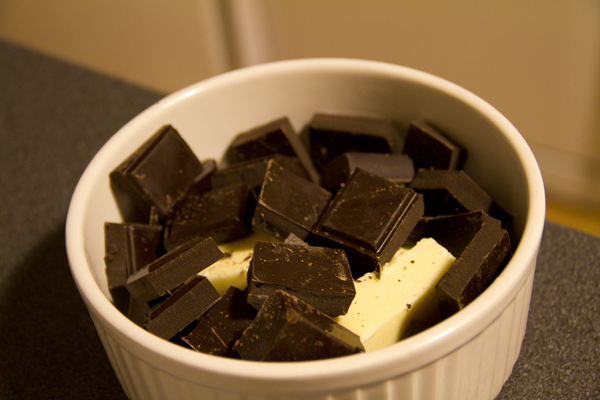
  • 150 g (5.3 oz) baking chocolate

  • Water

Pics and Cakes

How do we make them?

  • Mix the dry ingredients well: flours, sugar, salt, powdered milk and yeast.

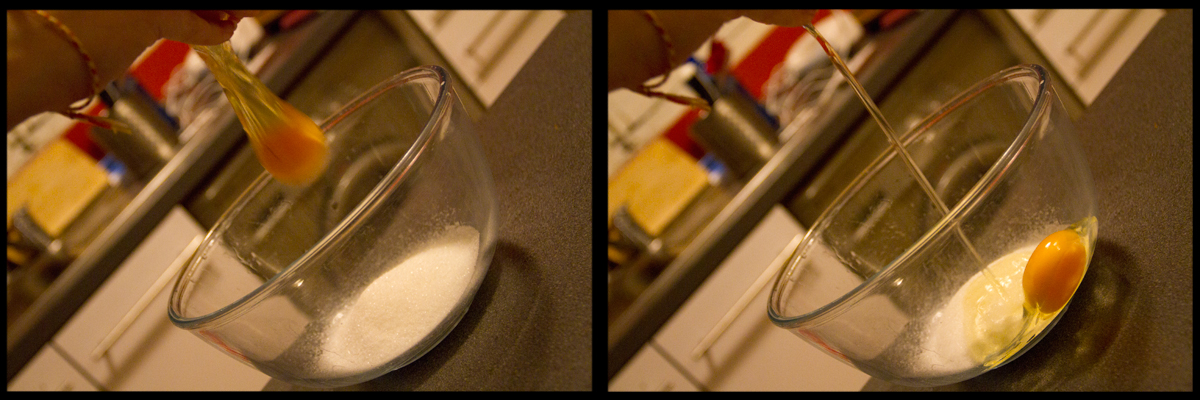
  • Add the water — neither hot nor too cold, at room temperature — along with the beaten egg and the orange extract. Remember: if the water is hot it will “kill the yeast,” and if it’s too cold the dough will take longer to rise. Knead for about 8 minutes.

  • Add the fat and keep kneading until the dough no longer sticks to your hands. You might need to add more flour, but you won’t know until the shortening is fully incorporated. The resulting texture should be smooth and elastic.

  • Form a ball and let it rest for about 45 minutes. It’s fine to let it go longer.

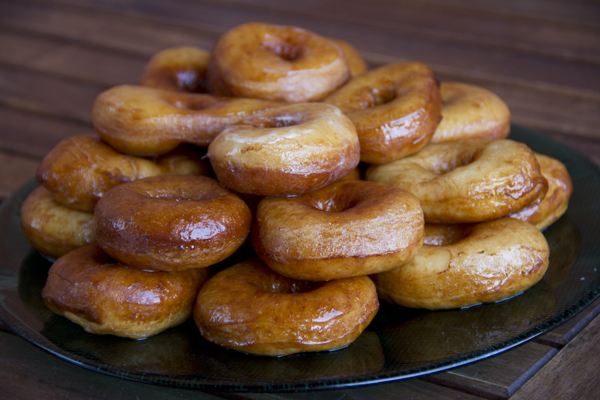
  • After that time, knead it a bit and roll it out to about 1 cm (3/8 inch) thick. If you have a doughnut cutter, perfect. If not, use a round cutter (or a glass) to make the circles, and a smaller one for the inner circle. For the center hole, we just made it with our finger and stretched it a little (the dough is very elastic, so any irregularity won’t show).

  • Let them rest on a tray lined with parchment paper for at least 1 hour so they can rise again.

  • Fry in sunflower oil (if you use olive oil it’ll give them too much flavor). The oil shouldn’t be too hot or they’ll burn right away. As soon as you drop them in the pan they’ll start puffing up. Leave them for a few seconds and flip them so they brown on the other side.

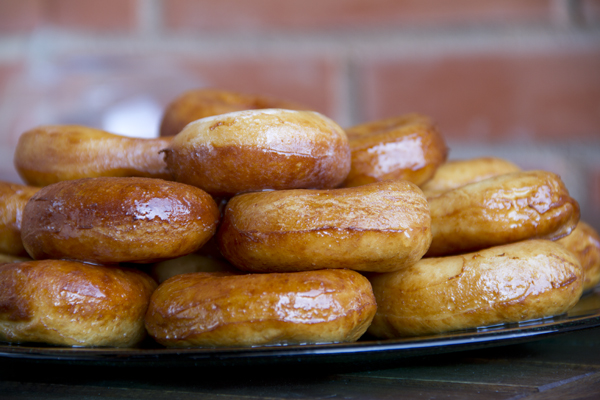
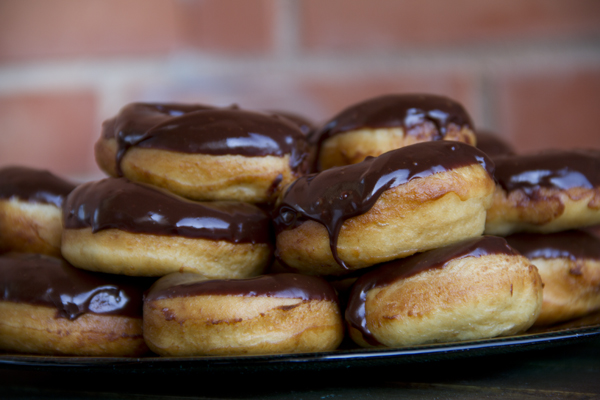
  • Take them out and drain on paper towels, and while they’re still warm, dip them in the sugar glaze. If you’re using the chocolate glaze, they don’t need to be warm.

  • To make the sugar glaze, melt the butter a bit in the microwave and mix it well with the confectioners’ sugar and a splash of lemon. Add a few tablespoons of water until you get a light, whitish slurry.

  • For the chocolate glaze, mix the confectioners’ sugar with a few tablespoons of water (again, you want a light slurry). Melt the chocolate with the butter in the microwave and once melted, add it to the sugar-and-water mixture. If it’s too thick, add a bit more water. If on the other hand it’s too runny, let it cool down.

  • To coat the doughnuts in the sugar glaze, dip them into the bowl so the glaze sticks all over. For the chocolate glaze, only dip one side.

Pics and Cakes

Tips:

  • It looks complicated but it isn’t. You just need time, because respecting the dough’s rising times is really important.

  • It’s important that the yeast is bread yeast (not baking powder) and that the milk is powdered — otherwise your dry ingredient ratios will change and you won’t get the same result.

  • When frying the doughnuts, do them one at a time, or if you have a large pan, 2 or 3 at most. Otherwise you risk burning them.

Pics and Cakes

Pics and Cakes


November 1, 2012 · 5 min · Palstelera

Mini Roast Beef and Arugula Sandwiches

Not too long ago we showed you how to make some delicious milk bread buns. They’re the perfect base for these tasty little roast beef sandwiches with arugula and honey mustard. It might sound fancy, but it really isn’t. Roast beef, originally from English cuisine, has become so common in Spain that even the word has been adapted into Spanish — our Royal Academy now accepts “rosbif” without any objections.

Pics and Cakes

What do we need?

To make 16 little buns, check here.

For the filling:

  • 800 g (1.75 lb) veal loin

  • Dried rosemary

  • Oregano

  • Salt and pepper

  • 1 teaspoon Worcestershire sauce

  • 2 tablespoons olive oil

  • 1 bag of arugula

  • Honey mustard sauce

How do we make it?

  • Preheat the oven to 200°C (390°F).

  • In a bowl, mix the rosemary, oregano, pepper, and salt with a couple of tablespoons of olive oil and the Worcestershire sauce.

  • Brush the meat with the mixture and sear it in a hot pan so the outside browns.

  • Place the loin on a baking tray and put another tray underneath filled with water.

  • Bake for about 30 minutes.

  • Once the time is up, wrap the meat in aluminum foil and let it cool.

  • Meanwhile, wash the arugula and set aside.

  • When the meat is cold, cut it into thin slices.

  • Assemble the little sandwich by slicing the bun in half and adding the roast beef, arugula, and honey mustard sauce.

Pics and Cakes

Tips:

  • Following the milk bread recipe, you can change the final shape. We went for round buns instead of making small cuts in the dough to give them the classic milk bread look.

  • We bought veal loin, but to make a roast (to roast) beef, any other cut works as long as it’s big enough to brown on the outside while staying rare on the inside.

Pics and Cakes

[English version] SANDWICHES OF ROASTBEEF, ROCKET SALAD AND HONEY-MUSTARD* *For the milk bread buns follow this previous recipe. Ingredients:

  • 800 g veal loin

  • Rosemary

  • Oregano

  • Salt and pepper

  • 1 tsp Perrins sauce

  • 2 tbsp olive oil

  • 1 bag of rocket salad

  • Honey-mustard sauce

  • Preheat oven at 200º C.

  • *In a bowl mix the rosemary, oregano, salt, pepper, olive oil and Perrins sauce. *

  • Brush the meat with this mixture and place it on a very hot pan and sear it.

  • Place the prepared meat into a baking tray and place another tray (or any other container) full of water.

  • Roast for 30 minutes.

  • Take it out from the oven and wrap the whole piece into aluminium foil. Let it cool.

  • Wash rocket salad and set aside.

  • When the roastbeef is cold, cut into thin slices.

  • Prepare the sandwich: open the bread, place roastbeef, rocket salad and honey-mustard sauce.

  • Tips:- You can choose the size and shape of your bread buns when making them.- We have used veal loin but you can use any big piece of meat that you can roast and the result is golden brown in the outside and tender in the inside. *

October 30, 2012 · 3 min · Cesmm

Brownie

Whole Kitchen’s Sweet Proposal for October invites us to make an American classic: brownies

And what a treat, seriously. I’ve made dozens of brownies in my life and I have to confess I almost always pull out a different recipe and they all turn out delicious. The secret is that a brownie is a compact but fluffy cake (sometimes even moist), since it usually doesn’t have any leavening and therefore doesn’t rise. I read somewhere that the brownie was actually discovered thanks to someone forgetting to add the leavening to a chocolate cake. All I can say is… blessed mistake!

Pics and Cakes

What do we need?

  • 200 g (7 oz) baking chocolate

  • 100 g (3.5 oz / 7 tbsp) butter

  • 2 eggs

  • 100 g (1/2 cup) regular sugar

  • 1/2 teaspoon baking soda

  • 1/2 teaspoon salt

  • 80 g (2/3 cup) flour

  • 100 g (3.5 oz / about 1 cup) walnuts

Pics and Cakes

How do we make it?

  • Chop the chocolate and put it in a microwave-safe bowl together with the butter. Melt in 20-30 second intervals, stirring each time so it doesn’t burn.

  • In another large bowl, whisk the eggs with the sugar until you get a foamy mixture.

  • Add the chocolate to this foamy mixture and stir well.

  • Mix the flour with the salt and baking soda. Sift it and add it to the previous mixture.

  • Stir well and add the walnuts.

  • Prepare a baking pan, greasing and flouring it so the cake doesn’t stick, and pour the mixture into it.

  • Put it in the oven (preheated to 180°C / 350°F) and bake for about 30 minutes.

  • It’ll be ready when you see a light brown crust has formed on top. Remember that the toothpick won’t come out perfectly clean since this is a moist cake. The important thing is that it’s not completely liquid.

Pics and Cakes

Tips:

  • Even though brownie batter is pretty dense and it’s usually not necessary, a trick to keep the walnuts from sinking to the bottom of the pan is to coat them in flour or cocoa first.

  • To turn the brownie into a proper dessert, serve it with a scoop of vanilla ice cream and hot chocolate sauce on top.

Pics and Cakes

[English version] BROWNIES* *Ingredients:

  • 200 g chocolate

  • 100 g butter

  • 2 eggs

  • 100 g sugar (sugar or confectioners’ sugar)

  • 1/2 tsp baking soda

  • 1/2 tsp salt

  • 80 g flor

  • *100 g walnuts *

  • Cut chocolate into chunks and put into a microwave bowl with butter. Melt it slowly (stop every 20-30 seconds and stir with a spoon).

  • *In a large bowl, whisk the eggs and the sugar together to get a fluffy mix. *

  • Add chocolate cream and stir well.

  • *Mix flour, salt and baking soda. Sift the flour mix and add to the previous cream. *

  • *Stir well and add walnuts. *

  • *Prepare the baking pan (butter and flour it!) and pour the mixture on it. *

  • *Put into oven (preheated at 180ºC) and bake for 30 minutes. *

  • *It will be ready when you see a brown crust created on the top. If you insert a needle or knife to check the baking, it might not be clean because it’s supposed to be a ‘wet’ cake. *

  • ** Tips:- Normally this tip is not needed with brownies recipe because the dough is very thick. However, when you add nuts to a cake and you don’t want to have all of them at the bottom of your baking pan, you can coat the walnuts in flour or cocoa powder. *- For a perfect dessert result, serve the brownie with a scoop of vanilla ice-cream and hot chocolate sauce over it!

October 25, 2012 · 4 min · Palstelera

Mango and Duck Ham Mille-Feuille

Between one thing and another, this delicious recipe seemed to have been forgotten. Luckily, now that we’re getting back into our routine, our weekly posts will too. This recipe, although it sounds fancy and complicated, is really just a salad with slightly unusual ingredients that will delight anyone who tries it.

Pics and Cakes

What do we need?

(serves 4)

  • 2 ripe mangoes

  • 150 g (5.3 oz) duck ham

  • Arugula

  • Pine nuts

  • Oil, salt, and vinegar

How do we make it?

  • Lightly toast the pine nuts in a hot pan, without oil.

  • Peel and slice the mangoes into thin layers.

  • Build the mille-feuilles by alternating mango slices with duck ham and arugula.

  • Prepare a vinaigrette to taste and drizzle it on top right before serving.

  • Sprinkle a few toasted pine nuts over each mille-feuille.

Tips:

  • For a more budget-friendly version, you can swap the duck ham for serrano ham and the pine nuts for toasted hazelnuts.

  • Fruit in salads adds a sweet, fresh touch, so feel free to throw mango, pineapple, apple… into your everyday salads.

[English version] SALAD WITH MANGO AND DUCK HAM Ingredients (serving 4):

  • 2 large mangos

  • 150 g duck ham

  • rocket salad

  • pine nuts

  • olive oil, vinegar and salt

  • Grill the pine nuts in a saucepan.

  • Peel and cut into thin slices the mangos.

  • Create the individual salads by alternating layers of mango, rocket salad and duck ham.

  • Make a vinaigrette and pour it over the salad before serving.

  • Add some pine nuts.

    Tips:- For the economic version of this recipe, use cured (pork) ham instead of duck ham and hazelnuts instead of pine nuts.- You can use mango or any other fruit for your ordinary salads, the taste will be fresh and sweet!


October 22, 2012 · 2 min · Palstelera

Coq au vin

Whole kitchen in their Savory Proposal for October invites us to prepare a French classic, “Coq au Vin”. Or in other words, chicken in wine — you can tell I learned French at school :p.

Pics and Cakes

What do we need?

(serves 2)

  • 2 chicken thighs

  • 1 large onion

  • 2 carrots

  • 3 slices of bacon

  • 2 cloves of garlic

  • 50 g (1.75 oz) mushrooms

  • 2 glasses of wine

  • 4 glasses of chicken stock

  • Flour and butter

  • Salt and pepper

How do we make it?

  • Start by chopping the onion, carrot and bacon.

  • Heat a little oil over medium heat in a wide, shallow pot. Add the chopped ingredients.

  • Once they’re slightly golden, add the minced garlic, cook for a minute and set aside in a bowl.

  • In a zip-lock plastic bag, add a couple of tablespoons of flour, a pinch of salt and pepper. Drop in one of the thighs and shake to coat. Repeat with the other.

  • Once floured and seasoned, sear the thighs in a pan for about 10 minutes.

  • Remove the chicken, add the wine and let it reduce a bit.

  • Return the thighs to the pan, add the vegetables and pour in the chicken stock.

  • Simmer everything together over low heat for about 50 minutes.

  • Once the chicken is well cooked, remove the chicken and the vegetables.

  • With a tablespoon of flour and one of butter, form a smooth paste and stir it into the sauce.

  • Stirring constantly, cook over low heat for a couple of minutes until the mixture thickens.

  • In a frying pan with a little oil, sauté the mushrooms until golden.

  • Finally, return all the ingredients to the pot and let everything cook together for a couple of minutes so the flavors blend.

Tips:

  • If you have some sauce left over, you can use it to make some tasty meatballs in sauce.

  • If it doesn’t thicken enough, add a tablespoon of cornstarch dissolved in cold water.

Pics and Cakes

[English version] COQ AU VIN* *Ingredients (serving 2):

  • 2 chicken legs an thighs

  • 1 large onion

  • 2 carrots

  • 3 bacon slides

  • 2 cloves of garlic

  • 50 g mushrooms

  • 2 cups of red wine

  • *4 cups of chicken stock *

  • Flour and butter

  • Salt and pepper

  • Chop onion, carrot and bacon.

  • *Place some olive oil into a deep sauce pan and heat it. Add chopped ingredients. *

  • Cook until ingredients are slightly browned, add chopped garlic and keep cooking for one minute. Set aside.

  • *Put a couple of tbsp of flour, a pinch of salt and pepper into a plastic bag. Put the chicken inside and shake it well to create a thin layer on the chicken. *

  • Stir over a high heat for 10 minutes.

  • *Remove chicken, add red wine and simmer to reduce it. *

  • *Put the chicken back into the sauce pan, add chopped vegetables and chicken stock. *

  • *Simmer for round 50 minutes, cooking over a low heat. *

  • When chicken is soft and cooked, remove it from the sauce pan.

  • *In a different bowl, mix some flour and butter and add it to the sauce. *

  • *Keep stiring, cooking over a low heat for a couple of minutes. *

  • *In another pan, stir fry the mushrooms with a bit of olive oil until golden browned. *

  • Add all the ingredients into the sauce pan with the wine sauce and cook for a couple of minutes in order to combine all flavors.

  • Tips:**- If there is some sauce left, you can use for preparing meatballs. It will be delicious!*
    • If you want a thicker sauce, add some corn flour.*

Comments

tía pi (2012-11-18 22:03:03):

Today I made the coq au vin following your recipe — delicious! I didn’t make it with rooster, I used a free-range chicken, one of those that look like they’ve got hepatitis, and honestly it was finger-licking good. I had some sauce left over and I’m planning to poach a few eggs to keep dipping bread. Thanks, piggies.

October 18, 2012 · 4 min · Cesmm

Piononos

Whole kitchen, in their Sweet Proposal for September, invites us to make a Spanish classic: “Piononos”. And honestly, this challenge made me really happy because I think these little pastries are an absolute delight. I’d actually come across them before, though under the popular nickname ‘Vicksvaporub’ at Confitería Rufino in Aracena. Apparently they’re typical of Granada, and legend has it they got their name because they were made in honor of Pope Pius IX. Of course, like with every recipe, the origin and authorship are still up for debate, but whoever made them first, these little pastries are wonderful.

Pics and Cakes

What do we need?

(10-12 units)

For the sponge cake:

  • 2 large eggs

  • 2 tablespoons of sugar

  • 1 tablespoon of flour

  • 1 tablespoon of cornstarch

  • 2 tablespoons of milk

  • a pinch of salt

  • Butter for greasing

For the syrup:

  • 150 g (5.3 oz) sugar

  • 150 ml (2/3 cup) water

  • A cinnamon stick

  • A splash of rum (optional)

For the yolk cream:

  • 4 egg yolks

  • The weight of the yolks in sugar

  • The volume of the sugar in water

  • A pinch of cornstarch

How do we make them?

  • We start with the yolk cream so it has time to cool down.

  • First, make a syrup with equal parts water and sugar. Put both ingredients in a small saucepan and bring to a boil. How thick the yolk cream ends up depends, in part, on how much you cook the syrup down. For a filling-cream texture, let the syrup reach the soft-ball stage (reduce it down to the original water volume — that is, if you used 250 ml (1 cup) of water and 250 ml (1 cup) of sugar, take it off the heat once it’s reduced to 250 ml (1 cup) of syrup).

  • Let the syrup cool a bit. Meanwhile, separate the yolks and whisk them lightly. Once the syrup is lukewarm, add it to the yolks slowly, whisking constantly (off the heat), until you’ve added all the syrup.

  • Put it on low heat and cook, stirring constantly, until it thickens. (The longer you cook it, the thicker it gets.) You can add half a teaspoon of cornstarch dissolved in a tablespoon of cold water.

  • Make the syrup by boiling all the ingredients for 5 minutes.

  • Line the baking tray with parchment paper and grease it with butter.

  • Preheat the oven to 180°C (355°F) and start preparing the sponge cake.

  • Whip the egg whites with a pinch of salt. Once they’re stiff, add the sugar little by little while still whisking, until it’s fully dissolved and the meringue is firm and glossy. Set aside.

  • In a bowl, combine the flour and cornstarch (sifted together), add the yolks and mix, then gradually add the milk to get a smooth, lump-free cream.

  • Add the yolk mixture to the meringue in several stages, folding gently with a spatula.

  • Carefully spread the batter on the prepared baking tray in a 4-5 mm (about 1/5 inch) thick layer. Place in the preheated oven on the middle rack. Pull it out as soon as it picks up a bit of color (about 7-8 minutes). Flip it onto another sheet of parchment paper. Let it cool slightly and brush it with the syrup.

  • Once it’s cool, spread a thin layer of yolk cream over the sponge sheet.

  • Cut strips about 3-4 cm (1.2-1.6 inches) wide and roll them up in a spiral. Place the little pastries vertically into paper cupcake liners. Add a teaspoon of cream on top of each one. Sprinkle with sugar and torch it with a kitchen blowtorch.

Pics and Cakes

Tips:

  • The sponge cake has to be very thin. These quantities worked for me with my oven, which has a square tray that’s smaller than usual. I think if you double the amounts you’ll have enough for a regular-size tray. In any case, if it’s too much batter, better not to use it all or the sponge will end up too thick.

  • In principle, the sponge doesn’t need any baking powder because the whipped egg whites give it enough volume. Even so, next time I’ll try adding a pinch to see how it turns out.

  • Don’t forget to grease the parchment paper with butter — the sponge sheet is very thin and could easily tear when you try to peel it off.

  • The recipe we followed is from Belenciaga, but using it as inspiration you can come up with all kinds of variations.

Pics and Cakes


September 25, 2012 · 4 min · Palstelera

Fresh Stuffed Pasta

Whole Kitchen in their Savory Proposal for the month of September invites us to make an Italian classic: “Stuffed Pasta.” With this recipe we kick off a new adventure on this amazing food blog, where every month we’re challenged to make a savory dish and a sweet one. We love the idea — it’s original and pretty useful, since it pushes you to make dishes you might not normally tackle, and it also lets you check out what the other participants come up with.

Pics and Cakes

What do we need?

(Serves 4)

  • For the dough:
  •   300 g (2.5 cups) flour
    
  •   1 egg and 1 egg white
    
  •   2 tbsp olive oil
    
  •   1/2 tsp salt
    
  •   1 tsp vinegar
    
  • For the filling:
  •   2 small onions, finely chopped
    
  •   1 clove of garlic, finely chopped
    
  •   300 g (10.5 oz) mushrooms
    
  •   2 tbsp parsley
    
  •   Salt
    
  •   40 g (1.5 oz) aged cheese
    
  • For the sauce:
  •   200 ml (3/4 cup + 1 tbsp) heavy cream
    
  •   4 slices of bacon (thick-cut)
    
  •   Salt and pepper
    

Pics and Cakes

How do we do it?

  • Put the flour in a bowl, make a well in the center, and add the egg, the egg white, the salt, the oil, and the vinegar.

  • Knead until you get an elastic dough, adding a splash of water if needed.

  • Wrap the dough in plastic wrap and let it rest in the fridge for at least an hour.

  • Heat a little oil in a large pan, add the onions, garlic, and mushrooms. Cook gently over low heat until all the liquid has evaporated.

  • Stir in the parsley and season. Add the finely chopped aged cheese and mix well (with the heat off). Let it cool.

  • Once the dough has rested, divide it in two and roll out one half with a rolling pin until very thin. Ideally you’d use a pasta machine, but not everyone has one at home, so a rolling pin will do the trick.

  • Place small mounds of filling on the pasta sheet, leaving space between them.

  • Roll out the second half of the dough very thin and lay it over the first one. With your hands, press around the mounds to shape the ravioli.

  • Finally, cut out the ravioli with a round cutter (like a pizza cutter) with fluted edges. Set the ravioli aside while you prepare the sauce.

  • If instead of ravioli you’d rather make tortellini, roll out the dough very thin, fill it, and fold as shown in this [video](

{{}}

).

  • For the sauce, use the leftover filling. Sauté the bacon cut into small cubes, add the leftover filling and the cream, and bring to a boil. Simmer for a few minutes and adjust salt and pepper to taste.

  • Cook the pasta, drain it, add the sauce, and… buon appetito!

Pics and Cakes

Tips:

  • The dough has to be very thin. If you’re using a rolling pin, that means once you think it’s thin enough, roll it out at least three more times. I also recommend making your ravioli or tortellini small, since they’ll grow when cooked.
  • If you don’t have a pasta cutter, you can use a regular knife, but make sure to seal the edges well afterward or you’ll lose the filling during cooking. You can seal them with your fingers, a fork, or the edge of a serrated knife.
  • Our pasta took quite a while to cook (15 minutes) because the pieces were too big and chunky.

Pics and Cakes


September 18, 2012 · 4 min · Palstelera

Hummus

When Palstelera first told me she was going to make hummus, I had no idea what she was even talking about. She had tried it in Edinburgh and told me it was some kind of chickpea purée. Chickpea purée? Well, yes — and a really tasty one. Since then we’ve made it loads of times for parties, because it’s a super easy appetizer to put together and it’s absolutely delicious.

Pics and Cakes

What do we need?

  •   1 large can of cooked chickpeas
    
  •   2-3 cloves of garlic
    
  •   1 tablespoon of tahini (sesame seed paste)
    
  •   1 teaspoon of ground cumin
    
  •   1 teaspoon of salt
    
  •   100 ml (scant 1/2 cup) of olive oil
    
  •   100 ml (scant 1/2 cup) of lemon juice
    
  •   Sweet paprika
    

How do we make it?

  • Rinse and drain the chickpeas.

  • Add all the ingredients except the paprika to a blender jug and blend until smooth.

  • Once it’s ready, taste and adjust the salt if needed.

  • Serve in a bowl, sprinkle a little sweet paprika on top and add a drizzle of olive oil.

  • Serve with breadsticks, grissini, toasted bread, pita, etc.

Tips:

  • If you’d rather, you can swap the canned chickpeas for some you cook fresh for the occasion, or leftovers from a delicious Cocido Madrileño/Maragato.

  • If it turns out too thick, you can add a bit more lemon juice or a splash of water.

    Pics and Cakes [English version] HUMMUS **Ingredients:- 1 can of chickpeas

  • 2-3 cloves of garlic

  • 1 tsp tahini (sesamo seed paste)

  • 1 tsp cumin- 1 tsp salt- 100 ml olive oil

  • 100 ml lemon juice

  • Paprika

  • Wash and drain chickpeas.

  • Put all the ingredients into a bowl except sweet paprika and combine them in blender or food processor.

  • Taste and add some extra salt if need it.

  • Place in a serving bowl, and add a small amount of paprika and a bit of olive oil.

  • Serve with small toasts, grilled bread, pita bread, etc.

    Tips:- Instead of canned chickpeas you can boil chickpeas for this recipe or use some you have from previous stews.

  • If the hummus is too dry, you can add some more lemon juice or even a bit of water.


Comments

zordor (2012-09-13 18:14:16):

Mmmh so good! Seriously, you didn’t know it? Come on, you really didn’t?! Hehe, that said… it gives you some terrible farts :P

September 13, 2012 · 2 min · Cesmm

Milk Bread Buns

We were putting together a surprise afternoon snack where we wanted everything to be absolutely homemade, so we couldn’t even allow ourselves to buy the bread. One of the things we wanted to make was little savory sandwiches and, once again, we turned to the La Receta de la Felicidad blog to follow their steps and make some great milk bread buns. Honestly, we thought it would be pretty complicated, but how wrong we were…

Pics and Cakes

What do we need?

(16 buns)

  •   500 g (about 4 cups) bread flour
    
  •   25 g (about 1 oz) fresh yeast (or two sachets of dry baker's yeast)
    
  •   250 ml (1 cup) milk
    
  •   70 g (about 5 tbsp) butter, softened (i.e. nice and soft)
    
  •   40 g (about 3 tbsp) sugar
    
  •   1 egg
    
  •   2 tablespoons of honey
    
  •   A pinch of salt
    

How do we do it?

  • Mix the flour and yeast in a large bowl and add the egg and milk.

  • Add the sugar, honey and salt, and mix well using a spoon or fork.

  • Add the butter, and knead for 10-15 minutes, until you get a soft, pliable, slightly shiny dough.

  • Form the dough into a ball by turning it and folding it inwards, and let it rest in a lightly floured bowl, covered with a cloth, for about two hours so it doubles in volume.

  • Take the dough out of the bowl and lightly press it down with your fingers to ‘deflate’ it.

  • Cut the dough into 16 portions, and shape them into buns.

  • To do this, we have two methods. The first one is to take each piece of dough and roll it on itself, as if the bun were swallowing itself up. (Since my explanation leaves a lot to be desired, you can watch it in this video). The second method is to roll out each piece of dough into a rectangular shape. On one of the ends, make three or four cuts with a sharp knife to create some fringes. Finally, roll up the dough starting from the side opposite the fringes, so that when you finish, the fringes end up on the outside and give that distinctive look of milk buns.

  • Brush the buns with a little milk, let them rest on a baking tray lined with parchment paper for about 20 minutes, and meanwhile preheat the oven to 180°C (355°F).

  • Bake the buns for 10-12 minutes, and let them cool to room temperature on a wire rack.

Tips:

  • If you let the dough rest longer, nothing happens except that it might grow out of control (like what happened to us, when we discovered a mutant dough trying to escape from the bowl).
  • To shape the buns, we used the two methods we found at La Receta de la Felicidad, since we made two batches of dough and one of them (despite following the same steps) came out stickier, so the first method was easier for us.
  • The flavor in my opinion isn’t exactly the same as store-bought milk buns, but they are delicious, very fluffy, and you can fill them with both sweet and savory fillings.

Pics and Cakes

*[English version] MILK BREAD BUNS ** *Ingredients:

- 500 g strong bread flour - 25 g fresh yeast (or two sachets dry yeast) - 250 ml milk - 70 g butter, room temperature - 40 g sugar - 1 egg - 2 tbs honey - A pinch of salt

  • Combine flour and yeast in a bowl. Add the egg, honey, milk, sugar and salt and mix well.

  • Add butter and use a large spoon or fork to mix everything together.

  • Take the dough out of the bowl and knead. You will feel the dough become elastic after kneading for about 5 minutes. Knead the dough for 5-10 minutes more or until the dough is soft, pliable, smooth and slightly shiny-

  • Put the dough into a lightly floured bowl and cover with a cloth. Let the dough rise in a warm place until its size doubles (aprox. two hours)

  • Take the dough out of the bowl, deflate it by touching lightly.

  • Cut the dough into 16 pieces, and roll each of them into an oval shape. Or alternatively, roll out each piece of dough forming a rectangle 1 cm thick. Cut 1/3 the length of the rectangle into 4/5 strips of equal width and roll up the dough similar to a Swiss roll.

  • Preheat oven to 180ºC and let the milk buns rest for 20 minutes.

  • Glaze the buns with some milk, and bake them for 10-12 minutes. Let them cool on a wire rack

  • Tips:**- Nothing wrong if you leave the dough more time covered with a cloth, it will just rise even more! * - We made the bun shape following the two different methods. For sticky doughs is easier the first method (just forming the oval shape). *- You won’t achieve exactly the same flavor than the milk buns of the supermarket but it is absolutely delicious, spongy and can be filled with sweet or savory ingredients. *


Comments

marmota zampona (2012-09-12 08:16:25):

we’ll make them. thanks

September 8, 2012 · 4 min · Palstelera

German-Style Salad

Taking advantage of the fact that it’s not too cold yet, though it’s clearly true that Winter is Coming, here’s a simple recipe you can put together for any family gathering, get-together with friends, or just an everyday meal — you can even make it the day before.

Pics and Cakes

What do we need?

(serves 4-6)

  •   2-3 large potatoes
    
  •   3-4 sausages
    
  •   1 onion
    
  •   2 tomatoes
    
  •   3-4 pickles
    

How do we make it?

  • Boil the potatoes with the skin on, washed.

  • Poke the potatoes with a “pincho catador” (a fork or any utensil that lets you check if the potatoes are done). Once they’re ready, take them out, peel, chop into pieces and set aside.

  • In a frying pan with a splash of oil, cook the sausages and then cut them into chunks. Set aside once done.

  • Meanwhile, slice an onion into strips and dice the tomatoes.

  • Mix everything in a large salad bowl and add the mostanesa sauce (mayonnaise and mustard in a 4-to-1 ratio).

  • Finally, let it chill in the fridge.

Tips:

  • Palstelera loves sweet-and-sour pickles, so the tip is obvious — go with sweet-and-sour pickles.
  • The mayo-to-mustard ratio is just a guideline. It depends on the kind of mustard you’re using and whether you like the flavor milder or with more kick.

Pics and Cakes

September 2, 2012 · 1 min · Cesmm