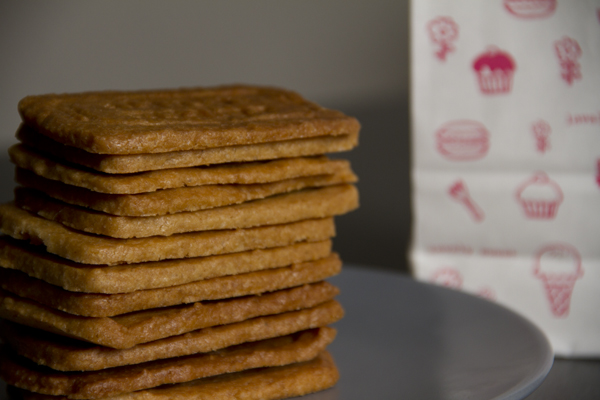
Speculoos Cookies

These cookies are typical of Belgium, France, and the Netherlands, and they’re known for their intense aroma and flavor packed with spices. That smell tends to take over Christmas markets, since traditionally it was Saint Nicholas who handed them out to the kids over there. Nowadays in Spain you can find them under the name “galletas caramelizadas” by the Lotus brand, but in France and Belgium, at least, you can find them in all sorts of shapes and from a ton of different brands. For example, if you ever get the chance, don’t miss out on trying speculoos spread (pâte à tartiner) or speculoos ice cream.

Pics and Cakes

What do we need?

  • 250 g (2 cups) flour

  • 170 g (3/4 cup) brown sugar

  • 150 g (2/3 cup) butter

  • 1 teaspoon baking soda

  • 1 egg, lightly beaten

  • 1 pinch of salt

  • 2 teaspoons of spice mix*

How do we make it?

  • In a bowl, add the flour, baking soda, salt, and spices. Stir a bit.

  • In another bowl, the room-temperature butter, the sugar, and the egg. Add all of this to the flour mix and combine well until you get a smooth, even dough. Pop it in the fridge, covered with plastic wrap, for at least two hours or overnight.

  • Preheat the oven to 170°C (340°F).

  • Once you take it out of the fridge, roll the dough between two plastic sheets so it doesn’t stick, to about half a centimeter (1/5 inch) thick. Cut it out with whatever cookie cutters you like, or if you don’t have any, just make rectangles with a knife.

  • Bake for about 15 minutes.

  • The pre-made spice mix isn’t easy to find, so you can make your own with these proportions: 2 tablespoons ground cinnamon, 5 grated cloves, 1 small tablespoon grated nutmeg, 1 teaspoon ground pepper, 1 small tablespoon ground ginger, and 3 grated cardamom seeds.

Pics and Cakes

Tips:

  • Butter cookies are best baked when the dough is cold. Otherwise, they’ll spread too much in the oven and lose whatever shape you gave them. What you can do is put the rolled-out dough in the fridge, cut it without handling it too much, and straight into the oven.

  • If you go looking for speculoos cookie recipes, you’ll find tons, and they all vary in some way. In fact, Belgian and French recipes use kinds of sugar we don’t have here (vergeoise and cassonade), and we usually swap them out for brown sugar. My advice is to try out your recipe and tweak it to your taste.

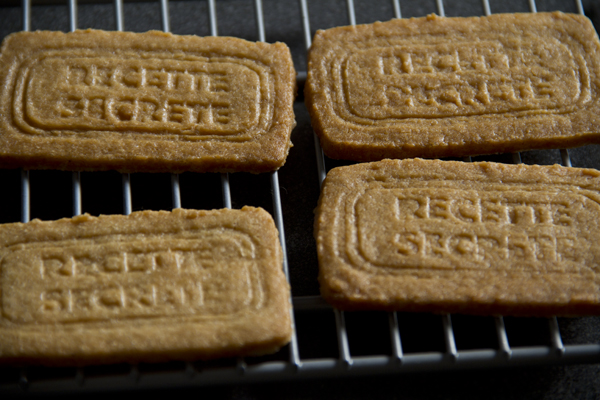
  • Traditional cookies were made using wooden molds, which is why they have stamped designs on them. I used some cookie stamps I bought in France, but you have to be careful because the dough is a bit sticky.

Pics and Cakes

Pics and Cakes


Comments

La Enana (2012-12-19 11:20:58):

Wow!! So easy to make!!!! :) I love them!!!

Esther (2012-12-29 14:21:45):

The dough is already in the fridge! In a few hours we’ll be tasting your recipe… I can already tell you the dough is super yummy!!!!

Palstelera (2012-12-30 21:09:47):

How did they turn out?

Esther (2012-12-31 17:23:31):

Really good… they didn’t last long, honestly! The oven I put them in runs hot, and at 170 they got a bit scorched, so afterwards I dropped it down to 150. As for the spice mix, total success! HAPPY 2013, Picsandcakes!!!

Palstelera (2013-01-05 00:17:16):

So glad to hear it!

December 19, 2012 · 3 min · Palstelera

Blue Cheese Burger

Good and freezing morning. Today we’re bringing you a really simple recipe, the kind that even Jesús will be able to pull off without having to call twenty times :p The thing is, I’m a huge fan of making burgers at home. They’re usually way better than the ones you eat out, plus you make them to your own taste and load them with the ingredients you like best. This time we made the burger with blue cheese mixed right into the patty.

Pics and Cakes

What do we need?

(For each big-eater burger)

  • 200 g (7 oz) ground beef

  • 25-30 g (1 oz) blue cheese

  • 1 egg

  • Pepper

  • Salt

  • Breadcrumbs

  • Tomato

  • Lettuce

  • Onion

  • Burger bun

How do we make it?

  • Take the ground beef and dump it into a large bowl, since you’re going to be getting your hands in there.

  • Add the egg, a bit of freshly ground pepper, salt to taste, and a little breadcrumbs to give the meat some consistency.

  • Mix everything together with your hands.

  • Once all the ingredients are well combined, add the blue cheese cut into cubes. Try to work it into the meat but without pressing too hard so the cheese doesn’t break apart.

  • Wrap in cling film and shape into a burger.

  • Let the burger rest in the fridge for a couple of hours.

  • When you’re ready to eat, put a frying pan with a splash of oil over the heat and, while it’s warming up, start chopping the rest of the ingredients.

  • Cut the onion into rings, the lettuce into fairly large leaves (that way it’s easier to eat), and the tomato into slices.

  • Once the oil is hot, lower the heat a bit so the burger doesn’t burn on the outside while staying raw inside. Cook it to your liking (I like mine rare).

  • When it’s done, set it aside, wipe the pan clean with kitchen paper, and toast the bun for about half a minute.

  • Build your burger and enjoy.

Tips:

  • If you’re not going to use all the ground beef you bought, you can keep the formed patties in the freezer.

  • For me, as I said, I really enjoy a good burger, so 150 to 200 grams (5-7 oz) of ground beef is the “standard” size. Yes, that’s on the generous side, but hey, it’s a burger. Obviously you can make it with less.

  • If you want, you can dust the patty in flour before cooking it.

  • As my dad says when we play tute, “side dish requested.” A good beer or a cold Coke with fries (homemade or store-bought) is a must.

Pics and Cakes

[English version] **Ingredients:

(For each big hamburger)

  • 200 g de minced meat

  • 25-30 g de blue cheese

  • 1 egg

  • Pepper

  • Salt

  • Bread crumbs

  • Tomato

  • Salad

  • Onion

  • Hamburger bun

  • Place minced meat into a large bowl and mix well with your hands.

  • Add the egg, a bit of salt and pepper and some bread crumbs.

  • Mix well all ingredients.

  • Then chop blue cheese into small squares and add to the meat mix. Try to ‘knead’ the mix integrating the cheese but keeping it into pieces.

  • Make a ball, wrap in cling film and and flatten it with your hand to have hamburger shape.

  • Leave for a couple of hours in fridge.

  • Then, pour a bit of olive oil in the frying pan. Let it get warm and start preparing your fresh ingredients (onion, tomato and salad).

  • Cut onion into rings, tomato into slices and salad (lettuce) into big parts (it will be easier to eat).

  • Cook the hamburger according to your preferences (well done, medium or rare).

  • When it’s ready take it out from the pan, clean the frying pan with kitchen paper and toat the bread bun.

  • Prepare you hamburger sandwich with all the ingredients and enjoy it.

Tips:

  • You can freeze the prepared raw hamburgers and you will only need to defrost and cook in the pan whenever you need it.

  • This amount of minced meat is for a big hamburger but it’s up to you the size of your hamburger.

  • You can coat in flour the raw hamburger before cooking it.

  • It’s a must to serve the hamburger with a cold beer and chips or fries.


December 11, 2012 · 4 min · Cesmm

Sardine pâté

This is one of those recipes that comes together almost without thinking, with just a few totally everyday ingredients. An easy way to put out an appetizer where you know exactly what’s in it and that’s bound to surprise more than one guest. We made it as part of a big buffet-style spread for a birthday. You can serve it already spread, piped into little tartlets, or, if you prefer, in a pretty bowl so everyone can help themselves.

Pics and Cakes

What do we need?

  • 1 small tin of sardines in olive oil

  • 70 g (2.5 oz) cream cheese

  • ¼ spring onion

  • 60 ml (¼ cup) lemon juice

  • Chopped parsley

  • Salt and black pepper

How do we make it?

  • Drain the sardines and, with the help of a thin knife, remove the central bone (if they’re baby sardines, you probably won’t need to).

  • Finely chop the spring onion.

  • Put all the ingredients in a bowl and mix, mashing them with a fork (if you want to feel the chunks) or with a blender (if you’d rather have a smoother, finer pâté).

  • Refrigerate for at least an hour so the flavors meld and it thickens up.

Tips:

  • You can make it the day before — it’ll firm up nicely and you’ll get a head start on the kitchen work.

  • For those who like it, you can swap the parsley for cilantro.

*[English version] SARDINE PÂTÉ

  • **Ingredients:
  • 1 small tin of sardines in olive oil

  • 70 g cream cheese

  • ¼ spring onion

  • 60 ml fresh lemon juice

  • Chopped parsley

  • Salt and black pepper

  • Drain sardines and remove the central bone with a sharp knive.

  • Finely chop the spring onion.

  • Put all the ingredients together into a bowl and mix smashing them with a fork (if you want to feel the ingredients) or with a mixer (if you prefer a thinner and smoother pâté).

  • Leave cool in the fridge for at least 1 hour. It will unify flavours and become thicker.

Tips:

  • You can prepare it the day before. It will be tastier and you’ll save time in the kitchen.

  • If you like, you can use coriander instead of parsley.


Comments

cris (2013-01-02 18:27:57):

This pâté is sooooo good! and super easy to make! we made it for New Year’s Eve and it was a hit. Don’t go thinking you’re about to eat a tin of sardines — between the onion, the bit of lemon and the cheese, it’s a super tasty mousse!!

Thanks so much to you both

xx

Palstelera (2013-01-05 00:16:37):

So glad you made it for New Year’s Eve and that you all enjoyed it… :-D

December 7, 2012 · 3 min · Palstelera

Caprese Windmills

Today we bring you another easy recipe you can make for any get-together. The recipe, taken from Directo al Paladar, is inspired by Italian cooking. Mozzarella, basil and tomato — a delicious combo that works not just in these little windmills but also in salads and, one of my favorites, on pizzas.

Pics and Cakes

What do we need?

  • 1 sheet of puff pastry

  • 1 ball of mozzarella

  • 2 ripe tomatoes

  • Basil

  • Olive oil

  • Oregano

How do we make it?

  • Roll out the puff pastry on a lightly floured surface.

  • Cut it into squares about 8-10 cm (3-4 inches) on each side.

  • Once you have the squares, make a cut along each diagonal, stopping before you reach the center, so you can fold the corners in toward the middle.

  • Slice the mozzarella into strips and place a basil leaf and a piece of cheese on each of the “blades” formed by the puff pastry.

  • Wash the tomatoes and slice them into strips too, then place them on two of the blades.

  • Preheat the oven to 180°C (355°F).

  • Sprinkle with a little oregano, drizzle with a bit of olive oil and put them in the oven.

  • Bake for 10 minutes or until golden brown.

  • When you take them out of the oven, place them on a rack so they stay crispy.

Tips:

  • This appetizer can be eaten warm or cold. If you decide to reheat it (in the oven or microwave) be careful not to let them get soft.

  • If you don’t like this “filling,” you can swap it for any other flavor — even sweet.

Pics and Cakes

December 4, 2012 · 2 min · Cesmm

Petal Cake

We’ve had this recipe pending for a few days now, but since in the meantime we published our Whole Kitchen challenges, it had to be pushed back to this week. And well, what better week for a birthday cake… :-D I made the recipe following exactly the one @SandeeA did at La Receta de la Felicidad. So all credit for the explanation this time goes to her. My personal touch was just the little sugar bear.

Pics and Cakes

What do we need?

For the sponge cake (to make a tall cake, we’ll need to bake two sponges like this one, so double the quantities):

  • 250 g (about 1 cup + 2 tbsp) butter, room temperature

  • 250 g (1 ¼ cups) sugar

  • 4 eggs

  • 225 g (1 ¾ cups) all-purpose flour

  • 25 g (about 3 tbsp) cornstarch

  • half a packet of Royal-style baking powder (8 g, about 2 tsp)

For the chocolate buttercream:

  • 750 g (about 1 ⅔ lb) melting chocolate

  • 375 g (about 1 ⅔ cups) butter, room temperature

  • 100 g (about ¾ cup) powdered sugar

How do we make it?

  • Preheat the oven to 180 ºC (355 ºF).

  • Prepare a cake pan by greasing it with butter and dusting it lightly with flour.

  • In a large bowl, using a whisk or a spoon, mix the butter and sugar well until you get a smooth, creamy mixture.

  • Add the eggs one at a time, not adding the next one until the previous one is fully incorporated.

  • Add the flour, cornstarch, and baking powder and mix with a spatula or spoon until everything is well combined.

  • Pour the batter into the prepared pan, spreading it evenly.

  • Bake for 25-30 minutes at 180 ºC (355 ºF).

  • Take it out of the oven and wait a few minutes before unmolding.

  • Repeat these steps to make a second sponge cake just like the first one. (If you have two identical pans, you can make all the batter at once and divide it between both pans.)

  • Slice each sponge into two layers, trying to make them as even as possible.

  • Next, we start preparing the chocolate buttercream. First, we’ll melt the chocolate.

  • Chop it up and place it in a microwave-safe bowl. Heat it in 30-second intervals, stirring each time, until the chocolate is fully liquid. Let it cool for a few minutes.

  • Meanwhile, in another large bowl, beat the butter and sugar at top speed with a whisk until you get a fluffy, pale, smooth mixture (about 5 minutes).

  • Check that the chocolate you melted earlier has cooled down, and add it to the butter mixture. Beat a bit more until fully combined, and then move on to filling and decorating the cake.

  • Place the first sponge layer — the least perfect of the ones you made — on the plate you’ll be serving on, covered with some strips of parchment paper or printer paper, so it doesn’t get stained and you can pull them out easily afterwards.

  • Place a couple of spoonfuls of filling on this sponge layer and spread it evenly — it’s fine if some spills over the sides.

  • Place another sponge layer on top, pressing down gently and making sure it’s well aligned with the layer below. Add another two spoonfuls of filling and proceed as before.

  • Continue the same way with the rest of the layers. On top, place the most perfect sponge, with the bottom side facing up (it’s always the prettiest). If you don’t want the sponge layers to shift, since we’re about to cover and decorate the cake, you can stick a skewer down through the center of the cake, which you’ll remove once you’re done decorating.

  • Cover the cake with a first, very thin layer of chocolate buttercream — this is just to set things in place and hide any imperfections in the sponge layers.

  • Leave the chocolate cake in the fridge for 15 minutes so this layer firms up.

  • Using a piping bag fitted with a medium-sized round tip, pipe dots of buttercream onto the cake, forming a vertical line (4 dots, in my case).

  • Place a spatula on top of each dot and slide it to the right in a single motion (or to the left if you’re left-handed). Wipe the spatula clean and continue doing the same with the rest of the dots, remembering to always wipe the spatula between strokes.

  • Each time you finish a row of dots, grab the piping bag, create a new line of dots, and repeat the pattern across the whole cake. The spot where you finish the last row of petals will have some imperfections, and that should be the “back” of your cake.

  • If you’re not going to eat it the same day, store the chocolate cake preferably outside the fridge so the chocolate buttercream stays creamy, since the fridge tends to harden it.

Tips:

  • To decorate it, you can make a stencil out of a sheet of paper, cutting out the number of years the birthday person is turning, and dust it with powdered sugar.

  • I made this sugar bear out of modeling paste to crown the cake. I’ll do a tutorial soon so you can see how easy it is.

Pics and Cakes

[English version] PETALS CAKE* *Ingredients:

  • *250 g butter, room temperature *

  • *250 g sugar *

  • 4 eggs

  • *225 g all purpose flour *

  • *25 g corstarch *

  • *8 g baking powder *

For the chocolate buttercream:

  • 750 g dark chocolate, melted

  • *375 g butter, room temperature *

  • *100 g confectioners’ sugar *

  • Preheat oven to 180ºC

  • Prepare a cake pan (butter and flour the bottom and the sides of the pan).

  • In a large bowl, place butter and sugar, and mix well.

  • Add eggs one by one.

  • Add flour, cornstarch and baking powder, and beat until combined.

  • Pour batter into pan and bake for 25 minutes.

  • Leave the cake in its pan on a wire rack for 10 minutes and then turn out to cool.

  • Repeat the whole process to make another similar cake.

  • Now we are going to prepare the chocolate buttercream.

  • Using and electric mixer, cream butter and sugar, until light and fluffy (about 5 minutes). Add melted chocolate, that shall be cool, and mix well. Now the buttercream is ready to use.

  • Fill the cake layers with chocolate buttercream, and then frost it with a thin layer of buttercream.

  • Place the cake in the fridge for 15 minutes to set.

  • Place the remaining chocolate buttercream on a piping bag fitted with a medium sized round tip.

  • Create a row of dots (vertical), as shown on the pictures.

  • Using a spatula, spread every dot to the right, in one motion (or to the left if you are left-handed). Clean the spatula between every swipe.

  • Once you have spread one row of dots, add another row of dots and repeat the pattern until the whole cake is covered with “petals”.

  • If you are not going to eat the cake on the same day, please avoid keeping it in the fridge if possible, so that the chocolate buttercream remains creamy.

Tips:

  • You can create a template showing the number of the age that the special person is turning and then sprinkle with confectioners’ sugar.

  • On the top, I placed this sugar bear made by myself. Soon I will post a tutorial about how to make it with gum paste.


November 29, 2012 · 6 min · Palstelera

Baklava

Whole kitchen, for their Sweet Proposal for the month of November, invites us to prepare a Persian classic: Baklava. Apparently this little pastry has its origins in ancient Mesopotamia, although several cultures and civilizations are still fighting over who actually invented it. Persian, Greek or Arab — it’s delicious. This time we’ve made two versions: one with dates and toasted almonds, and another with hazelnuts and chocolate. Filo pastry is a wonder of the kitchen that you really have to try, both for sweet and savory.

Pics and Cakes

What do we need?

  • 1 package of filo pastry

  • 100 g (3.5 oz) butter

For the syrup:

  • 210 ml (scant 1 cup) water

  • 180 g (about 3/4 cup) sugar

  • 30 g (1 tbsp) honey

  • Juice of half a lemon

  • A cinnamon stick

For the filling:

  • 18 dates

  • 50 g (1.75 oz) toasted almonds

  • 50 g (1.75 oz) chocolate (drops or chips)

  • 50 g (1.75 oz) hazelnuts

Pics and Cakes

How do we make it?

  • We start by making the syrup. Put all the ingredients in a saucepan and, over high heat, bring to a boil. Lower the heat a bit and let it simmer for about 15 minutes so it thickens.

  • Preheat the oven to 180°C (355°F).

  • Prepare the filling: pit the dates and cut them into small pieces. Chop the almonds and hazelnuts as well. In one bowl mix the dates with the almonds, and in another mix the hazelnuts with the chocolate.

  • Melt the butter for a few seconds in the microwave.

  • Grease the baking dish you’re going to use with butter and cut all the filo sheets to the size of your tray.

  • Lay down a sheet of filo and, with a brush or your hands, smear it with butter on one side. Add another layer and brush it with butter again. Keep going until you have 8 layers.

  • Spread half of the date-and-almond filling over the filo.

  • Add more filo on top — this time, 4 layers (always brushed with butter so they stay separate after baking).

  • Add the rest of the date-and-almond filling.

  • Make another batch of 8 filo layers (always buttered).

  • With a sharp knife, cut the baklava into squares.

  • Bake for 45 minutes total: the first 20 minutes uncovered, and the next 25 minutes with a sheet of aluminum foil over the baklava so it doesn’t brown too much.

  • As soon as you take it out of the oven, let it rest for 5 minutes, then pour the cold syrup over the hot baklava (this way it’ll stay crispy).

  • For the hazelnut-and-chocolate version you can repeat the same process in another baking dish, or make triangles. To do that, cut the filo into strips of about 5 cm by 20 cm (2 in by 8 in). Brush each layer with butter and stack 4 strips together.

  • Place a teaspoon of filling at one end and fold a corner over to form a triangle with the filling tucked inside. Take the other end and keep folding the triangle over itself. (Since it’s a bit tricky to explain, I found [this video](

{{}}

) where you can easily see how to do it.)

  • Bake them at 180°C (355°F) too, but they’ll be ready in 10–15 minutes.

  • Once out of the oven, you can dust them with powdered sugar.

Tips:

  • Filo pastry dries out very quickly, so whenever you’re not using it, keep it well wrapped in a plastic bag.

  • It’s important to add butter between each layer, but you don’t need to “drown” it either.

  • It’s quite a rich, filling sweet, so it’s better to cut the squares small.

Pics and Cakes

[English version] BAKLAVA* *Ingredients:

  • 1 package of filo pastry

  • 100 g butter

For the syrup:

  • 210 ml water

  • 180 g sugar

  • 30 g honey

  • Juice of 1/2 lemon

  • Cinnammon stick

For the filling:

  • 18 dates

  • 50 g almonds

  • 50 g chocolate (drops or chips)

  • 50 g hazelnuts

  • Combine the syrup ingredients in a medium saucepan and bring to boil. Let the syrup simmer on low heat for about 15 minutes

  • Preheat oven at 180ºC.

  • *Now prepare the filling: pit the dates and chop into small pieces. Chop almonds and hazelnuts. Mix almonds and dates into a bowl and chocolate and hazelnut in other. *

  • Melt the butter in the microwave for a few seconds.

  • Butter the baking pan and cut the filo pastry sheets into the size of the baking pan.

  • *Place a sheet of filo pastry and butter it. Place another sheet over it and butter again. Do it again until having 8 layers. *

  • *Scatter half of the dates-almonds filling. *

  • *Place more filo pastry. This time, only 4 layers but always buttered. It will make to have separate layers once the baklava is baked. *

  • *Add the other half of the filling. *

  • *Create another pack of 8 layers of filo pastry (always buttered). *

  • *With sharp knife cut baklava into small squares. *

  • *Bake for 45 minutes. The first 20 minutes uncovered and then you can cover with aluminium foil to prevent it from browning too much. *

  • When you take it out from oven, let stand for 5 minutes and then pour the cold syrup.

  • For the hazelnut-chocolate version, you can follow the same steps or make small triangles of filo pastry. For the triangles, cut the pastry into stripes (4 x 20 cm aprox.). Butter each stripe and put 4 of them together.

  • *Add a tsp of the filling in one of the sides and proceed to fold into triangle shape. You can see how to do it easily in [this video](

{{}}

).*

  • Bake at 180ºC only for 10-15 minutes.

  • You can powder some confectioners’ sugar when you take them out from oven.

Tips:

*- Filo pastry dries very fast, so when you are not using it, keep it in a plastic bag. *

- It’s important to butter every single sheet (layer) of filo pastry but don’t “over butter” (otherwise, it will be too greasy).

- It’s a filling sweet, so make small squares when cutting the baklava.


Comments

Apfelstrudelkuchen (2012-11-26 00:03:04):

Hi!!

Your baklava-as-triangles version turned out really original!! And with dates it must be amazing.

Hugs,

Mara (2012-11-26 17:34:08):

So good with the chocolate touch. I love the idea of making individual portions, because when you cut it the filo sheets tend to come apart a bit. Since everyone at home liked it so much I’ll make it again, and I’m going to do it your way, in the individual triangle version. This is my version: http://masdulcequesaladopuntocom.blogspot.com.es/

tía pi (2012-11-27 17:48:26):

This Friday I have guests over for dinner — it’s going to be a light meal, so the baklava is going to be a great dessert. I’ll let you know how it goes.

silvia (2012-11-29 22:09:14):

The little chocolate triangles were really tasty… and that’s saying something, because I’m not really one for sweets…

Palstelera (2012-12-07 19:16:00):

Mara, I’m glad you like the little-triangles version… :-)

November 25, 2012 · 6 min · Palstelera

Ciabatta Bread

Whole Kitchen in their Savory Challenge for the month of November invites us to prepare an Italian classic: “Ciabatta”. I had been really wanting to make this recipe but I never thought it would turn out well, and… it turned out so well, yes indeed! It even looked like a real ciabatta. The recipe is slow because of the rising times, but it’s simple to make and the result is incredibly good.

Pics and Cakes

What do we need?

(For two loaves)

For the starter:

  • 2.5 g fresh yeast

  • 150 ml (2/3 cup) water

  • 3 tablespoons warm milk

  • 1/4 teaspoon honey or granulated sugar

  • 150 g (1.25 cups) bread flour

For the dough:

  • 2.5 g fresh yeast

  • 250 ml (1 cup) water

  • 1/2 tablespoon olive oil

  • 350 g (2.75 cups) bread flour

  • 1 and 1/2 teaspoons salt

Pics and Cakes

How do we make it?

  • First, we prepare the starter. Sprinkle the yeast into a large bowl with the water and milk. Let it sit for 5 minutes, then add the honey or sugar and stir to dissolve.

  • Add the flour and mix to form a loose dough. Cover the bowl with a kitchen towel and let it ferment for 12 hours or overnight.

  • Once the wait is over, we move on to the dough. Sprinkle the yeast into a small bowl with the water. Let it sit for 5 minutes; stir to dissolve. Add the yeast water and the olive oil to the starter and mix well.

  • Into the bowl, add the flour with the salt and mix to form a wet, sticky dough. Beat continuously with a wooden spoon for 5 minutes; the dough will turn fluffy and start to pull away from the sides, but it will still be too soft to knead.

  • Cover the dough with a kitchen towel. Let it ferment for about 3 hours, until the dough has tripled in size and is full of air bubbles. Generously flour two baking sheets and have extra flour ready to dust your hands.

  • Divide the dough in half while it’s still in the bowl. Tip half of the dough onto one of the sheets.

  • With your hands well coated in flour, shape it into a rectangular loaf about 30 cm (12 inches) long. Dust the loaf and your hands again with flour. Tidy and thicken it by running your fingers along the sides and gently tucking under the bottom of the dough. Repeat the same with the other half.

  • Uncovered, let the loaves rise for about 20 minutes; they will spread out and grow in volume.

  • Put them in the oven, preheated to 220°C (430°F), and bake for 30 minutes until the loaves have risen, are golden brown, and sound hollow when tapped on the bottom. Let cool on a wire rack.

Tips:

  • It’s a very sticky dough that you barely have to work with your hands. That’s why, in the final steps, it’s important to keep your hands well covered in flour and not handle the dough too much, since otherwise half of it will end up stuck to you.

  • I use the pressed baker’s yeast you can find in cubes in the supermarket in the bakery/pastry section, always refrigerated. I buy a bunch and freeze them, so I always have some on hand whenever I need it. That said, it’s important to keep in mind that frozen yeast loses a bit of its “power”, so you’ll need to add a little more than what the recipe calls for.

  • When baking, I put both sheets in at the same time and after 20 minutes I swapped them so that both loaves cooked evenly on both sides.

Pics and Cakes


Comments

Marisa (2012-11-22 12:51:05):

She brought a piece home for me and it’s awesome, delicious, amazing… mmm, I want more!

tía pi (2012-11-22 18:13:13):

It’s a pleasure how well you explain everything and the tips you give. I promise to make it and tell you how it turns out.

Angeles (2012-11-22 22:35:32):

It looks fantastic, just like an authentic Italian ciabatta.

marmota zampona (2012-11-24 19:27:46):

I’m going to give it a try right now.

November 22, 2012 · 4 min · Palstelera

Cherry tomato and cheese quiche

I’m sure you’ve all tried — and many of you have made — the classic quiche lorraine (we’ve got ours ready and we’ll be posting it soon). Today we’re sharing a variation we absolutely loved, easy to make and seriously tasty.

Pics and Cakes

What do we need?

For the shortcrust pastry:

  • 200 g (1 ⅔ cups) flour

  • 100 g (7 tbsp) cold butter

  • 1 egg

  • A pinch of salt

  • A pinch of sugar

For the filling:

  • A dozen cherry tomatoes

  • 100 g (3.5 oz) emmental cheese

  • 50 g (1.75 oz) goat cheese log

  • 200 ml (¾ cup + 1 tbsp) heavy cream

  • 4 medium eggs

  • Oregano, salt and pepper.

How do we make it?

  • First, make the shortcrust pastry. Here you can see how we did it.

  • While the pastry is resting, preheat the oven to 180-200°C (355-390°F).

  • Once the dough is ready, roll it out, place it in a tart pan and bake for about 15 minutes. We do this before adding the filling so the base doesn’t end up raw. To stop it from puffing up, prick it with a fork or weigh it down with dried chickpeas.

  • Cut the tomatoes in half, chop the emmental and slice the goat cheese log into rounds.

  • Beat the eggs and mix with the cream. Add salt and pepper.

  • Stir in the emmental and the oregano.

  • When the pastry is partly baked, take it out of the oven and pour in the mixture. Spread it evenly across the pan.

  • Add the halved cherry tomatoes and the goat cheese on top.

  • Put it back in the oven and bake for another 30 minutes or so.

Tips:

  • You can use any kind of cheese for the filling.

  • If you’re feeling lazy and don’t fancy making the shortcrust pastry, you can buy it at any supermarket, either refrigerated or frozen. If you go for frozen, take it out about 15 minutes before you want to use it so you can work with it — otherwise it’ll crack.

Pics and Cakes


Comments

silvia (2012-11-29 22:13:25):

man… I wish I had an oven so I could follow these recipes… well, the no-bake ones except for the sweet ones, you already know I’m a fan, like that pineapple salad… yum yum

November 16, 2012 · 2 min · Cesmm

Caramelised Garlic Tart

And then we say the poor Brits have nothing in their cuisine beyond fish & chips and porridge… I tried this recipe at my aunt’s house in Edinburgh and it was honestly a surprise. A savoury tart whose main ingredient is garlic but which, contrary to what you might think, isn’t sharp or strong-tasting at all. It’s creamy, smooth and light on the palate. Hope you enjoy it…

Pics and Cakes

What do we need?

  • 1 sheet of puff pastry

  • 3 heads of garlic (cloves separated and peeled)

  • 1 tablespoon olive oil

  • 1 tablespoon balsamic vinegar of Modena

  • 220 ml (¾ cup + 2 tbsp) water

  • 1 teaspoon icing sugar

  • 1 tablespoon chopped rosemary

  • 1 tablespoon chopped thyme, plus a few whole leaves for garnish

  • 120 g (4 oz) soft goat’s cheese

  • 120 g (4 oz) hard, mature goat’s cheese

  • 2 eggs

  • 100 ml (scant ½ cup) heavy cream

  • 100 ml (scant ½ cup) crème fraîche (can be replaced with heavy cream)

  • Salt and pepper

How do we make it?

  • Roll out the sheet of puff pastry over a round, shallow tart tin so it covers the bottom and the sides. Prick the dough with a fork, place a sheet of baking paper on top and add two handfuls of raw chickpeas (this stops the dough from puffing up while baking). Let it rest in the fridge.

  • Preheat the oven to 180°C (355°F). Bake the pastry case for about 20 minutes. Remove the paper and chickpeas and bake for another 5-10 minutes. Take it out of the oven and set aside. Leave the oven on.

  • While the pastry is baking, make the caramelised garlic. Put the garlic cloves in a pan and cover with water. Bring to a boil and blanch for 3 minutes. Drain well.

  • Dry the pan and put the garlic cloves back in with the olive oil. Fry over high heat for 2 minutes. Add the balsamic vinegar and water and bring to a boil. Let it simmer gently for 10 minutes.

  • Add the sugar, rosemary, thyme and salt. Keep cooking over medium heat for another 10 minutes, or until almost all the liquid has evaporated and the garlic cloves are coated in a kind of dark syrup.

  • To assemble the tart, break up both types of cheese and scatter them over the baked pastry case. Then spoon the caramelised garlic and syrup over the whole surface.

  • In a bowl, whisk the eggs, creams, salt and pepper. Pour this mixture into the tart, trying to fill the gaps left between the cheese and the garlic but without completely covering the ingredients (you should still be able to see them).

  • Lower the temperature to 160°C (320°F). Bake for 35-45 minutes or until you see the filling has set and the top has turned golden.

  • Remove from the tin and serve with a little thyme sprinkled on top.

Tips:

  • To unmould the tart easily once it’s done, you can use a loose-bottomed tin, or otherwise place baking paper before lining it with the puff pastry to prevent sticking.

  • It’s delicious served with a salad. Why not with a rocket and mango salad?

The recipe is from this website: http://britishfood.about.com/od/adrecipes/r/caramelisedgarlictart.htm

*[English version] CARAMELISED GARLIC TART

  • **Ingredients:
  • 1 puff pastry sheet

  • 3 medium heads of garlic (cloves separated and peeled)

  • 1 tbsp olive oil

  • 1 tsp balsamic vinegar

  • 220ml water

  • ¾ tbsp fine sugar

  • 1 tsp chopped rosemary

  • 1 tsp chopped thyme, plus a few whole sprigs to finish

  • 120g soft, creamy goat’s cheese

  • 120g hard, mature goat’s cheese

  • 2 free-range eggs

  • 100ml heavy/double cream

  • 100ml crème fraîche

  • salt and black pepper

  • Have ready a shallow, loose-bottomed, 28cm fluted tart tin. Roll out the puff pastry into a circle that will line the bottom and sides of the tin, plus a little extra. Line the tin with the pastry. Place a large circle of greaseproof paper on the bottom and fill up with baking beans. Leave to rest in the fridge.

  • Preheat the oven to 180°C. Place the tart case in the oven and bake blind for 20 minutes. Remove the beans and paper, then bake for a further 5-10 minutes, or until the pastry is golden. Set aside. Leave the oven on.

  • While the tart case is baking, make the caramelized garlic. Put the cloves in a small saucepan and cover with plenty of water. Bring to a simmer and blanch for 3 minutes, then drain well.

  • Dry the saucepan, return the cloves to it and add the olive oil. Fry the garlic cloves on a high heat for 2 minutes. Add the balsamic vinegar and water and bring to the boil, then simmer gently for 10 minutes.

  • Add the sugar, rosemary, chopped thyme and ¼ teaspoon salt. Continue simmering on a medium flame for 10 minutes, or until most of the liquid has evaporated and the garlic cloves are coated in a dark caramel syrup. Set aside.

  • To assemble the tart, break both types of goat’s cheese into pieces and scatter in the pastry case. Spoon the garlic cloves and syrup evenly over the cheese.

  • In a jug whisk together the eggs, creams, ½ teaspoon salt and some black pepper. Pour this custard over the tart filling to fill the gaps, making sure that you can still see the garlic and cheese over the surface.

  • Reduce the oven temperature to 160°C and place the tart inside. Bake for 35-45 minutes, or until the tart filling has set and the top is golden brown. Remove from the oven and leave to cool a little.

  • Then take out of tin, trim the pastry edge if needed, lay a few sprigs of thyme on top and serve warm.

    Tips:- To take it out of tin in an easy way you can use a quiche pan with the bottom removable or you can just place some oven paper on the tin before rolling out the pastry. - Serve with salad. Why not with mango and rocket salad? Recipe from this website: http://britishfood.about.com/od/adrecipes/r/caramelisedgarlictart.htm


Comments

Sergio (2012-11-16 00:32:29):

Wow!!

This looks incredible. Who would have thought — what a surprise from the Brits.

Palstelera (2012-11-22 19:05:14):

Poor things, we really do underestimate them on the food front…

November 9, 2012 · 5 min · Palstelera

Pasta Carbonara

Truth is, this is a recipe we’ve been making for ages and one that I always thought was “the original” — the way I figured this typical Italian dish was prepared by mammas all over Italy. How wrong I was… Every Italian who’s seen us make this dish has been surprised, has laughed, and has gotten outraged in equal measure when watching us prepare “their dish” with cream instead of uovo. Here you can see how they make it, and without further ado I’ll show you our version (having tried both, I’ll stick with ours :p)

Pics and Cakes

What do we need?

(Serves 2)

  • 200 g (7 oz) spaghetti

  • 4 slices of bacon

  • 1/2 onion

  • 200 ml (3/4 cup) cooking cream

  • Salt and pepper

How do we make it?

  • Put the spaghetti to cook in plenty of water (once it’s boiling), lightly salted.

  • While the pasta is cooking — we’ll leave it for around 15 minutes — pour a splash of oil in a frying pan and add the onion.

  • Let it sauté a little and add the bacon.

  • Once it’s done, add the cream and let it come to a boil.

  • Add a pinch of salt — careful not to overdo it since the bacon already gives flavor to the sauce — and a bit of pepper. Set aside if the pasta isn’t ready yet.

  • Drain the pasta and mix with the carbonara sauce.

Pics and Cakes

Tips:

  • Depending on your stove, pot, and pasta, it may be ready a little before the fifteen minutes or a little after. Keep an eye on it if you like your pasta “al dente”.

  • The bacon can be swapped for pancetta.

  • You can sprinkle a bit of Parmesan cheese on top when you serve the pasta.

Pics and Cakes


Comments

Miguel (2012-11-07 12:01:29):

I usually make this same recipe, but when I add the salt and pepper, I take the chance to throw in a tiny bit (very, very little) of nutmeg.

And I also prefer the cream version over the egg one.

tía pi (2012-11-07 23:41:40):

For me, carbonara is without onion, with bacon, cream and egg, but I’ll give yours a try.

Palstelera (2012-11-09 21:26:49):

I love nutmeg. Truth is I always add it to béchamel but never to carbonara — I’ll try it next time :-)

Palstelera (2012-11-09 21:27:17):

Without onion? Try it, it’s delicious!

Vio (2012-12-07 20:44:34):

Boo! I love the blog, but you also know I couldn’t stay quiet knowing you call this carbonara. Maledetti!

I’ll take the chance to tell you that, aside from the amazing recipes, the site is super pretty and the photos rock ;-)

Big kiss!

Palstelera (2012-12-11 13:04:25):

hehe, Vio. It’s not that we call it carbonara… it’s that half of Spain does! That’s why, to avoid hurting any feelings, we started the post by making clear that what’s called carbonara in Spain has nothing to do with the Italian recipe… But honestly, I love the Spanish version :-)

Vio (2013-03-05 12:39:39):

Haha, sure — you, Spain… it’s all about complaining :-P

The truth is I do really like this version, but I think the Italian one is much tastier when it’s done right, with crispy bacon, lots of pepper, and nice juicy spaghetti. I will say a lot of Italians make a pretty lousy version and it really brings the dish down.

November 6, 2012 · 3 min · Cesmm