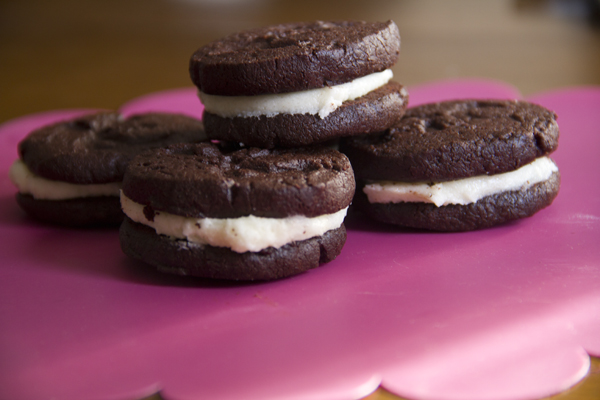
Maybe they don’t look exactly like a store-bought Oreo, but the flavor is, simply, incredible. In this case, I’d almost dare to say it’s even better than the original. It might seem a little laborious, but I promise neither the dough nor the cream is hard to make, so I’d encourage you to get started right away.
What do we need?
For the cookies:
230 g (1 cup) butter
150 g (3/4 cup) sugar
1 tablespoon vanilla extract
200 g (7 oz) couverture chocolate
1 egg
210 g (1 2/3 cups) flour
90 g (3/4 cup) cocoa powder
1 teaspoon salt
1/2 tablespoon baking powder
For the cream:
110 g (1/2 cup) butter
200 g (1 2/3 cups) powdered sugar
1 teaspoon vanilla extract
1 tablespoon milk
1 pinch of salt
How do we make it?
Beat the butter with the sugar until you get a creamy mixture.
Add the melted chocolate and the vanilla extract. Add the egg and stir well.
In a separate bowl, mix the cocoa with the flour, the baking powder, and the salt.
Pour the flour mixture over the previous chocolate mixture and combine well. Use your hands if necessary.
Shape the dough into a cylinder and wrap it in plastic wrap.
Let it rest in the fridge for a couple of hours.
Take it out, remove the plastic wrap, and slice it into pieces about half a centimeter (1/4 inch) thick.
Bake on a tray lined with parchment paper for 12 minutes at 180°C (355°F).
Let cool and set aside.
For the cream, beat the butter with the sugar.
Then add the milk, the vanilla, and the pinch of salt.
Beat well until you have a smooth cream.
Assemble your Oreo cookies using two cookies and a little cream in the middle to stick them together. Take one cookie, add a bit of filling, and press down with the other so the filling spreads nicely.
Tips:
For the chocolate, you can also use a mix of couverture chocolate and 70% dark chocolate. It’s a matter of taste, since some people don’t like such a bitter flavor.
If you cut the cookies this way, they’ll come out a bit “rustic” — meaning slightly uneven and more handmade-looking. If you prefer, you can roll out the dough with a rolling pin (placing it between two plastic sheets or two pieces of parchment paper), let it cool that way in the fridge, and then cut it with cookie cutters like when making butter cookies. They’ll come out more uniform and “perfect”.
When baking these cookies, you have to be careful not to burn them, because since they’re almost black, the color won’t help you tell when they’re done. So there’s nothing to do but keep a close eye on them.
I got the recipe from these two amazing blogs: El Monstruo de las Galletas and Seasaltwithfood. 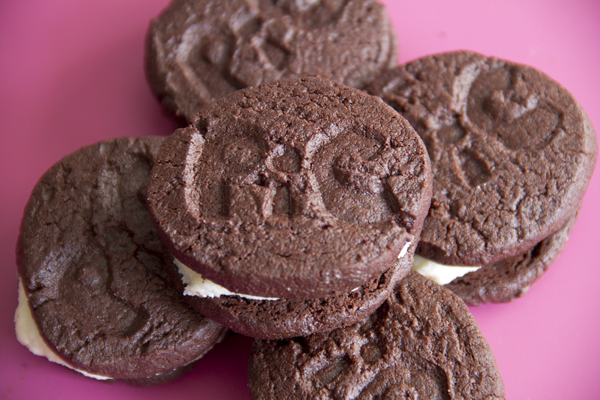 [English version] HOMEMADE OREO COOKIES* *Ingredients: For the cookies:
230 g butter,
150g granulated Sugar
1 tsp Pure Vanilla Extract
*200g semisweet Chocolate *
1 egg
210g Unbleached All-Purpose Flour
90g Dutch-Processed Cocoa Powder
1 tsp salt
1/2 tsp Baking Soda
For the cream filling:
110 g unsalted butter, at room temperature
200 g Confectioners’ Sugar
1 tsp Pure Vanilla Extract
1 Tbsp Milk
Pinch Salt
- In a medium bowl, whisk together the butter and granulated sugar until well combined. Whisk in the vanilla and chocolate. Add the egg and whisk until thoroughly incorporated.*
In another medium bowl, stir together the flour, cocoa powder, salt, and baking soda until well mixed. Using a wooden spoon or a fork, stir the flour mixture into the chocolate mixture. You may find it easier to switch to mixing it with your hands until the dough comes together.
*Transfer the dough to a 15-inch square sheet of parchment or waxed paper. Using your hands, shape the dough into a log about 10 inches long and 2 to 2 1/2 inches in diameter. Place the log at the edge of the paper and roll the paper around the log. With the log fully encased in paper, roll it into a smoother log no more than 2 1/2 inches in diameter. Refrigerate for at least 2 hours or until firm. *
Position a rack in the center of the oven and preheat the oven to 180°C. Butter a baking sheet or line it with parchment paper.
*Slice the dough log into 1/4-inch-thick slices. Place the slices about 1 inch apart on the prepared baking sheet.Bake for 12 minutes, or until the cookies are firm to the touch. *
- Using a stand mixer fitted with the paddle attachment or a handheld mixer or even a wooden spoon, beat the butter on low speed for about 30 seconds, or until completely smooth and soft.*
*Add the confectioners’ sugar and vanilla and beat until the mixture is perfectly smooth. Add the milk and salt and beat until smooth. *
To assemble the sandwich cookies: Scoop about 1 rounded tablespoon of the filling onto the flat side of 1 cookie. Top with a second cookie, flat side down, then press the cookies together to spread the filling toward the edges. Repeat with the remaining cookies.
Tips: - You can use a mixture of different chocolates. I like using dark chocolate for desserts and bitter chocolate (70% cocoa). - You can use another method to shape your cookies. You can roll out the dough with the rolling pin. Place the dough between two plastic sheets or oven paper, roll it out and place in the fridge. Then use the cookie cutter to cut the shapes of your cookies. - When baking, be careful, because you can’t judge by colour given that the dough is almost black. So you’ll have to pay attention and avoid them to get burnt. 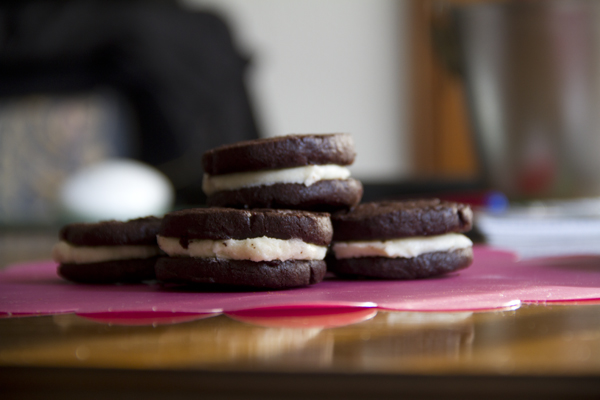
Comments
zordor (2013-03-12 01:25:14):
What do you mean you’d “dare to say” the flavor is better than the original? It’s infinitely better than the originals, no question whatsoever. I’ve been lucky enough to try this recipe and I have to say without a doubt these are among the best cookies I’ve ever eaten in my life! They’re absolutely amazing!
Esther (2013-03-16 15:46:02):
Hi Pics&Cakes,
I want to make the cookies but I have an existential question: how do I make or where do I get the couverture chocolate? I have Valor drinking chocolate at home, not sure if that works.
Thanks so much!
EPS
Palstelera (2013-03-16 16:14:26):
The important thing is that it’s dark chocolate, not milk. It can be the so-called fondant chocolate, dessert chocolate, or couverture. Almost any of those would work. I don’t really like drinking chocolate for these recipes because the flavor isn’t as intense, in my opinion. Hope that helped.
Esther (2013-03-16 18:29:22):
It helped a ton, yes! In a little bit I’m getting to work… Thanks so much
Palstelera (2013-06-29 13:22:37):
We’re so glad you made them and especially that you liked them. Answering your questions: if they came out a bit soft, it’s true that a little more time in the oven would have made them harder. That said, you did the right thing because since it’s a dark dough it’s hard to tell when they’re at their perfect point and when they’re starting to burn, and I think it’s better to enjoy a soft cookie than a scorched one. :-) In any case, I’m sure they’ll come out perfect the second time. As for the vanilla in the dough… Oops! I forgot to include it so I have to fix the recipe (thanks!). In principle, it goes in along with the chocolate. Lastly, your question about the mixer. Mine is a regular mixer, the kind with detachable beaters. You could even mix it by hand, but with the mixer you save time and effort and you also get a smoother, fluffier mixture.
Hugs and thanks for following us. :-D
setitapili (2013-06-29 09:09:40):
Hi!!! I wanted to write to you to tell you how the cookies turned out… Simply delicious! I took them to work and everyone was blown away… But I had a couple of problems. The cookie part came out a bit soft, maybe a little more time in the oven would have helped, but I didn’t want to leave them too long because they harden a bit more when they cool. Another problem was that I didn’t know they grew in the oven, so they came out a bit big. And one question: the vanilla for the cookie, when do you add it? I didn’t see it in the recipe so I added it in the last step. Another question: I beat the cream with a whisk, but the dough with a regular mixer. Did I do it right? Conclusion: the cookies are amazing!! They’re my first cookies and everyone asked me for the recipe!!! You can be sure I’ll be making them again!!! Spectacular!!!
Palstelera (2013-06-23 01:15:59):
I think I’m late with the answer… but cocoa powder is also easy to find, in any supermarket. I usually use the Valor brand, which is unsweetened. And as for the milk, any kind works. I used semi-skimmed because that’s what I had, and it came out perfect. Let us know how it goes. :-)
setitapili (2013-06-22 09:52:57):
Hi!!! I’m going to get started in the cookie world and this afternoon I want to make this recipe, but I have a couple of questions:
- what cocoa powder could I use for the dough? The couverture is easier because they sell it as is, but powder, no idea… Another question, for the cream you use a tablespoon of milk, what type of milk? Sure they’re silly questions, but I hope you’ll let me know… I’ll let you know how it went!! Thanks!!!