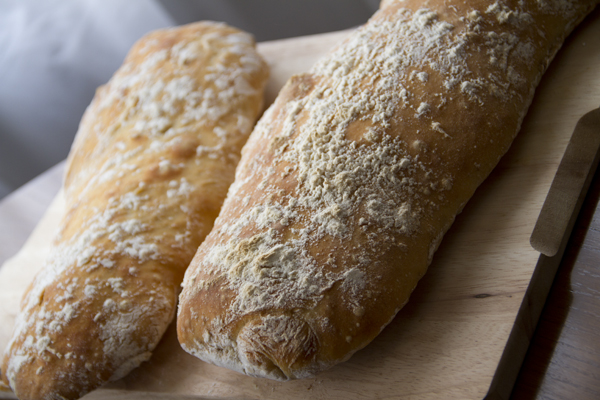
Ciabatta Bread

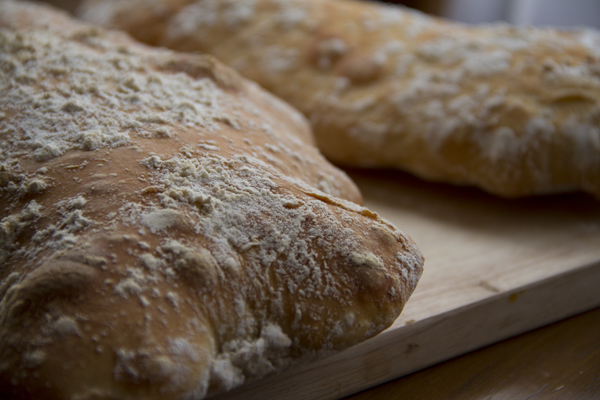
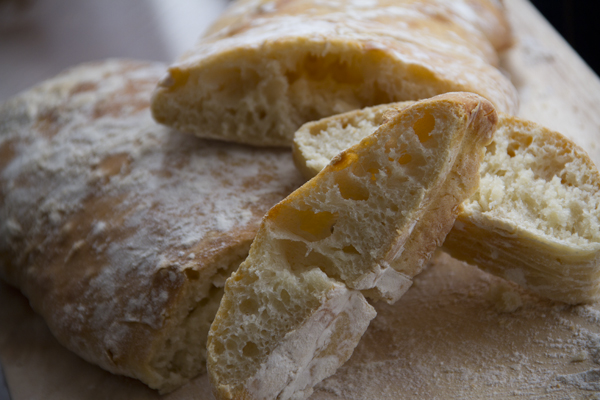
Whole Kitchen in their Savory Challenge for the month of November invites us to prepare an Italian classic: “Ciabatta”. I had been really wanting to make this recipe but I never thought it would turn out well, and… it turned out so well, yes indeed! It even looked like a real ciabatta. The recipe is slow because of the rising times, but it’s simple to make and the result is incredibly good.
Pics and Cakes

What do we need?

(For two loaves)

For the starter:

  • 2.5 g fresh yeast

  • 150 ml (2/3 cup) water

  • 3 tablespoons warm milk

  • 1/4 teaspoon honey or granulated sugar

  • 150 g (1.25 cups) bread flour

For the dough:

  • 2.5 g fresh yeast

  • 250 ml (1 cup) water

  • 1/2 tablespoon olive oil

  • 350 g (2.75 cups) bread flour

  • 1 and 1/2 teaspoons salt

Pics and Cakes

How do we make it?

  • First, we prepare the starter. Sprinkle the yeast into a large bowl with the water and milk. Let it sit for 5 minutes, then add the honey or sugar and stir to dissolve.

  • Add the flour and mix to form a loose dough. Cover the bowl with a kitchen towel and let it ferment for 12 hours or overnight.

  • Once the wait is over, we move on to the dough. Sprinkle the yeast into a small bowl with the water. Let it sit for 5 minutes; stir to dissolve. Add the yeast water and the olive oil to the starter and mix well.

  • Into the bowl, add the flour with the salt and mix to form a wet, sticky dough. Beat continuously with a wooden spoon for 5 minutes; the dough will turn fluffy and start to pull away from the sides, but it will still be too soft to knead.

  • Cover the dough with a kitchen towel. Let it ferment for about 3 hours, until the dough has tripled in size and is full of air bubbles. Generously flour two baking sheets and have extra flour ready to dust your hands.

  • Divide the dough in half while it’s still in the bowl. Tip half of the dough onto one of the sheets.

  • With your hands well coated in flour, shape it into a rectangular loaf about 30 cm (12 inches) long. Dust the loaf and your hands again with flour. Tidy and thicken it by running your fingers along the sides and gently tucking under the bottom of the dough. Repeat the same with the other half.

  • Uncovered, let the loaves rise for about 20 minutes; they will spread out and grow in volume.

  • Put them in the oven, preheated to 220°C (430°F), and bake for 30 minutes until the loaves have risen, are golden brown, and sound hollow when tapped on the bottom. Let cool on a wire rack.

Tips:

  • It’s a very sticky dough that you barely have to work with your hands. That’s why, in the final steps, it’s important to keep your hands well covered in flour and not handle the dough too much, since otherwise half of it will end up stuck to you.

  • I use the pressed baker’s yeast you can find in cubes in the supermarket in the bakery/pastry section, always refrigerated. I buy a bunch and freeze them, so I always have some on hand whenever I need it. That said, it’s important to keep in mind that frozen yeast loses a bit of its “power”, so you’ll need to add a little more than what the recipe calls for.

  • When baking, I put both sheets in at the same time and after 20 minutes I swapped them so that both loaves cooked evenly on both sides.
Pics and Cakes


Comments

Marisa (2012-11-22 12:51:05):

She brought a piece home for me and it’s awesome, delicious, amazing… mmm, I want more!

tía pi (2012-11-22 18:13:13):

It’s a pleasure how well you explain everything and the tips you give. I promise to make it and tell you how it turns out.

Angeles (2012-11-22 22:35:32):

It looks fantastic, just like an authentic Italian ciabatta.

marmota zampona (2012-11-24 19:27:46):

I’m going to give it a try right now.
November 22, 2012 · 4 min · Palstelera

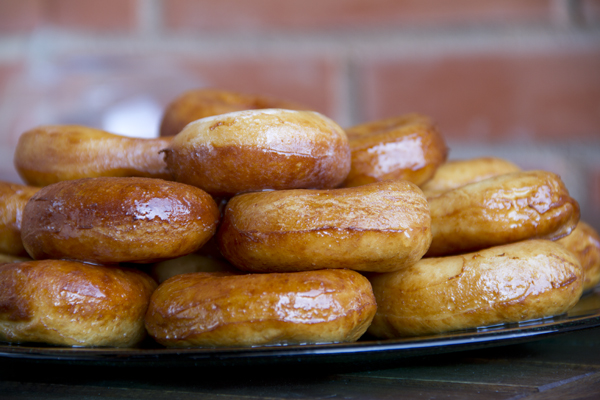
Doughnuts

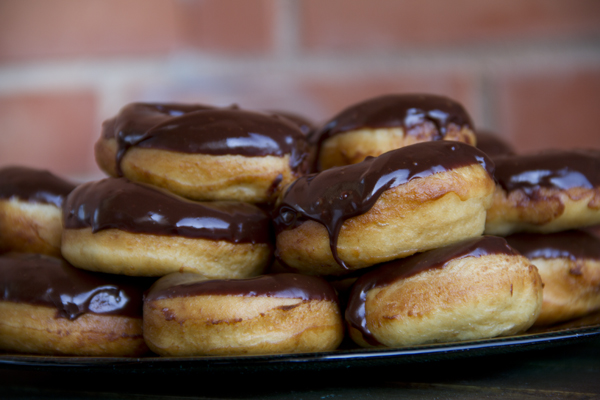
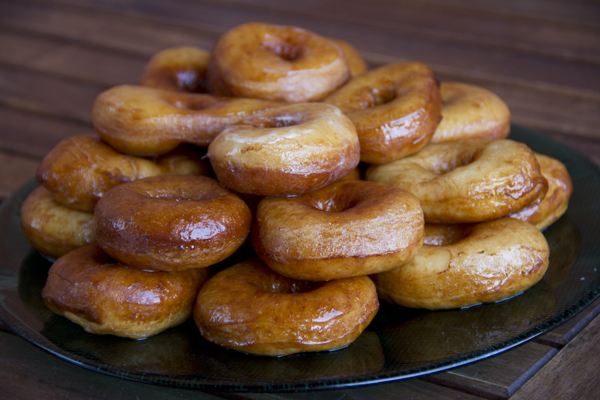
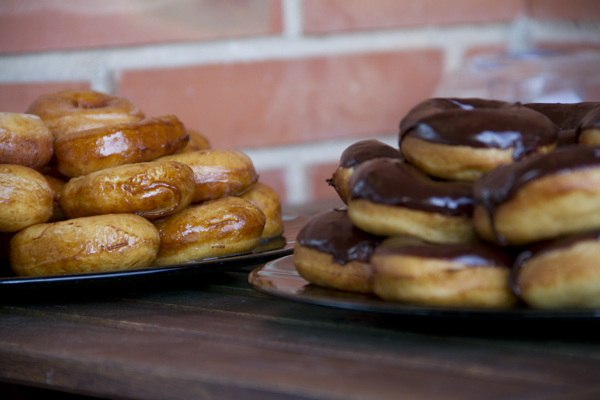
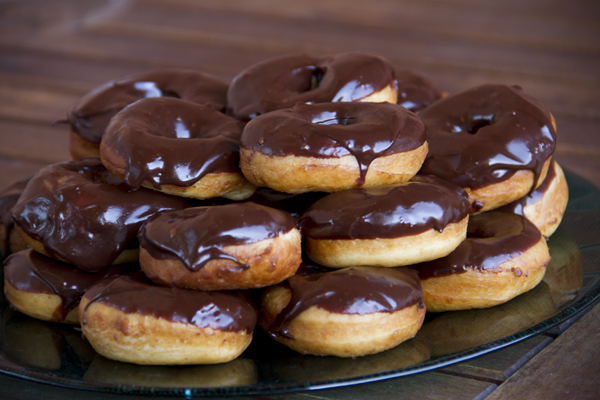
I think this is hands-down one of the best culinary discoveries I’ve made in my life. As unbelievable as it sounds, the flavor is really close to the store-bought ones — the dough is super fluffy, it doesn’t feel greasy like some bakery doughnuts, and the chocolate glaze is simply magnificent. The only problem is that they’re highly addictive… I’m warning you: once you try them, you’ll want to make them again and again. But hey, I think it’s worth it.

Pics and Cakes

What do we need?

  • 300 g (2.5 cups) bread flour

  • 200 g (1.5 cups) all-purpose flour

  • 80 g (1/3 cup + 1 tbsp) sugar

  • 5 g (1 tsp) salt

  • 20 g (3 tbsp) powdered milk

  • 2 packets of active dry yeast

  • 230 g (1 cup) warm water

  • 1 medium egg

  • 40 g (3 tbsp) shortening or margarine (we use Crisco, which is an odorless and tasteless vegetable fat)

  • 2 teaspoons orange extract

For the sugar glaze:

  • 200 g (1.75 cups) confectioners’ sugar

  • 1 teaspoon butter

  • A splash of lemon juice

  • Water

For the chocolate glaze:

  • 200 g (1.75 cups) confectioners’ sugar

  • 1 teaspoon butter

  • 150 g (5.3 oz) baking chocolate

  • Water

Pics and Cakes

How do we make them?

  • Mix the dry ingredients well: flours, sugar, salt, powdered milk and yeast.

  • Add the water — neither hot nor too cold, at room temperature — along with the beaten egg and the orange extract. Remember: if the water is hot it will “kill the yeast,” and if it’s too cold the dough will take longer to rise. Knead for about 8 minutes.

  • Add the fat and keep kneading until the dough no longer sticks to your hands. You might need to add more flour, but you won’t know until the shortening is fully incorporated. The resulting texture should be smooth and elastic.

  • Form a ball and let it rest for about 45 minutes. It’s fine to let it go longer.

  • After that time, knead it a bit and roll it out to about 1 cm (3/8 inch) thick. If you have a doughnut cutter, perfect. If not, use a round cutter (or a glass) to make the circles, and a smaller one for the inner circle. For the center hole, we just made it with our finger and stretched it a little (the dough is very elastic, so any irregularity won’t show).

  • Let them rest on a tray lined with parchment paper for at least 1 hour so they can rise again.

  • Fry in sunflower oil (if you use olive oil it’ll give them too much flavor). The oil shouldn’t be too hot or they’ll burn right away. As soon as you drop them in the pan they’ll start puffing up. Leave them for a few seconds and flip them so they brown on the other side.

  • Take them out and drain on paper towels, and while they’re still warm, dip them in the sugar glaze. If you’re using the chocolate glaze, they don’t need to be warm.

  • To make the sugar glaze, melt the butter a bit in the microwave and mix it well with the confectioners’ sugar and a splash of lemon. Add a few tablespoons of water until you get a light, whitish slurry.

  • For the chocolate glaze, mix the confectioners’ sugar with a few tablespoons of water (again, you want a light slurry). Melt the chocolate with the butter in the microwave and once melted, add it to the sugar-and-water mixture. If it’s too thick, add a bit more water. If on the other hand it’s too runny, let it cool down.

  • To coat the doughnuts in the sugar glaze, dip them into the bowl so the glaze sticks all over. For the chocolate glaze, only dip one side.

Pics and Cakes

Tips:

  • It looks complicated but it isn’t. You just need time, because respecting the dough’s rising times is really important.

  • It’s important that the yeast is bread yeast (not baking powder) and that the milk is powdered — otherwise your dry ingredient ratios will change and you won’t get the same result.

  • When frying the doughnuts, do them one at a time, or if you have a large pan, 2 or 3 at most. Otherwise you risk burning them.

Pics and Cakes

Pics and Cakes


November 1, 2012 · 5 min · Palstelera

Brownie

Whole Kitchen’s Sweet Proposal for October invites us to make an American classic: brownies

And what a treat, seriously. I’ve made dozens of brownies in my life and I have to confess I almost always pull out a different recipe and they all turn out delicious. The secret is that a brownie is a compact but fluffy cake (sometimes even moist), since it usually doesn’t have any leavening and therefore doesn’t rise. I read somewhere that the brownie was actually discovered thanks to someone forgetting to add the leavening to a chocolate cake. All I can say is… blessed mistake!

Pics and Cakes

What do we need?

  • 200 g (7 oz) baking chocolate

  • 100 g (3.5 oz / 7 tbsp) butter

  • 2 eggs

  • 100 g (1/2 cup) regular sugar

  • 1/2 teaspoon baking soda

  • 1/2 teaspoon salt

  • 80 g (2/3 cup) flour

  • 100 g (3.5 oz / about 1 cup) walnuts

Pics and Cakes

How do we make it?

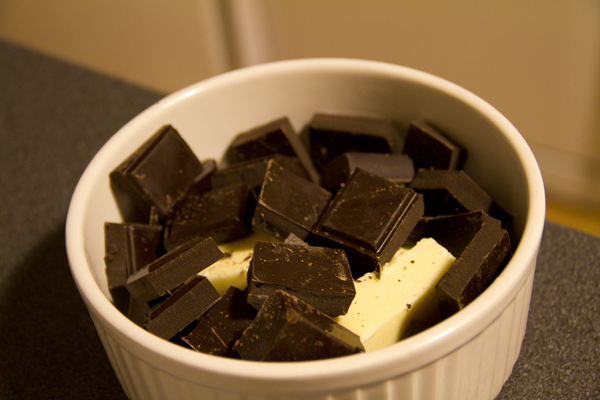
  • Chop the chocolate and put it in a microwave-safe bowl together with the butter. Melt in 20-30 second intervals, stirring each time so it doesn’t burn.

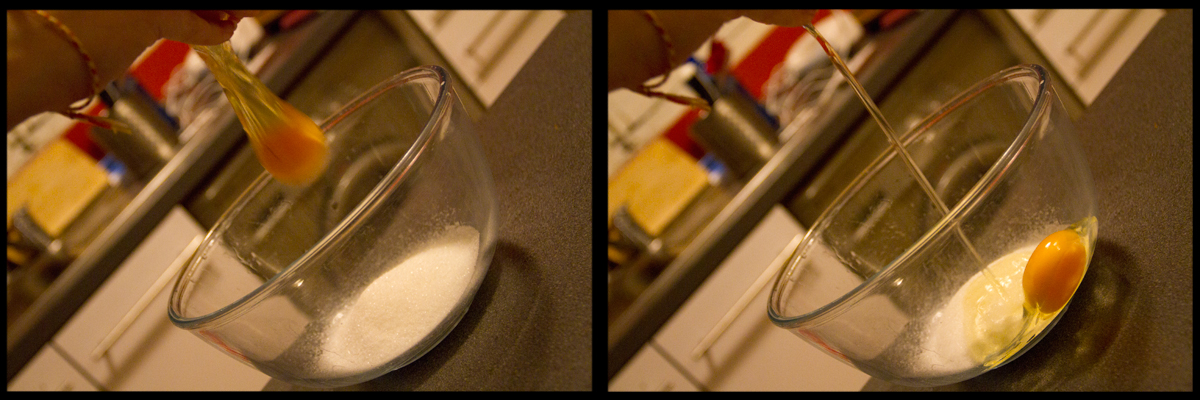
  • In another large bowl, whisk the eggs with the sugar until you get a foamy mixture.

  • Add the chocolate to this foamy mixture and stir well.

  • Mix the flour with the salt and baking soda. Sift it and add it to the previous mixture.

  • Stir well and add the walnuts.

  • Prepare a baking pan, greasing and flouring it so the cake doesn’t stick, and pour the mixture into it.

  • Put it in the oven (preheated to 180°C / 350°F) and bake for about 30 minutes.

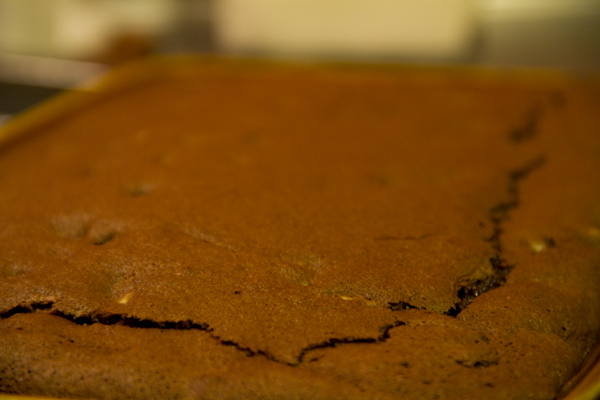
  • It’ll be ready when you see a light brown crust has formed on top. Remember that the toothpick won’t come out perfectly clean since this is a moist cake. The important thing is that it’s not completely liquid.

Pics and Cakes

Tips:

  • Even though brownie batter is pretty dense and it’s usually not necessary, a trick to keep the walnuts from sinking to the bottom of the pan is to coat them in flour or cocoa first.

  • To turn the brownie into a proper dessert, serve it with a scoop of vanilla ice cream and hot chocolate sauce on top.

Pics and Cakes

[English version] BROWNIES* *Ingredients:

  • 200 g chocolate

  • 100 g butter

  • 2 eggs

  • 100 g sugar (sugar or confectioners’ sugar)

  • 1/2 tsp baking soda

  • 1/2 tsp salt

  • 80 g flor

  • *100 g walnuts *

  • Cut chocolate into chunks and put into a microwave bowl with butter. Melt it slowly (stop every 20-30 seconds and stir with a spoon).

  • *In a large bowl, whisk the eggs and the sugar together to get a fluffy mix. *

  • Add chocolate cream and stir well.

  • *Mix flour, salt and baking soda. Sift the flour mix and add to the previous cream. *

  • *Stir well and add walnuts. *

  • *Prepare the baking pan (butter and flour it!) and pour the mixture on it. *

  • *Put into oven (preheated at 180ºC) and bake for 30 minutes. *

  • *It will be ready when you see a brown crust created on the top. If you insert a needle or knife to check the baking, it might not be clean because it’s supposed to be a ‘wet’ cake. *

  • ** Tips:- Normally this tip is not needed with brownies recipe because the dough is very thick. However, when you add nuts to a cake and you don’t want to have all of them at the bottom of your baking pan, you can coat the walnuts in flour or cocoa powder. *- For a perfect dessert result, serve the brownie with a scoop of vanilla ice-cream and hot chocolate sauce over it!

October 25, 2012 · 4 min · Palstelera

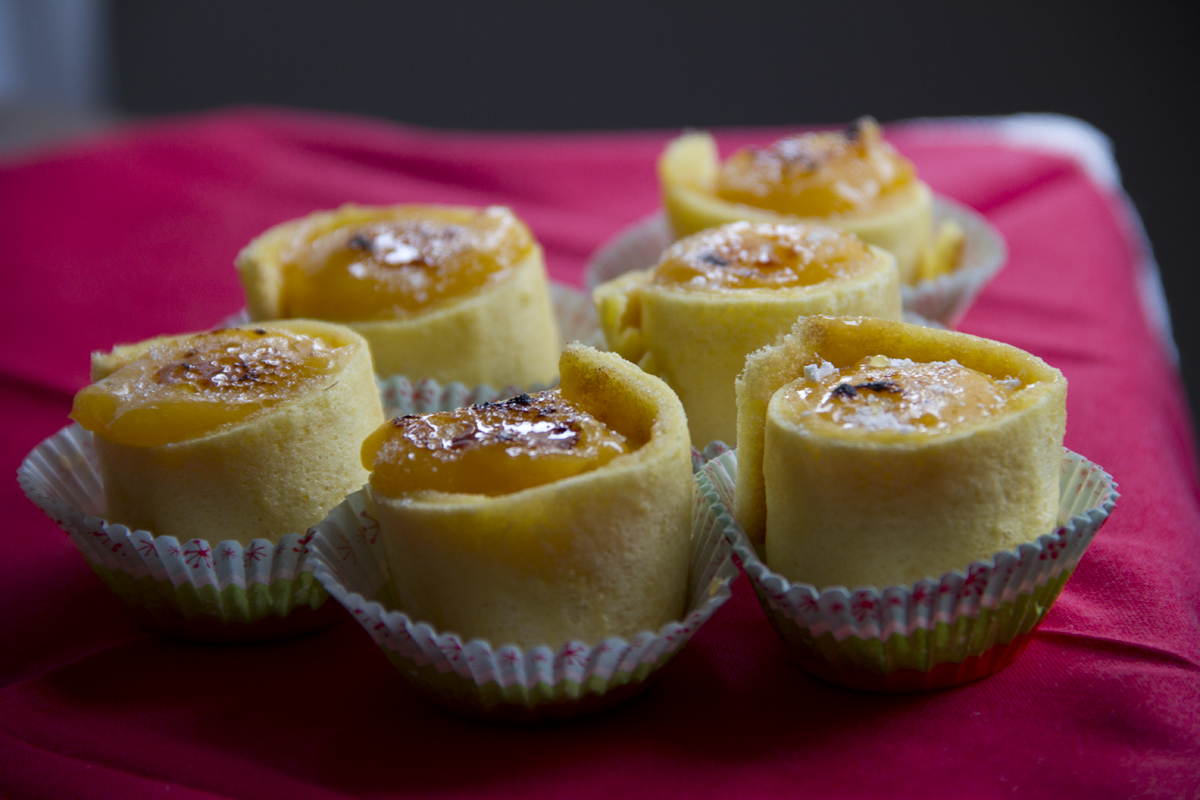
Piononos

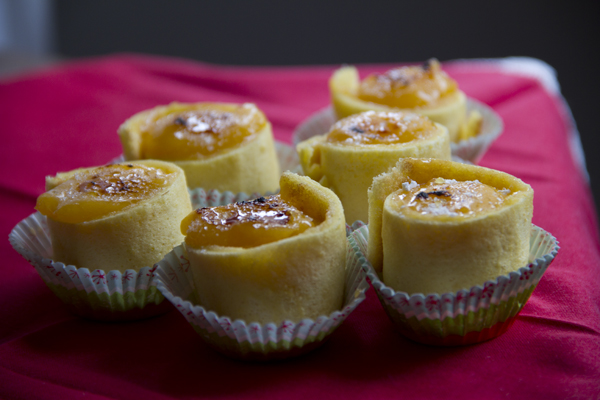
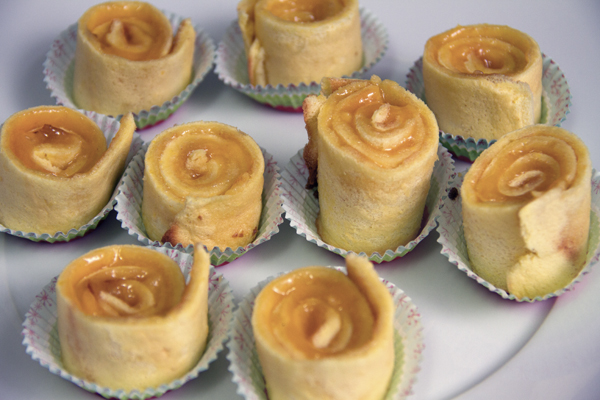
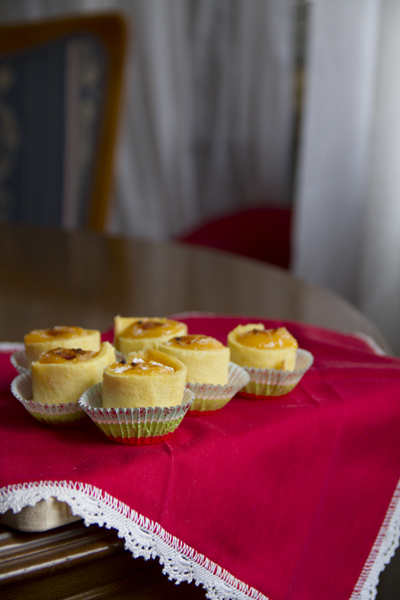
Whole kitchen, in their Sweet Proposal for September, invites us to make a Spanish classic: “Piononos”. And honestly, this challenge made me really happy because I think these little pastries are an absolute delight. I’d actually come across them before, though under the popular nickname ‘Vicksvaporub’ at Confitería Rufino in Aracena. Apparently they’re typical of Granada, and legend has it they got their name because they were made in honor of Pope Pius IX. Of course, like with every recipe, the origin and authorship are still up for debate, but whoever made them first, these little pastries are wonderful.

Pics and Cakes

What do we need?

(10-12 units)

For the sponge cake:

  • 2 large eggs

  • 2 tablespoons of sugar

  • 1 tablespoon of flour

  • 1 tablespoon of cornstarch

  • 2 tablespoons of milk

  • a pinch of salt

  • Butter for greasing

For the syrup:

  • 150 g (5.3 oz) sugar

  • 150 ml (2/3 cup) water

  • A cinnamon stick

  • A splash of rum (optional)

For the yolk cream:

  • 4 egg yolks

  • The weight of the yolks in sugar

  • The volume of the sugar in water

  • A pinch of cornstarch

How do we make them?

  • We start with the yolk cream so it has time to cool down.

  • First, make a syrup with equal parts water and sugar. Put both ingredients in a small saucepan and bring to a boil. How thick the yolk cream ends up depends, in part, on how much you cook the syrup down. For a filling-cream texture, let the syrup reach the soft-ball stage (reduce it down to the original water volume — that is, if you used 250 ml (1 cup) of water and 250 ml (1 cup) of sugar, take it off the heat once it’s reduced to 250 ml (1 cup) of syrup).

  • Let the syrup cool a bit. Meanwhile, separate the yolks and whisk them lightly. Once the syrup is lukewarm, add it to the yolks slowly, whisking constantly (off the heat), until you’ve added all the syrup.

  • Put it on low heat and cook, stirring constantly, until it thickens. (The longer you cook it, the thicker it gets.) You can add half a teaspoon of cornstarch dissolved in a tablespoon of cold water.

  • Make the syrup by boiling all the ingredients for 5 minutes.

  • Line the baking tray with parchment paper and grease it with butter.

  • Preheat the oven to 180°C (355°F) and start preparing the sponge cake.

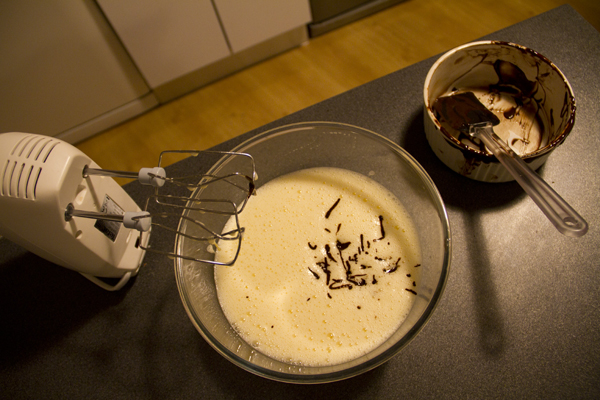
  • Whip the egg whites with a pinch of salt. Once they’re stiff, add the sugar little by little while still whisking, until it’s fully dissolved and the meringue is firm and glossy. Set aside.

  • In a bowl, combine the flour and cornstarch (sifted together), add the yolks and mix, then gradually add the milk to get a smooth, lump-free cream.

  • Add the yolk mixture to the meringue in several stages, folding gently with a spatula.

  • Carefully spread the batter on the prepared baking tray in a 4-5 mm (about 1/5 inch) thick layer. Place in the preheated oven on the middle rack. Pull it out as soon as it picks up a bit of color (about 7-8 minutes). Flip it onto another sheet of parchment paper. Let it cool slightly and brush it with the syrup.

  • Once it’s cool, spread a thin layer of yolk cream over the sponge sheet.

  • Cut strips about 3-4 cm (1.2-1.6 inches) wide and roll them up in a spiral. Place the little pastries vertically into paper cupcake liners. Add a teaspoon of cream on top of each one. Sprinkle with sugar and torch it with a kitchen blowtorch.

Pics and Cakes

Tips:

  • The sponge cake has to be very thin. These quantities worked for me with my oven, which has a square tray that’s smaller than usual. I think if you double the amounts you’ll have enough for a regular-size tray. In any case, if it’s too much batter, better not to use it all or the sponge will end up too thick.

  • In principle, the sponge doesn’t need any baking powder because the whipped egg whites give it enough volume. Even so, next time I’ll try adding a pinch to see how it turns out.

  • Don’t forget to grease the parchment paper with butter — the sponge sheet is very thin and could easily tear when you try to peel it off.

  • The recipe we followed is from Belenciaga, but using it as inspiration you can come up with all kinds of variations.

Pics and Cakes


September 25, 2012 · 4 min · Palstelera

Milk Bread Buns

We were putting together a surprise afternoon snack where we wanted everything to be absolutely homemade, so we couldn’t even allow ourselves to buy the bread. One of the things we wanted to make was little savory sandwiches and, once again, we turned to the La Receta de la Felicidad blog to follow their steps and make some great milk bread buns. Honestly, we thought it would be pretty complicated, but how wrong we were…

Pics and Cakes

What do we need?

(16 buns)

  •   500 g (about 4 cups) bread flour
    
  •   25 g (about 1 oz) fresh yeast (or two sachets of dry baker's yeast)
    
  •   250 ml (1 cup) milk
    
  •   70 g (about 5 tbsp) butter, softened (i.e. nice and soft)
    
  •   40 g (about 3 tbsp) sugar
    
  •   1 egg
    
  •   2 tablespoons of honey
    
  •   A pinch of salt
    

How do we do it?

  • Mix the flour and yeast in a large bowl and add the egg and milk.

  • Add the sugar, honey and salt, and mix well using a spoon or fork.

  • Add the butter, and knead for 10-15 minutes, until you get a soft, pliable, slightly shiny dough.

  • Form the dough into a ball by turning it and folding it inwards, and let it rest in a lightly floured bowl, covered with a cloth, for about two hours so it doubles in volume.

  • Take the dough out of the bowl and lightly press it down with your fingers to ‘deflate’ it.

  • Cut the dough into 16 portions, and shape them into buns.

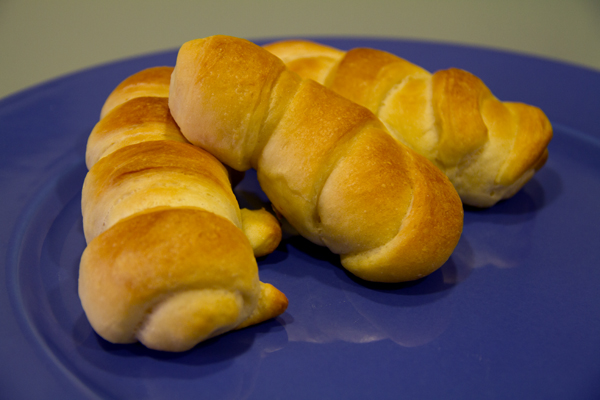
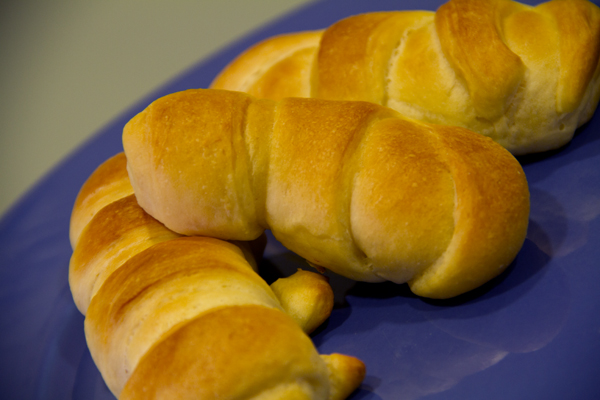
  • To do this, we have two methods. The first one is to take each piece of dough and roll it on itself, as if the bun were swallowing itself up. (Since my explanation leaves a lot to be desired, you can watch it in this video). The second method is to roll out each piece of dough into a rectangular shape. On one of the ends, make three or four cuts with a sharp knife to create some fringes. Finally, roll up the dough starting from the side opposite the fringes, so that when you finish, the fringes end up on the outside and give that distinctive look of milk buns.

  • Brush the buns with a little milk, let them rest on a baking tray lined with parchment paper for about 20 minutes, and meanwhile preheat the oven to 180°C (355°F).

  • Bake the buns for 10-12 minutes, and let them cool to room temperature on a wire rack.

Tips:

  • If you let the dough rest longer, nothing happens except that it might grow out of control (like what happened to us, when we discovered a mutant dough trying to escape from the bowl).
  • To shape the buns, we used the two methods we found at La Receta de la Felicidad, since we made two batches of dough and one of them (despite following the same steps) came out stickier, so the first method was easier for us.
  • The flavor in my opinion isn’t exactly the same as store-bought milk buns, but they are delicious, very fluffy, and you can fill them with both sweet and savory fillings.

Pics and Cakes

*[English version] MILK BREAD BUNS ** *Ingredients:

- 500 g strong bread flour - 25 g fresh yeast (or two sachets dry yeast) - 250 ml milk - 70 g butter, room temperature - 40 g sugar - 1 egg - 2 tbs honey - A pinch of salt

  • Combine flour and yeast in a bowl. Add the egg, honey, milk, sugar and salt and mix well.

  • Add butter and use a large spoon or fork to mix everything together.

  • Take the dough out of the bowl and knead. You will feel the dough become elastic after kneading for about 5 minutes. Knead the dough for 5-10 minutes more or until the dough is soft, pliable, smooth and slightly shiny-

  • Put the dough into a lightly floured bowl and cover with a cloth. Let the dough rise in a warm place until its size doubles (aprox. two hours)

  • Take the dough out of the bowl, deflate it by touching lightly.

  • Cut the dough into 16 pieces, and roll each of them into an oval shape. Or alternatively, roll out each piece of dough forming a rectangle 1 cm thick. Cut 1/3 the length of the rectangle into 4/5 strips of equal width and roll up the dough similar to a Swiss roll.

  • Preheat oven to 180ºC and let the milk buns rest for 20 minutes.

  • Glaze the buns with some milk, and bake them for 10-12 minutes. Let them cool on a wire rack

  • Tips:**- Nothing wrong if you leave the dough more time covered with a cloth, it will just rise even more! * - We made the bun shape following the two different methods. For sticky doughs is easier the first method (just forming the oval shape). *- You won’t achieve exactly the same flavor than the milk buns of the supermarket but it is absolutely delicious, spongy and can be filled with sweet or savory ingredients. *


Comments

marmota zampona (2012-09-12 08:16:25):

we’ll make them. thanks

September 8, 2012 · 4 min · Palstelera

Shortcrust Pastry Cookies

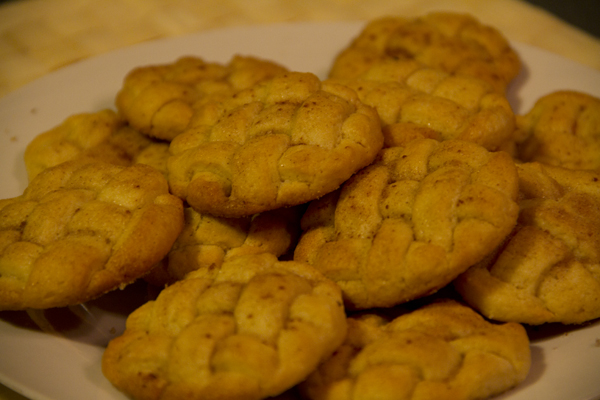
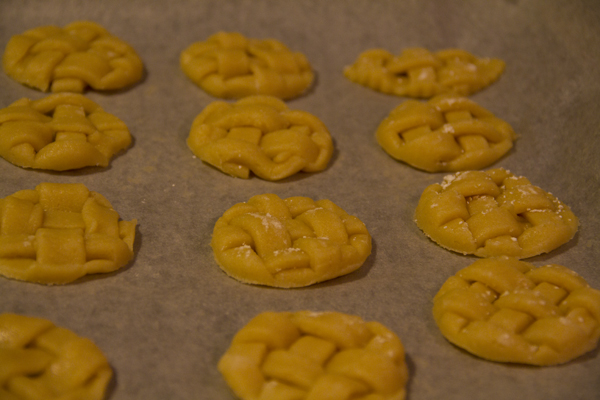
On one of my regular visits to the La Receta de la Felicidad blog, I came across this recipe for express cookies. In my case they weren’t quite so express since I decided to make the shortcrust pastry myself instead of buying it. In any case, the idea of the woven cookies is striking for how simple it is and how pretty they look, so you have no excuse not to try them.

Pics and Cakes

What do we need?

  •   1 sheet of shortcrust pastry*
    
  •   1 tablespoon of butter
    
  •   Sugar and cinnamon
    

*If instead of buying it you’d rather make the shortcrust pastry yourselves, you’ll also need:

  •   200 g (1.5 cups) of flour
    
  •   100 g (7 tbsp) of cold butter
    
  •   1 egg
    
  •   A pinch of salt
    
  •   A pinch of sugar
    

Pics and Cakes

How do we make it?

Shortcrust pastry:

  • Put all the ingredients in a bowl. The butter has to be very cold and cut into small pieces.

  • Start kneading with your hands until you have a smooth dough, shape it into a ball and wrap it in plastic wrap. Let it rest in the fridge for an hour.

  • Once the waiting time is up, roll out the dough with a rolling pin until it’s quite thin (about 5 mm / 1/4 inch). You can do this with the help of a couple of sheets of baking paper or even plastic wrap.

Cookies:

  • Preheat the oven to 200°C (390°F).

  • With the dough rolled out, cut strips of 1 cm (about 1/2 inch) with a sharp knife.

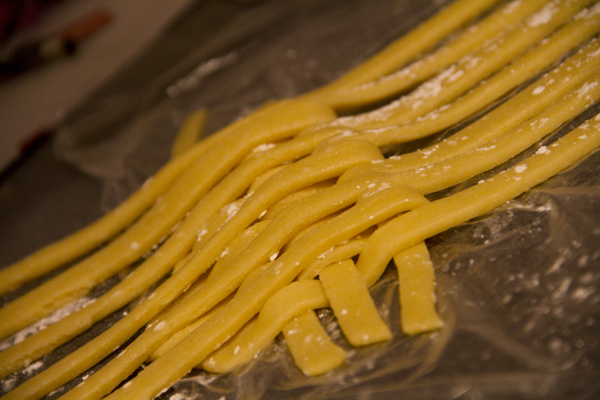
  • Now we weave the dough. To do this, place half of the strips together in a vertical position. Then place the other strips one by one horizontally, passing them through the vertical strips alternating over and under (since a picture is worth a thousand words, take a look at the photo).

  • With a round cookie cutter (or any shape you like), cut out the cookies from the freshly woven dough.

  • Brush them with melted butter and sprinkle with sugar and cinnamon (don’t be shy with the amount, since shortcrust pastry isn’t sweet).

  • Place the cookies on a tray lined with baking paper and bake them for 10 minutes.

Tips:

  • You can add any spice or flavoring you like. In my case I used a powdered sugar flavored with cinnamon and apple.
  • So they don’t lose their shape too much, the shortcrust pastry has to be very cold and you should handle it as little as possible (in this case, it’s easier with store-bought shortcrust pastry).
  • If you make them a bit bigger than a coffee cup, you can serve them in the original way that @SandeeA does.

Pics and Cakes

August 30, 2012 · 3 min · Palstelera

Strawberry and orange blossom jelly with mint

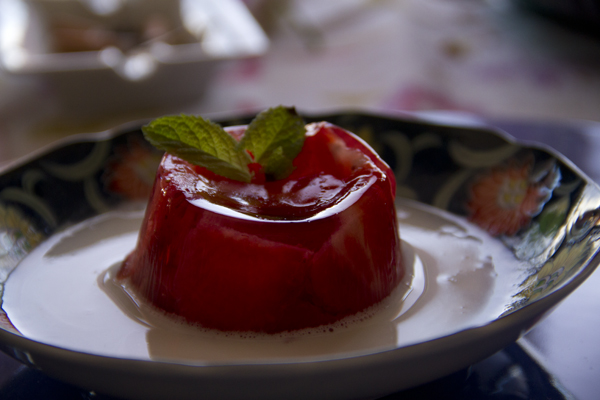
I spotted this dessert in a supermarket catalog and thought it was a really original idea — eye-catching and looking absolutely delicious. The truth is, my last memory of attempting a strawberry jelly involved a sort of extra-runny pink flan with a petrified slab of gelatin on top that nobody could sink their teeth into. So with that track record, this simple recipe was quite a challenge for me. I have to confess the challenge was completely conquered and the dessert went down a treat.

Pics and Cakes

What do we need?

(Makes about 10 servings)

  •   500 g (1.1 lb) strawberries
    
  •   200 ml (about 0.85 cups) milk
    
  •   5 tablespoons orange blossom water
    
  •   1 packet of unflavored gelatin
    
  •   1 Greek yogurt
    
  •   Sugar
    
  •   Mint leaves
    

How do we make it?

  • Heat some water with two tablespoons of sugar (a little less water than the amount indicated on the gelatin packet) and, separately, dissolve the powdered gelatin in the orange blossom water. Combine the two liquids.

  • Wash the strawberries, slice them, and arrange them in individual molds (place the prettiest slices against the walls since those will be what shows later).

  • Once the water-and-gelatin mixture has cooled a bit, pour it into each mold and chill in the fridge for at least 3 hours.

  • Meanwhile, gently heat the milk with two tablespoons of sugar and a few mint leaves for five minutes. Remove from heat, strain, and discard the mint. Once the milk is cold, add the yogurt and whisk it together.

  • Serve in a shallow dish, with a layer of the yogurt mixture on the bottom, the unmolded jelly on top, and a few mint leaves to garnish.

Tips:

  • Before pouring the liquid gelatin into the molds, make sure it isn’t too hot — otherwise it could ‘ugly up’ the strawberries a bit.
  • A neat trick for hulling strawberries: grab a plastic straw and push it into the strawberry from underneath, on the opposite side from the stem. Push the straw all the way through the fruit. This removes the green stem and the harder white core in one go. (It works better with slightly wider straws, like the ones at McDonald’s or Burger King.)
  • To unmold the jellies, you can dip the base of the molds in hot water so they release more easily. If you’re using disposable aluminum molds, you can just snip them open with scissors — no problem.

*[English version] ORANGE BLOSSOM & STRAWBERRY JELLY WITH MINT

  • **Ingredients (serves 10 approx.):- 500 g strawberries
  • 2 dl milk

  • 5 tbsp orange blossom water

  • 1 package of gelatine (flavour less)

  • 1 yoghurt (Greek style)

  • Sugar- Mint leaves

  • Heat some water (according to package instructions) with two tablespoons of sugar. Place the orange blossom water into a bowl and stir in the gelatin until it has dissolved. Mix both liquids.

  • Prepare the strawberries, remove the green leaves and slice them. Place these slices into individual moulds.

  • Set aside until temperature decreases. Pour over the gelatin mixture into the moulds and place in the fridge to set for at least three hours.

  • Pour the milk with two tablespoons and some mint leaves in a small saucepan and heat gently. Cook for 5 minutes, strain the milk and discard mint leaves. Once cold, add the yoghurt and beat the mixture.

  • To serve, remove the jelly from the mould and place into a dish with some yoghurt-mint milk and garnish with a leave of mint.

    Tips:- Before pouring the gelatine, let it cool a bit. Otherwise, strawberries will become ‘ugly’.

  • To clean the strawberries you can use a drinking straw. Insert the straw into the opposite side of the green leaves and pierce the fruit until you remove completely the leaves and the hard white core.

  • To remove the jelly from the mould you can place the bottom of it into some hot water. It will be much easier!


Comments

Marisa (2012-08-03 11:50:26):

I can confirm that, on top of being a really beautifully presented dessert, it’s absolutely delicious. I had the luck of being the guinea pig. :)

August 2, 2012 · 4 min · Palstelera

Cake Pops

Or pop cakes. Any name works for these little lollipop-shaped treats stuffed with cake. The original idea is to use up the trimmings from a cake you’ve made for something else, or one that didn’t turn out pretty enough — so you don’t feel bad destroying it (literally).

Pics and Cakes

What do we need?

  •   Cake*
    
  •   Cream cheese
    
  •   Chocolate for melting
    
  •   Chocolate sprinkles, colored sprinkles, crushed nuts, colored sugar...
    
  •   Lollipop sticks
    

Buttercream:

  •   250 g (1 cup + 2 tbsp) butter, at room temperature
    
  •   500 g (4 cups) powdered sugar
    
  •   1 tsp vanilla extract
    
  •   1 tbsp water
    
  •   Food coloring
    
  • If you don’t have any cake on hand, you can make a nice fluffy sponge cake with the following ingredients:
  •   4 eggs
    
  •   250 g (1 1/4 cups) sugar
    
  •   1 tsp vanilla extract
    
  •   250 ml (1 cup) milk
    
  •   55 g (4 tbsp) butter
    
  •   250 g (2 cups) all-purpose flour
    
  •   2 tsp baking powder
    
  •   1/4 tsp salt
    

How do we make it?

Making the sponge cake:

  • Beat the eggs with the whisk attachment of the mixer (this step is essential for getting a fluffy texture).

  • Add the sugar and keep beating for another 4 minutes until creamy. Add the vanilla extract and mix well.

  • In another bowl, mix the dry ingredients. Then add the egg-and-sugar cream and beat on low speed until everything is incorporated.

  • Heat the milk and butter in the microwave until the butter melts. Add to the rest of the mixture and stir well.

  • Pour into a greased and floured baking pan.

  • Bake at 170°C (340°F) until a skewer (or knife tip) inserted into the cake comes out clean.

Pics and Cakes

And now on to the cake pops themselves:

  • Once the cake has cooled, cut a piece and set aside roughly the same volume of cream cheese (making cake pops with a whole cake can be madness unless you’ve got a huge party and don’t mind spending the entire day rolling little balls).

  • Take your piece of cake, crumble it with your hands into a bowl and add the cream cheese. Mix well with your hands. (The mixture you get shouldn’t be too dry or too sticky — if either happens, fix it with more cake or more cream cheese.)

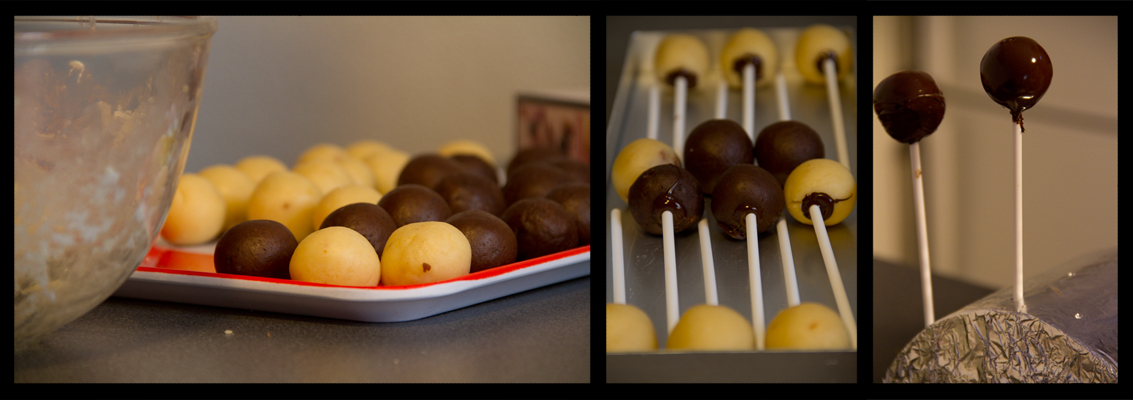
  • Now roll small balls with your new mixture. It’s important they come out very smooth, with no cracks visible.

  • Melt a little chocolate in the microwave.

  • Take a ball and stick a lollipop stick into it. Then pull the stick out, dip it in chocolate, drop a bit of melted chocolate inside the hole, and finally push the stick back into the ball for good. (This step matters so the ball doesn’t fall off the stick later.)

  • Repeat until you’ve used up all the mixture and put them in the fridge for half an hour, if possible.

  • Melt the chocolate in the microwave, being careful not to burn it (heat for a few seconds, take it out and stir. Repeat until you get the texture you want).

  • Take your skewered ball and dip it in the chocolate. Pull it out and rotate it so the whole surface gets coated.

  • Let it dry stuck into a piece of styrofoam, a potato or an egg carton (in any case, poke the holes ahead of time with a skewer so you don’t ruin the cake pop’s stick). Repeat with all the balls.

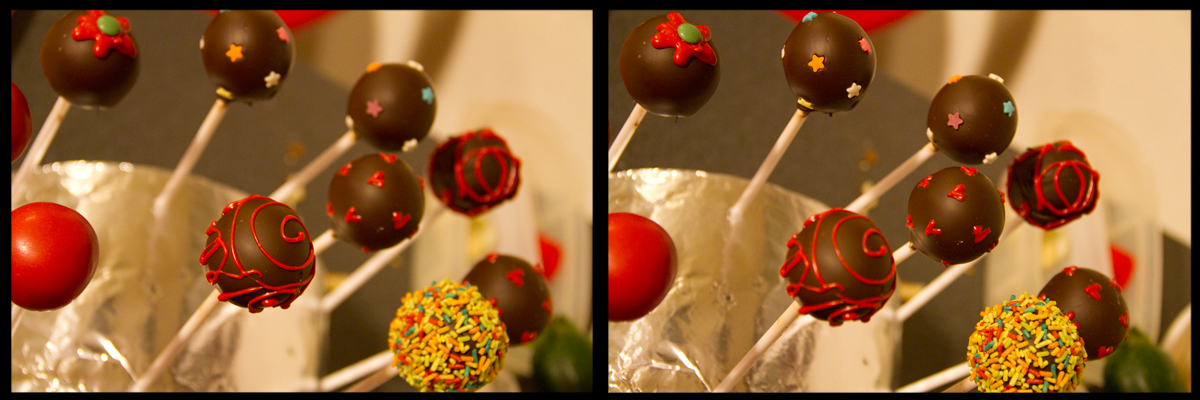
  • Once they’re coated in chocolate, all that’s left is to use your imagination and decorate them with chocolate of another color, sprinkles, colored sugar, chocolate jimmies, etc.

  • Another option is to decorate your cake pops with buttercream. To do that, mix all the buttercream ingredients with the whisk attachment (low speed if you don’t want a powdered-sugar blizzard in your kitchen). You can tint the buttercream with food coloring, transfer it to a piping bag, and pipe little mounds until the ball is fully covered.

Tips:

  • Instead of cream cheese for the mixture, you can use dulce de leche, Nutella, or any other spreadable filling.
  • If you use white chocolate, you can tint it with food coloring — but make sure it’s gel-based or chocolate-specific, never water-based. You can also use the colored chocolate buttons sold at baking shops (candy melts).
  • When melting the chocolate, if you want it runnier so the cake pops are easier to dip, you can add a bit of sunflower oil, butter, or Crisco (vegetable shortening). Never water!
  • If you don’t have sprinkles, jimmies or crushed nuts, you can make colored sugar very easily. Just put a few tablespoons of sugar in a plastic bag, add a couple of drops of food coloring (this one can be liquid), close the bag and shake. You’ll have lovely sugar tinted in whatever color you like.
  • If you’re after inspiration and want to enjoy some real artistry, definitely check out Bakerella’s website.

Pics and Cakes


Comments

Esther (2012-07-28 13:28:38):

Hi!

Just looking at this is making my mouth water! So much so that I think in a few days I’ll be getting to work on it, and I wanted to know where I can buy lollipop sticks in Madrid.

Thanks so much,

EPS

Palstelera (2012-07-28 15:09:13):

I’ll tell you the shops I usually buy from in Madrid, but with how popular all this stuff is getting, I’m sure you can find them in more places too: Decake, in the Estrella neighborhood, La tienda americana, near Plaza de Cristo Rey (Islas Filipinas metro stop), or Comercial Mínguez (downtown area).

I’ve seen that most of them close in August, so hurry up! And I’m waiting for the photos of the result…

Esther (2012-07-28 15:19:44):

Thanks so much!!! I promise photos if they turn out halfway decent, although yours have set the bar pretty high, hehe

July 19, 2012 · 5 min · Palstelera