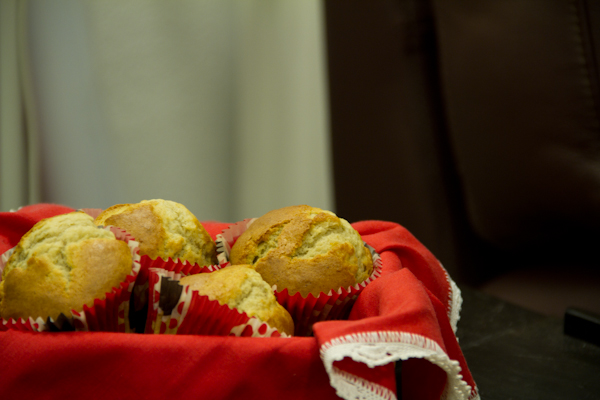
Banana Muffins

Today we’re bringing you a muffin recipe. Muffins are similar to Spanish magdalenas but, unlike those, they usually use butter instead of oil and the batter isn’t as smooth (you just mix the ingredients without having to beat them). Also, muffins can be either sweet or savory and they take a wide variety of “chunks” inside (chocolate chips, dried fruit, nuts, etc.). Don’t confuse them with the famous cupcakes that are so trendy these days, which are always sweet and decorated with buttercream or some other kind of frosting.
Pics and Cakes

What do we need?

  • 230 g (1¾ cups) all-purpose flour

  • 150 g (¾ cup) sugar

  • 1 teaspoon baking powder

  • 1/4 teaspoon baking soda

  • 1/4 teaspoon salt

  • 1 teaspoon cinnamon (optional)

  • 2 eggs

  • 110 g (½ cup) butter (room temperature)

  • 3 ripe bananas

  • 1 teaspoon vanilla extract (optional)

How do we make it?

  • Preheat the oven to 180°C (355°F).

  • In a bowl, combine all the dry ingredients (flour, sugar, baking powder, baking soda, salt and cinnamon).

  • In another bowl, mash the bananas with a fork until you get a purée. Add the lightly beaten eggs, the softened butter and the vanilla. Mix well.

  • Fold the banana mixture into the bowl with the dry ingredients. Using a spatula, mix until the ingredients are just combined, but don’t overmix. The batter will be a bit thick and lumpy.

  • Divide the batter into muffin molds, filling each one about 3/4 of the way since they’ll rise. Bake for about 20-25 minutes or until a toothpick inserted comes out completely clean.

Tips:

  • You can add walnuts or chocolate chips to this recipe by mixing them in with the dry ingredients.

  • The riper the bananas, the better. You can even use those ones that have gone ugly and a bit brown.

  • Even if you use paper liners, I recommend placing them in a metal muffin pan. Otherwise, the paper liners might not hold the weight and the batter will spill out.

    [English version] BANANA MUFFINS* Ingredients:-*

  • 230 g all-purpose flour

  • 150 g granulated sugar

  • 1 teaspoon baking powder

  • 1/4 teaspoon baking soda

  • 1/4 teaspoon salt

  • 1 teaspoon cinnamon (optional)

  • 2 eggs

  • 110 g butter (soften)

  • 3 ripe bananas

  • 1 teaspoon vanilla extract (optional)

  • Preheat oven to 180ºC.

  • Combine all dry ingredients in a large bowl (flour, sugar, baking powder, baking soda, salt and cinnamon).

  • In a different bowl, mash the bananas with a fork. Add lightly beaten eggs, soften butter and vanilla. Mix well.

  • With a rubber spatula or wooden spoon, lightly fold he wet ingredients (banana mixture) into the dry ingredients just until combined and the batter is thick and chunky. The important thing is not to over mix the batter. You do not want it smooth.

  • Bake about 20 -25 minutes or until a toothpick inserted in the center comes out clean.

Tips:

- You can add nuts or chocolate chips when combining the dry ingredients. - The riper bananas the better. You can use even those ones that have turned brown. - When using paper liners, use a muffin pan too. Otherwise paper liners might not be strong enough to hold the butter and the muffin shape will be ruined.
October 2, 2014 · 3 min · Palstelera

Estonian Kringle

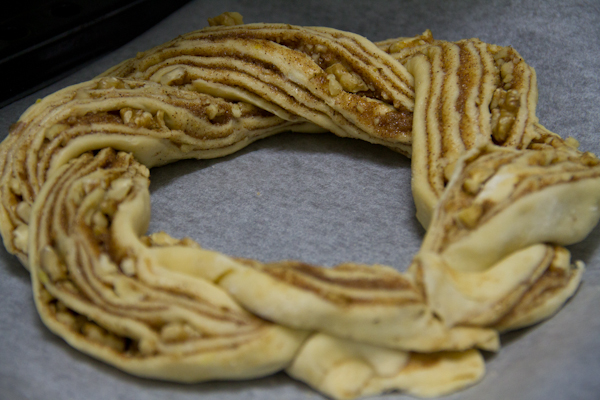
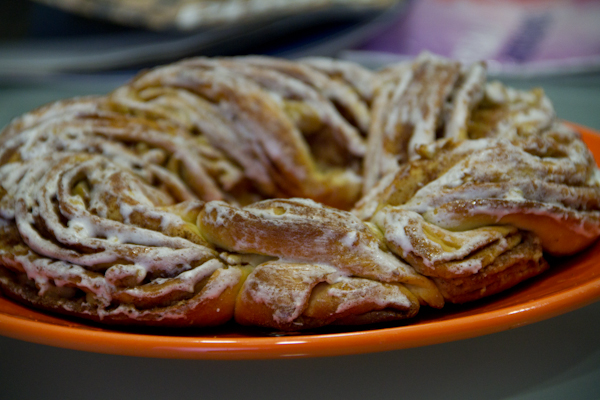
It’s not just that it seems like we haven’t published anything in ages — it’s actually true… almost three months without any blog action on PiC! The summer has been a bit hectic but here we are, back and loaded with new finger-licking recipes. Today I’m bringing you a recipe that could be considered the Nordic roscón de Reyes, and some say its shape is reminiscent of pretzels and the dough is brioche-style. In short, a sweet wonder we pulled from a Thermomix magazine but made without one to prove that any recipe is adaptable.

Pics and Cakes

What do we need?

For the dough:

  • 30 g (2 tbsp) sugar

  • The peel of 1/2 lemon (yellow part only)

  • 120 g (1/2 cup) milk

  • 30 g (2 tbsp) butter

  • 15 g fresh yeast

  • 1 egg yolk

  • 300 g (2.5 cups) bread flour

  • **1 pinch of salt

For the filling:

  • 50 g (3.5 tbsp) butter (room temperature)

  • 60 g (1/4 cup) sugar

  • 2 tablespoons cinnamon

  • 50 g (1/2 cup) chopped walnuts

For the glaze:

  • 20 g egg white

  • 50 g (1/2 cup) confectioners’ sugar

How do we make it?

  • If we have an electric coffee grinder or a food processor, we put the sugar with the lemon peel and grind it well until the lemon is incorporated into the sugar and we get a sort of paste. If we don’t have one, we can just grate the lemon peel and mix it with the sugar.

  • We heat the milk a little in the microwave and add it to the bowl with the sugar and lemon peel.

  • We add the butter and the yeast and stir until everything comes together nicely.

  • We add the egg yolk and mix well again.

  • Finally, we add the flour and the salt. We stir with a spoon or fork and then transfer the dough to a floured surface and knead by hand.

  • We form a ball with the dough and let it rest in the bowl covered with cling film until it doubles in size.

  • In the meantime, we prepare the filling. To do this, we mix the room-temperature butter with the sugar and the cinnamon.

  • We preheat the oven to 180°C (355°F).

  • Once the dough has doubled in size, we place it on a floured surface and roll it out with a rolling pin until we have a rectangle of about 40 x 50 cm (16 x 20 in).

  • We spread the filling cream over it and sprinkle the walnuts on top.

  • We roll up the dough (starting from the wider side).

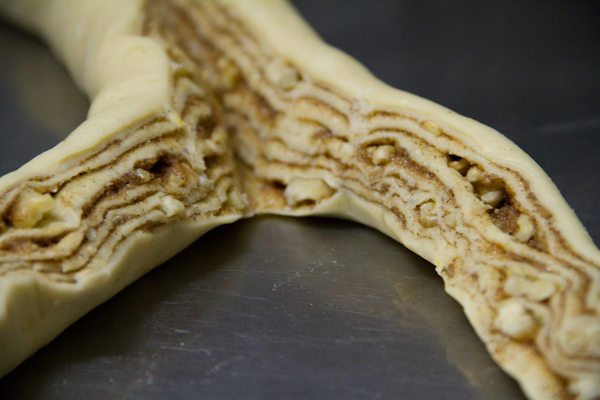
  • Once we have a sort of thin Swiss roll, we cut the log lengthwise down the middle, leaving one of the ends joined. When we cut it, we should see the alternating layers of dough and filling.

  • We cross each piece of dough to form a kind of braid (always keeping the layered side facing up).

  • Once everything is ‘braided’, we form a wreath and place it on a baking tray lined with parchment paper.

  • We bake for about 20 minutes.

  • While it’s baking, we prepare the glaze. To do this, we beat the egg whites a little with a fork and mix them with the confectioners’ sugar.

  • When we take the kringle out of the oven, we brush it with this glaze.

Pics and Cakes

Tips:

  • The lemon peel is optional. You can skip it or swap it for orange peel — for sure it’ll be delicious too.

  • If you want a whiter, thicker glaze, you can beat the egg whites with the sugar using an electric whisk. That’s how we made it, and that’s why the glaze looks like it does in the photo. If you beat it just with a fork, it’ll give the kringle a certain shine but it won’t be white and as thick.

  • Starting from this base, you can fill the dough with other nuts or even jam.

Pics and Cakes

[English version] ESTONIAN KRINGLE* *Ingredients: For the dough:

  • 30 g sugar

  • 1/2 lemon peel (only the yellow part)

  • 120 g milk

  • 30 g butter

  • 15 g fresh yeast

  • 1 egg yolk

  • 300 g strength

  • 1 pinch of salt

For the filling:

  • 50 g de butter (room temperature)

  • 60 g de sugar

  • 2 tbsp cinnamon

  • 50 g chopped walnuts

For the icing:

  • 20 g egg white

  • 50 g confectioners’ sugar

  • If you have a coffee grinder or food processor, place the sugar and the lemon peel on it and grind it until getting a sort of paste. If you don’t have a grinder, just mix sugar with grated lemon peel.

  • Heat the milk in the microwave and pour over the sugar.

  • Add the butter and yeast and stir well.

  • Add egg yolk and stir well again.

  • Then, add flour and salt. Mix with a spoon and fork and then knead the dough on a floury surface.

  • Make a dough ball and leave to rise into the bowl covered with cling film (until the dough has doubled in volume).

  • In the meanwhile, prepare the filling. Mix butter (room temperature) with sugar and cinnamon.

  • Preheat oven at 180º.

  • When the dough has doubled in volume, place on a floury surface and roll it out with a rolling pin until getting a rectangle (40 x 50 cm aprox.)

  • Spread the filling and sprinkle with chopped walnuts.

  • Roll up the dough (starting by the wider side).

  • Cut the log in half length-wise leaving one edge uncut.

  • Start braiding the two pieces, trying to keep the open layers exposed so the cut ends remain on top.

  • Pinch the ends together and form a wreath.

  • Bake for 20 minutes.

  • Prepare the icing. Whisk white eggs with a fork and add confectioners’ sugar. Mix well.

  • Out of the oven, brush the kringle with the sugar icing.

  • *Tips: - Lemon peel is optional. You can leave it out or use orange peel. For sure, it will be delicious too. - If you want a thicker and whiter sugar icing you can use an electric mixer with whisk attachment. The result will be more similar to our kringle shown in the picture. If you whisk only with fork you will have a lighter and clearer icing. - You can change the filling and use any nuts or jam you like.

September 24, 2013 · 5 min · Palstelera

Chocolate and Salted Caramel Tart

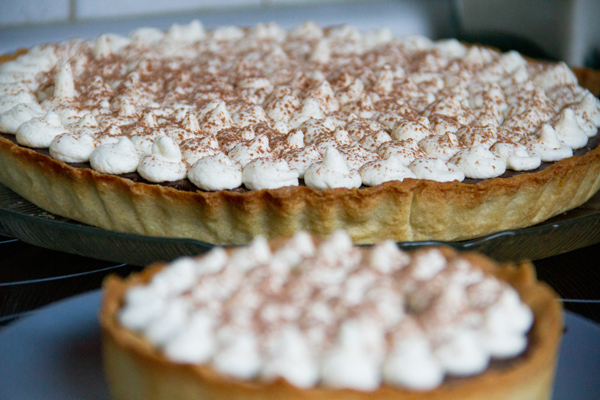
Even though putting the words ‘caramel’ and ‘salted’ together in the same phrase sounds weird, it’s a delicious combination that I tried for the first time thanks to French delicatessens. So as soon as I saw this recipe on La receta de la felicidad I couldn’t resist giving it a go, and I knew it’d be a guaranteed success. Even those weird beings who aren’t crazy about chocolate end up liking it, thanks to the crunchy bite of the crust and the creaminess of the filling. So what are you waiting for to try it?

Pics and Cakes

What do we need?

For the special shortcrust pastry:

  • 250 g (2 cups) all-purpose flour

  • 30 g (1/4 cup) ground almonds

  • 150 g (2/3 cup) butter

  • 80 g (1/3 cup) sugar

  • 1 egg

  • 1 pinch of salt

  • 1 pinch of powdered vanilla

For the salted caramel sauce:

  • 70 g (1/3 cup) sugar

  • 70 ml (1/3 cup) heavy cream

  • 1 teaspoon butter

  • a pinch of salt

For the chocolate cream:

  • 500 ml (2 cups) heavy cream

  • 350 g (12 oz) dark chocolate

For the whipped cream:

  • 300 ml (1 1/4 cups) heavy whipping cream, very cold (at least 35% fat)

  • 2 heaping tablespoons of powdered sugar

  • Optional: cocoa powder for dusting on top

Pics and Cakes

How do we make it?

  • We start by preparing the crust. Mix the very cold butter, cut into small cubes, with the rest of the ingredients. You can use the dough attachment on your mixer or use a spoon and finish kneading by hand. It’ll come out crumbly and you’ll have to keep squeezing the butter with your hands to incorporate everything well, but don’t despair. Wrap in plastic wrap and chill in the fridge for half an hour.

  • Meanwhile, prepare a 24 to 26 cm (9.5 to 10 in) springform tin by lightly greasing it and placing a sheet of baking paper on the bottom.

  • Roll out the dough on a floured surface or between two sheets of baking paper or plastic wrap (so it doesn’t stick) until it’s about 3 mm (1/8 in) thick.

  • Roll the dough onto the rolling pin and unroll it over the tin. Press it well into the tin, patching any gaps with bits of dough. Trim the edges by running the rolling pin over the top of the tin and pressing down.

  • Put the tin with the dough in the fridge for 30 minutes.

  • Preheat the oven to 180°C (355°F).

  • Cover the bottom of the tart with baking paper and fill with dried chickpeas (just like when making quiches — this keeps the dough from rising in the oven). Bake the crust for about 25 minutes.

  • Take it out and once it’s cooled, unmold and place on a plate or tray.

  • Now we’ll prepare the salted caramel sauce. Have the cream and butter ready beforehand. Put the sugar in a saucepan over medium heat and wait without stirring until it turns into caramel (2 or 3 minutes). Once you have a golden caramel, lower the heat to minimum and add the butter, salt, and cream, stirring constantly until you get a smooth sauce. If any caramel lumps form, keep stirring vigorously over low-medium heat until they fully dissolve.

  • Once it’s cooled a bit, pour the caramel over the tart base and put it in the fridge for half an hour.

  • Next we make the chocolate cream. Bring the cream to a boil in a saucepan while you chop the chocolate. When it boils, remove from the heat and add the chopped chocolate. Let it sit for a few minutes and stir until you get a smooth cream. Once the chocolate cream has cooled a bit, pour it over the tart that you had reserved in the fridge and let it chill overnight.

  • Finally, whip the cream. Beat the very cold cream with the sugar using a whisk until it reaches the desired consistency (be careful not to overdo it or it’ll turn into butter).

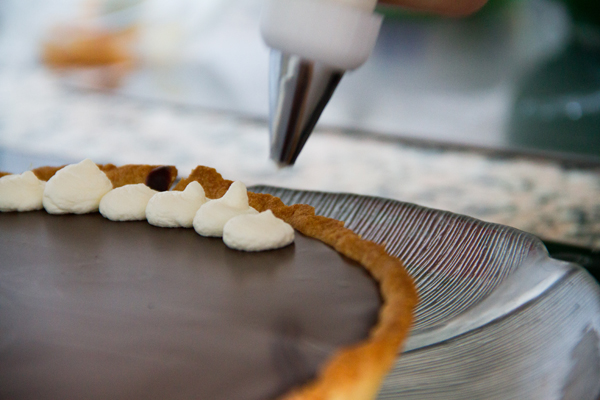
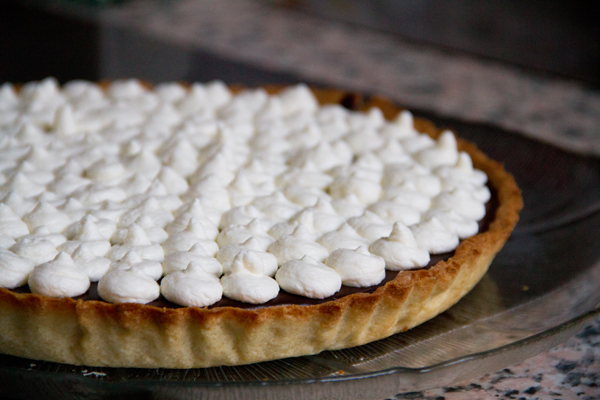
  • Put the whipped cream into a piping bag with a round tip and pipe little mounds of cream over the tart. Using a sieve, dust with cocoa powder and keep in the fridge until ready to serve.

Tips:

  • When whipping the cream you can use regular sugar, but store-bought powdered sugar will help keep the consistency longer since it usually contains a small amount of starch.

  • If you don’t want to even turn on the oven, you can swap the shortcrust base for a cookie base. Crush digestive-type cookies, for example, and mix with melted butter. Cover the tin pressing down well so it’s nice and compact, let it chill before pouring the caramel and you’re done.

  • If you don’t have a piping bag or tip, you can use a plastic bag (like a freezer bag) and snip a small hole in the corner.

Pics and Cakes

[English version] CHOCOLATE AND SALTED CARAMEL TART* *

For the crust:

  • *250 g all purpose flour *

  • *30 g powdered almonds *

  • *150 g butter, cold, cut into cubes *

  • *80 g sugar *

  • 1 egg

  • 1 pinch of salt

  • 1 pinch powdered vanilla

For the salted caramel sauce:

  • *70 g sugar *

  • *70 ml heavy cream *

  • 1 teaspoon butter

  • pinch of salt

For the chocolate cream:

  • *500 ml heavy cream *

  • *350 g dark chocolate *

For the whipped cream:

  • 300 ml heavy cream, very cold (1 cup aprox)

  • 2 tablespoons sugar

  • Optional: unsweetened cocoa powder for dusting

* *

  • Prepare the crust. Whizz all the ingredients in a food processor to a dough and finish by hand until getting a homogeneous dough. Wrap the dough and chill for 30 minutes. Roll out the pastry and line a deep 24-26 cm tart tin with it; patch any holes if crumbly. Cover and chill for at least 30 minutes.

  • Preheat oven to 180 ºC. Prick the tart shell all over with a fork or use baking beans and bake about 25 minutes.

  • Transfer to a rack and let cool.

  • Prepare the caramel sauce. Place sugar a small saucepan and bring to a boil over medium heat. Look for the caramel to turn a rich amber colour, then lower the heat and whisk in butter and cream (the mixture will bubble up, so be careful!). Pour caramel into cooled tart shell and let cool slightly; refrigerate 1/2 hour.

  • Prepare the chocolate cream. Chop the chocolate. Bring heavy cream to boil in a small saucepan over medium heat. Put chocolate into a medium bowl and pour in the hot cream. Let sit for a few minutes, then stir until smooth. Pour ganache evenly over tart and refrigerate 24 hours .

  • Before serving, prepare the whipped cream. In a bowl, using an electric mixer, beat the cream with the sugar until firm. Pipe the whipped cream on top of the pie and dust with some cocoa powdered if desired.

Tips:**- If you use confectioners’ sugar when whipping the cream, you’ll get a firmer cream.

- If you don’t want even to switch on the oven you can prepare the crust with biscuits. Just smash the biscuits and mix with melted butter. Cover the tart mold with it, pressing well with your fingers.Refrigerate before pouring the caramel sauce.

- If you don’t have piping bag, you can use a plastic bag instead.


April 16, 2013 · 6 min · Palstelera

Custard Cream Tartlets

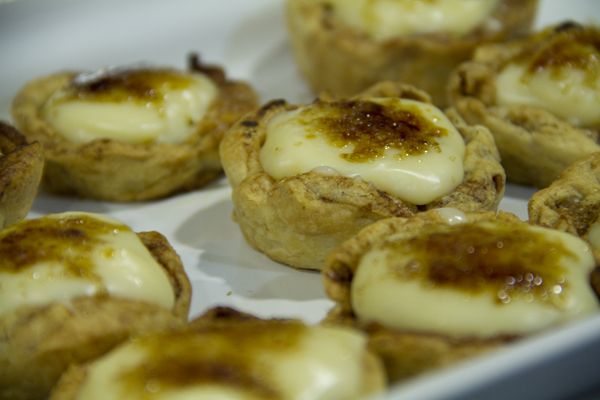
As strange as it sounds, this recipe could pass as an express one, even though we have to make a custard cream. And the secret of today’s recipe lies precisely in making that cream fast, easy, delicious, and in just 10 minutes. The trick: the microwave, that great forgotten appliance we only ever bother with to heat up the morning milk.

Pics and Cakes

What do we need?

For the cream:

  • 100 g (1/2 cup) sugar

  • 40 g (1/3 cup) cornstarch

  • 3 egg yolks

  • 1/2 liter (2 cups) milk

  • 1 tablespoon butter

For the tartlet:

  • 1 sheet of puff pastry

  • Sugar

  • Cinnamon

Pics and Cakes

How do we make it?

  • First we prepare the custard cream. Whisk the sugar and cornstarch together in one bowl, and the egg yolks with the milk in another.

  • Then mix everything together and pop it in the microwave for 8 minutes at max power, stopping every 2 minutes to stir.

  • Once the 8 minutes are up, add the butter, stir, and you’re done.

  • Next, roll the puff pastry sheet out a bit with a rolling pin and sprinkle it with sugar and cinnamon.

  • Roll the dough into a log, pressing it with your fingers so it doesn’t end up too uniform.

  • Cut it into several pieces and flatten each one to form a sort of mini-pizza.

  • Use a muffin tin (the kind with several holes, like little flan molds). Place each circle into one of the cavities and press it in to form a tartlet.

  • Pop it in the oven, preheated to 180°C (350°F), for about 12 minutes.

  • Keep an eye on it and press the dough down every now and then to keep the hollow where the cream will go.

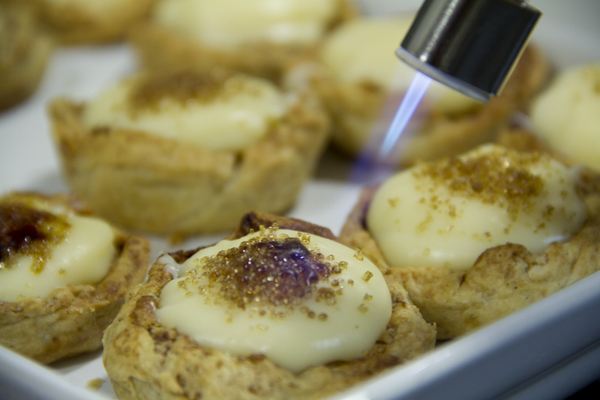
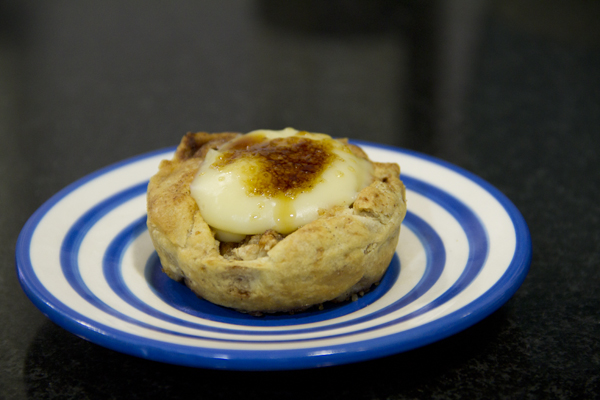
  • Once baked, fill them with the cream, sprinkle with sugar, and brown them in the oven or with a blowtorch.

Tips:

  • Microwaves come in different wattages so the cooking time may vary. As you heat the cream, you’ll see it thicken until it reaches the consistency you want.

  • If you want to use the custard cream for another recipe that calls for a thinner cream, just cut down on the amount of cornstarch.

Pics and Cakes

March 25, 2013 · 2 min · Palstelera

Oreo Cookies

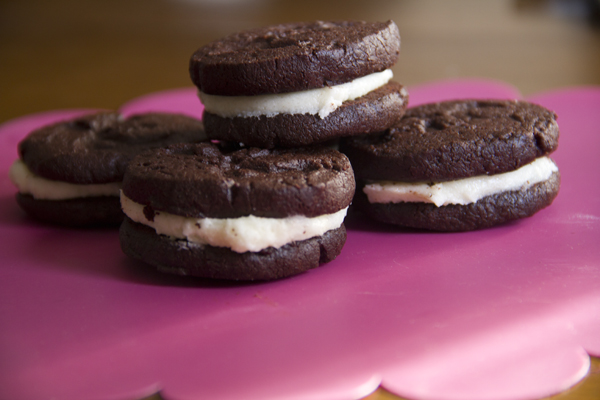
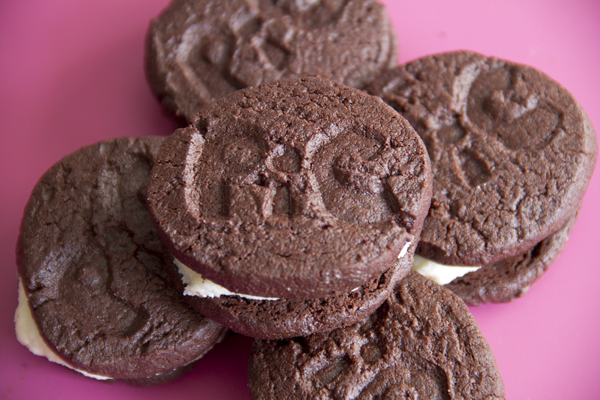
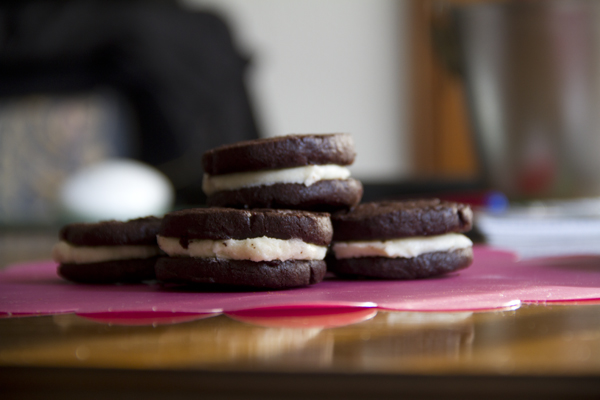
Maybe they don’t look exactly like a store-bought Oreo, but the flavor is, simply, incredible. In this case, I’d almost dare to say it’s even better than the original. It might seem a little laborious, but I promise neither the dough nor the cream is hard to make, so I’d encourage you to get started right away.

Pics and Cakes

What do we need?

For the cookies:

  • 230 g (1 cup) butter

  • 150 g (3/4 cup) sugar

  • 1 tablespoon vanilla extract

  • 200 g (7 oz) couverture chocolate

  • 1 egg

  • 210 g (1 2/3 cups) flour

  • 90 g (3/4 cup) cocoa powder

  • 1 teaspoon salt

  • 1/2 tablespoon baking powder

For the cream:

  • 110 g (1/2 cup) butter

  • 200 g (1 2/3 cups) powdered sugar

  • 1 teaspoon vanilla extract

  • 1 tablespoon milk

  • 1 pinch of salt

How do we make it?

  • Beat the butter with the sugar until you get a creamy mixture.

  • Add the melted chocolate and the vanilla extract. Add the egg and stir well.

  • In a separate bowl, mix the cocoa with the flour, the baking powder, and the salt.

  • Pour the flour mixture over the previous chocolate mixture and combine well. Use your hands if necessary.

  • Shape the dough into a cylinder and wrap it in plastic wrap.

  • Let it rest in the fridge for a couple of hours.

  • Take it out, remove the plastic wrap, and slice it into pieces about half a centimeter (1/4 inch) thick.

  • Bake on a tray lined with parchment paper for 12 minutes at 180°C (355°F).

  • Let cool and set aside.

  • For the cream, beat the butter with the sugar.

  • Then add the milk, the vanilla, and the pinch of salt.

  • Beat well until you have a smooth cream.

  • Assemble your Oreo cookies using two cookies and a little cream in the middle to stick them together. Take one cookie, add a bit of filling, and press down with the other so the filling spreads nicely.

Tips:

  • For the chocolate, you can also use a mix of couverture chocolate and 70% dark chocolate. It’s a matter of taste, since some people don’t like such a bitter flavor.

  • If you cut the cookies this way, they’ll come out a bit “rustic” — meaning slightly uneven and more handmade-looking. If you prefer, you can roll out the dough with a rolling pin (placing it between two plastic sheets or two pieces of parchment paper), let it cool that way in the fridge, and then cut it with cookie cutters like when making butter cookies. They’ll come out more uniform and “perfect”.

  • When baking these cookies, you have to be careful not to burn them, because since they’re almost black, the color won’t help you tell when they’re done. So there’s nothing to do but keep a close eye on them.

I got the recipe from these two amazing blogs: El Monstruo de las Galletas and Seasaltwithfood. Pics and Cakes [English version] HOMEMADE OREO COOKIES* *Ingredients: For the cookies:

  • 230 g butter,

  • 150g granulated Sugar

  • 1 tsp Pure Vanilla Extract

  • *200g semisweet Chocolate *

  • 1 egg

  • 210g Unbleached All-Purpose Flour

  • 90g Dutch-Processed Cocoa Powder

  • 1 tsp salt

  • 1/2 tsp Baking Soda

For the cream filling:

  • 110 g unsalted butter, at room temperature

  • 200 g Confectioners’ Sugar

  • 1 tsp Pure Vanilla Extract

  • 1 Tbsp Milk

  • Pinch Salt

    • In a medium bowl, whisk together the butter and granulated sugar until well combined. Whisk in the vanilla and chocolate. Add the egg and whisk until thoroughly incorporated.*
  • In another medium bowl, stir together the flour, cocoa powder, salt, and baking soda until well mixed. Using a wooden spoon or a fork, stir the flour mixture into the chocolate mixture. You may find it easier to switch to mixing it with your hands until the dough comes together.

  • *Transfer the dough to a 15-inch square sheet of parchment or waxed paper. Using your hands, shape the dough into a log about 10 inches long and 2 to 2 1/2 inches in diameter. Place the log at the edge of the paper and roll the paper around the log. With the log fully encased in paper, roll it into a smoother log no more than 2 1/2 inches in diameter. Refrigerate for at least 2 hours or until firm. *

  • Position a rack in the center of the oven and preheat the oven to 180°C. Butter a baking sheet or line it with parchment paper.

  • *Slice the dough log into 1/4-inch-thick slices. Place the slices about 1 inch apart on the prepared baking sheet.Bake for 12 minutes, or until the cookies are firm to the touch. *

    • Using a stand mixer fitted with the paddle attachment or a handheld mixer or even a wooden spoon, beat the butter on low speed for about 30 seconds, or until completely smooth and soft.*
  • *Add the confectioners’ sugar and vanilla and beat until the mixture is perfectly smooth. Add the milk and salt and beat until smooth. *

  • To assemble the sandwich cookies: Scoop about 1 rounded tablespoon of the filling onto the flat side of 1 cookie. Top with a second cookie, flat side down, then press the cookies together to spread the filling toward the edges. Repeat with the remaining cookies.

Tips: - You can use a mixture of different chocolates. I like using dark chocolate for desserts and bitter chocolate (70% cocoa). - You can use another method to shape your cookies. You can roll out the dough with the rolling pin. Place the dough between two plastic sheets or oven paper, roll it out and place in the fridge. Then use the cookie cutter to cut the shapes of your cookies. - When baking, be careful, because you can’t judge by colour given that the dough is almost black. So you’ll have to pay attention and avoid them to get burnt. Pics and Cakes


Comments

zordor (2013-03-12 01:25:14):

What do you mean you’d “dare to say” the flavor is better than the original? It’s infinitely better than the originals, no question whatsoever. I’ve been lucky enough to try this recipe and I have to say without a doubt these are among the best cookies I’ve ever eaten in my life! They’re absolutely amazing!

Esther (2013-03-16 15:46:02):

Hi Pics&Cakes,

I want to make the cookies but I have an existential question: how do I make or where do I get the couverture chocolate? I have Valor drinking chocolate at home, not sure if that works.

Thanks so much!

EPS

Palstelera (2013-03-16 16:14:26):

The important thing is that it’s dark chocolate, not milk. It can be the so-called fondant chocolate, dessert chocolate, or couverture. Almost any of those would work. I don’t really like drinking chocolate for these recipes because the flavor isn’t as intense, in my opinion. Hope that helped.

Esther (2013-03-16 18:29:22):

It helped a ton, yes! In a little bit I’m getting to work… Thanks so much

Palstelera (2013-06-29 13:22:37):

We’re so glad you made them and especially that you liked them. Answering your questions: if they came out a bit soft, it’s true that a little more time in the oven would have made them harder. That said, you did the right thing because since it’s a dark dough it’s hard to tell when they’re at their perfect point and when they’re starting to burn, and I think it’s better to enjoy a soft cookie than a scorched one. :-) In any case, I’m sure they’ll come out perfect the second time. As for the vanilla in the dough… Oops! I forgot to include it so I have to fix the recipe (thanks!). In principle, it goes in along with the chocolate. Lastly, your question about the mixer. Mine is a regular mixer, the kind with detachable beaters. You could even mix it by hand, but with the mixer you save time and effort and you also get a smoother, fluffier mixture.

Hugs and thanks for following us. :-D

setitapili (2013-06-29 09:09:40):

Hi!!! I wanted to write to you to tell you how the cookies turned out… Simply delicious! I took them to work and everyone was blown away… But I had a couple of problems. The cookie part came out a bit soft, maybe a little more time in the oven would have helped, but I didn’t want to leave them too long because they harden a bit more when they cool. Another problem was that I didn’t know they grew in the oven, so they came out a bit big. And one question: the vanilla for the cookie, when do you add it? I didn’t see it in the recipe so I added it in the last step. Another question: I beat the cream with a whisk, but the dough with a regular mixer. Did I do it right? Conclusion: the cookies are amazing!! They’re my first cookies and everyone asked me for the recipe!!! You can be sure I’ll be making them again!!! Spectacular!!!

Palstelera (2013-06-23 01:15:59):

I think I’m late with the answer… but cocoa powder is also easy to find, in any supermarket. I usually use the Valor brand, which is unsweetened. And as for the milk, any kind works. I used semi-skimmed because that’s what I had, and it came out perfect. Let us know how it goes. :-)

setitapili (2013-06-22 09:52:57):

Hi!!! I’m going to get started in the cookie world and this afternoon I want to make this recipe, but I have a couple of questions:

  • what cocoa powder could I use for the dough? The couverture is easier because they sell it as is, but powder, no idea… Another question, for the cream you use a tablespoon of milk, what type of milk? Sure they’re silly questions, but I hope you’ll let me know… I’ll let you know how it went!! Thanks!!!
March 11, 2013 · 8 min · Palstelera

Lemon Pay

You might be wondering about the name and why I’m not just calling it lemon tart or lemon pie. The thing is, I made this tart for my mom and for her it brought back childhood memories. Apparently, when they were kids in Peru they used to eat this tart and they called it “pay de limón.” If we already use more and more anglicisms in Spain, you can imagine how common they are in Latin American countries and the kind of Spanglish that reigns there. In any case, whether or not this is the authentic Peruvian recipe, and whether you call it tart, pie, or pay, this dessert turned out absolutely delicious.

Pics and Cakes

What do we need?

  • 150 g (5.3 oz) ground digestive-style biscuits

  • 110 g (1/2 cup) butter

  • 400 g (14 oz) condensed milk

  • Half a cup of lemon juice

  • 4 egg yolks

  • 4 egg whites

  • 85 g (3/4 cup) powdered sugar

How do we make it?

  • First, melt the butter in the microwave and mix it with the ground biscuits until you get a uniform paste. Put this mixture into a shallow oven-safe pie pan. Press with your fingers until you’ve covered the bottom and sides of the pan well.

  • Pop it in the oven (preheated to 180°C / 350°F) and bake for 15 minutes. Take it out and let it cool.

  • To prepare the filling, mix the condensed milk well with the lemon juice and egg yolks. Pour the mixture over the biscuit base in the pan and put it back in the oven for another 15 minutes. Take it out and let it cool.

  • To make the meringue, whip the egg whites to stiff peaks with a pinch of salt using a whisk (electric is better; it’ll save you time and sore arms). Gradually add the sugar until you get a firm consistency.

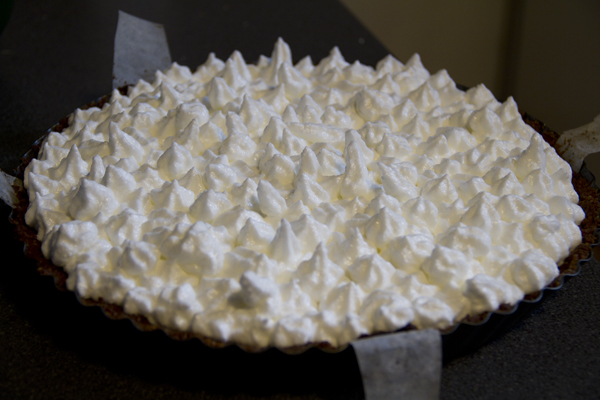
  • Now all that’s left is to put the meringue on top of the lemon tart. You can use a piping bag or just spoon it on, forming peaks.

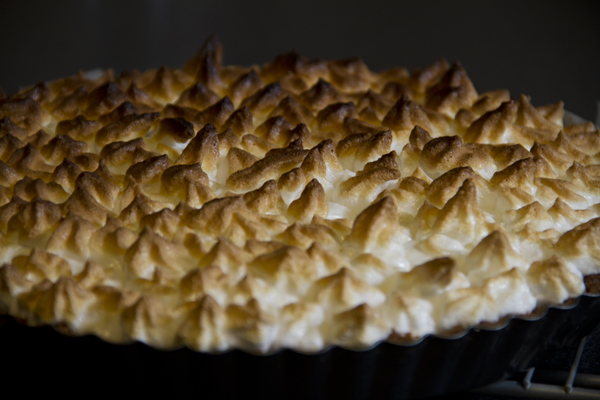
  • Finally, when it’s completely covered, put it back in the oven for a few minutes so the meringue browns slightly.

Tips:

  • If you don’t love the tangy lemon flavor, you can reduce the amount of juice.

  • When you make the meringue, you need to get it really firm (you should even be able to flip the bowl upside down and have it stay put). It’s really important that neither the bowl nor the whisk have any grease on them so the whites whip up properly. Also, be careful in the oven because meringue burns really quickly, so never leave it unattended.

  • If you prefer, you can make a shortcrust pastry for the base.

Pics and Cakes

[English version] LEMON PIE* *Ingredients:

  • *2 cups ground biscuits *

  • 1/2 cup butter

  • 400 g condensed milk

  • 1/2 cup lemon juice

  • 4 egg yolks

  • 4 egg whites

  • 3/4 confectioner’s sugar

  • *First, melt butter in the microwave and stir well with ground biscuits. Put this mix into a pie mould using your fingers to press. Cover the bottom and the sides of the mould. *

  • Bake in preheated oven (to 180º) for 15 minutes.

  • *For the filling, mix together condensed milk, lemon juice and egg yolks. Pour the lemon mixture into the baked biscuit pastry. Bake in oven for 15 minutes. *

  • *Whip egg whites with a pinch of salt (use an electric whisk for better results and saving time). Add sugar gradually and keep whipping until getting a firm meringue. *

  • *Pour the meringue over the lemon pie. You can use a piping bag or use a spoon to make peaks. *

  • *Bake in oven for a few minutes until slightly golden brown. *

Tips:

- If you don’t like strong lemon flavour, you can reduce the amount of lemon juice.

- When making meringue you need a firm mixture (you could even put the mixing bowl upside down and it will keep there). To get good results, the mixing bowl has to be completely free of grease. Be careful when baking meringue because it get burnt very easily.

- You can also make shortbread pastry instead of biscuit pastry.


Comments

Marisa (2013-04-03 10:48:50):

Yum! I love this tart. Make it for me one day, please. :)

February 19, 2013 · 4 min · Palstelera

Scones

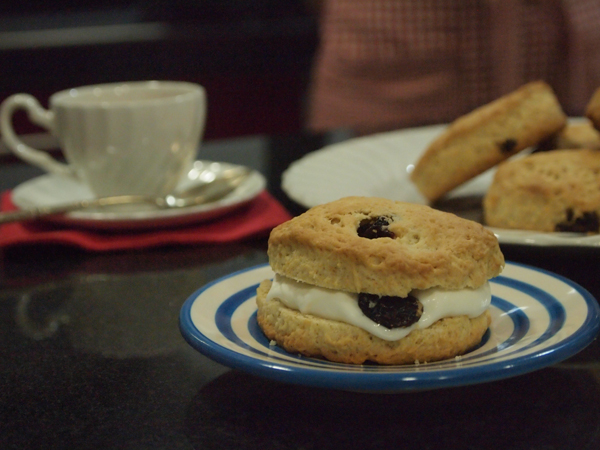
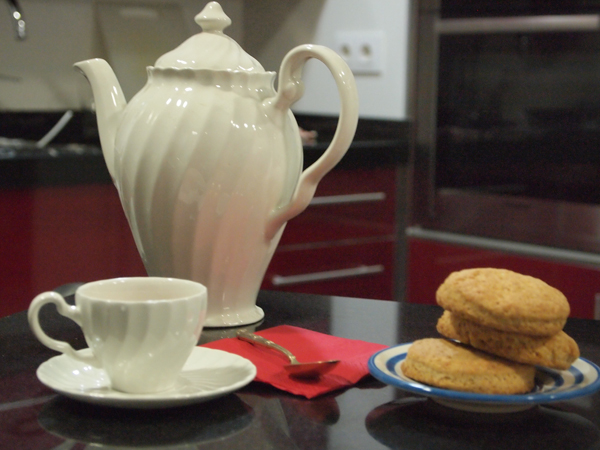
Whole Kitchen, in their Sweet Proposal for January, invites us to make a Scottish classic: Scones

We almost ran out of time with this recipe because — unusual for us — we made it the same day it was published. Luckily, it’s super easy and takes very little time. As usual, the baking time is what stretches the recipe out the most, but hey, the little wait is well worth it. We followed the recipe from www.joyofbaking.com

Pics and Cakes

What do we need?

  • 260 g (2 cups) all-purpose flour

  • 50 g (¼ cup) sugar

  • 1 sachet of Royal baking powder

  • a pinch of salt

  • 75 g (5 tbsp) very cold butter, cubed

  • 1 beaten egg

  • 120 ml (½ cup) heavy cream

How do we make it?

  • Preheat the oven to 190°C (375°F).

  • In a bowl, mix the flour with the sugar, baking powder and salt. Add the butter and rub it in with your fingertips — it should look like crumbs. Set aside.

  • In a separate bowl, mix the egg with the cream.

  • Combine both mixtures until well integrated, but don’t overwork the dough.

  • Roll out lightly until you have a fairly thick dough (about 1.5 cm / ½ inch). (Our first ones came out too thin.) Using a cookie cutter or a glass, cut out circles about 6 cm (2.5 inches) wide.

  • Place them on a baking tray lined with parchment paper and brush with a little milk.

  • Bake for 15 to 18 minutes, until golden.

  • Take them out of the oven and let them cool on a wire rack.

Tips:

  • We forgot to brush the scones with milk and they still turned out delicious, so if you forget too, it’s not the end of the world.

  • You can add chocolate chips, nuts, raisins… to the dough. This time we used dried cranberries.

  • To eat them, just split them in half and spread on butter and jam, whipped cream, lemon curd or anything else you fancy.

Pics and Cakes

[English version] SCONES* Ingredients: *

  • 260 g all-purpose flour

  • 50 g granulated white sugar

  • *1 sachet baking powder *

  • 1/4 teaspoon salt

  • 75 g cold unsalted butter

  • 1 large egg

  • 120 ml milk, half-and-half, or heavy cream

  • *Preheat oven to 190 degrees C. Line a baking sheet with parchment paper. *

  • In a large bowl, whisk or sift together the flour, sugar, baking powder and salt. Cut the butter into small pieces and blend into the flour mixture with a pastry blender, two knives, or with your fingertips. (The mixture should look like coarse crumbs.) In a small measuring cup whisk together the milk or cream and beaten egg. Add this mixture to the flour mixture. Stir just until combined. Do not over mix.

  • Transfer to a lightly floured surface and knead the dough gently four or five times and then pat into a 1,5cm of thickness. Then, using a 6 cm round cookie cutter, cut the dough into rounds. Place the rounds on the prepared cookie sheet, spacing a few centimetres apart. Brush the tops of the scones with a little cream.(This helps to brown the tops of the scones during baking.)

  • *Bake for about 15 -18 minutes or until nicely browned and a toothpick inserted into the center of a scone comes out clean. Remove from oven and transfer to a wire rack to cool. *

Tips:

*- We forgot brushing the scones with milk before baking. The result was wonderful anyway, so in case you forget it too, don’t panic! *

- You can add to the dough chocolate chips, nuts, raisins… We used dried cranberries.

*- You can serve them with butter and jam, marmalade, whipped cream, lemon curd or anything you like. *


Comments

Marivi (2013-01-26 00:39:22):

They look fantastic, and with the filling I’m sure they were even better.

Cristina (2013-01-26 00:55:54):

I really like your version, with cranberries they must be really good ;) and judging by the photos they look delicious!

A kiss!

PIlarHG (2013-01-26 00:59:03):

The same thing happened to me! I ended up making the recipe today too! Lucky it’s a quick one! They turned out great! ;)

Apfelstrudelkuchen (2013-01-26 01:55:06):

Hi!!!

Yeah, it’s true that nothing happens if you don’t brush them, because those scones look absolutely delicious.

A little kiss, Sandra von Cake

Palstelera (2013-01-26 12:48:42):

The truth is they were really tasty, and since I used the leftover cream to whip it up with a bit of sugar, even better. :-)

Palstelera (2013-01-26 12:49:39):

So glad you like them. The cranberries were a last-minute decision and they worked out really well.

Palstelera (2013-01-26 12:50:13):

Yes! Thank goodness they were quick :-)

Palstelera (2013-01-26 12:51:02):

Although now I’ll have to make them again to make them thicker and brushed with milk to see how they turn out :-)

Gri (2013-01-28 11:20:08):

I love your scones… they look fantastic!

A hug Gri http://eltallerdelosviernes.blogspot.com.es/2013/01/hoy-toca-receta-del-cwk.html

mara (2013-01-28 16:49:19):

They turned out so well and look so good with cranberries. I made mine plain because my daughters don’t like them. Here’s my version http://masdulcequesaladopuntocom.blogspot.com.es/2013/01/scones.html

zordor (2013-01-30 05:45:23):

This had a rhyme to it, but honestly I can’t remember what it was right now… :P

guillus (2013-02-27 20:27:45):

Scones! Do we also have to explain how to eat them? :P

guillus (2013-02-27 20:28:47):

Scones! Do we also have to explain how to eat them? :P And with clotted cream they’re even better…

January 25, 2013 · 5 min · Palstelera

Speculoos Cookies

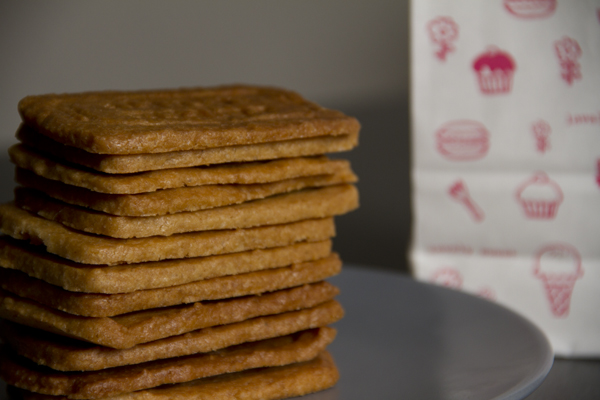
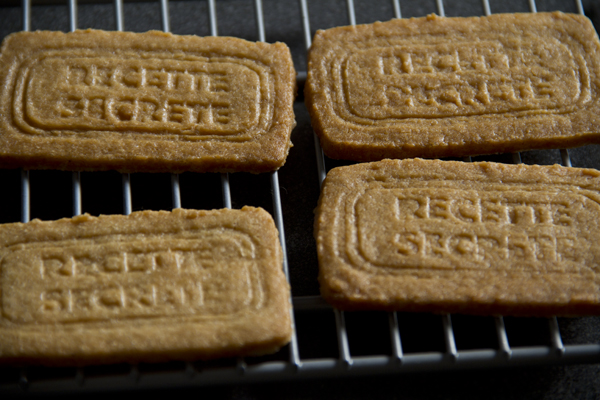
These cookies are typical of Belgium, France, and the Netherlands, and they’re known for their intense aroma and flavor packed with spices. That smell tends to take over Christmas markets, since traditionally it was Saint Nicholas who handed them out to the kids over there. Nowadays in Spain you can find them under the name “galletas caramelizadas” by the Lotus brand, but in France and Belgium, at least, you can find them in all sorts of shapes and from a ton of different brands. For example, if you ever get the chance, don’t miss out on trying speculoos spread (pâte à tartiner) or speculoos ice cream.

Pics and Cakes

What do we need?

  • 250 g (2 cups) flour

  • 170 g (3/4 cup) brown sugar

  • 150 g (2/3 cup) butter

  • 1 teaspoon baking soda

  • 1 egg, lightly beaten

  • 1 pinch of salt

  • 2 teaspoons of spice mix*

How do we make it?

  • In a bowl, add the flour, baking soda, salt, and spices. Stir a bit.

  • In another bowl, the room-temperature butter, the sugar, and the egg. Add all of this to the flour mix and combine well until you get a smooth, even dough. Pop it in the fridge, covered with plastic wrap, for at least two hours or overnight.

  • Preheat the oven to 170°C (340°F).

  • Once you take it out of the fridge, roll the dough between two plastic sheets so it doesn’t stick, to about half a centimeter (1/5 inch) thick. Cut it out with whatever cookie cutters you like, or if you don’t have any, just make rectangles with a knife.

  • Bake for about 15 minutes.

  • The pre-made spice mix isn’t easy to find, so you can make your own with these proportions: 2 tablespoons ground cinnamon, 5 grated cloves, 1 small tablespoon grated nutmeg, 1 teaspoon ground pepper, 1 small tablespoon ground ginger, and 3 grated cardamom seeds.

Pics and Cakes

Tips:

  • Butter cookies are best baked when the dough is cold. Otherwise, they’ll spread too much in the oven and lose whatever shape you gave them. What you can do is put the rolled-out dough in the fridge, cut it without handling it too much, and straight into the oven.

  • If you go looking for speculoos cookie recipes, you’ll find tons, and they all vary in some way. In fact, Belgian and French recipes use kinds of sugar we don’t have here (vergeoise and cassonade), and we usually swap them out for brown sugar. My advice is to try out your recipe and tweak it to your taste.

  • Traditional cookies were made using wooden molds, which is why they have stamped designs on them. I used some cookie stamps I bought in France, but you have to be careful because the dough is a bit sticky.

Pics and Cakes

Pics and Cakes


Comments

La Enana (2012-12-19 11:20:58):

Wow!! So easy to make!!!! :) I love them!!!

Esther (2012-12-29 14:21:45):

The dough is already in the fridge! In a few hours we’ll be tasting your recipe… I can already tell you the dough is super yummy!!!!

Palstelera (2012-12-30 21:09:47):

How did they turn out?

Esther (2012-12-31 17:23:31):

Really good… they didn’t last long, honestly! The oven I put them in runs hot, and at 170 they got a bit scorched, so afterwards I dropped it down to 150. As for the spice mix, total success! HAPPY 2013, Picsandcakes!!!

Palstelera (2013-01-05 00:17:16):

So glad to hear it!

December 19, 2012 · 3 min · Palstelera

Petal Cake

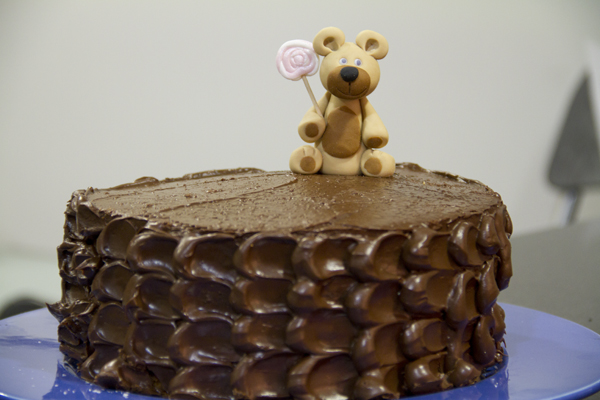
We’ve had this recipe pending for a few days now, but since in the meantime we published our Whole Kitchen challenges, it had to be pushed back to this week. And well, what better week for a birthday cake… :-D I made the recipe following exactly the one @SandeeA did at La Receta de la Felicidad. So all credit for the explanation this time goes to her. My personal touch was just the little sugar bear.

Pics and Cakes

What do we need?

For the sponge cake (to make a tall cake, we’ll need to bake two sponges like this one, so double the quantities):

  • 250 g (about 1 cup + 2 tbsp) butter, room temperature

  • 250 g (1 ¼ cups) sugar

  • 4 eggs

  • 225 g (1 ¾ cups) all-purpose flour

  • 25 g (about 3 tbsp) cornstarch

  • half a packet of Royal-style baking powder (8 g, about 2 tsp)

For the chocolate buttercream:

  • 750 g (about 1 ⅔ lb) melting chocolate

  • 375 g (about 1 ⅔ cups) butter, room temperature

  • 100 g (about ¾ cup) powdered sugar

How do we make it?

  • Preheat the oven to 180 ºC (355 ºF).

  • Prepare a cake pan by greasing it with butter and dusting it lightly with flour.

  • In a large bowl, using a whisk or a spoon, mix the butter and sugar well until you get a smooth, creamy mixture.

  • Add the eggs one at a time, not adding the next one until the previous one is fully incorporated.

  • Add the flour, cornstarch, and baking powder and mix with a spatula or spoon until everything is well combined.

  • Pour the batter into the prepared pan, spreading it evenly.

  • Bake for 25-30 minutes at 180 ºC (355 ºF).

  • Take it out of the oven and wait a few minutes before unmolding.

  • Repeat these steps to make a second sponge cake just like the first one. (If you have two identical pans, you can make all the batter at once and divide it between both pans.)

  • Slice each sponge into two layers, trying to make them as even as possible.

  • Next, we start preparing the chocolate buttercream. First, we’ll melt the chocolate.

  • Chop it up and place it in a microwave-safe bowl. Heat it in 30-second intervals, stirring each time, until the chocolate is fully liquid. Let it cool for a few minutes.

  • Meanwhile, in another large bowl, beat the butter and sugar at top speed with a whisk until you get a fluffy, pale, smooth mixture (about 5 minutes).

  • Check that the chocolate you melted earlier has cooled down, and add it to the butter mixture. Beat a bit more until fully combined, and then move on to filling and decorating the cake.

  • Place the first sponge layer — the least perfect of the ones you made — on the plate you’ll be serving on, covered with some strips of parchment paper or printer paper, so it doesn’t get stained and you can pull them out easily afterwards.

  • Place a couple of spoonfuls of filling on this sponge layer and spread it evenly — it’s fine if some spills over the sides.

  • Place another sponge layer on top, pressing down gently and making sure it’s well aligned with the layer below. Add another two spoonfuls of filling and proceed as before.

  • Continue the same way with the rest of the layers. On top, place the most perfect sponge, with the bottom side facing up (it’s always the prettiest). If you don’t want the sponge layers to shift, since we’re about to cover and decorate the cake, you can stick a skewer down through the center of the cake, which you’ll remove once you’re done decorating.

  • Cover the cake with a first, very thin layer of chocolate buttercream — this is just to set things in place and hide any imperfections in the sponge layers.

  • Leave the chocolate cake in the fridge for 15 minutes so this layer firms up.

  • Using a piping bag fitted with a medium-sized round tip, pipe dots of buttercream onto the cake, forming a vertical line (4 dots, in my case).

  • Place a spatula on top of each dot and slide it to the right in a single motion (or to the left if you’re left-handed). Wipe the spatula clean and continue doing the same with the rest of the dots, remembering to always wipe the spatula between strokes.

  • Each time you finish a row of dots, grab the piping bag, create a new line of dots, and repeat the pattern across the whole cake. The spot where you finish the last row of petals will have some imperfections, and that should be the “back” of your cake.

  • If you’re not going to eat it the same day, store the chocolate cake preferably outside the fridge so the chocolate buttercream stays creamy, since the fridge tends to harden it.

Tips:

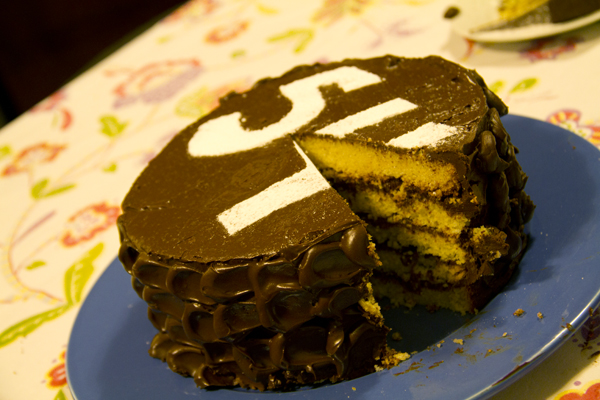
  • To decorate it, you can make a stencil out of a sheet of paper, cutting out the number of years the birthday person is turning, and dust it with powdered sugar.

  • I made this sugar bear out of modeling paste to crown the cake. I’ll do a tutorial soon so you can see how easy it is.

Pics and Cakes

[English version] PETALS CAKE* *Ingredients:

  • *250 g butter, room temperature *

  • *250 g sugar *

  • 4 eggs

  • *225 g all purpose flour *

  • *25 g corstarch *

  • *8 g baking powder *

For the chocolate buttercream:

  • 750 g dark chocolate, melted

  • *375 g butter, room temperature *

  • *100 g confectioners’ sugar *

  • Preheat oven to 180ºC

  • Prepare a cake pan (butter and flour the bottom and the sides of the pan).

  • In a large bowl, place butter and sugar, and mix well.

  • Add eggs one by one.

  • Add flour, cornstarch and baking powder, and beat until combined.

  • Pour batter into pan and bake for 25 minutes.

  • Leave the cake in its pan on a wire rack for 10 minutes and then turn out to cool.

  • Repeat the whole process to make another similar cake.

  • Now we are going to prepare the chocolate buttercream.

  • Using and electric mixer, cream butter and sugar, until light and fluffy (about 5 minutes). Add melted chocolate, that shall be cool, and mix well. Now the buttercream is ready to use.

  • Fill the cake layers with chocolate buttercream, and then frost it with a thin layer of buttercream.

  • Place the cake in the fridge for 15 minutes to set.

  • Place the remaining chocolate buttercream on a piping bag fitted with a medium sized round tip.

  • Create a row of dots (vertical), as shown on the pictures.

  • Using a spatula, spread every dot to the right, in one motion (or to the left if you are left-handed). Clean the spatula between every swipe.

  • Once you have spread one row of dots, add another row of dots and repeat the pattern until the whole cake is covered with “petals”.

  • If you are not going to eat the cake on the same day, please avoid keeping it in the fridge if possible, so that the chocolate buttercream remains creamy.

Tips:

  • You can create a template showing the number of the age that the special person is turning and then sprinkle with confectioners’ sugar.

  • On the top, I placed this sugar bear made by myself. Soon I will post a tutorial about how to make it with gum paste.


November 29, 2012 · 6 min · Palstelera

Baklava

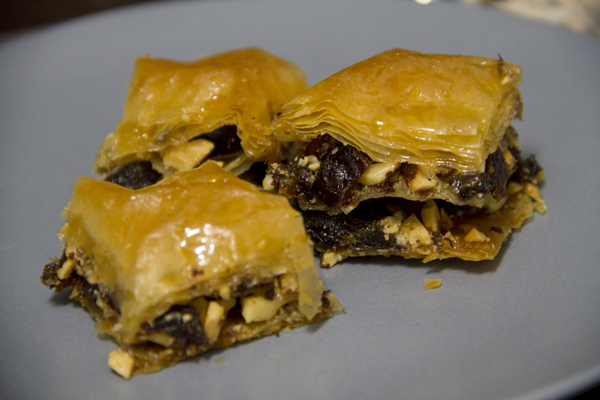
Whole kitchen, for their Sweet Proposal for the month of November, invites us to prepare a Persian classic: Baklava. Apparently this little pastry has its origins in ancient Mesopotamia, although several cultures and civilizations are still fighting over who actually invented it. Persian, Greek or Arab — it’s delicious. This time we’ve made two versions: one with dates and toasted almonds, and another with hazelnuts and chocolate. Filo pastry is a wonder of the kitchen that you really have to try, both for sweet and savory.

Pics and Cakes

What do we need?

  • 1 package of filo pastry

  • 100 g (3.5 oz) butter

For the syrup:

  • 210 ml (scant 1 cup) water

  • 180 g (about 3/4 cup) sugar

  • 30 g (1 tbsp) honey

  • Juice of half a lemon

  • A cinnamon stick

For the filling:

  • 18 dates

  • 50 g (1.75 oz) toasted almonds

  • 50 g (1.75 oz) chocolate (drops or chips)

  • 50 g (1.75 oz) hazelnuts

Pics and Cakes

How do we make it?

  • We start by making the syrup. Put all the ingredients in a saucepan and, over high heat, bring to a boil. Lower the heat a bit and let it simmer for about 15 minutes so it thickens.

  • Preheat the oven to 180°C (355°F).

  • Prepare the filling: pit the dates and cut them into small pieces. Chop the almonds and hazelnuts as well. In one bowl mix the dates with the almonds, and in another mix the hazelnuts with the chocolate.

  • Melt the butter for a few seconds in the microwave.

  • Grease the baking dish you’re going to use with butter and cut all the filo sheets to the size of your tray.

  • Lay down a sheet of filo and, with a brush or your hands, smear it with butter on one side. Add another layer and brush it with butter again. Keep going until you have 8 layers.

  • Spread half of the date-and-almond filling over the filo.

  • Add more filo on top — this time, 4 layers (always brushed with butter so they stay separate after baking).

  • Add the rest of the date-and-almond filling.

  • Make another batch of 8 filo layers (always buttered).

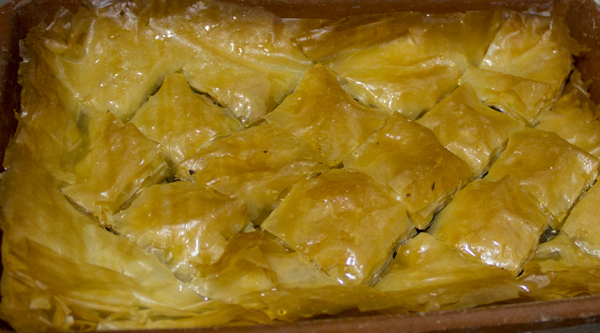
  • With a sharp knife, cut the baklava into squares.

  • Bake for 45 minutes total: the first 20 minutes uncovered, and the next 25 minutes with a sheet of aluminum foil over the baklava so it doesn’t brown too much.

  • As soon as you take it out of the oven, let it rest for 5 minutes, then pour the cold syrup over the hot baklava (this way it’ll stay crispy).

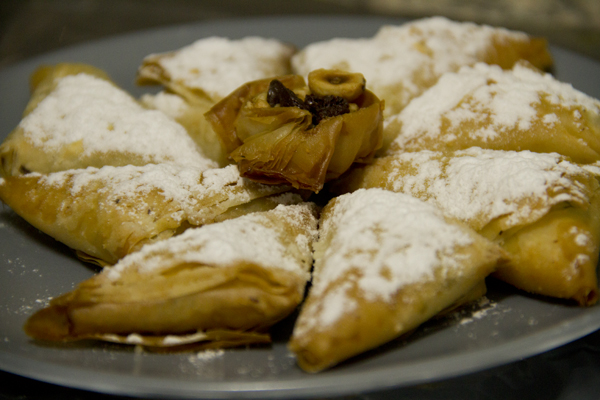
  • For the hazelnut-and-chocolate version you can repeat the same process in another baking dish, or make triangles. To do that, cut the filo into strips of about 5 cm by 20 cm (2 in by 8 in). Brush each layer with butter and stack 4 strips together.

  • Place a teaspoon of filling at one end and fold a corner over to form a triangle with the filling tucked inside. Take the other end and keep folding the triangle over itself. (Since it’s a bit tricky to explain, I found [this video](

{{}}

) where you can easily see how to do it.)

  • Bake them at 180°C (355°F) too, but they’ll be ready in 10–15 minutes.

  • Once out of the oven, you can dust them with powdered sugar.

Tips:

  • Filo pastry dries out very quickly, so whenever you’re not using it, keep it well wrapped in a plastic bag.

  • It’s important to add butter between each layer, but you don’t need to “drown” it either.

  • It’s quite a rich, filling sweet, so it’s better to cut the squares small.

Pics and Cakes

[English version] BAKLAVA* *Ingredients:

  • 1 package of filo pastry

  • 100 g butter

For the syrup:

  • 210 ml water

  • 180 g sugar

  • 30 g honey

  • Juice of 1/2 lemon

  • Cinnammon stick

For the filling:

  • 18 dates

  • 50 g almonds

  • 50 g chocolate (drops or chips)

  • 50 g hazelnuts

  • Combine the syrup ingredients in a medium saucepan and bring to boil. Let the syrup simmer on low heat for about 15 minutes

  • Preheat oven at 180ºC.

  • *Now prepare the filling: pit the dates and chop into small pieces. Chop almonds and hazelnuts. Mix almonds and dates into a bowl and chocolate and hazelnut in other. *

  • Melt the butter in the microwave for a few seconds.

  • Butter the baking pan and cut the filo pastry sheets into the size of the baking pan.

  • *Place a sheet of filo pastry and butter it. Place another sheet over it and butter again. Do it again until having 8 layers. *

  • *Scatter half of the dates-almonds filling. *

  • *Place more filo pastry. This time, only 4 layers but always buttered. It will make to have separate layers once the baklava is baked. *

  • *Add the other half of the filling. *

  • *Create another pack of 8 layers of filo pastry (always buttered). *

  • *With sharp knife cut baklava into small squares. *

  • *Bake for 45 minutes. The first 20 minutes uncovered and then you can cover with aluminium foil to prevent it from browning too much. *

  • When you take it out from oven, let stand for 5 minutes and then pour the cold syrup.

  • For the hazelnut-chocolate version, you can follow the same steps or make small triangles of filo pastry. For the triangles, cut the pastry into stripes (4 x 20 cm aprox.). Butter each stripe and put 4 of them together.

  • *Add a tsp of the filling in one of the sides and proceed to fold into triangle shape. You can see how to do it easily in [this video](

{{}}

).*

  • Bake at 180ºC only for 10-15 minutes.

  • You can powder some confectioners’ sugar when you take them out from oven.

Tips:

*- Filo pastry dries very fast, so when you are not using it, keep it in a plastic bag. *

- It’s important to butter every single sheet (layer) of filo pastry but don’t “over butter” (otherwise, it will be too greasy).

- It’s a filling sweet, so make small squares when cutting the baklava.


Comments

Apfelstrudelkuchen (2012-11-26 00:03:04):

Hi!!

Your baklava-as-triangles version turned out really original!! And with dates it must be amazing.

Hugs,

Mara (2012-11-26 17:34:08):

So good with the chocolate touch. I love the idea of making individual portions, because when you cut it the filo sheets tend to come apart a bit. Since everyone at home liked it so much I’ll make it again, and I’m going to do it your way, in the individual triangle version. This is my version: http://masdulcequesaladopuntocom.blogspot.com.es/

tía pi (2012-11-27 17:48:26):

This Friday I have guests over for dinner — it’s going to be a light meal, so the baklava is going to be a great dessert. I’ll let you know how it goes.

silvia (2012-11-29 22:09:14):

The little chocolate triangles were really tasty… and that’s saying something, because I’m not really one for sweets…

Palstelera (2012-12-07 19:16:00):

Mara, I’m glad you like the little-triangles version… :-)

November 25, 2012 · 6 min · Palstelera