Pumpkin, Oat and Chocolate Muffins

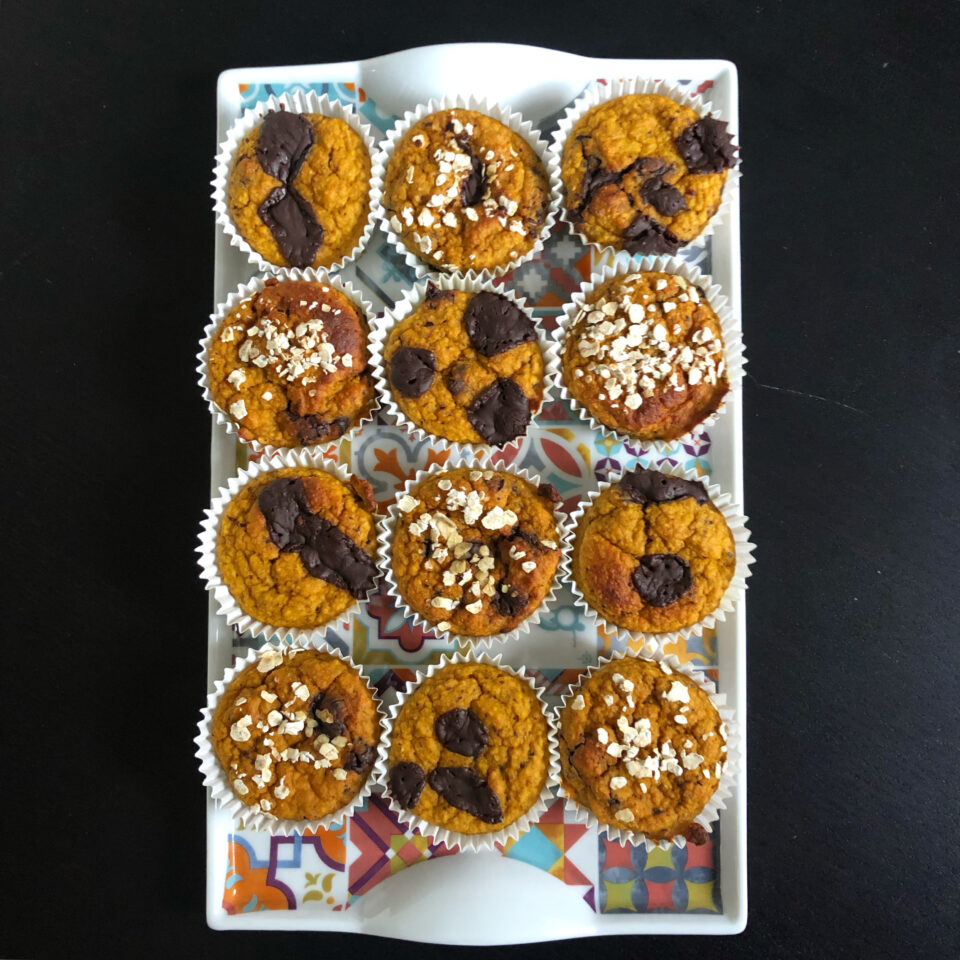
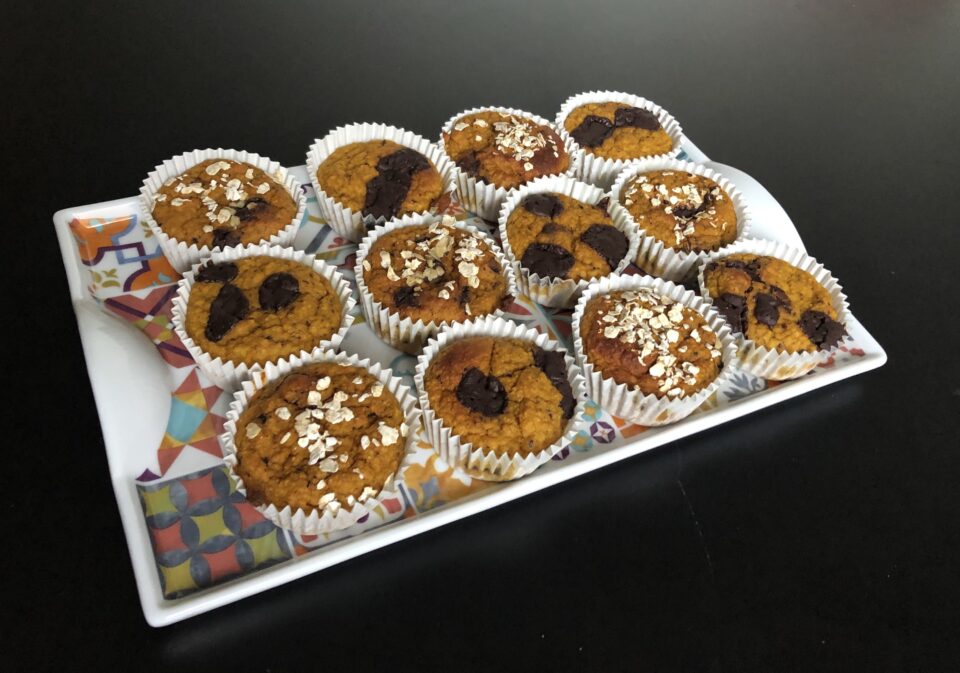
This recipe is another one of those healthy ones, since it skips refined sugars, refined flours and fats. The result is a fairly decent and tasty treat but, although it's fluffy, the texture is a little "chewy" for my taste and a bit moist, as tends to happen with recipes that include other vegetables (zucchini, carrot, etc.). All in all, for me this is a treat that works well for eating with less guilt and in a healthier way, but they're not the muffins I'd make for a special occasion or when I really want to treat myself or someone else.
Pics and Cakes

Ingredients

  • 150 g (1.5 cups) ground oats
  • 250 g (1 cup) pumpkin purée
  • 150 g (2/3 cup) plain yogurt
  • 1 tablespoon honey
  • 6 dates (pre-soaked)
  • 2 eggs
  • 1.5 teaspoons baking powder
  • 1 teaspoon cinnamon
  • 1 pinch of salt
  • 2 tablespoons milk
  • 100 g (3.5 oz) 70% dark chocolate, chopped into small pieces

Method

  1. Peel and chop the pumpkin into chunks and boil until soft. Drain and mash with a fork to make a purée.
  2. Preheat the oven to 180°C (355°F).
  3. Blitz the soaked dates in a food processor to make a paste. Add the pumpkin purée and blend again until you get a smooth mixture.
  4. In a bowl, combine the wet ingredients (eggs, honey, milk and the pumpkin-date purée).
  5. Separately, mix the dry ingredients (oats, salt, baking powder) and add them to the wet mixture.
  6. Mix well and fold in the chocolate pieces.
  7. Divide between muffin liners and bake for 25 minutes.
Pics and Cakes

PiC Tips

  • You can sprinkle some oat flakes or extra chocolate on top before baking.
  • If you use silicone or metal molds, don't forget to grease them first. With paper liners they stick a bit (so they won't be the prettiest muffins you'll ever make).
  • The best dates for sweetening are Medjool dates, which are meatier, but if you don't have any you can use regular ones.
October 30, 2020 · 2 min · Palstelera

Cinnamon Pull-Apart Bread

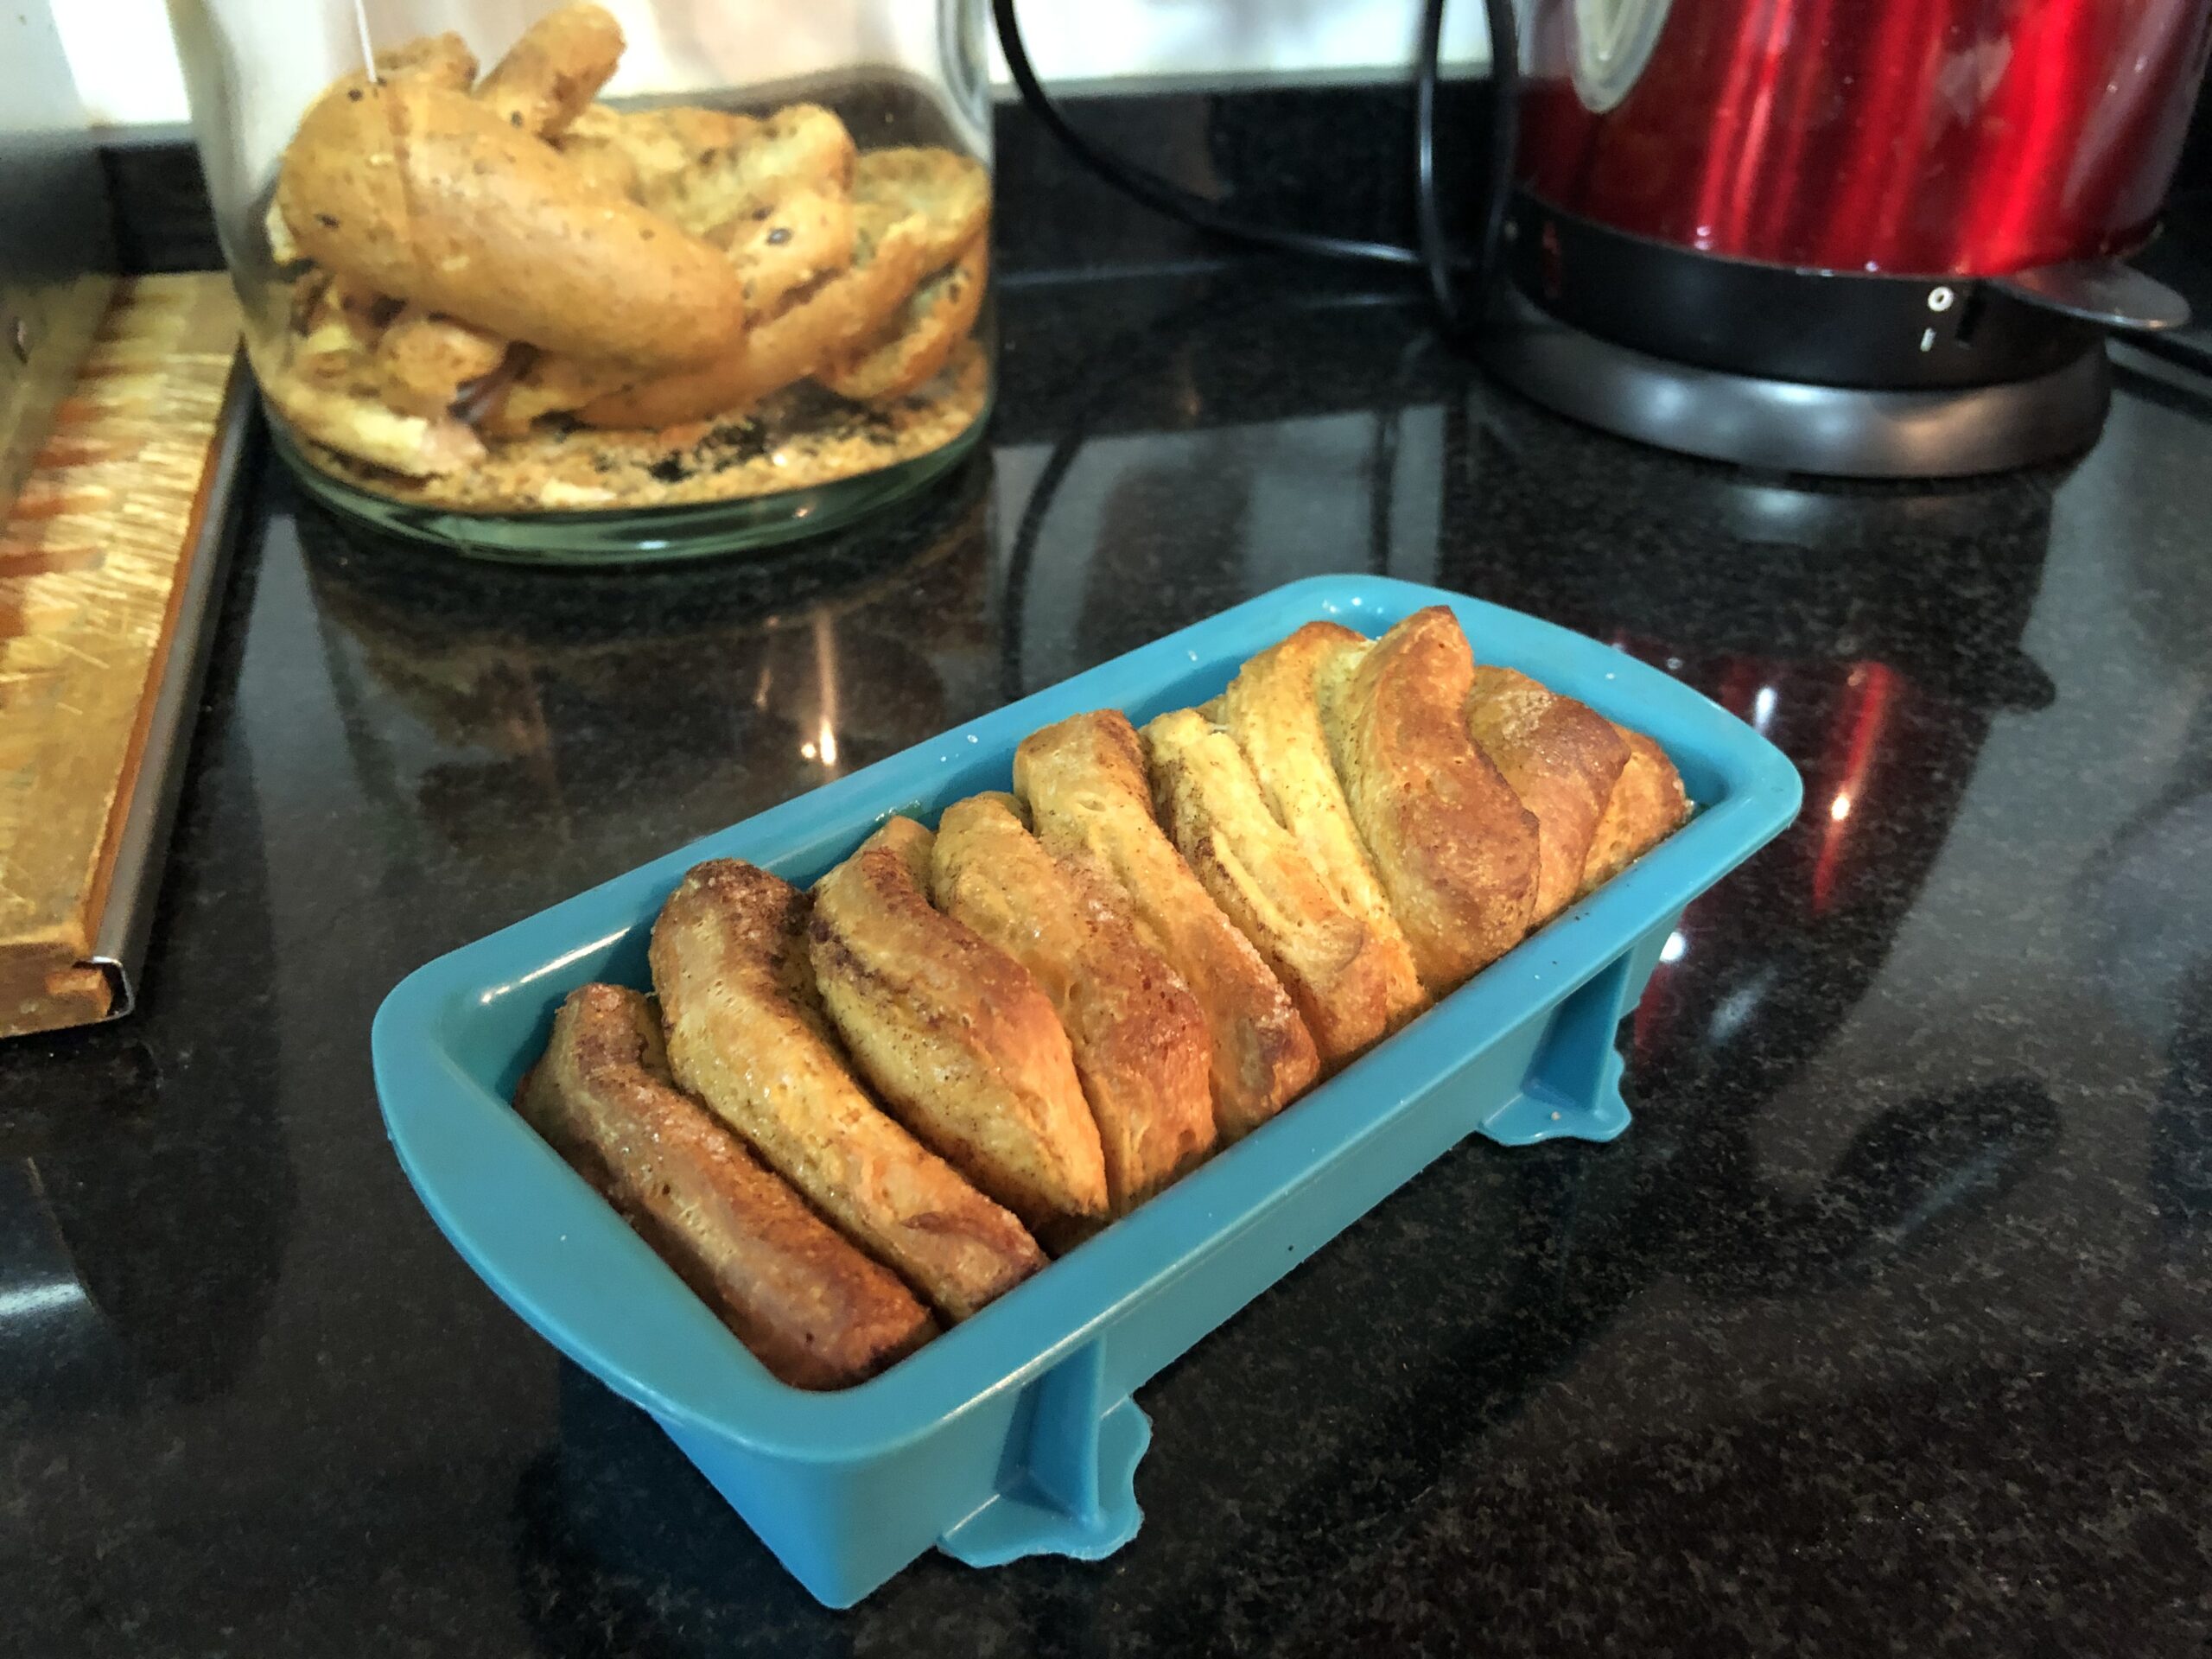
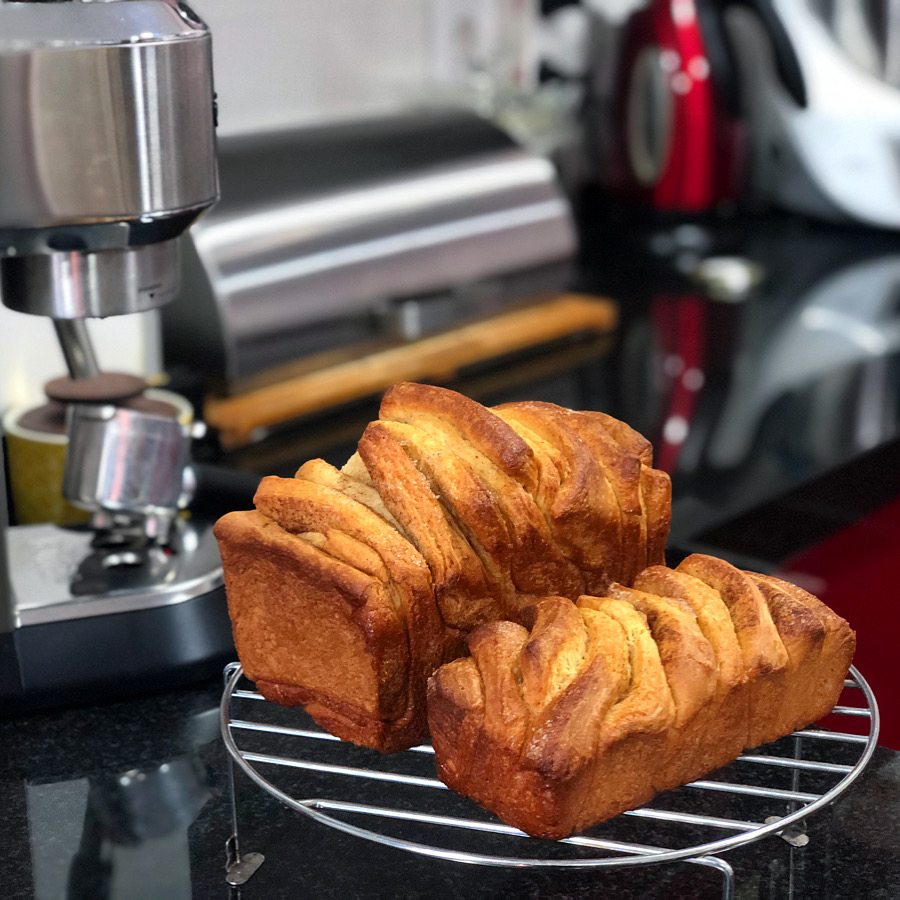
One day I woke up, saw this gorgeous brioche-style sweet bread on Claudia&Julia's Instagram, and knew I had to make it. In my case, I made two loaves, a medium one and a small one to give away. I really liked the texture, though I think I should have been more patient with the first proof of the dough so it would rise more and be fluffier. My taste-testers loved it; I'll have to make it again to truly enjoy it once my brain decides to start picking up the aroma and flavor of cinnamon again, after fully recovering from the aftereffects of damn COVID-19.

Pics and Cakes

Ingredients

  • 330 g (2.6 cups) bread flour
  • 4 g (1.25 tsp) active dry yeast
  • 125 ml (1/2 cup) milk
  • 2 eggs
  • 75 g (6 tbsp) sugar
  • 1/2 teaspoon salt
  • 60 g (4 tbsp) butter (at room temperature)
  • 1 teaspoon ground cinnamon

Method

  1. Mix the bread flour and dry yeast in a bowl. Make a well in the center and add the lightly beaten eggs, the warm milk, 30 g (2 tbsp) of the sugar (reserve the rest), and the salt.
  2. Whisk the wet ingredients with a fork while gradually incorporating the flour and yeast mixture. Stir until the dough gets too stiff, then turn it out onto a clean work surface and knead for 10 minutes. You want to end up with a smooth dough.
  3. Next, add the butter, cut into small cubes, and keep kneading until it's fully incorporated.
  4. Grease a deep, roomy bowl with a touch of oil and let the dough rest inside it, covered with a clean dry kitchen towel, until it doubles in size (it'll depend on room temperature, but easily two hours).
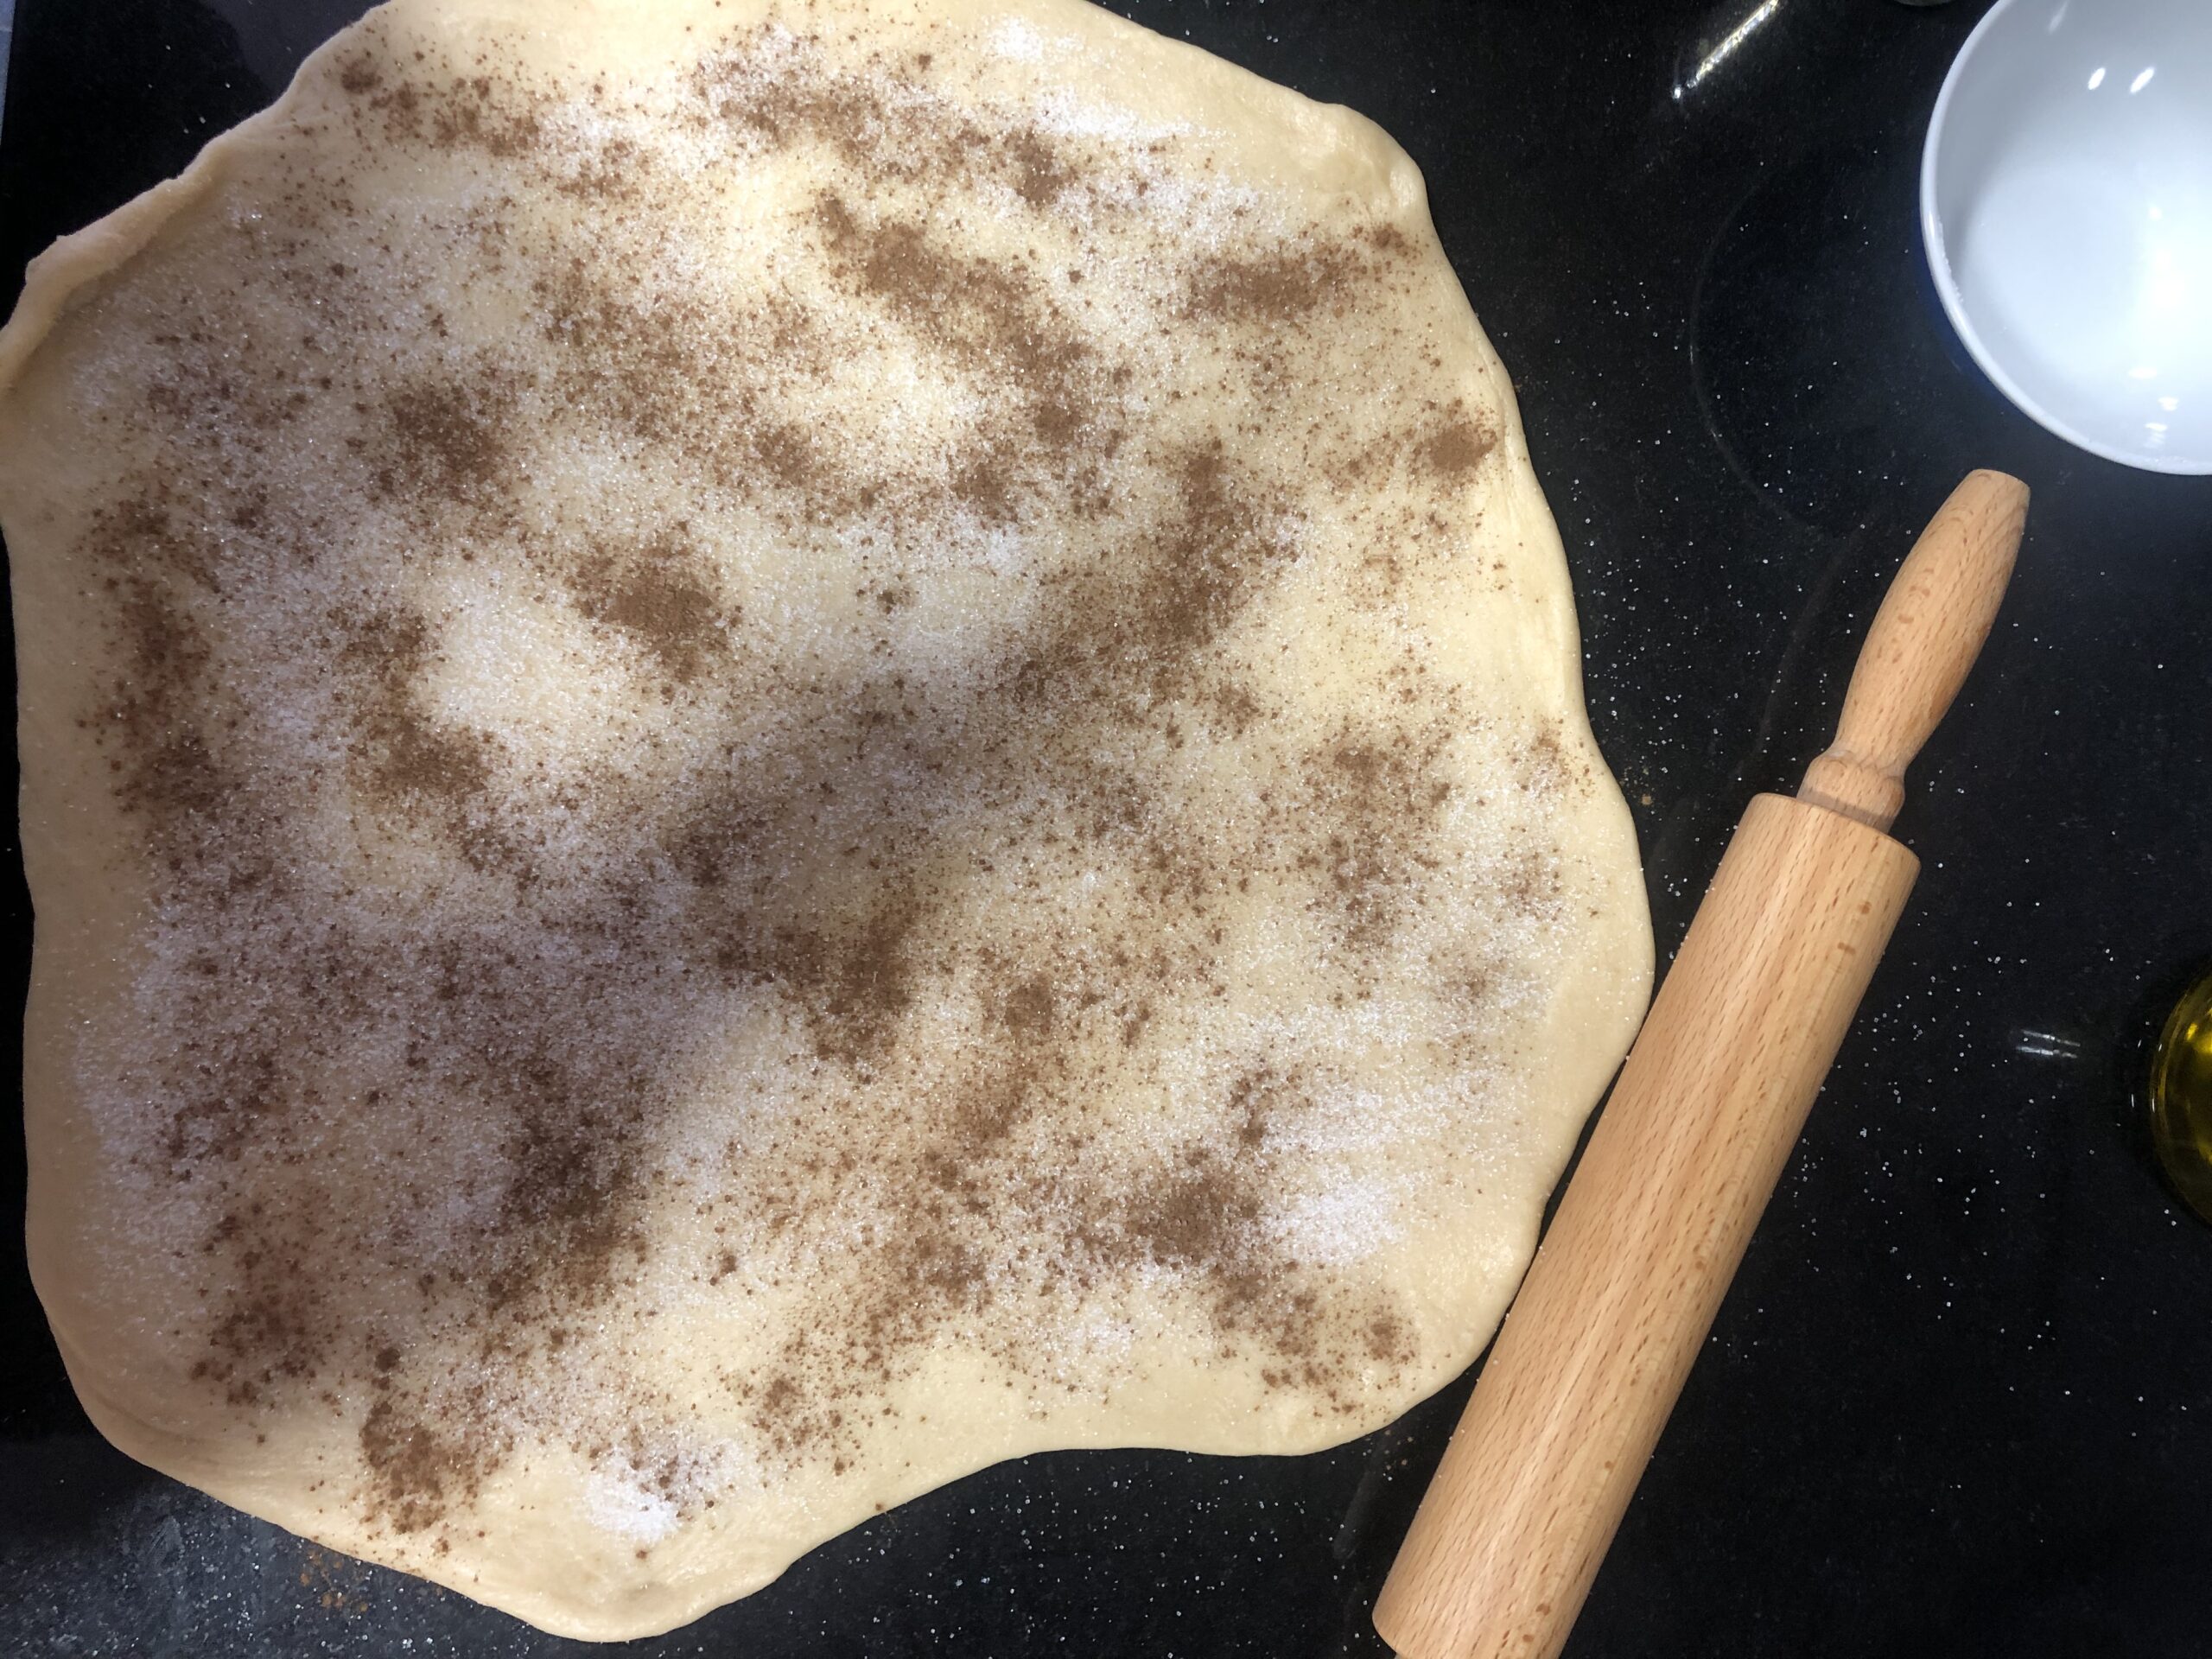
  5. Once the first rise is done, punch it down by pressing with your fingers a few times. Roll the dough out with a rolling pin to about one centimeter (about 3/8 inch) thick.
  6. Sprinkle with the rest of the sugar and the ground cinnamon and press down with your hands or the rolling pin so it sticks well.
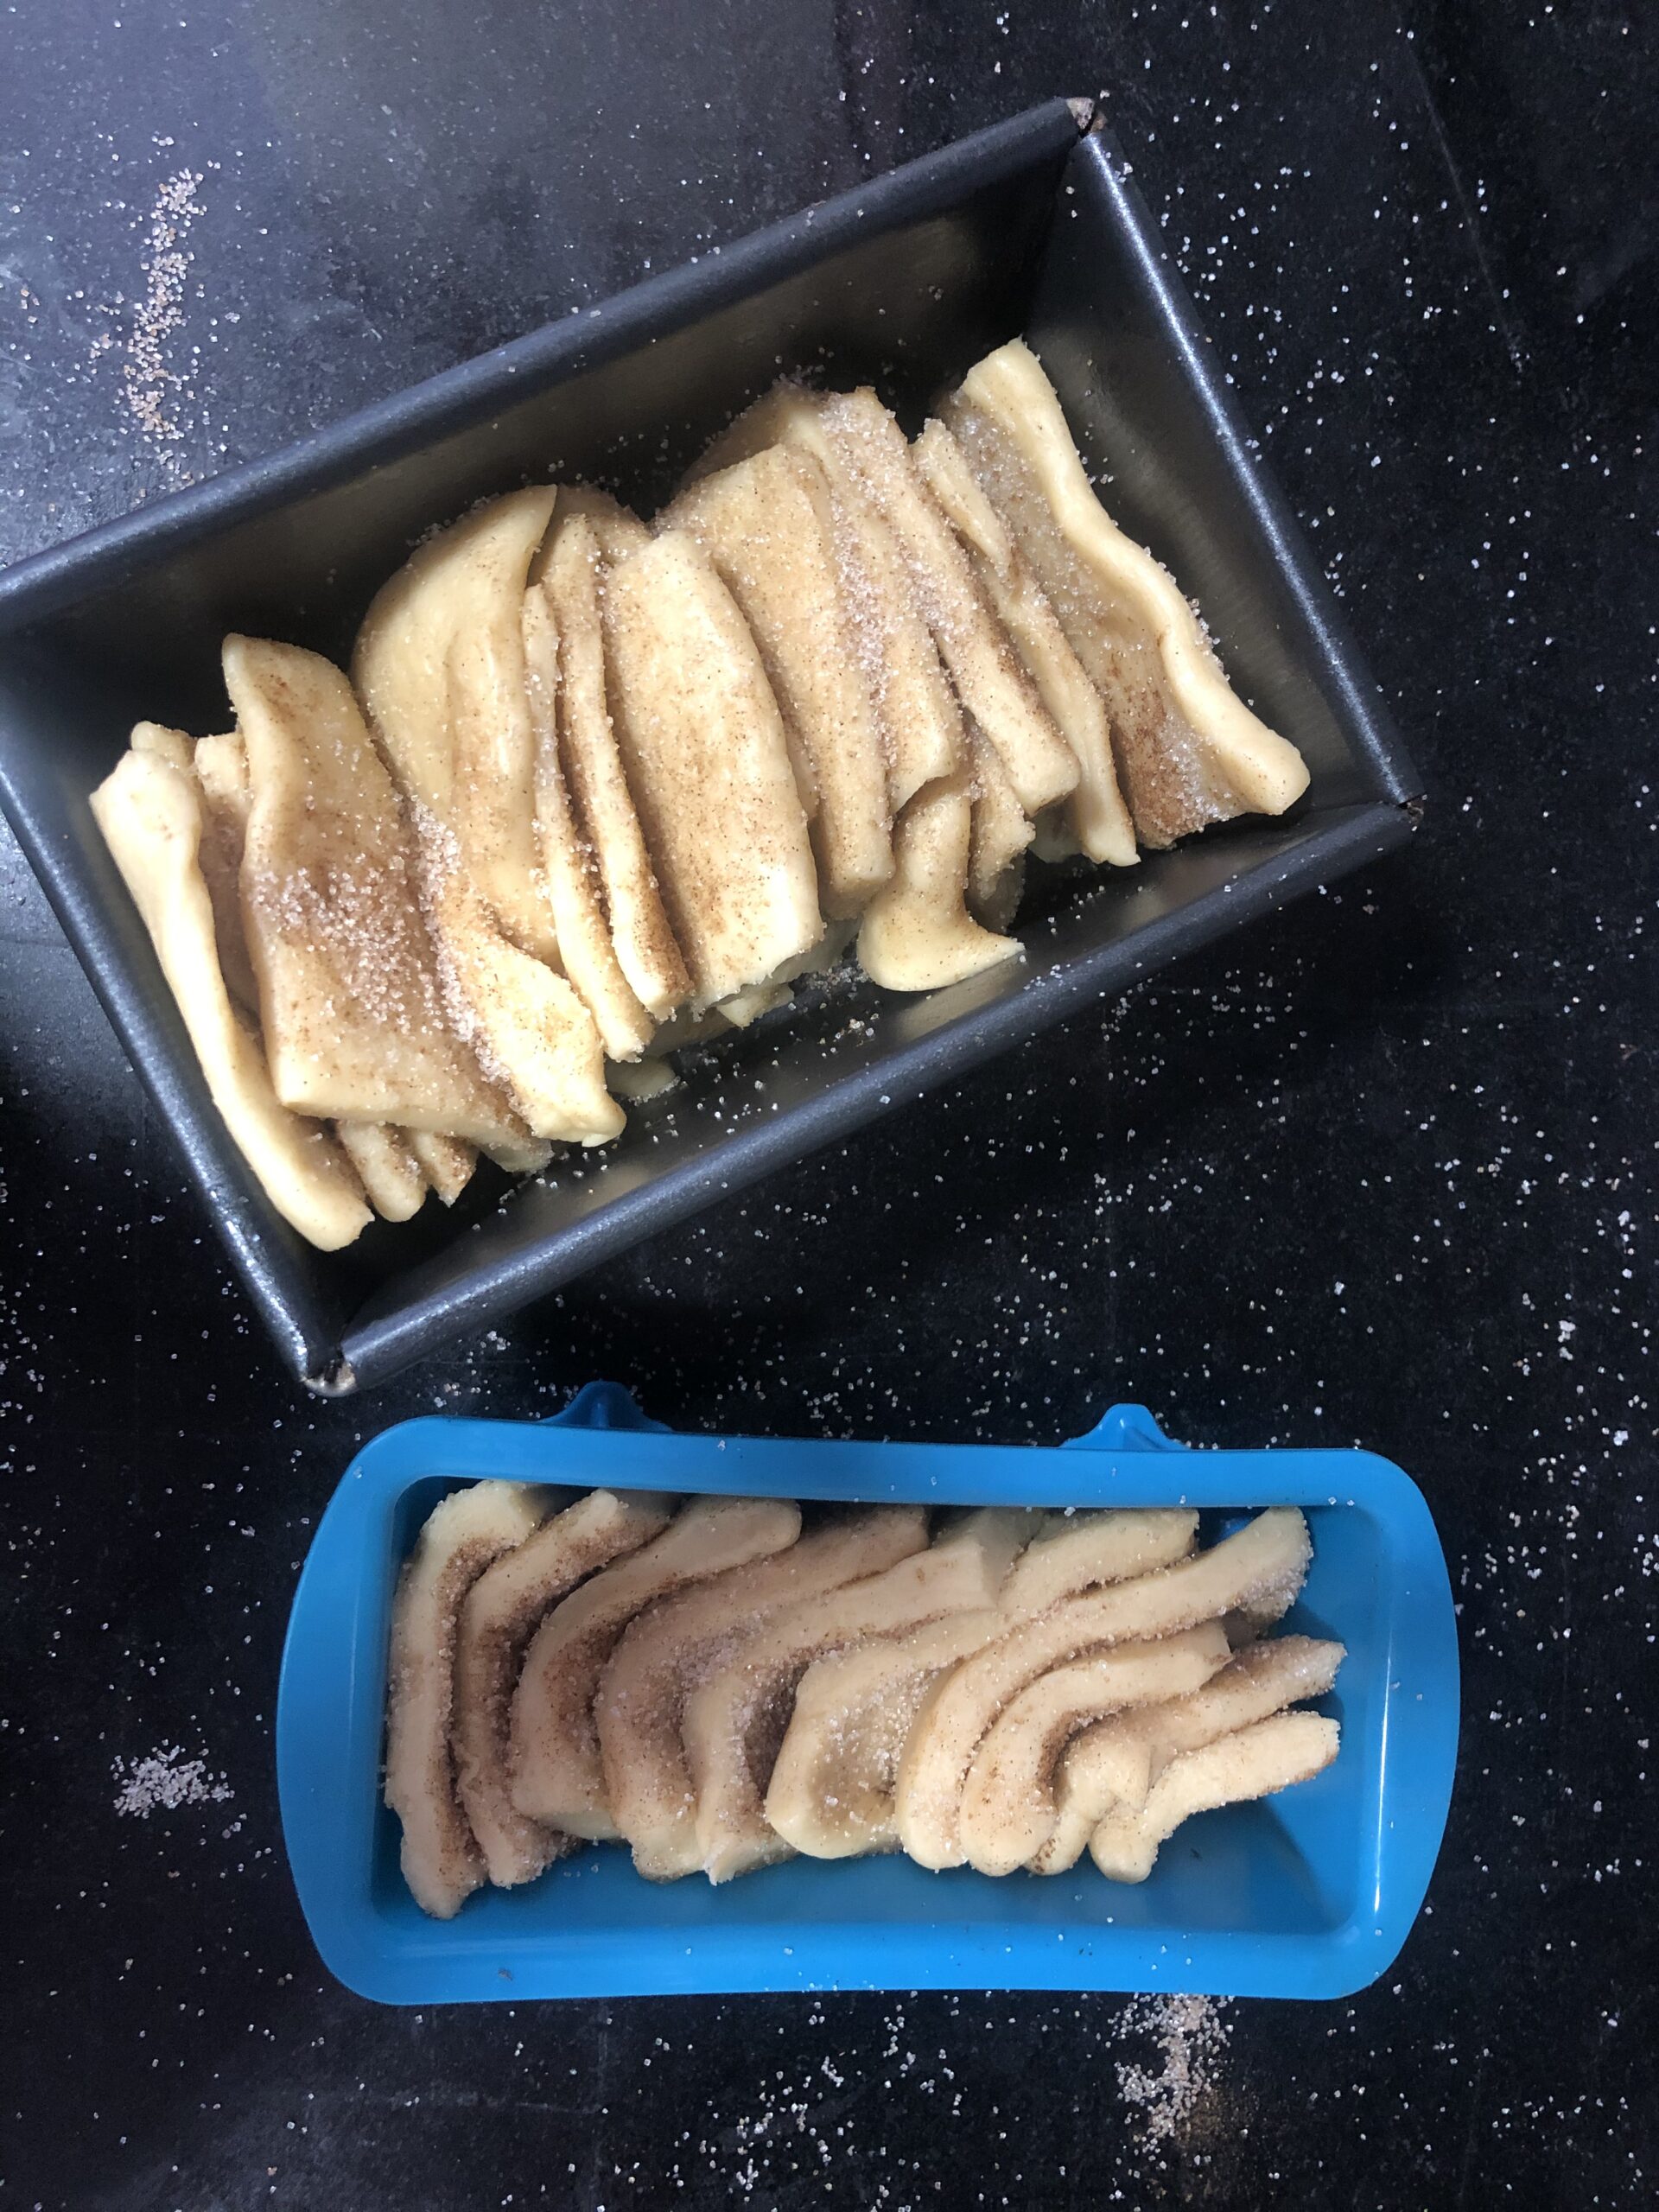
  7. Cut the dough into squares slightly narrower than the loaf pan you're going to bake it in. Don't worry if they're a bit uneven.
  8. Place the squares of dough vertically inside the previously greased loaf pan. Any sugar and cinnamon left on the counter from falling off the dough as you arranged it can be sprinkled over the top of the bread.
  9. Cover the pan with a clean dry kitchen towel and let it rise again for about 60 minutes, or until it nearly reaches the rim of the pan.
  10. Put the pan in the oven, preheated to 180°C (350°F) with top and bottom heat, and bake for 45-50 minutes. If you see it browning too much, cover with foil.
  11. Take it out of the oven and let it cool before unmolding and serving.
Pics and Cakes
Pics and Cakes
Pics and Cakes

PiC Tips

  • Be patient with the proofing times — they depend on room temperature, so in winter it'll take longer, but not waiting long enough can completely ruin the recipe.
  • If you don't like cinnamon, leave it out or swap it for something else. It won't be a cinnamon pull-apart bread anymore, but it'll be just as delicious.
October 30, 2020 · 3 min · Palstelera

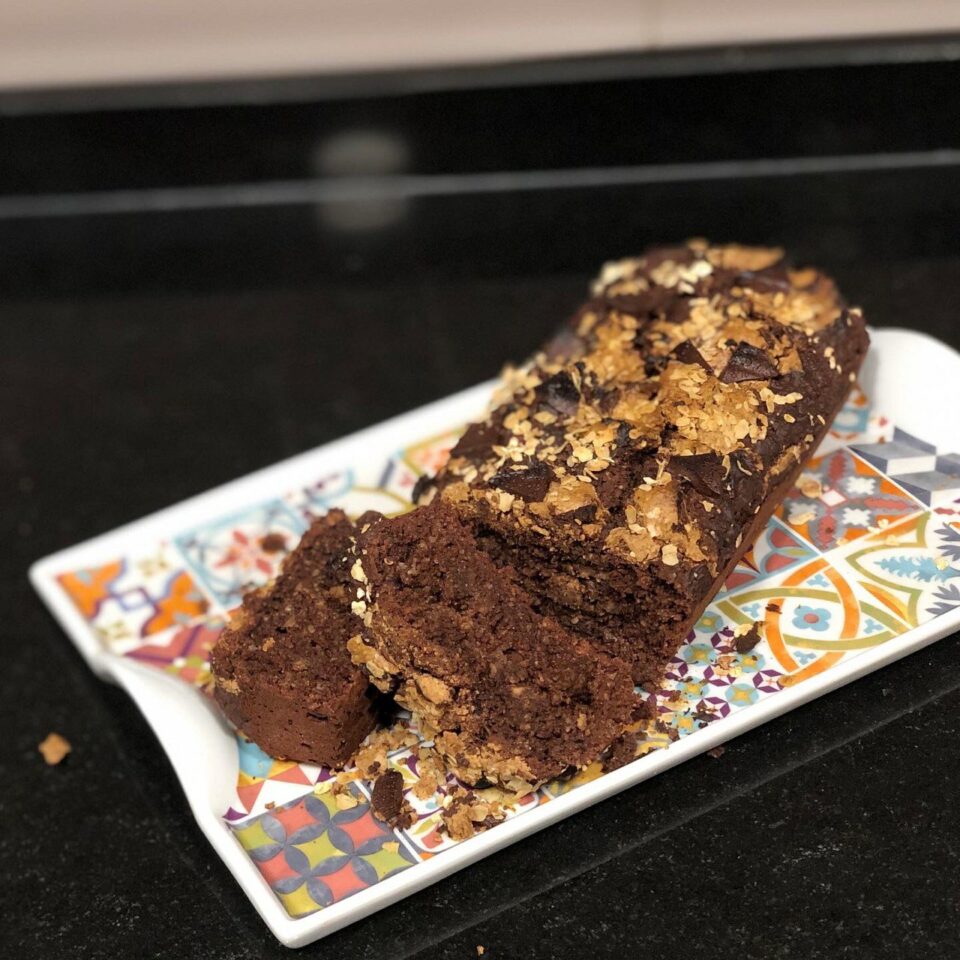
Banana, Cocoa and Peanut Butter Loaf

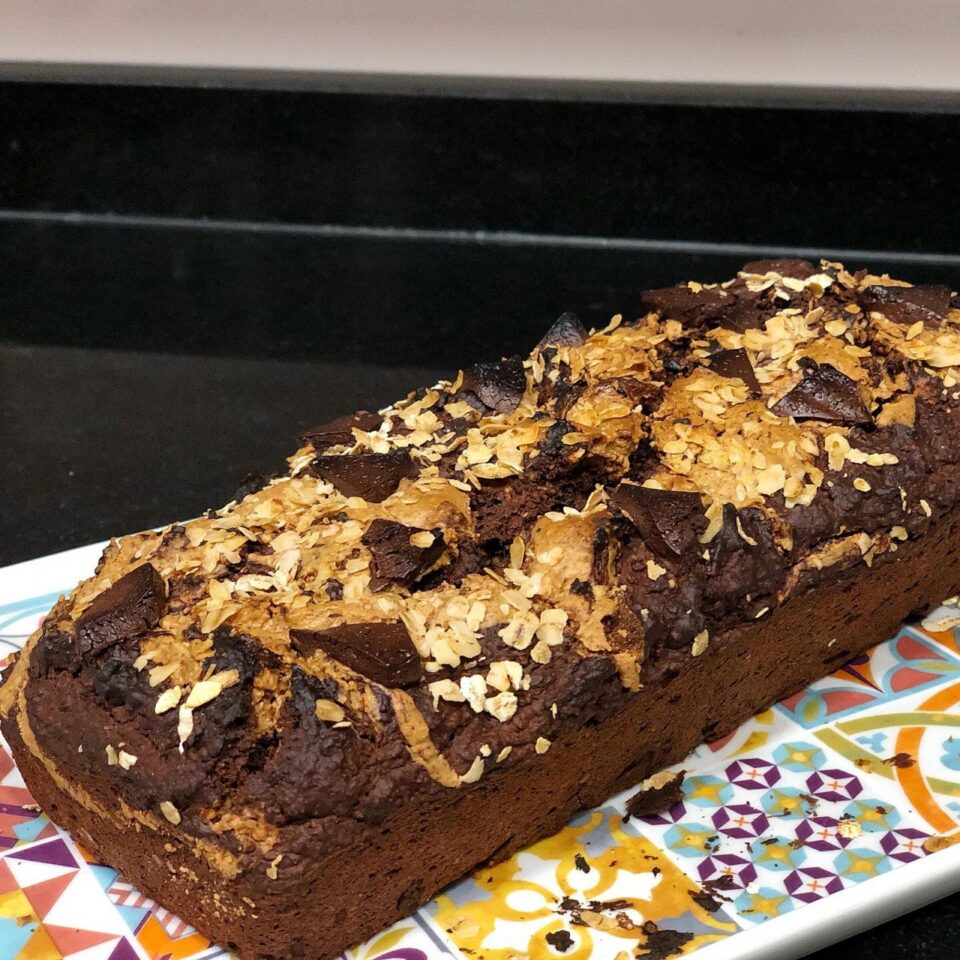
A healthy loaf cake with a moist texture and a strong peanut butter flavor. Definitely not for everyone, but I'm crazy about it. These flavors are addictive for me and I can't really hold back. The good news is that the ingredients are healthy and, even though we can't really call it diet food — especially because of the peanut butter — we know it's a pretty moderate treat.

I got the recipe from @petit_fit's Instagram profile, but I tweaked it a little. Here's my version. Hope you like it.

Pics and Cakes

Ingredients

  • 3 ripe bananas
  • 50 g (1.75 oz) honey
  • 40 g (1.4 oz) extra virgin olive oil
  • 50 ml (3.5 tbsp) milk
  • 1 egg
  • 4 tablespoons peanut butter
  • 175 g (6 oz / about 1.75 cups) ground oats or oat flour
  • 50 g (1.75 oz) pure unsweetened cocoa powder
  • 5 g (1 tsp) baking powder (Royal-type)
  • A pinch of salt
  • A couple of squares of dark chocolate and some oat flakes (for topping)

Method

  1. Preheat the oven to 180°C (355°F).
  2. Mash the bananas in a bowl with a fork and add the wet ingredients (honey, milk, oil and the lightly beaten egg).
  3. Stir until everything comes together.
  4. Add the dry ingredients (oats, cocoa, salt and baking powder) and mix well.
  5. Grab a loaf pan (plumcake-style) and grease it with a bit of oil.
  6. Pour half of the batter into the pan and drop two tablespoons of peanut butter on top. Then, using a knife, swirl the peanut butter into the batter to get a kind of marbled effect.
  7. Add the other half of the reserved batter and another two tablespoons of peanut butter. Repeat the marbling process.
  8. Finally, chop the chocolate into chunks and scatter them on top along with a few oat flakes.
  9. Bake for about 45-50 minutes and it's ready to enjoy (technically you should wait for it to cool… I never can).
Pics and Cakes

PiC Tips

  • Try to use peanut butter that's 100% peanuts, with no added sugar, salt or weird stuff, because it doesn't need any of that. It's pretty easy to find this kind these days at Mercadona, Ahorramás or sports/nutrition supplement shops.
  • Same goes for the cocoa. It's really easy to find pure 100% cocoa (I usually use Mercadona's store brand). Don't be fooled by advertising for "intense" cocoas because they tend to contain added sugars, sweeteners or even some kind of flour as a thickener.
  • If you don't have oat flour but do have oat flakes, you can blitz them in a food processor or Thermomix. You can choose how fine you want them. In my case, I used roughly ground oats.
  • As always, you can swap the honey for another sweetener of your choice, or for dates that have been soaked and blended into a paste. Also keep in mind that the riper the bananas, the more sweetness they'll add.
October 15, 2020 · 3 min · Palstelera

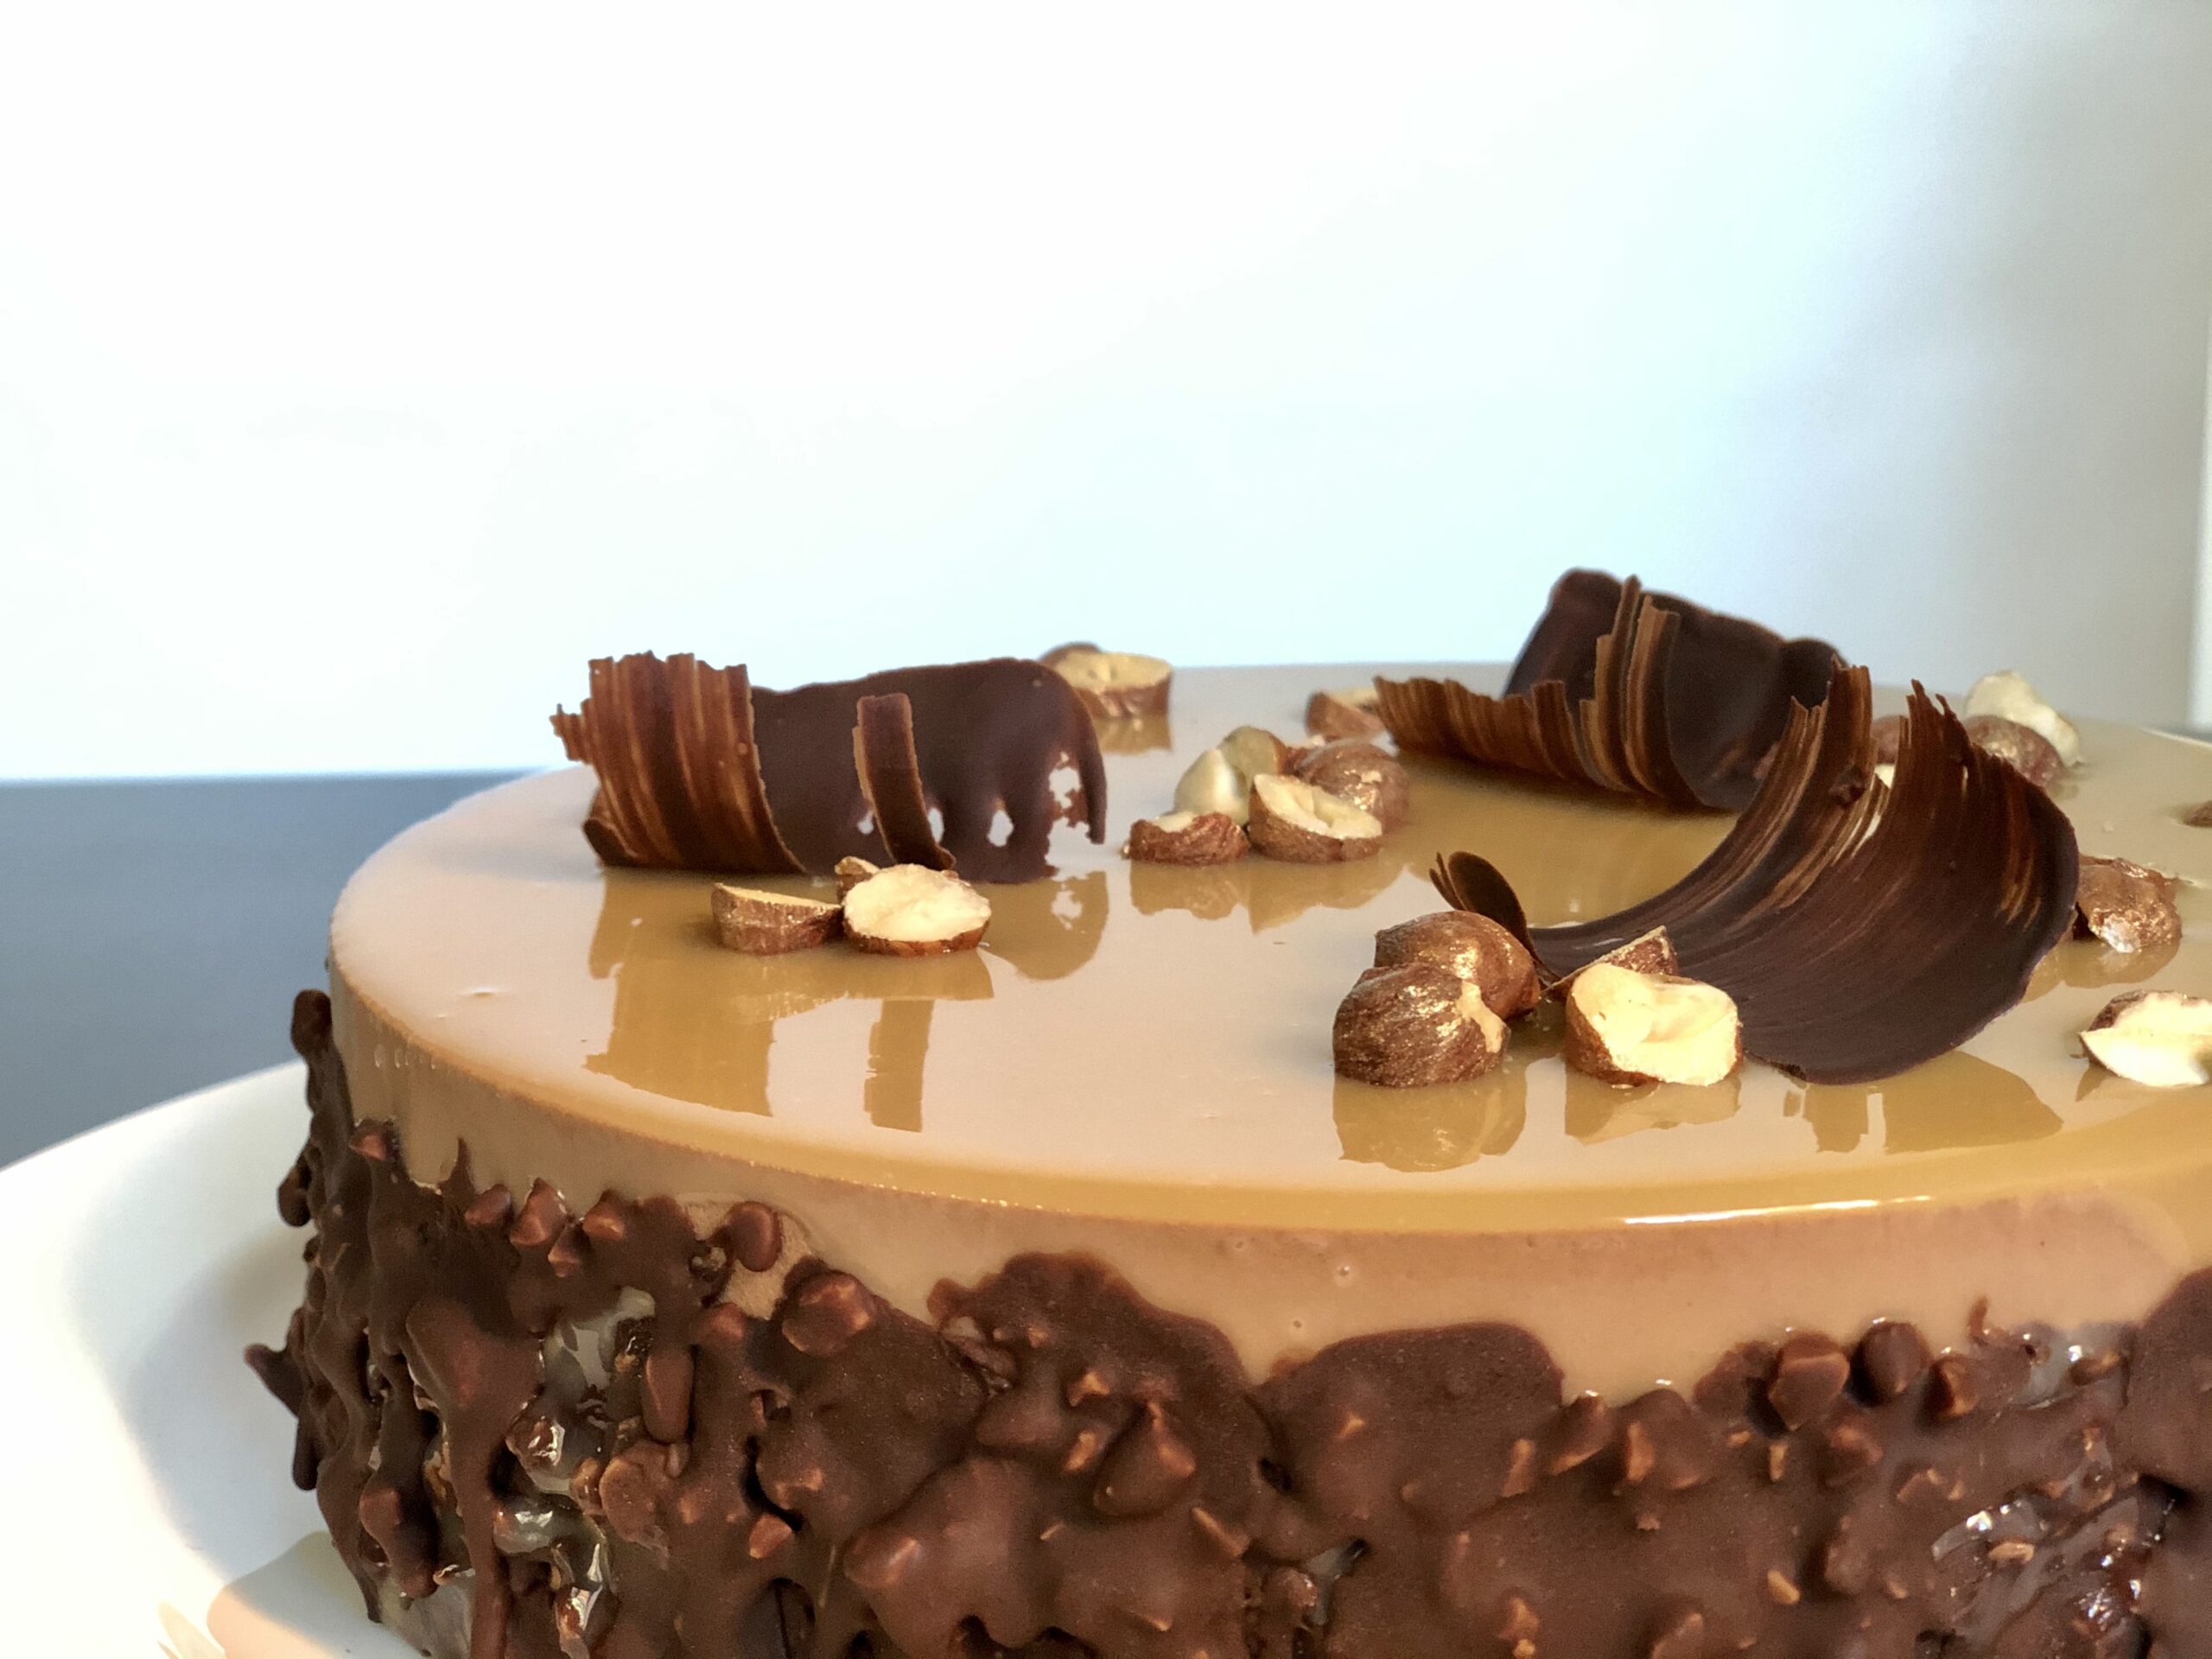
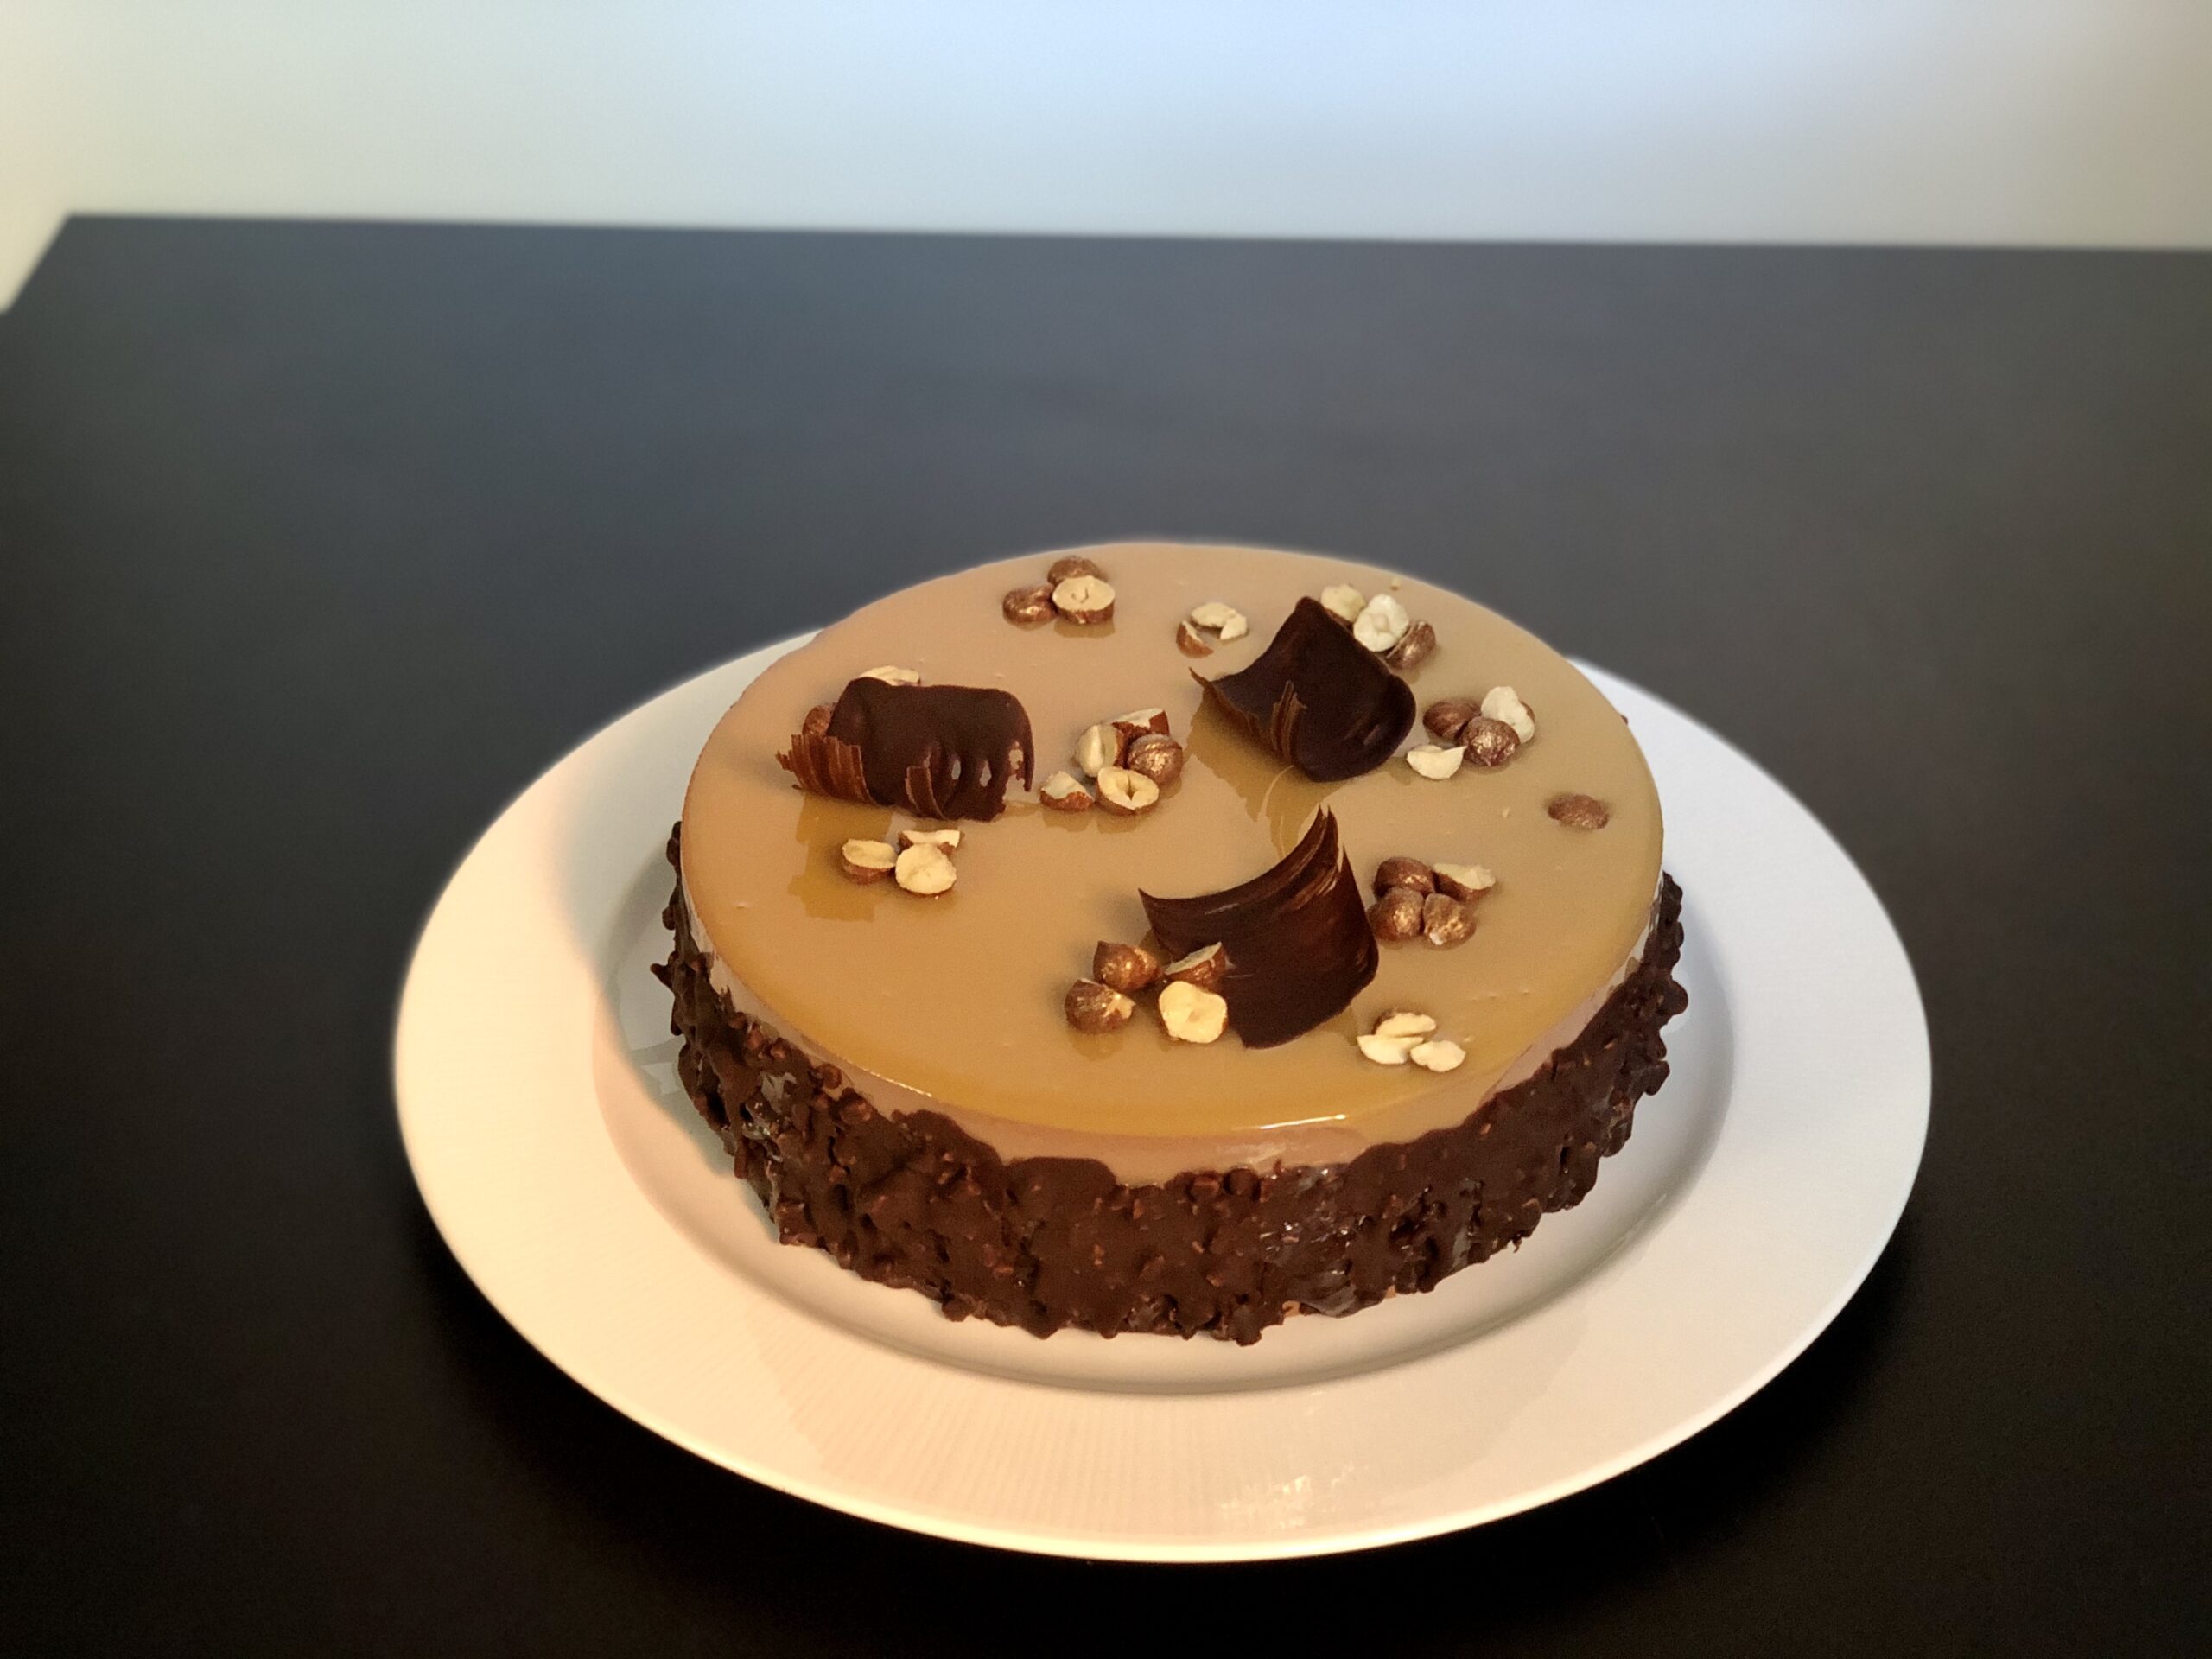
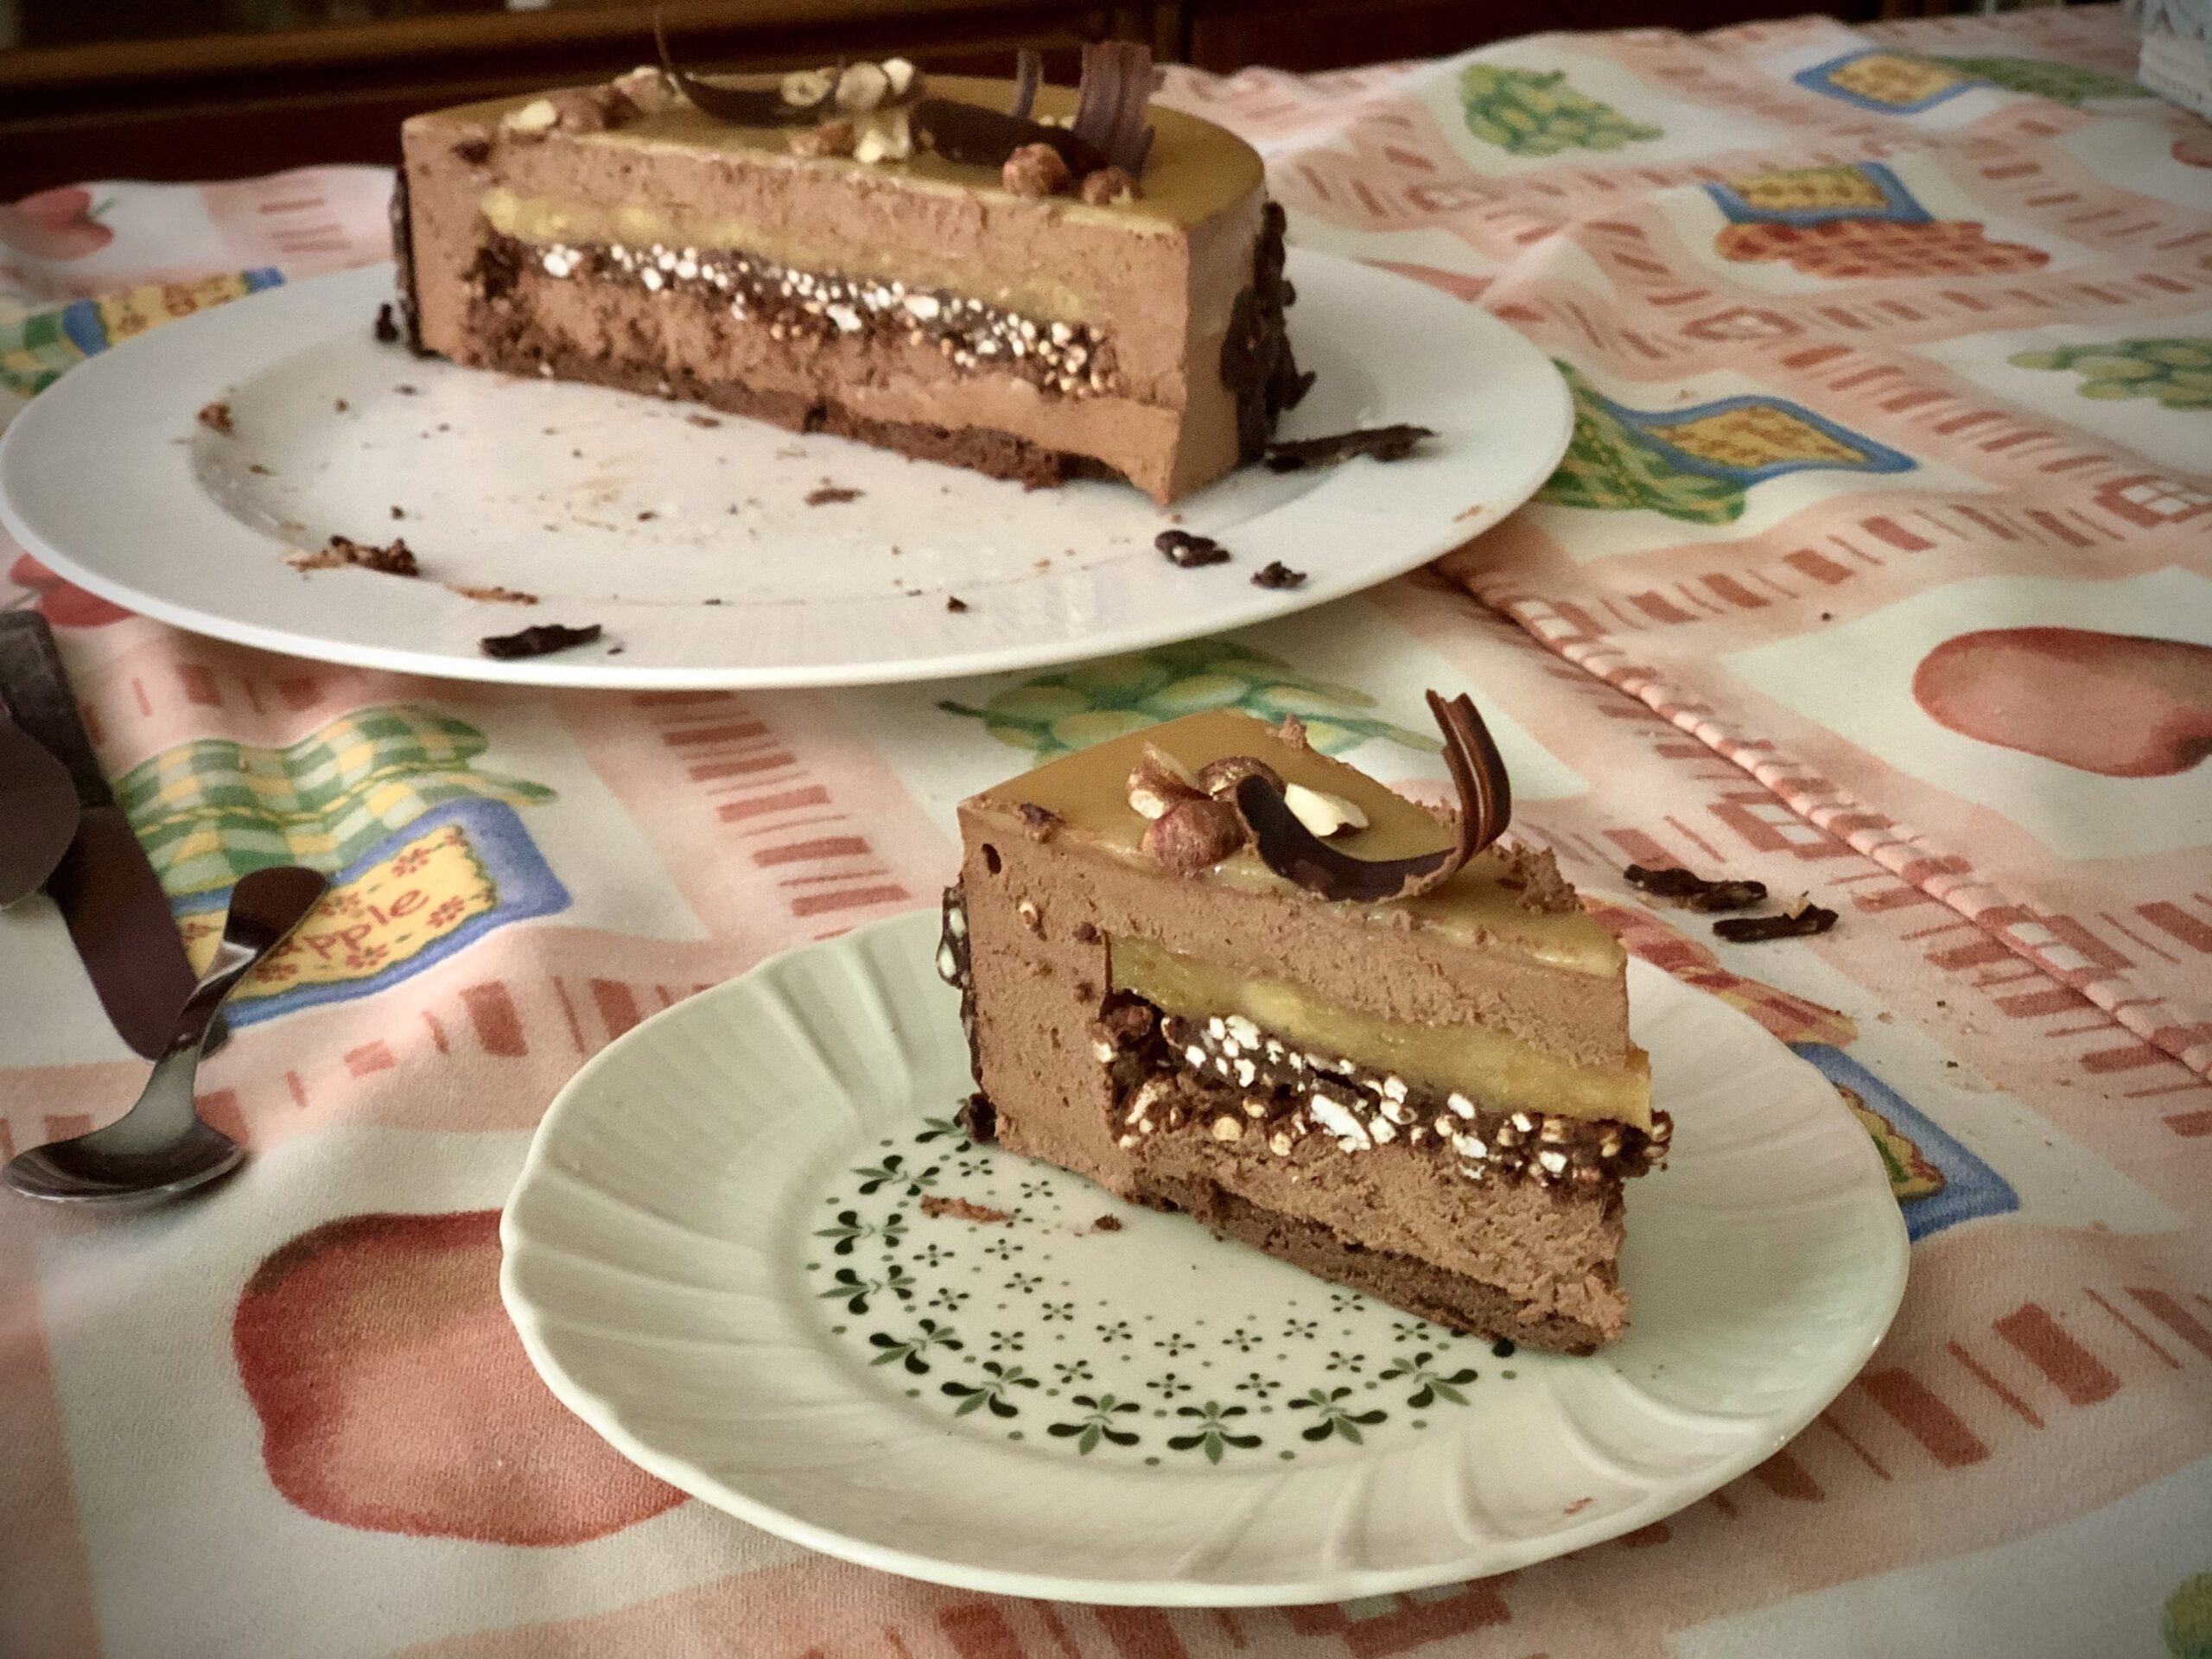
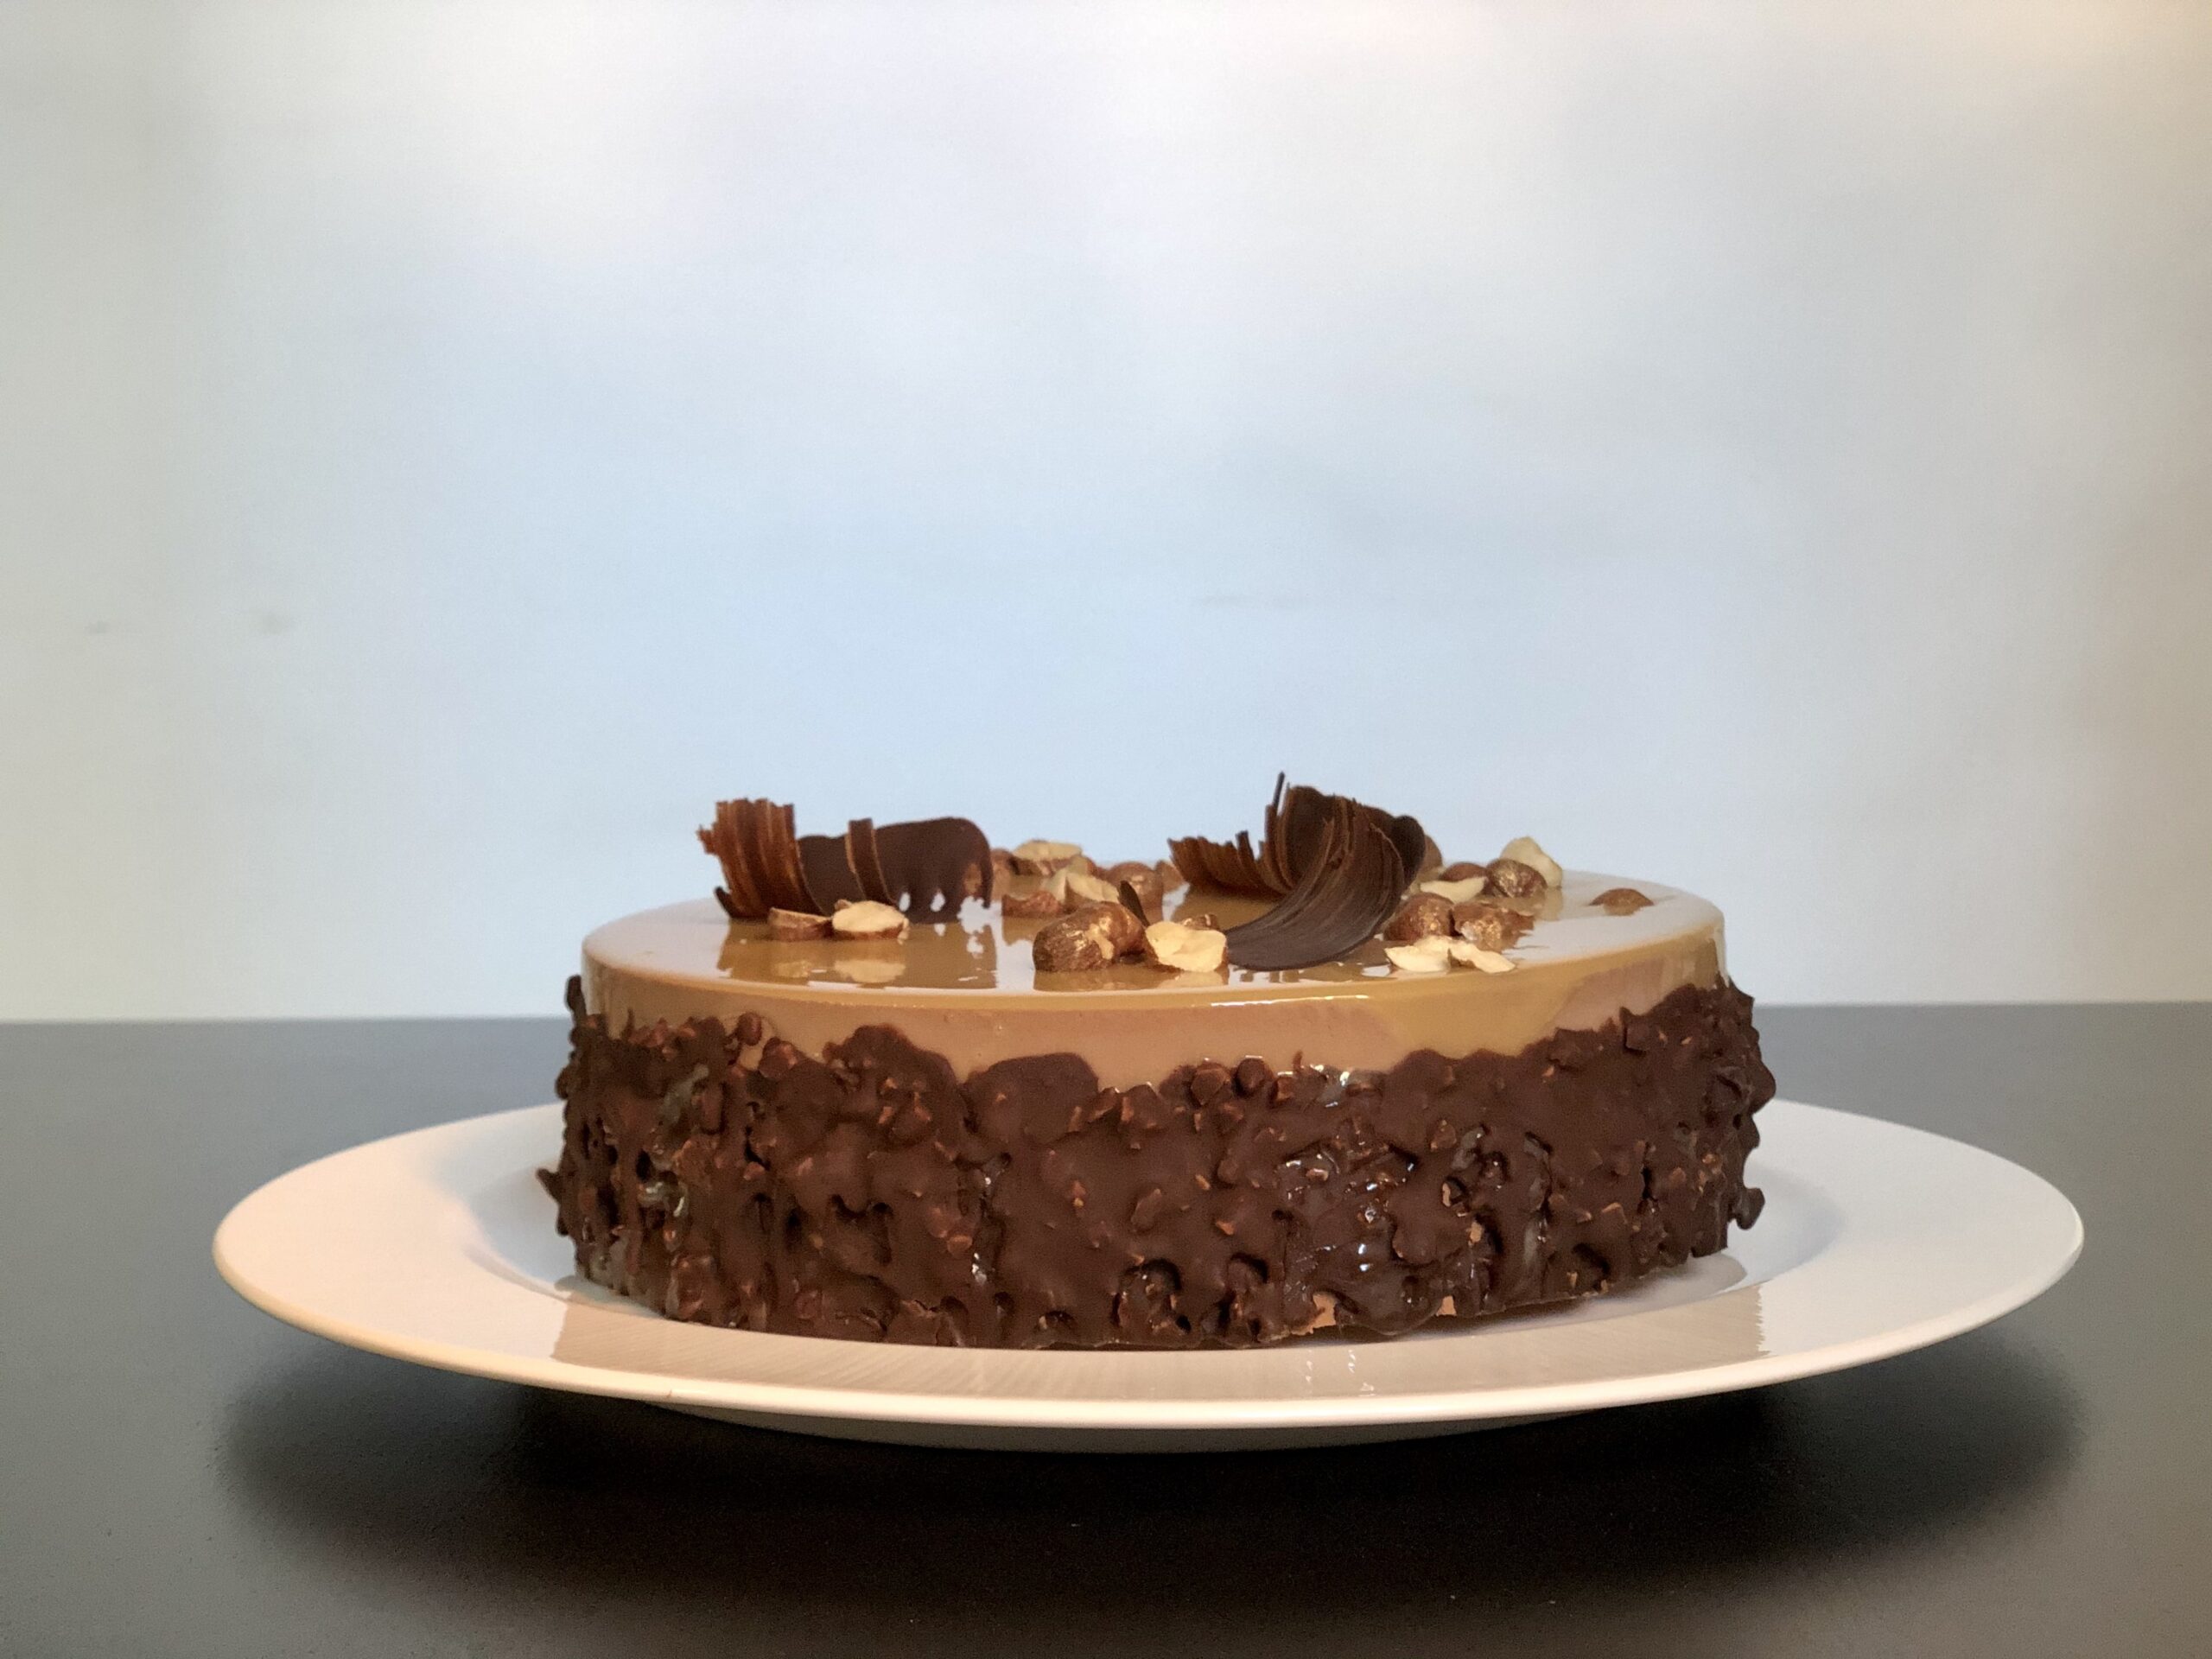
Chocolate and caramel cake with banana and crunchy cereal layer

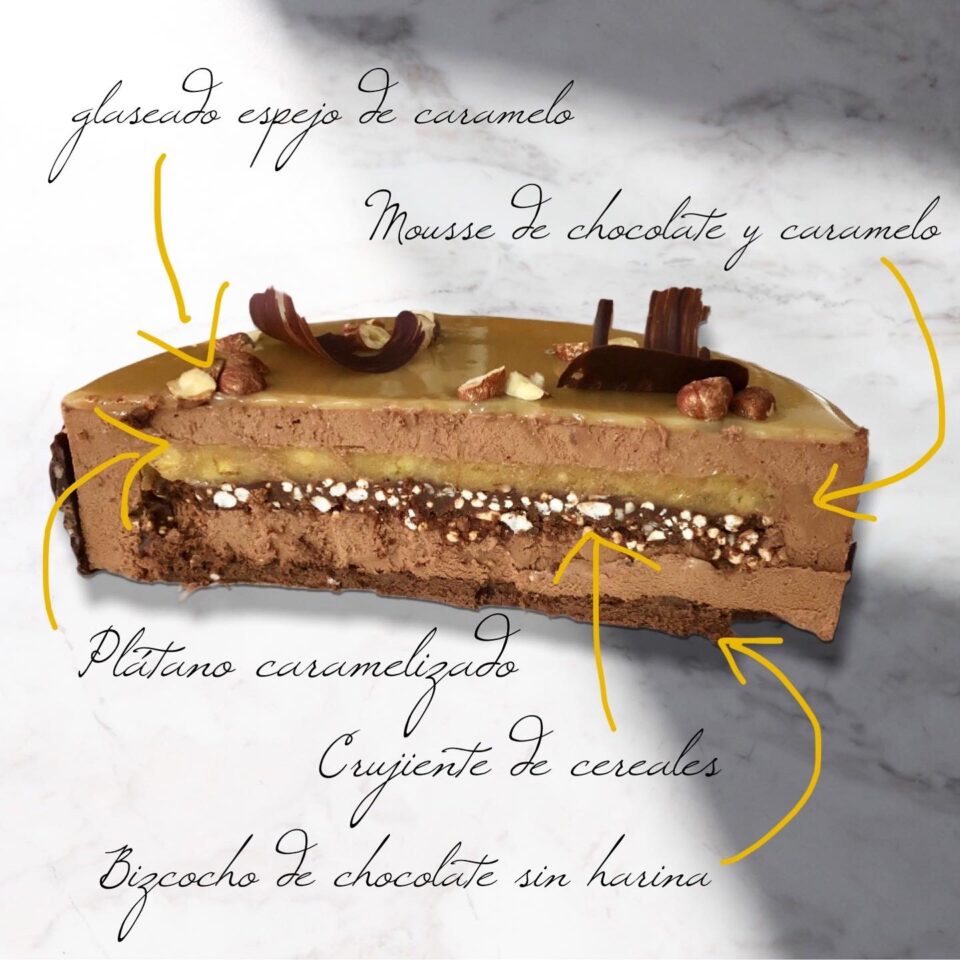
This time I wanted to make a chocolate cake that didn't have a super intense pure-chocolate flavor, since some of my taste-testers aren't huge fans of that level of intensity. The banana filling won me over as a way to balance out all that sweetness, and the crunchy layer adds a bit of joy to creamy desserts.

The recipe is from Ettore Cioccia, although I made several changes to the filling and decoration because I wanted to use up ingredients I had at home and try out some new things. So here's my version of this delicious cake — I hope you like it. It's not a complicated cake, but it does have several components and requires patience and planning to give yourself enough time, considering all the chilling/freezing times involved.

Pics and Cakes

Ingredients

Crunchy cereal layer

  • 60 g (2.1 oz) almond butter
  • 35 g (1.2 oz) chocolate
  • 20 g (0.7 oz) raw chopped hazelnuts
  • 15 g (0.5 oz) puffed rice
  • 15 g (0.5 oz) puffed quinoa

Caramelized banana

  • 30 g (2 tbsp) sugar
  • 15 g (1 tbsp) butter
  • 3 bananas (210 g / 7.4 oz)
  • Lemon juice
  • 2 g gelatin (1 sheet)

Flourless chocolate sponge

  • 60 g (2.1 oz) 65% dark chocolate
  • 20 g (1.5 tbsp) unsalted butter
  • 2 egg whites at room temperature
  • 2 egg yolks
  • 20 g (1.5 tbsp) sugar

Chocolate and caramel mousse

  • 200 g (7 oz) 65% chocolate
  • 6 g gelatin (3 sheets)
  • 60 g (1/4 cup) sugar
  • 100 ml (1/2 cup) heavy whipping cream
  • 4 egg yolks, beaten
  • 400 g (14 oz) heavy cream whipped to soft peaks

Ferrero-style coating

  • 215 g (7.6 oz) 65% chocolate
  • 40 g (3 tbsp) sunflower oil
  • 45 g (1.6 oz) chopped almonds (almond brittle)

Caramel mirror glaze

  • 300 g (1.5 cups) sugar
  • 300 g (1 cup) glucose syrup, slightly warmed in the microwave
  • 375 ml (1.5 cups) water
  • 200 g (7 oz) sweetened condensed milk
  • 300 g (10.6 oz) white couverture chocolate, finely chopped
  • 18 g gelatin, hydrated beforehand and then dissolved in 108 ml (about 1/2 cup) of hot water

Method

  1. We start by making the crunchy cereal layer. Melt the chocolate in the microwave in short bursts to keep it from burning. Next, add the almond butter and mix well. Finally, add the cereals and hazelnuts and mix again until everything comes together.
  2. Line the bottom of a 17 cm (6.7 in) springform ring or pan with plastic wrap and a strip of acetate around the edge. Pour in the chocolate mixture and smooth out the surface with a spoon. Pop it into the freezer.
  3. For the caramelized banana, hydrate the gelatin in a bowl of cold water.
  4. Cut the bananas into small dice and add a splash of lemon juice so they don't oxidize.
  5. Put the sugar in a saucepan and let it melt until it forms an amber-colored caramel. Add the butter, and once it's incorporated, add the banana. Cook for a few minutes over low heat, stirring frequently (the mixture is likely to get more liquid as the fruit releases its juice).
  6. Drain the gelatin well and stir it into the saucepan after turning off the heat. Stir well so it dissolves completely.
  7. Take the crunchy layer out of the freezer and pour the caramelized banana on top, forming another even layer. Put it back in the freezer.
  8. To make the chocolate sponge, preheat the oven to 180°C (355°F).
  9. Melt the chocolate and butter in short bursts in the microwave.
  10. In another bowl, whip the egg whites to stiff peaks with a pinch of salt and the sugar. Once they're firm, fold in the beaten yolks gently.
  11. Next, add the melted chocolate, also folding gently so it doesn't deflate, until you have a smooth batter.
  12. Spread it onto a parchment-lined baking sheet (it's not a lot of batter and it's not very runny) until it's about 1 cm (0.4 in) thick. The important thing is that you'll be able to cut a 17 cm (6.7 in) circle out of it later.
  13. Bake for 8 minutes.
  14. To make the chocolate and caramel mousse, hydrate the gelatin sheets in very cold water.
  15. Melt the chocolate in the microwave in short bursts and set aside.
  16. In a saucepan, melt the sugar and let it cook until you get a light caramel. Add 100 ml (1/2 cup) of cream (warmed in the microwave so there isn't a big temperature difference). Pour it in a little at a time, stirring constantly to keep crystals from forming, and very carefully so it doesn't splash you.
  17. Pour the mixture over the beaten egg yolks while stirring constantly, then return it to the heat until it reaches 82–84°C (180–183°F).
  18. Take it off the heat and add the well-drained gelatin, stirring until it dissolves.
  19. Next, blend with an immersion blender until smooth, and pour this hot cream over the melted chocolate. Mix well and let cool to 40–45°C (104–113°F).
  20. Finally, fold in a third of the soft-peak whipped cream and mix. Add the rest and fold gently again.
  21. For the assembly, take a 20 cm (8 in) springform pan (or ring) and line the edge with a strip of acetate and the bottom with plastic wrap.
  22. Now we're going to layer everything. First, spread a generous layer of chocolate and caramel mousse in the bottom and use a spatula to coat the sides too. Then unmold the banana and hazelnut crunch insert and place it on top of the mousse with the crunchy side facing up. Fill with more mousse, and finally lay down the chocolate sponge disc. Put the cake in the freezer for at least 3–4 hours (I leave it overnight and finish the decoration the next day).
  23. Now we're going to prepare the glazes. For the Ferrero-style coating, melt the chocolate in the microwave and then add the oil. Once it's well combined, add the chopped almonds. Set aside until it cools to 35°C (95°F).
  24. To make the caramel mirror glaze, hydrate the gelatin in a bowl of cold water. Heat the water, drain the gelatin, and dissolve it in this hot water. Set aside.
  25. In a saucepan, make a dry caramel using just the sugar — no water. When it turns a dark golden color, turn off the heat and pull the pan off the burner. Immediately and very carefully, slowly pour in the 375 ml (1.5 cups) of water while whisking. (Be very careful — it splatters and burns badly.)
  26. Then add the glucose, stir well until it dissolves, and next add the condensed milk and white chocolate, whisking until the chocolate dissolves and is fully incorporated.
  27. Finally, add the dissolved gelatin and mix until combined. Let it rest until the caramel cools to 25–30°C (77–86°F).
  28. All that's left is the final assembly. Take the frozen cake out of the freezer and remove the pan, the acetate strip, and the plastic wrap. Set the cake on top of a smaller mold or bowl so it's elevated and you can glaze it well. It's a good idea to put a plate or tray underneath to catch the drippings of glaze so you can reuse them.
  29. First we're going to glaze the sides with the Ferrero coating. The easiest way is to put the coating in a pitcher and pour it over the sides. Since the cake is frozen, the chocolate will set almost instantly. If you have any gaps, you can patch them up with the help of a spoon.
  30. Finally, pour the mirror glaze over the top of the cake. You want to use just the right amount so it only covers the top and doesn't drip down the sides. You can finish decorating it with broken hazelnuts and chocolate.
  31. Carefully transfer it to a flat plate and store in the fridge. Before serving, you'll need to give it 2 or 3 hours to defrost slowly.
Pics and Cakes
Pics and Cakes
Pics and Cakes

PiC tips

  • The amounts I give for the mirror glaze are enough to cover the entire cake (top and sides). In that case, you wouldn't need the Ferrero-style coating, and it would also look beautiful. Any leftover glaze (that hasn't been contaminated with other components of the cake) can be stored in the fridge for a few days, or longer in the freezer, and reheated whenever you want to glaze another dessert. In fact, that's what I did. This glaze had been frozen — it was leftover from a previous cake. You can also choose to halve the quantities.
  • I used almond butter, but you can use any other nut butter or even praline like Ettore does in his original recipe.
Pics and Cakes
October 14, 2020 · 7 min · Palstelera

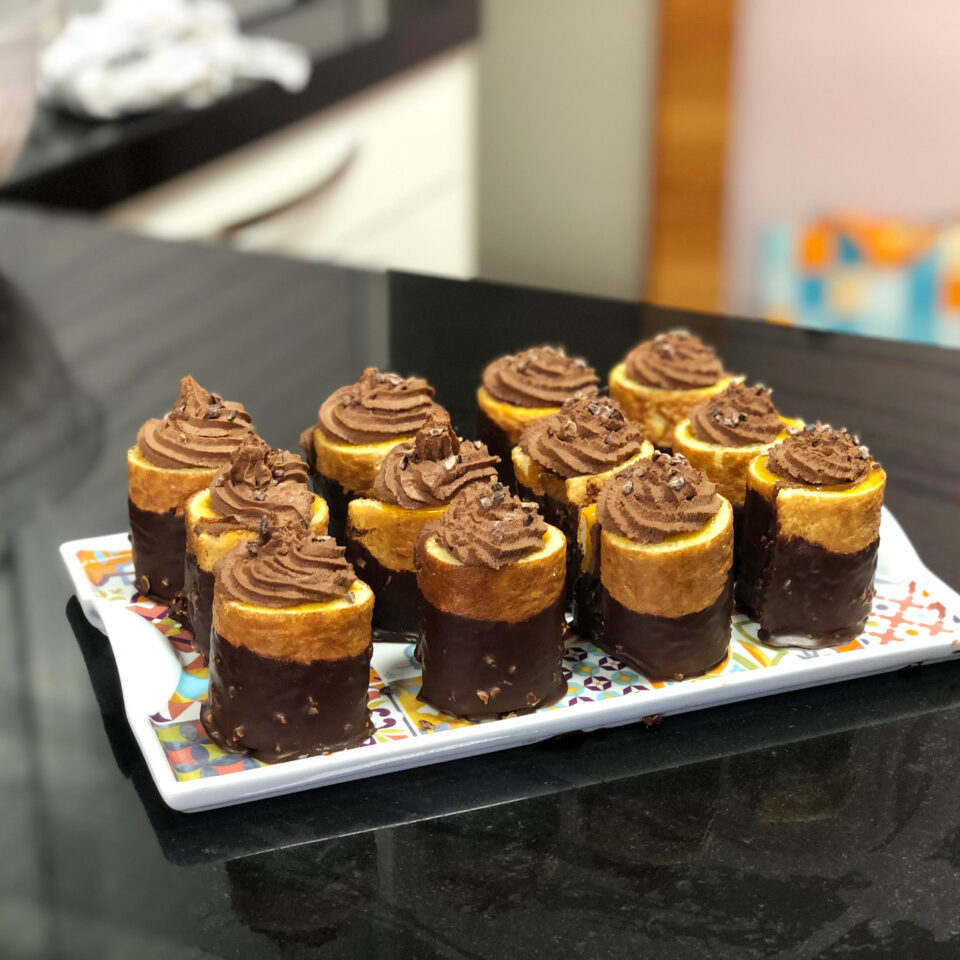
Chocolate and Mango-Passion Roll Cakes

This recipe comes from Ettore Cioccia, who I call "my master" because I've followed several recipes from his blog Bavette and they all turn out amazing. On top of that, I had the luck of attending a pastry course he gave in Madrid and I couldn't have enjoyed it more. So if you feel like making a delicious dessert and spending a good while in the kitchen putting together different components, you can pick any of Ettore's recipes and you'll be guaranteed success. Today I'm sharing my version of his chocolate and mango-passion fruit roll cakes. The only thing I did differently from his recipe was the pionono sponge, since I used the one from another pastry great: Osvaldo Gross.

Pics and Cakes

Ingredients

For the dark chocolate ganache

  • 100 g (3.5 oz) heavy cream (30-35% fat)
  • 100 g (3.5 oz) chocolate (66% cocoa)
  • 210 g (7.4 oz / about 1 cup) cold heavy cream

For the pionono-style sponge

  • 5 eggs
  • 50 g (1.75 oz / about 1/4 cup) sugar
  • 50 g (1.75 oz / about 1/3 cup) flour
  • A pinch of salt
  • One tablespoon of honey (about 25 g / 0.9 oz)

For the exotic jam

  • 265 g (9.3 oz) mango purée
  • 85 g (3 oz) passion fruit purée
  • 70 g (2.5 oz / about 1/3 cup) granulated sugar
  • 13 g (0.5 oz) pectin

For the Ferrero Rocher glaze

  • 250 g (8.8 oz) chocolate (60% cocoa)
  • 50 g (1.75 oz / about 1/4 cup) sunflower oil
  • 70 g (2.5 oz / about 1/2 cup) granulated almonds

Method

Dark chocolate ganache

  1. In a small saucepan, bring 100 g (3.5 oz) of cream to a boil. Pour the boiling cream over the chocolate (which we've previously melted in the microwave) in two or three additions, mixing well after each one.
  2. Then add the cold cream and mix until everything is well combined. Cover with cling film pressed against the surface and chill in the fridge for at least 4 hours.

For the pionono-style sponge

  1. Preheat the oven to 190ºC – 200ºC (375ºF – 390ºF).
  2. Put the eggs into the bowl of your stand mixer along with the sugar, salt, and honey, and whisk until you reach what's called "ribbon stage" (this is when you can lift a spoonful of batter and drizzle it over the rest, drawing lines on the surface that don't disappear right away). Since it takes a good while, it's best to use a stand mixer.
  3. Sift the flour and fold it in with the mixer at minimum speed. Bump the speed up to maximum for a few seconds.
  4. Using a spatula, fold everything together with gentle, sweeping motions.
  5. Prepare the oven tray with parchment paper greased with butter or margarine.
  6. Pour the batter onto the prepared tray and spread it out so the surface is level (we want a thin sponge, about 4-5 mm / 1/6 inch thick).
  7. Bake for 8 to 10 minutes until the surface is golden and the bottom is too — you can check by lifting it with the help of the paper (carefully, so you don't burn yourself).

For the exotic jam

  1. Mix the sugar with the pectin.
  2. Gently heat both fruit purées together to about 40ºC (105ºF) and add the sugar-pectin mixture. Bring to a boil for a few seconds.
  3. Remove from the heat and transfer the purée to a clean bowl.
  4. Let it cool to 36ºC (97ºF), stirring frequently.
  5. Finally, spread a thin, even layer of the jam over the sponge sheet. Chill in the fridge until the jam firms up a little.

For the Ferrero Rocher glaze

  1. Melt the chocolate to about 50ºC (120ºF) in the microwave.
  2. Stir in the sunflower oil and mix well.
  3. Add the granulated almonds and mix again so they're evenly distributed.
  4. Let the coating cool down to 35ºC (95ºF).

Assembling the dessert

  1. With electric beaters, whip a little more than half of the chocolate ganache and keep the rest in the fridge. At medium speed, whip just until you get a creamy texture.
  2. Spread a thin, even layer of ganache over the jam we placed on the sponge. Let it firm up in the fridge.
  3. Cut the sponge — with its layers of jam and ganache — into strips. I made mine 5 cm (2 inches) wide.
  4. Roll up each strip with the filling on the inside, being careful not to tear the sponge.
  5. Freeze the rolls for about 10-15 minutes (or you can leave them in the freezer until you need them if you've prepared the recipe ahead).
  6. Take the rolls out of the freezer and dip each one into the chocolate coating we prepared, going about halfway up.
  7. Whip the rest of the ganache with electric beaters at medium speed until you get a medium-firm consistency.
  8. Using a piping bag fitted with a star tip, pipe little chocolate roses on top of each roll. You can decorate with cocoa nibs.
  9. Let them temper a bit and enjoy.

PiC tips

  • Even though I followed the exact proportions, my jam didn't set as much as I'd have liked (no idea why), so if you see it's too runny, you can add a bit more pectin (that's the ingredient that gels it). I'd also suggest not using all of the jam you make — pay attention to the thickness and aim for a thin layer over the sponge base.
  • In his recipe, Ettore Cioccia makes 4 large roll cakes; I preferred bite-sized portions — or rather, two- or three-bite ones ;-). You can adjust this however you like when you cut the sponge.
September 30, 2020 · 5 min · Palstelera

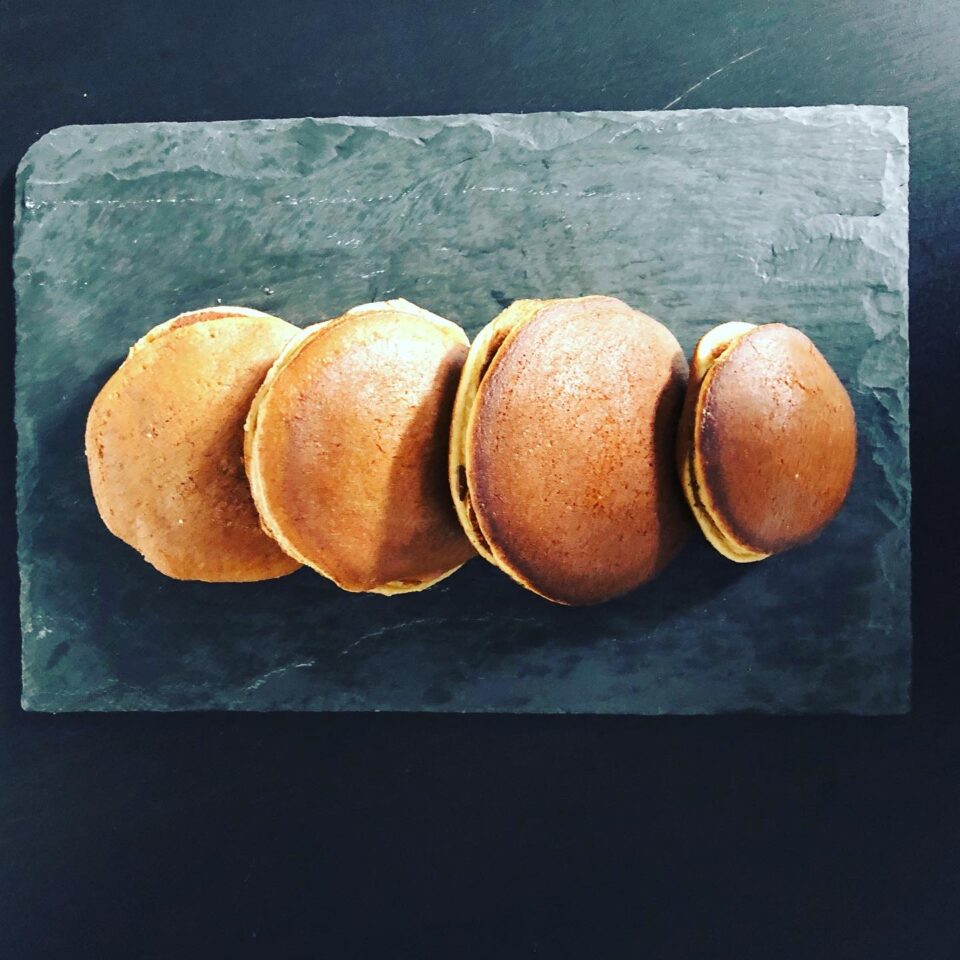
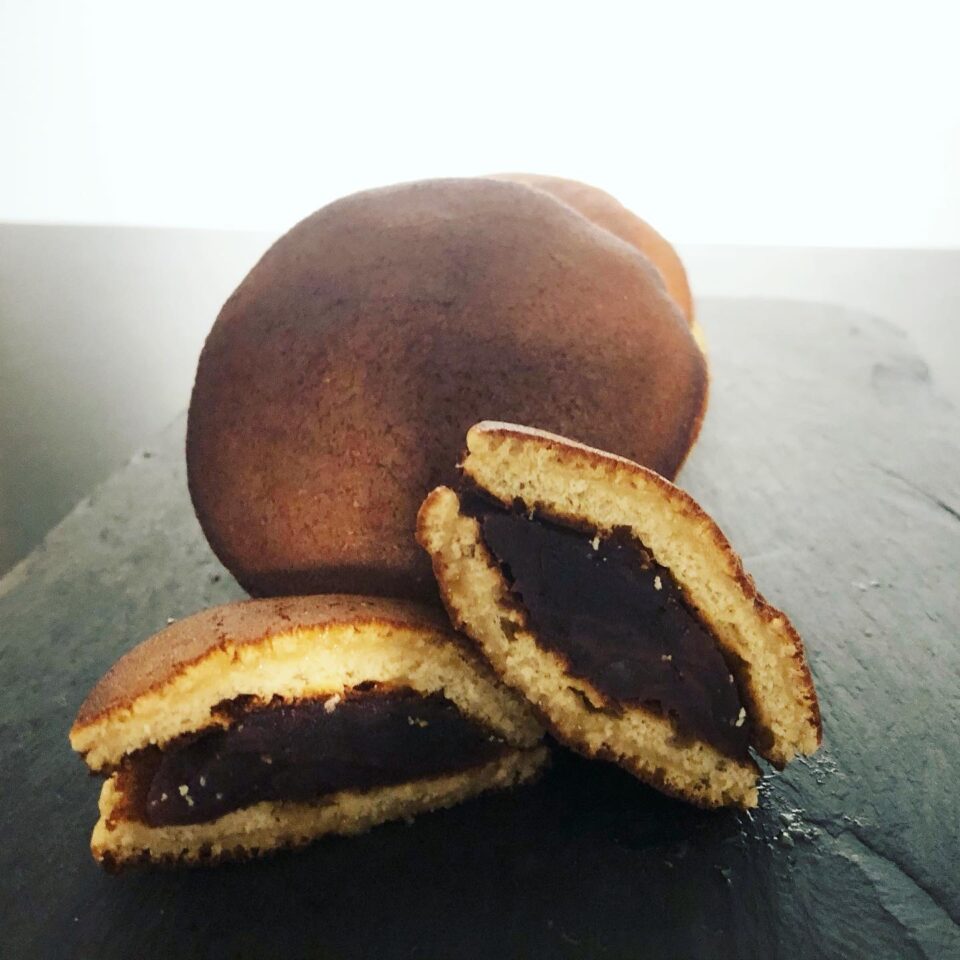
Dorayaki

Dorayaki are a traditional Japanese sweet that you probably know as the favorite food of the cartoon character Doraemon. They're a type of pancake cooked in a pan and sandwiched together (kind of like a Codan shell, but a bit thicker). The traditional filling is anko, a sweet paste made from azuki beans and sugar. Anko is used in lots of Japanese desserts, so if you've never tried it, I encourage you to give it a chance — even if the words "bean" and "sweet" don't sound too tempting together in the same sentence.

This recipe comes from Masaharu Tada, the chef at the residence of the Japanese Ambassador in Spain.

Ingredients

Makes 5 units (that is, 10 pancakes)

  • 1.5 g (¼ tsp) baking soda
  • 15 ml (1 tbsp) water
  • 2 eggs
  • 6 g (1 tsp) mirin (I didn't have any and substituted white wine)
  • 15 g (1 tbsp) honey
  • 80 g (⅔ cup) powdered sugar
  • 100 g (¾ cup) flour
  • 300 g (10.5 oz) anko for the filling
Pics and Cakes

Method

  1. Mix the baking soda with the water until fully dissolved. It's better if the water is lukewarm to make this step easier.
  2. Beat the eggs in a bowl with a whisk and add the mirin, honey, and sugar, then whisk again.
  3. Once everything is combined, add the water and baking soda mixture and whisk again.
  4. Add the flour and whisk until you get a smooth, lump-free batter — but be careful not to overmix.
  5. To make sure the batter has no lumps at all, pass it through a strainer or sieve.
  6. Let the batter rest for 30 minutes so that the baking soda kicks in and you get a much fluffier, more homogeneous batter.
  7. Once the resting time is up, heat a pan, brush on a little vegetable oil, and pour a small amount of batter in the center — it'll spread on its own into a perfect circle.
  8. When bubbles appear on the surface, it's time to flip the pancake and cook the other side.
  9. Repeat with the rest of the batter.
  10. Once all the pancakes are done, all that's left is to pair them up and put the anko filling inside. The best way is to roll the anko into a ball, place it on one pancake, cover with its pair, and gently press them together so they close without breaking.
Pics and Cakes

PiC Tips

  • If you don't have or don't like anko, you can fill them with chocolate cream or pastry cream. Anko is the original version and, besides being delicious, it's easier to handle for this recipe since it's a more compact filling.
  • The heat of the pan will depend on your stove. You need to keep an eye on them so the dorayaki turn out golden on the outside but well cooked on the inside. I made them on medium heat on an induction cooktop.
  • It's a fairly sweet batter and since the anko is also sweet, I think you could get away with reducing the amount of powdered sugar a little.
September 28, 2020 · 3 min · Palstelera

American Pancakes

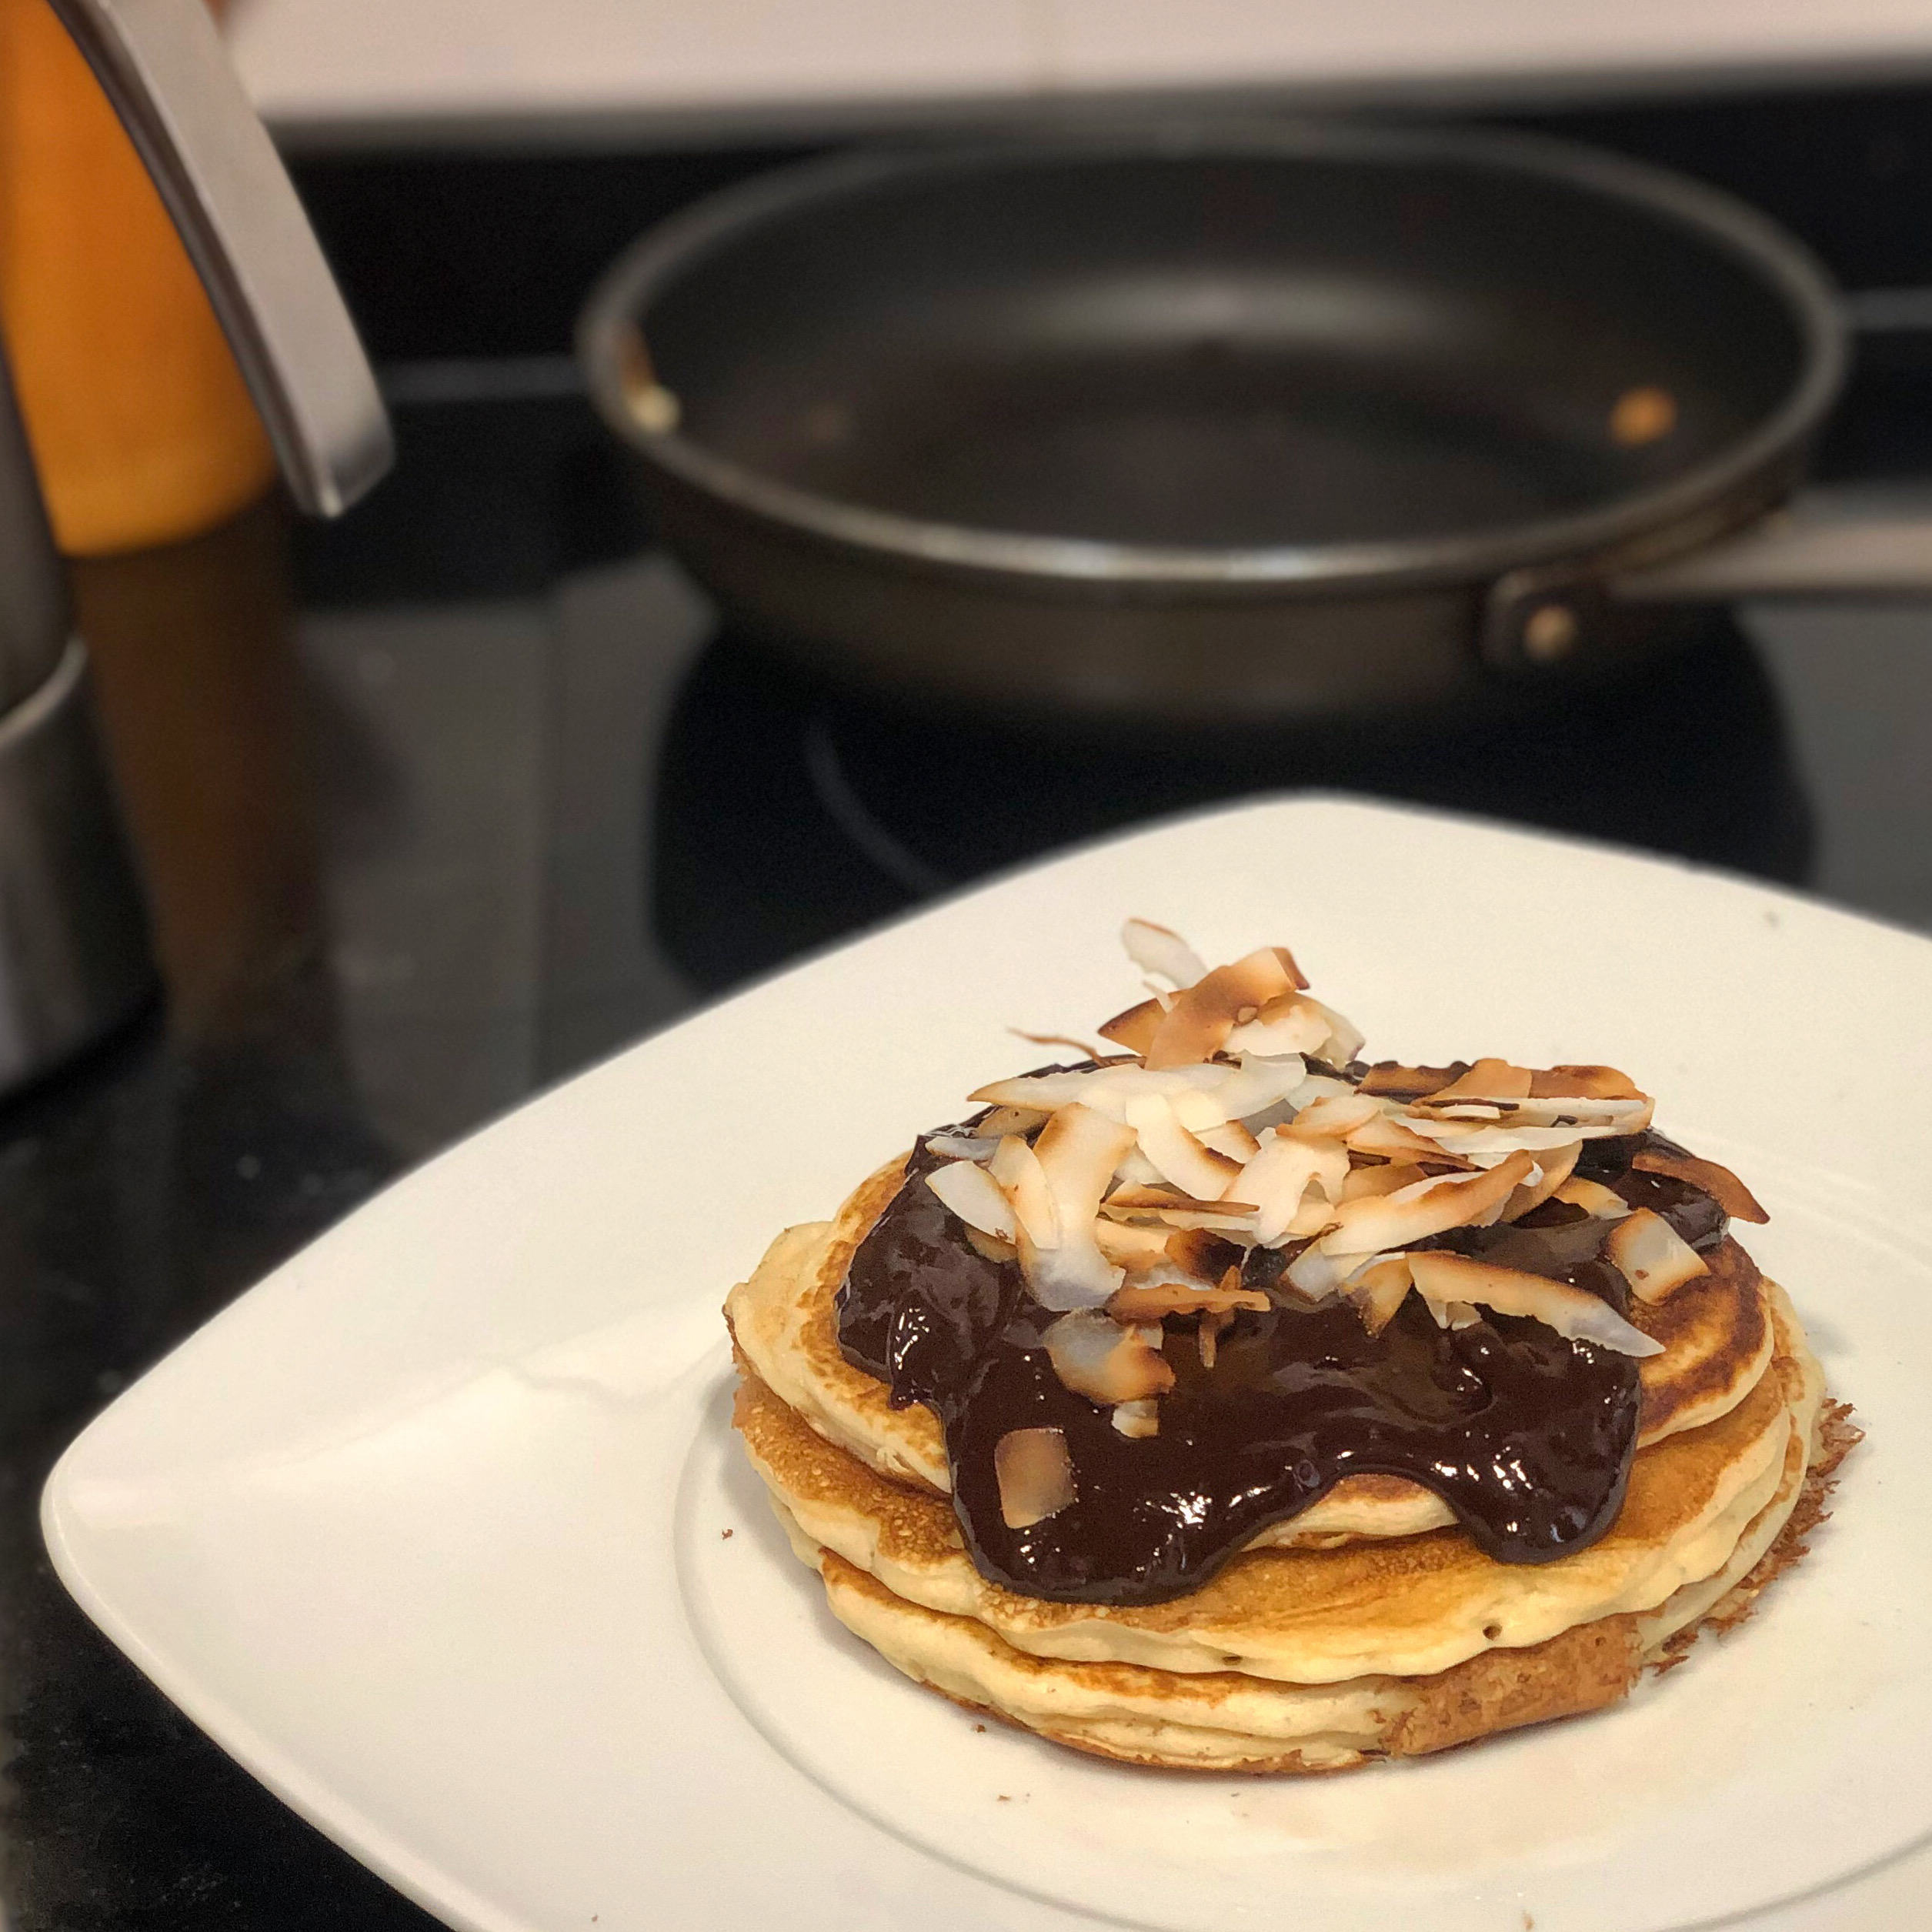
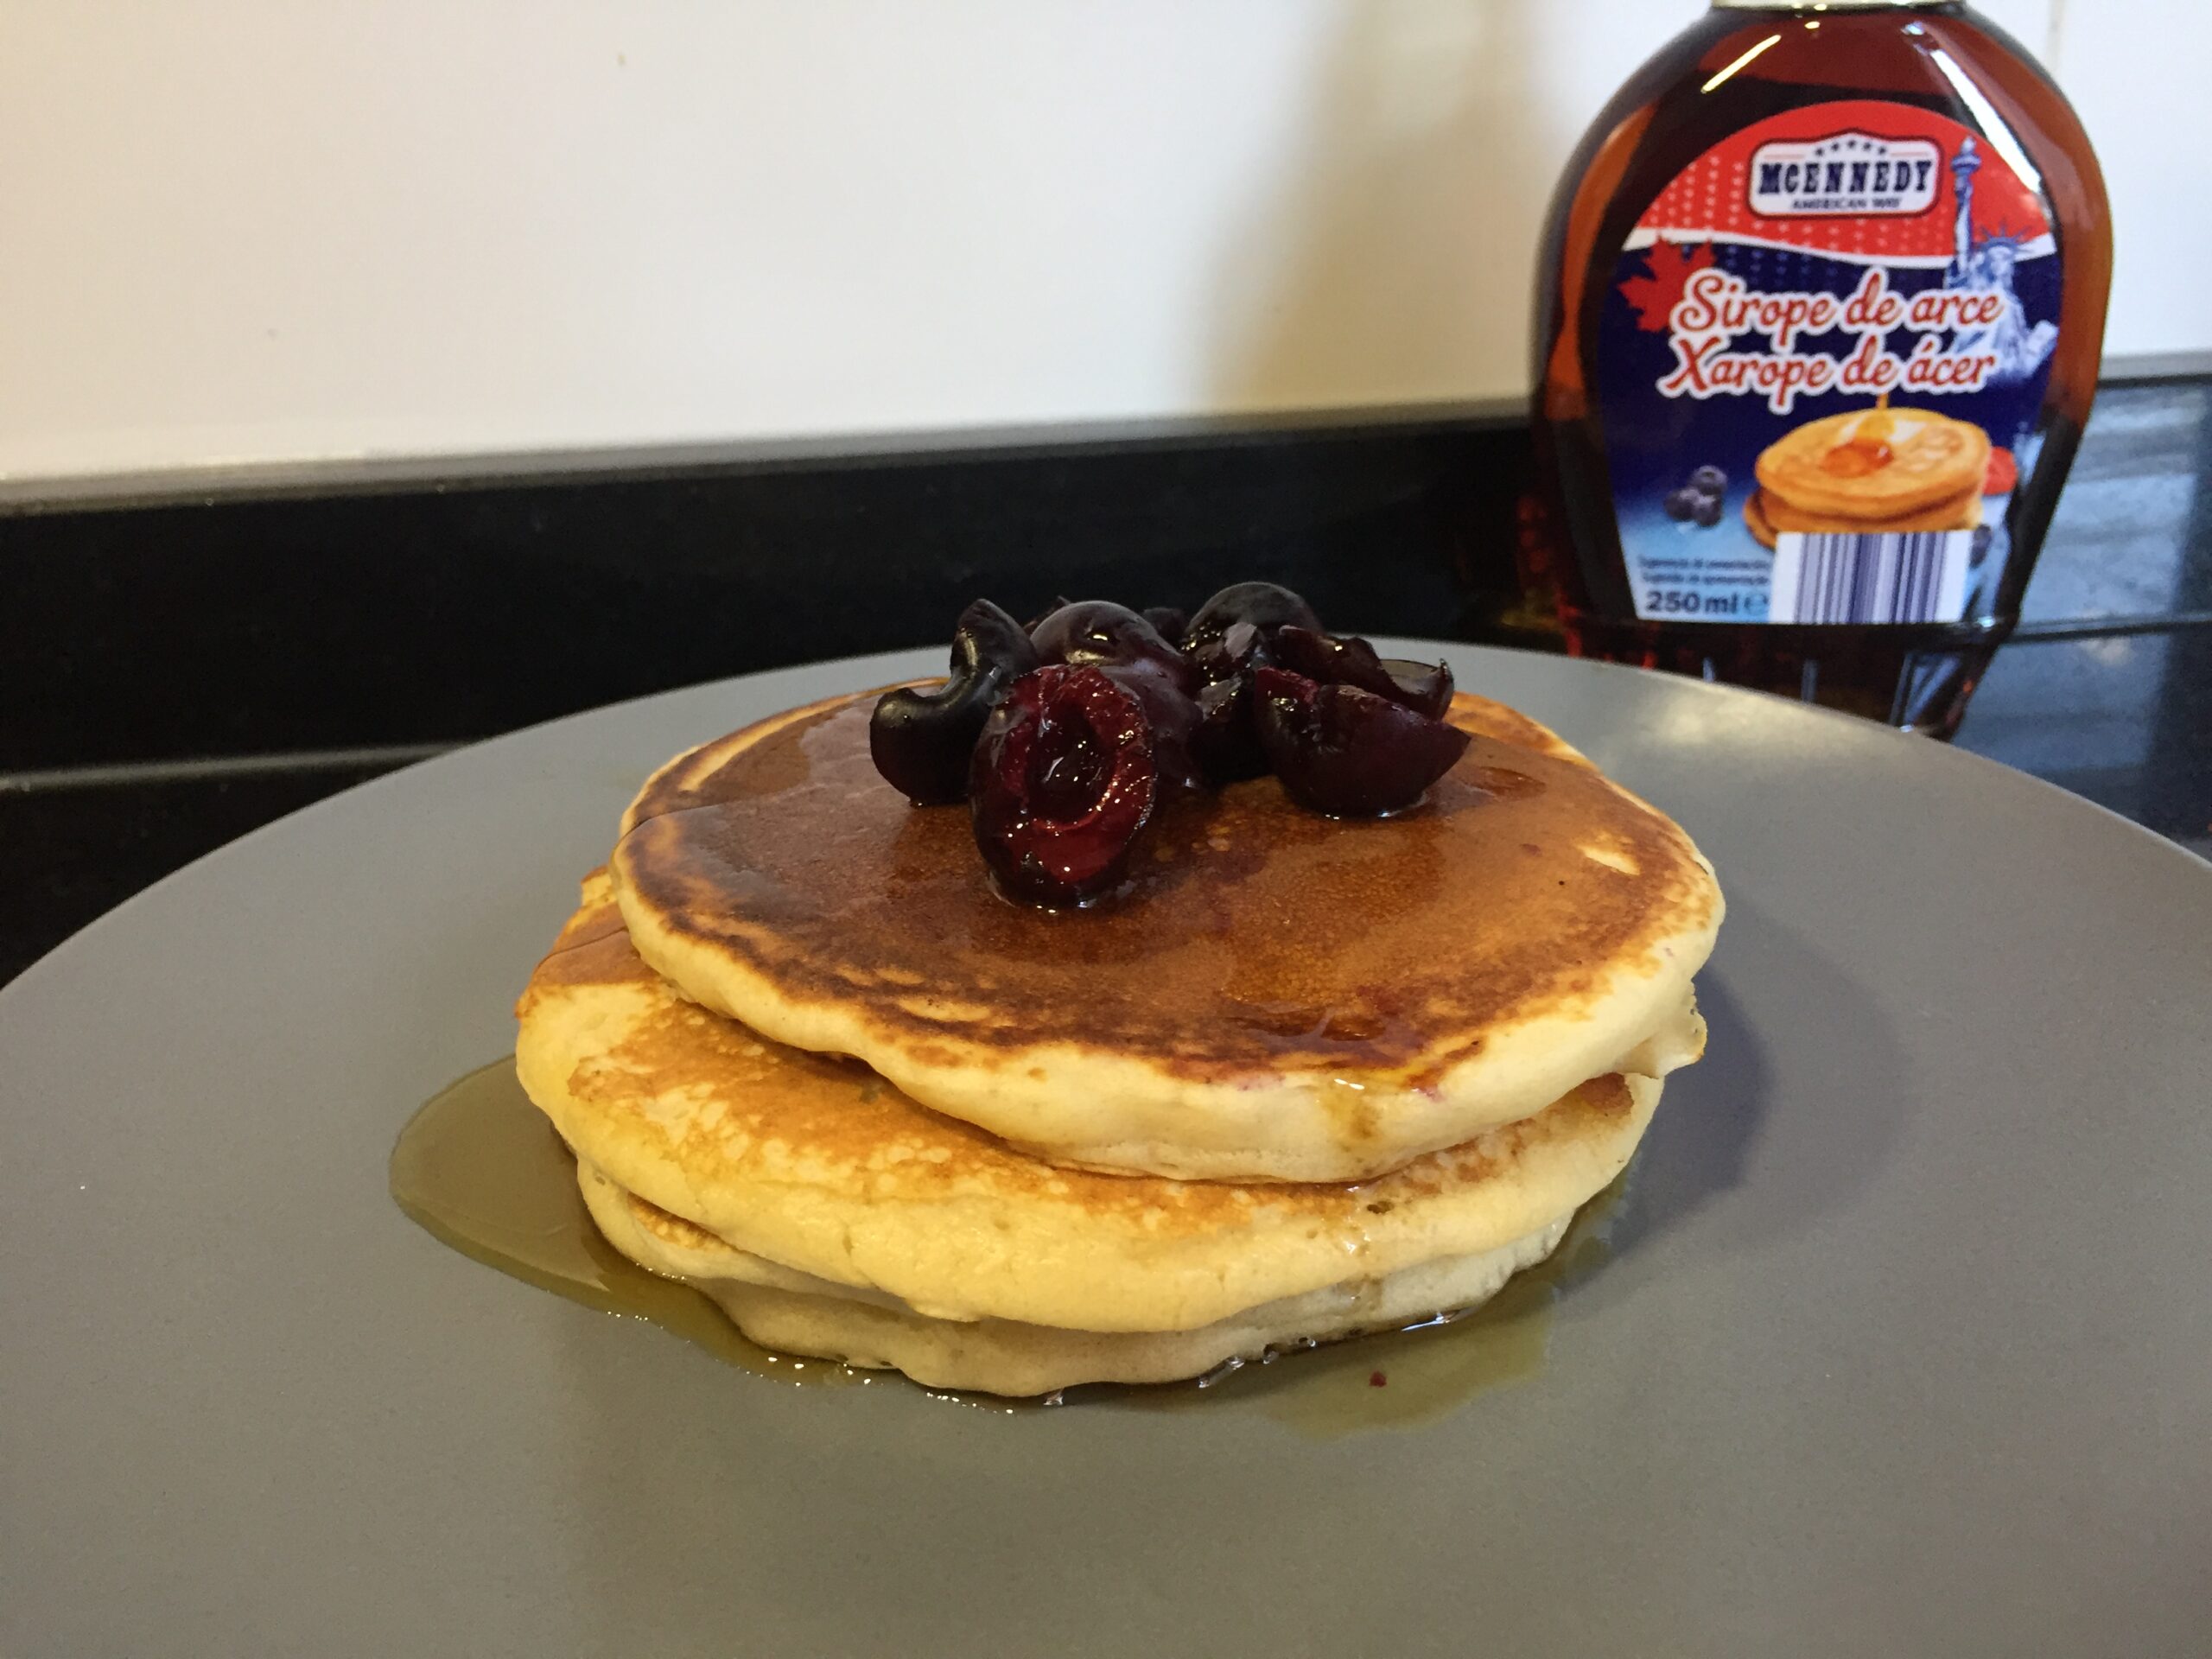
And this is the exact title of recipe number 1029 in the book «1080 Recetas» by Simone Ortega, a classic of Spanish kitchens. It really can't get any simpler or more delicious. There are loads of pancake variations out there, but let's start with the basics and just enjoy ;-).

Pics and Cakes
Pancakes with dark chocolate and toasted coconut

Ingredients

  • 200 g (1 ⅔ cups) flour
  • ½ teaspoon of salt (in Simone's words: «the mocha-spoon kind», so really tiny)
  • 3 teaspoons of Royal-type baking powder
  • 1 tablespoon of sugar
  • 1 tablespoon of olive oil
  • 2 eggs
  • 1 glass (a water glass) of cold milk (about 200 ml / ¾ cup + 1 tbsp)

Method

Here I'm not going to follow the traditional recipe, I'm going to make it way easier for you, so you can whip up some pancakes even before heading off to work.

  1. Put all the ingredients in a blender jug or bowl and blitz them with a hand blender or any kitchen robot until you get a smooth, even batter.
  2. Heat a pan and, when it's nice and hot, pour a bit of the batter in the center. It'll form a perfect circle. Cook it over medium heat.
  3. When you see bubbles forming all over the surface, that's the moment to flip it with a spatula and cook it for a similar time on the other side.
  4. Repeat with all the batter.
  5. Serve with syrup, jam, chocolate, fruit, or whatever you like best.

PiC Tips

  • If you don't quite trust your pan's non-stick coating, you can add a little butter or oil to keep them from sticking.
  • If the olive oil flavor is too strong for you, you can swap it for sunflower oil.
  • If you don't want to make all the batter at once, you can keep the raw batter in the fridge and make the rest of the pancakes the next day (two days of guaranteed happiness). Or you can just halve the recipe directly (it divides easily).
Pics and Cakes
Pancakes with cherries and maple syrup
September 27, 2020 · 2 min · Palstelera

Swiss Buns

There are recipes you see and immediately you're dying to try at least once in your life. The results in the photos online look so perfect it seems impossible you'll ever get something even remotely similar. Well, that's exactly what happened to me with these incredible Swiss buns from María Lunarillos's blog, and I have to say I pulled it off: they came out simply spectacular. I'm sharing the recipe just as I made it, since the proofing times are quite different from the original. Be warned, this isn't one for when you're in a rush, but it's totally worth it…

suizos1

What do we need?

  • 500 g (4 cups) bread flour
  • 250 g (1 cup) whole milk
  • Two eggs
  • 90 g (about 1/2 cup) sugar
  • 5 g (1 tsp) salt
  • 3 g (1 tsp) active dry yeast
  • 80 g (about 1/3 cup) softened butter
  • One beaten egg for glazing
  • Sugar and water for decorating

How do we make it?

  1. First, dissolve the yeast in 100 g (about 1/3 cup + 1 tbsp) of warm milk and add 100 g (about 3/4 cup) of bread flour. Mix well with a wooden spoon, cover the bowl, and let it ferment until you see bubbles forming.
  2. After the resting time, add all the other ingredients except the butter. Start mixing with the wooden spoon and finish with your hands. Let it rest for 10 minutes and knead again, simply pinching a bit of dough from the outside and folding it inward. Repeat this rest-and-quick-knead cycle two more times. You'll notice the dough becomes less sticky and more elastic.
  3. Add the softened butter and knead again. In my case I used the dough hooks on my mixer, but you can do it perfectly well by hand. You want to end up with a fairly smooth dough.
  4. Grease a clean bowl with a little sunflower oil and put the dough in, covered with plastic wrap. Let it rest until doubled in size. Since my kitchen was pretty cool, I left it overnight (about 20 hours of proofing in total).
  5. Once doubled, turn the dough out onto a floured countertop and press it down with your hands to release all the air. Form little balls of 60 g (about 2 oz) each.
  6. To get perfect balls, pinch them to form a sort of bundle and then roll them. Since a picture is worth a thousand words, you can see this technique in the video by María Lunarillos.
  7. Let the balls rest on a baking tray lined with parchment paper, covered with plastic wrap, until doubled in size. In my case, I left them for almost 4 hours and they didn't quite double, but it was enough.
  8. Preheat the oven to 210°C (410°F) and brush the buns with beaten egg, being careful not to flatten them. Brush them twice, leaving about 10 minutes between coats so the egg film dries slightly.
  9. With a very sharp serrated knife, make a deep cut down the center and sprinkle on sugar moistened with water (just like the kind we use for roscón de reyes).
  10. Place in the oven on the lowest rack (top and bottom heat, no fan), lower the temperature to 200°C (390°F), and bake for 12 minutes. Finish with 1 more minute with the fan turned on.
  11. Take them out and let them cool as long as your cravings to sink your teeth into one will let you.

suizos2

Tips:

– It's not a difficult recipe but it requires time and patience. It's better to trust the look of the dough than the times I give you, since depending on the room temperature and other factors they can vary considerably.

– In many recipes there are ingredients you can easily swap for others, but in this case, you cannot replace the bread flour with regular flour or the active dry yeast with baking powder.

suizos3

November 17, 2017 · 4 min · Palstelera

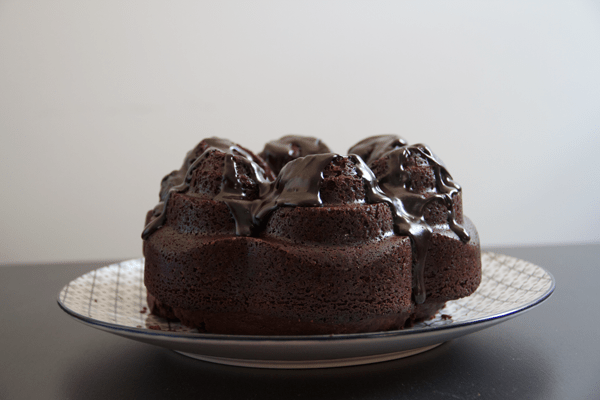
Pure Cocoa Bundt Cake

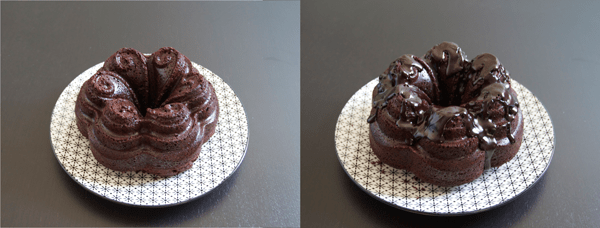
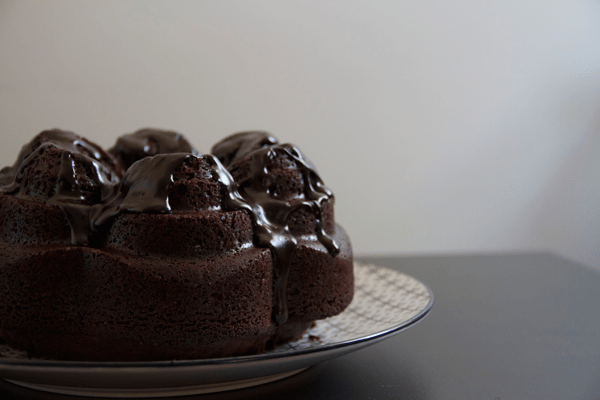
To kick off the weekend, the holidays, celebrate Madrid's La Paloma festivities… any excuse is a good one to bake this wonderful, fluffy cocoa cake. I got this recipe from Alma Obregón's blog and only made a few small tweaks (Cesmm always tells me I'm incapable of following a recipe to the letter… could it be true?). Made with pure cocoa instead of chocolate, it feels lighter, and the syrup on top is perfect for those who love bitter, not-too-sweet chocolate. Bundt cakes are those ring-shaped cakes with a hole in the middle. Technically, only Nordic Ware® brand cakes are bundt cakes, but the name is generally used for any cake of this shape. If you want to learn more about its history and even when its international day is celebrated, you can read about it here.

bundt

What do we need?

  • 125 g (4.4 oz / 1 stick + 1 tbsp) butter
  • 2 eggs
  • 250 ml (1 cup) milk
  • 360 g (1¾ cups) white sugar
  • 60 g (⅔ cup) unsweetened pure cocoa powder (I use the Valor brand)
  • 260 g (2 cups) all-purpose flour
  • ½ teaspoon baking soda
  • ½ teaspoon baking powder
  • 1 pinch of salt

For the syrup:

  • 40 g (scant ½ cup) unsweetened pure cocoa powder
  • 3 tablespoons white sugar
  • 1 tablespoon cornstarch
  • 3 tablespoons corn syrup
  • 120 ml (½ cup) milk


How do we make it?

  1. Preheat the oven to 180°C (350°F).
  2. Melt the butter in the microwave and once fully melted, add the eggs and the milk and mix well. It's best if the milk is at room temperature so the butter doesn't solidify into little lumps (if it does, it's not a big deal, the cake will be just as delicious).
  3. In another bowl, mix all the dry ingredients together (sifted flour, sugar, baking soda, baking powder, and salt).
  4. Then add the wet mixture to the dry one and stir well with a whisk until you have a smooth, lump-free batter. You don't need to use an electric mixer, a hand whisk works perfectly.
  5. Pour the batter into the previously greased pan (with a baking spray or with butter/margarine/sunflower oil) and bake at 180°C (350°F) for 45-50 minutes. You'll know it's done when a skewer inserted into the cake comes out clean.
  6. Let it rest for at least 20 minutes inside the pan while you prepare the syrup.
  7. For the syrup, mix all the dry ingredients in a small saucepan and then add the rest.
  8. Heat over low heat and stir constantly until it thickens and reaches the desired consistency.
  9. Once the resting time is up, unmold the cake and pour the syrup over the top. Enjoy!

bundt2

Tips:

– You can easily find corn syrup in creative baking shops, which are popping up in more and more places. One of the most common brands is Karo, which is what I used for this recipe.

– As tempting as it is to dig in straight out of the oven, it's really important to let it rest. Otherwise, the cake will fall apart. So, patience…

– It's best to pour the syrup while it's still hot so it runs nicely down the sides of the cake, since it solidifies very quickly (it never goes completely hard, but it sets into a kind of gooey cream).

bundt3

August 12, 2016 · 3 min · Palstelera

Strawberry Petit Suisse

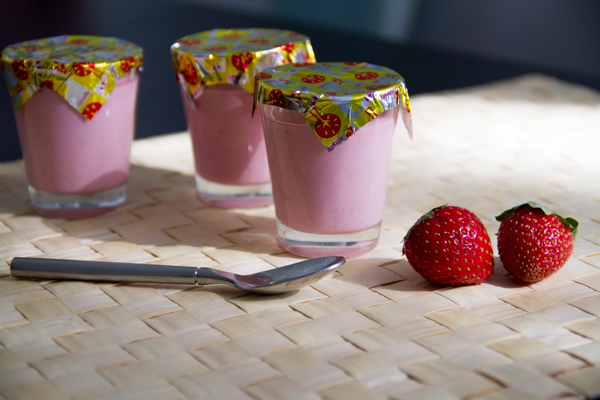
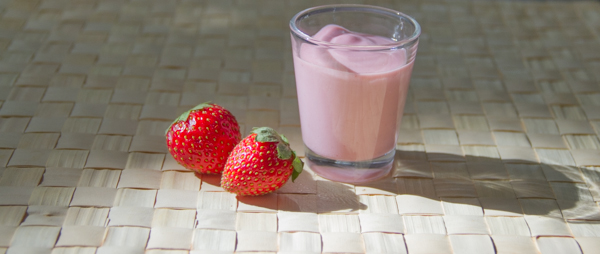
For many of you, this is probably a childhood memory, and I bet that every once in a while you get tempted to buy them again and eat two in a row without your mom scolding you. Well, if I tell you that you can make them at home and that the size is up to you, I think you should already be on your way out to buy some good ripe strawberries.

Pics and Cakes

What do we need?

  • 500 g (1.1 lb) strawberries
  • 250 g (9 oz / about 1 cup) cream cheese (Philadelphia type)
  • 100 g (about 1/2 cup) heavy whipping cream
  • 150 g (3/4 cup) sugar
  • 2 teaspoons powdered cuajada (rennet-based setting mix)


How do we make it?

  1. First, wash the strawberries and remove the stems. Blend them well with a hand blender until you get a strawberry purée.
  2. In a small glass, put a bit of the strawberry purée and dissolve the cuajada in it. Set aside.
  3. Put the rest of the strawberry purée in a saucepan and heat it until it boils.
  4. Remove from the heat, add the portion of purée with the dissolved cuajada, and stir well.
  5. Put it back on the heat for about two minutes, stirring constantly. (BE CAREFUL at this step because if the heat is too high the strawberry purée can splatter and burn you. Trust me, the stuff is worse than water — being denser, it really sticks to you.)
  6. Let the purée cool down a little and then add the rest of the ingredients (sugar, cheese, and cream).
  7. Blend everything well with the hand blender and you'll see it has already taken on a lovely petit suisse color.
  8. All that's left is to pour it into whatever little glasses you want to serve it in and leave it in the fridge overnight.

Pics and Cakes

Tips:

– We used shot glasses — they look really cute and it's the perfect portion size, since we have to admit this is a pretty rich dessert (now I understand why our moms wouldn't let us eat too many… :-P). You can also use the little glass yogurt jars or any small cup you have around.

– I can't tell you for sure how long they'll keep in the fridge, but with these ingredients I'd estimate they'll last a week without any problem.

June 4, 2015 · 2 min · Palstelera