Pasta Carbonara

Truth is, this is a recipe we’ve been making for ages and one that I always thought was “the original” — the way I figured this typical Italian dish was prepared by mammas all over Italy. How wrong I was… Every Italian who’s seen us make this dish has been surprised, has laughed, and has gotten outraged in equal measure when watching us prepare “their dish” with cream instead of uovo. Here you can see how they make it, and without further ado I’ll show you our version (having tried both, I’ll stick with ours :p)
Pics and Cakes

What do we need?

(Serves 2)

  • 200 g (7 oz) spaghetti

  • 4 slices of bacon

  • 1/2 onion

  • 200 ml (3/4 cup) cooking cream

  • Salt and pepper

How do we make it?

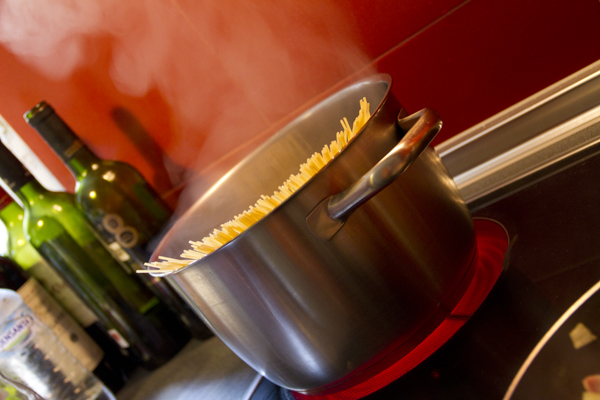
  • Put the spaghetti to cook in plenty of water (once it’s boiling), lightly salted.

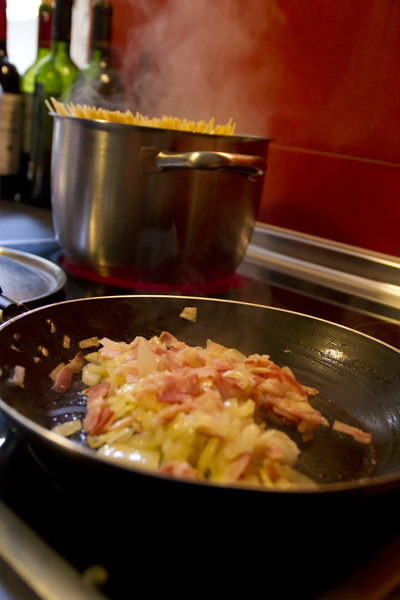
  • While the pasta is cooking — we’ll leave it for around 15 minutes — pour a splash of oil in a frying pan and add the onion.

  • Let it sauté a little and add the bacon.

  • Once it’s done, add the cream and let it come to a boil.

  • Add a pinch of salt — careful not to overdo it since the bacon already gives flavor to the sauce — and a bit of pepper. Set aside if the pasta isn’t ready yet.

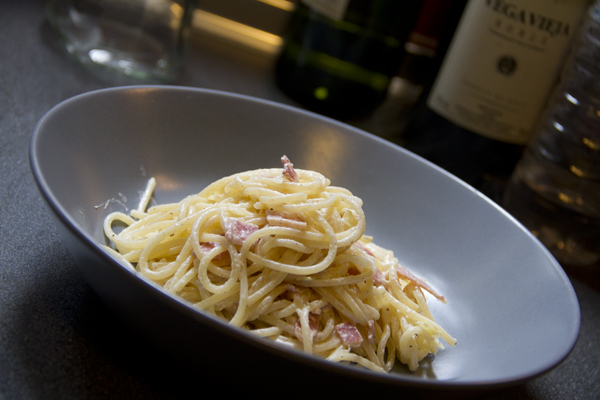
  • Drain the pasta and mix with the carbonara sauce.
Pics and Cakes

Tips:

  • Depending on your stove, pot, and pasta, it may be ready a little before the fifteen minutes or a little after. Keep an eye on it if you like your pasta “al dente”.

  • The bacon can be swapped for pancetta.

  • You can sprinkle a bit of Parmesan cheese on top when you serve the pasta.
Pics and Cakes


Comments

Miguel (2012-11-07 12:01:29):

I usually make this same recipe, but when I add the salt and pepper, I take the chance to throw in a tiny bit (very, very little) of nutmeg.

And I also prefer the cream version over the egg one.

tía pi (2012-11-07 23:41:40):

For me, carbonara is without onion, with bacon, cream and egg, but I’ll give yours a try.

Palstelera (2012-11-09 21:26:49):

I love nutmeg. Truth is I always add it to béchamel but never to carbonara — I’ll try it next time :-)

Palstelera (2012-11-09 21:27:17):

Without onion? Try it, it’s delicious!

Vio (2012-12-07 20:44:34):

Boo! I love the blog, but you also know I couldn’t stay quiet knowing you call this carbonara. Maledetti!

I’ll take the chance to tell you that, aside from the amazing recipes, the site is super pretty and the photos rock ;-)

Big kiss!

Palstelera (2012-12-11 13:04:25):

hehe, Vio. It’s not that we call it carbonara… it’s that half of Spain does! That’s why, to avoid hurting any feelings, we started the post by making clear that what’s called carbonara in Spain has nothing to do with the Italian recipe… But honestly, I love the Spanish version :-)

Vio (2013-03-05 12:39:39):

Haha, sure — you, Spain… it’s all about complaining :-P

The truth is I do really like this version, but I think the Italian one is much tastier when it’s done right, with crispy bacon, lots of pepper, and nice juicy spaghetti. I will say a lot of Italians make a pretty lousy version and it really brings the dish down.
November 6, 2012 · 3 min · Cesmm

Mango and Duck Ham Mille-Feuille

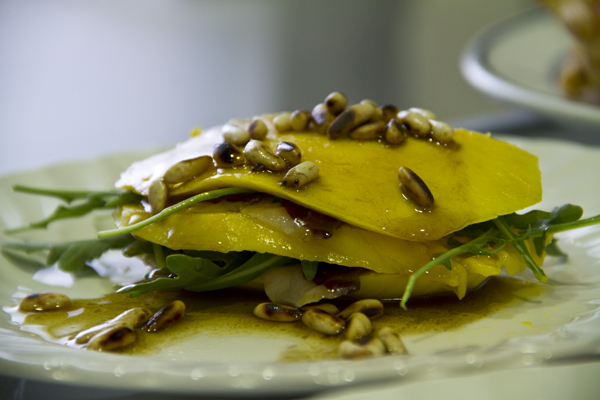
Between one thing and another, this delicious recipe seemed to have been forgotten. Luckily, now that we’re getting back into our routine, our weekly posts will too. This recipe, although it sounds fancy and complicated, is really just a salad with slightly unusual ingredients that will delight anyone who tries it.

Pics and Cakes

What do we need?

(serves 4)

  • 2 ripe mangoes

  • 150 g (5.3 oz) duck ham

  • Arugula

  • Pine nuts

  • Oil, salt, and vinegar

How do we make it?

  • Lightly toast the pine nuts in a hot pan, without oil.

  • Peel and slice the mangoes into thin layers.

  • Build the mille-feuilles by alternating mango slices with duck ham and arugula.

  • Prepare a vinaigrette to taste and drizzle it on top right before serving.

  • Sprinkle a few toasted pine nuts over each mille-feuille.

Tips:

  • For a more budget-friendly version, you can swap the duck ham for serrano ham and the pine nuts for toasted hazelnuts.

  • Fruit in salads adds a sweet, fresh touch, so feel free to throw mango, pineapple, apple… into your everyday salads.

[English version] SALAD WITH MANGO AND DUCK HAM Ingredients (serving 4):

  • 2 large mangos

  • 150 g duck ham

  • rocket salad

  • pine nuts

  • olive oil, vinegar and salt

  • Grill the pine nuts in a saucepan.

  • Peel and cut into thin slices the mangos.

  • Create the individual salads by alternating layers of mango, rocket salad and duck ham.

  • Make a vinaigrette and pour it over the salad before serving.

  • Add some pine nuts.

    Tips:- For the economic version of this recipe, use cured (pork) ham instead of duck ham and hazelnuts instead of pine nuts.- You can use mango or any other fruit for your ordinary salads, the taste will be fresh and sweet!


October 22, 2012 · 2 min · Palstelera

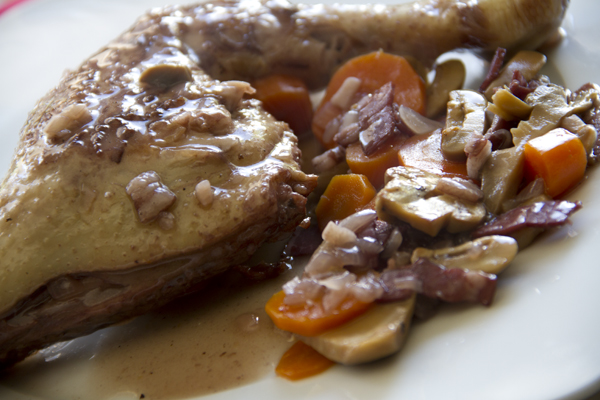
Coq au vin

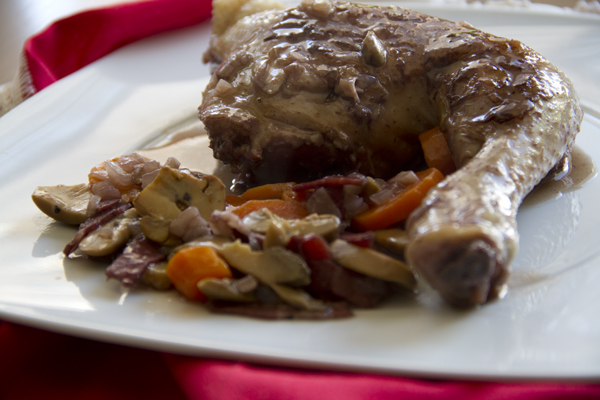
Whole kitchen in their Savory Proposal for October invites us to prepare a French classic, “Coq au Vin”. Or in other words, chicken in wine — you can tell I learned French at school :p.

Pics and Cakes

What do we need?

(serves 2)

  • 2 chicken thighs

  • 1 large onion

  • 2 carrots

  • 3 slices of bacon

  • 2 cloves of garlic

  • 50 g (1.75 oz) mushrooms

  • 2 glasses of wine

  • 4 glasses of chicken stock

  • Flour and butter

  • Salt and pepper

How do we make it?

  • Start by chopping the onion, carrot and bacon.

  • Heat a little oil over medium heat in a wide, shallow pot. Add the chopped ingredients.

  • Once they’re slightly golden, add the minced garlic, cook for a minute and set aside in a bowl.

  • In a zip-lock plastic bag, add a couple of tablespoons of flour, a pinch of salt and pepper. Drop in one of the thighs and shake to coat. Repeat with the other.

  • Once floured and seasoned, sear the thighs in a pan for about 10 minutes.

  • Remove the chicken, add the wine and let it reduce a bit.

  • Return the thighs to the pan, add the vegetables and pour in the chicken stock.

  • Simmer everything together over low heat for about 50 minutes.

  • Once the chicken is well cooked, remove the chicken and the vegetables.

  • With a tablespoon of flour and one of butter, form a smooth paste and stir it into the sauce.

  • Stirring constantly, cook over low heat for a couple of minutes until the mixture thickens.

  • In a frying pan with a little oil, sauté the mushrooms until golden.

  • Finally, return all the ingredients to the pot and let everything cook together for a couple of minutes so the flavors blend.

Tips:

  • If you have some sauce left over, you can use it to make some tasty meatballs in sauce.

  • If it doesn’t thicken enough, add a tablespoon of cornstarch dissolved in cold water.

Pics and Cakes

[English version] COQ AU VIN* *Ingredients (serving 2):

  • 2 chicken legs an thighs

  • 1 large onion

  • 2 carrots

  • 3 bacon slides

  • 2 cloves of garlic

  • 50 g mushrooms

  • 2 cups of red wine

  • *4 cups of chicken stock *

  • Flour and butter

  • Salt and pepper

  • Chop onion, carrot and bacon.

  • *Place some olive oil into a deep sauce pan and heat it. Add chopped ingredients. *

  • Cook until ingredients are slightly browned, add chopped garlic and keep cooking for one minute. Set aside.

  • *Put a couple of tbsp of flour, a pinch of salt and pepper into a plastic bag. Put the chicken inside and shake it well to create a thin layer on the chicken. *

  • Stir over a high heat for 10 minutes.

  • *Remove chicken, add red wine and simmer to reduce it. *

  • *Put the chicken back into the sauce pan, add chopped vegetables and chicken stock. *

  • *Simmer for round 50 minutes, cooking over a low heat. *

  • When chicken is soft and cooked, remove it from the sauce pan.

  • *In a different bowl, mix some flour and butter and add it to the sauce. *

  • *Keep stiring, cooking over a low heat for a couple of minutes. *

  • *In another pan, stir fry the mushrooms with a bit of olive oil until golden browned. *

  • Add all the ingredients into the sauce pan with the wine sauce and cook for a couple of minutes in order to combine all flavors.

  • Tips:**- If there is some sauce left, you can use for preparing meatballs. It will be delicious!*
    • If you want a thicker sauce, add some corn flour.*

Comments

tía pi (2012-11-18 22:03:03):

Today I made the coq au vin following your recipe — delicious! I didn’t make it with rooster, I used a free-range chicken, one of those that look like they’ve got hepatitis, and honestly it was finger-licking good. I had some sauce left over and I’m planning to poach a few eggs to keep dipping bread. Thanks, piggies.

October 18, 2012 · 4 min · Cesmm

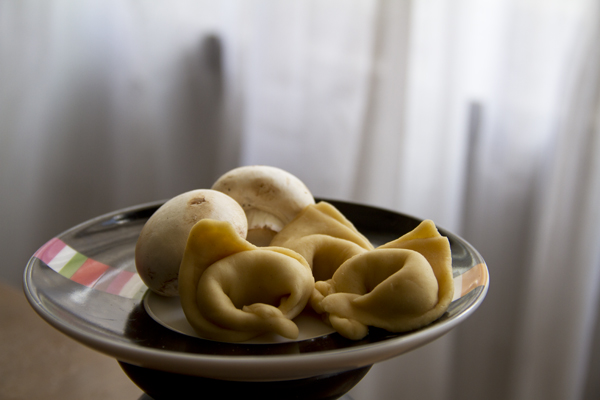
Fresh Stuffed Pasta

Whole Kitchen in their Savory Proposal for the month of September invites us to make an Italian classic: “Stuffed Pasta.” With this recipe we kick off a new adventure on this amazing food blog, where every month we’re challenged to make a savory dish and a sweet one. We love the idea — it’s original and pretty useful, since it pushes you to make dishes you might not normally tackle, and it also lets you check out what the other participants come up with.

Pics and Cakes

What do we need?

(Serves 4)

  • For the dough:
  •   300 g (2.5 cups) flour
    
  •   1 egg and 1 egg white
    
  •   2 tbsp olive oil
    
  •   1/2 tsp salt
    
  •   1 tsp vinegar
    
  • For the filling:
  •   2 small onions, finely chopped
    
  •   1 clove of garlic, finely chopped
    
  •   300 g (10.5 oz) mushrooms
    
  •   2 tbsp parsley
    
  •   Salt
    
  •   40 g (1.5 oz) aged cheese
    
  • For the sauce:
  •   200 ml (3/4 cup + 1 tbsp) heavy cream
    
  •   4 slices of bacon (thick-cut)
    
  •   Salt and pepper
    

Pics and Cakes

How do we do it?

  • Put the flour in a bowl, make a well in the center, and add the egg, the egg white, the salt, the oil, and the vinegar.

  • Knead until you get an elastic dough, adding a splash of water if needed.

  • Wrap the dough in plastic wrap and let it rest in the fridge for at least an hour.

  • Heat a little oil in a large pan, add the onions, garlic, and mushrooms. Cook gently over low heat until all the liquid has evaporated.

  • Stir in the parsley and season. Add the finely chopped aged cheese and mix well (with the heat off). Let it cool.

  • Once the dough has rested, divide it in two and roll out one half with a rolling pin until very thin. Ideally you’d use a pasta machine, but not everyone has one at home, so a rolling pin will do the trick.

  • Place small mounds of filling on the pasta sheet, leaving space between them.

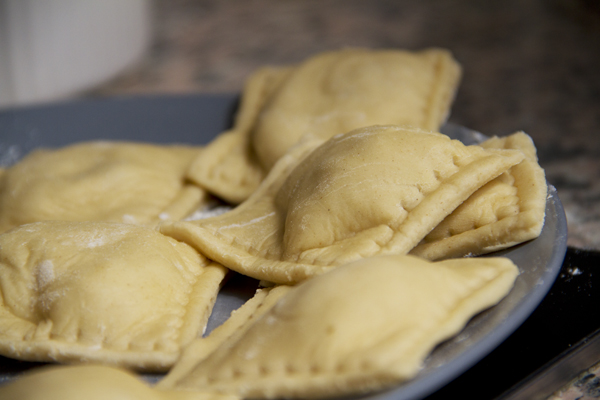
  • Roll out the second half of the dough very thin and lay it over the first one. With your hands, press around the mounds to shape the ravioli.

  • Finally, cut out the ravioli with a round cutter (like a pizza cutter) with fluted edges. Set the ravioli aside while you prepare the sauce.

  • If instead of ravioli you’d rather make tortellini, roll out the dough very thin, fill it, and fold as shown in this [video](

{{}}

).

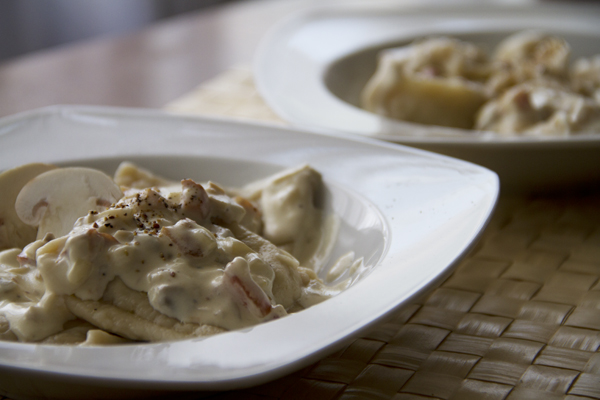
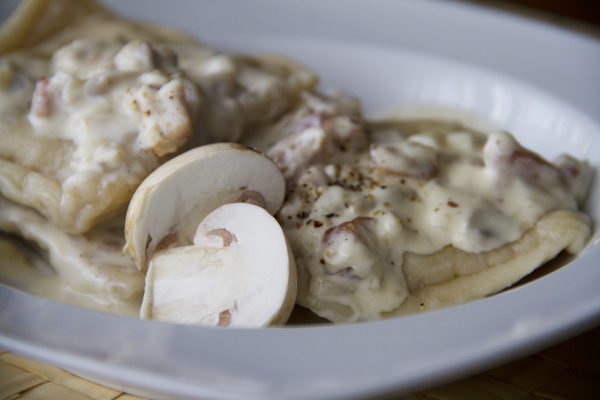
  • For the sauce, use the leftover filling. Sauté the bacon cut into small cubes, add the leftover filling and the cream, and bring to a boil. Simmer for a few minutes and adjust salt and pepper to taste.

  • Cook the pasta, drain it, add the sauce, and… buon appetito!

Pics and Cakes

Tips:

  • The dough has to be very thin. If you’re using a rolling pin, that means once you think it’s thin enough, roll it out at least three more times. I also recommend making your ravioli or tortellini small, since they’ll grow when cooked.
  • If you don’t have a pasta cutter, you can use a regular knife, but make sure to seal the edges well afterward or you’ll lose the filling during cooking. You can seal them with your fingers, a fork, or the edge of a serrated knife.
  • Our pasta took quite a while to cook (15 minutes) because the pieces were too big and chunky.

Pics and Cakes


September 18, 2012 · 4 min · Palstelera

German-Style Salad

Taking advantage of the fact that it’s not too cold yet, though it’s clearly true that Winter is Coming, here’s a simple recipe you can put together for any family gathering, get-together with friends, or just an everyday meal — you can even make it the day before.

Pics and Cakes

What do we need?

(serves 4-6)

  •   2-3 large potatoes
    
  •   3-4 sausages
    
  •   1 onion
    
  •   2 tomatoes
    
  •   3-4 pickles
    

How do we make it?

  • Boil the potatoes with the skin on, washed.

  • Poke the potatoes with a “pincho catador” (a fork or any utensil that lets you check if the potatoes are done). Once they’re ready, take them out, peel, chop into pieces and set aside.

  • In a frying pan with a splash of oil, cook the sausages and then cut them into chunks. Set aside once done.

  • Meanwhile, slice an onion into strips and dice the tomatoes.

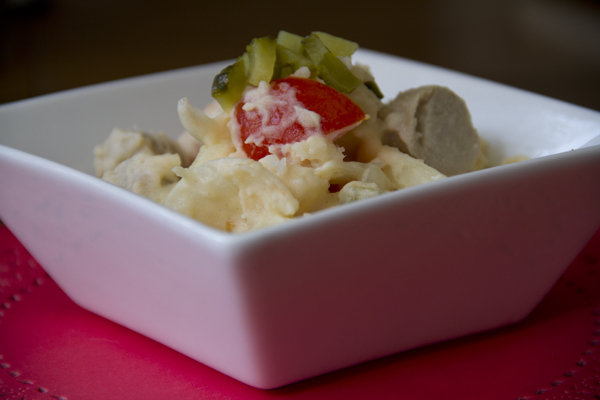
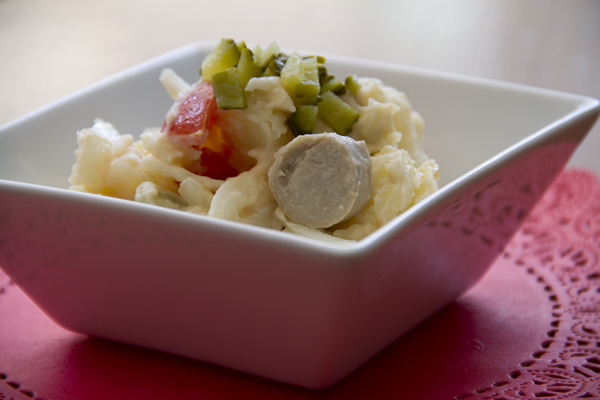
  • Mix everything in a large salad bowl and add the mostanesa sauce (mayonnaise and mustard in a 4-to-1 ratio).

  • Finally, let it chill in the fridge.

Tips:

  • Palstelera loves sweet-and-sour pickles, so the tip is obvious — go with sweet-and-sour pickles.
  • The mayo-to-mustard ratio is just a guideline. It depends on the kind of mustard you’re using and whether you like the flavor milder or with more kick.

Pics and Cakes

September 2, 2012 · 1 min · Cesmm

Salmorejo

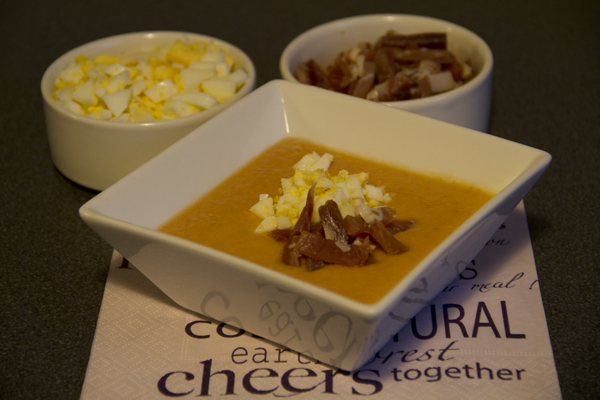
Salmorejo is one of my favorite dishes, and I can vouch for the fact that I’m not the only person in my family who, the moment we get back from a long trip abroad, the first thing we ask for at home is a good salmorejo and a proper Spanish potato omelette. This dish is typical of Córdoba and it shares similarities with gazpacho since, at the end of the day, it’s a kind of cold soup or cream with tomato as its base. Needless to say, the better the tomatoes you use, the better the salmorejo will turn out.

Pics and Cakes

What do we need?

(serves 6)

  •   1 kg (2.2 lb) ripe red tomatoes
    
  •   1 piece of bread
    
  •   150 ml (2/3 cup) olive oil (or to taste)
    
  •   1-2 cloves of garlic
    
  •   Salt
    
  •   Vinegar
    
  •   4 eggs
    
  •   200 g (7 oz) Serrano ham
    

How do we make it?

  • Wash the tomatoes, cut them into pieces and put them in a bowl.

  • Add the bread (it can be stale bread that we’ve soaked in water for a few minutes beforehand to soften it), salt, garlic, vinegar and a little olive oil.

  • Blend with the mixer until you get a smooth cream. Keep adding more olive oil until you get a soft, creamy texture. The amount of olive oil depends on personal taste. The more oil you add, the thicker it will get and the pinker it will look.

  • Taste and adjust the salt and vinegar to your liking. Set aside in the fridge.

  • Boil the eggs, peel them and cut them into small cubes.

  • Chop the Serrano ham into small cubes too.

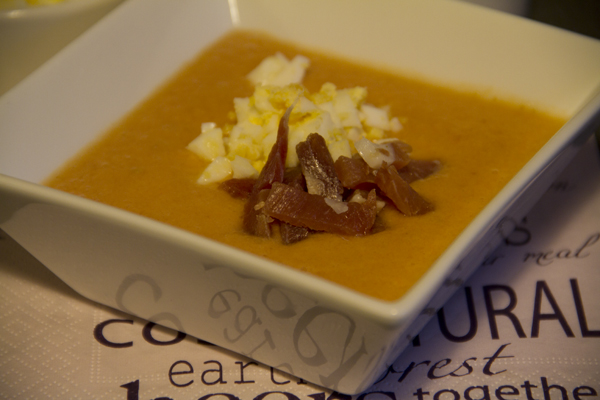
  • Serve the salmorejo very cold with ham and egg on top.

Tips:

  • Some people prefer to peel the tomatoes for a finer result. To make this easier, you can blanch the tomatoes first to remove the skin comfortably.
  • You can make the salmorejo a bit lighter by skipping the bread and reducing the amount of oil.
  • As always, garlic is up to personal taste, but don’t go overboard or you’ll kill the flavor.

Pics and Cakes

*[English version] SALMOREJO (Spanish cold tomatoe soup)

  • **Ingredients (serves 6):- 1 kg ripe red tomatoes
  • Bread

  • 150 ml olive oil

  • Vinegar

  • Salt

  • 1-2 cloves of garlic- 4 eggs- 200 g cured ham

  • Wash and cut tomatoes into pieces. Place into a large bowl.

  • Add bread (you can use stale bread so put it before with some water in order to soften it), salt, garlic, vinegar and a bit of olive oil.

  • Blend all the ingredients with a mixer or blender until you get a smooth cream. Add more olive oil until creamy and soft. (The amount of olive oil is up to you).

  • Try and add more salt and vinegar if necessary. Place into fridge.

  • Boil the eggs, peel them and cut into small pieces.

  • Cut ham into small pieces.

  • Serve cold salmorejo with some egg and ham in the top.

    Tips:- You can peel the tomatoes. For making it easier, scald tomatoes in boiling water.

  • If you want to prepare a lighter version, avoid adding bread and reduce the amount of olive oil.

  • Use garlic according to your preferences but don’t add too much or you won’t taste the other flavours!


Comments

zordor (2012-08-21 05:56:31):

Haha I can vouch for it, I can vouch that the first thing we need to see on the table is salmorejo and potato omelette :) Ufff you’ve made me so hungry! Well, not even hungry! Salmorejo is something you can eat even when you’re not hungry!

Marisa (2012-08-21 09:26:34):

Yummmm! I’m making it tomorrow

August 20, 2012 · 3 min · Palstelera

Chicken and Pineapple Salad

A summer wouldn’t really be summer without this dish. In my family this salad has been around for as long as I can remember, and it feels like an old friend — you might go a while without seeing it, but just thinking about it brings a smile to your face and makes you want to enjoy its company. The first time I offered it to Cesmm, he frowned at the whole pineapple thing, but once he got past those first doubts he became yet another addict of this delicious salad.

Pics and Cakes

What do we need?

(serves 4)

  •   1 whole chicken
    
  •   1 can of pineapple, or fresh pineapple (even better)
    
  •   1 head of lettuce
    
  •   Mayonnaise
    

How do we make it?

  • First, boil the chicken in a pot with water and salt. Let it cook for a good while (2 hours) until you can see it’s well done and the meat practically falls off the thigh bone on its own.

  • Once the chicken is cooked and has cooled down a bit, shred it with your hands into medium-sized pieces (just right for a bite).

  • Wash the lettuce and slice it into very thin strips (julienne).

  • Separately, cut the pineapple slices (or fresh pineapple) into small pieces.

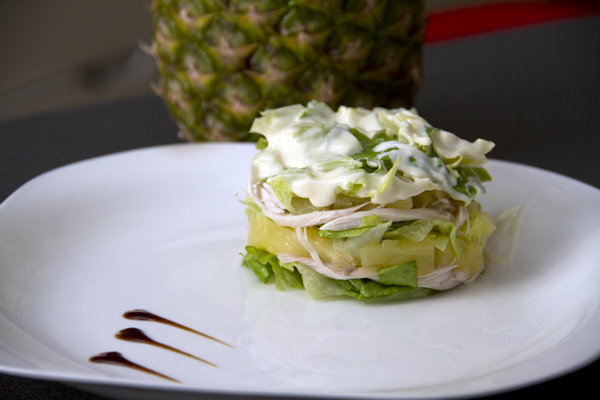
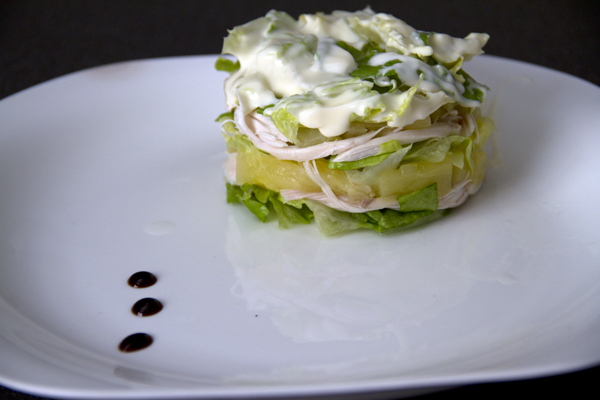
  • Build your salad by laying down a layer of lettuce, then pineapple, then chicken. Repeat the process, pressing down well with your hands so it packs together tightly.

  • Finally, add a layer of mayonnaise on top and let it rest in the fridge.

Tips:

  • It doesn’t matter if there are leftovers — once it’s “rested” the salad is just as good, or even better.
  • Don’t throw away the broth from boiling the chicken; you can use it for rice, soup, etc.
  • You can sprinkle some chopped walnuts or hazelnuts on top of the mayonnaise. They add the perfect finishing touch.

Pics and Cakes

*[English version] CHICKEN & PINEAPPLE SALAD

  • **Ingredients:- 1 whole chicken
  • 1 lettuce

  • Fresh pineapple or canned pineapple

  • Mayonnaise

  • Place chicken in a large pot and add water to cover. Add some salt, cover pot and bring to boil. Cook for about 2 hours or until chicken meat is falling off the bone.

  • When chicken is boiled and cooled shred chicken using your fingers.

  • Wash lettuce and chop finely.

  • Dice pineapple.

  • Place the ingredients by layers: lettuce, pineapple and chicken. Repeat the order and press with your hands.

  • Add some mayonnaise on the top.

    Tips:- If there is some salad left, no problem, it will be even better the day after!

  • Don’t discard the water from boiled chicken, you can use it to cook rice, soup, etc.

  • You can add some chopped nuts or hazelnuts on the top. Simply delicious!


Comments

Marisa (2012-08-07 08:24:55):

What lovely photos! I know this dish — although I don’t plate it as nicely, I chop the lettuce really, really finely and press the layers down as I go.

silvia (2012-08-07 21:39:01):

I’m getting hungry, and it looks so refreshing!! I tried it at Fuentes and I can confirm it was really tasty… maybe I’ll make it tomorrow for lunch…

zordor (2012-08-10 01:55:25):

Without a doubt this recipe is one of the crown jewels of our family wisdom, hehe. For me the best part is that one chicken yields a tooon of salad, it’s super refreshing, and you can make it the day before, for the next day, or even the day after that — just pull it out of the fridge and eat! A really refreshing dish, one of the best things going for summer.

Ociore (2012-08-30 17:23:25):

Oh, if you only knew that your brother revealed this secret family recipe of yours to me years ago, when I was just starting out with my blog (in London)… XD The truth is, looking at the photos, the salad looks amazing! By the way, congrats on your blog!! :) Greetings from Heidiland. ;)

Antz (2012-08-31 09:54:24):

Like Ces, I was wary of the whole pineapple thing… but after trying it last night, I have to say I’ve been converted to the pineapple world!! A 10/10 combo!!! :D

La Enana (2012-09-14 22:54:08):

Mmmmmmh I love this salad!!!!!!! :) I like to top mine with some lightly crushed hazelnuts!!

20 low-calorie salad recipes - Me Siento Guapa (2014-01-07 16:01:33):

[…] Chicken and pineapple salad […]

August 6, 2012 · 4 min · Palstelera

Risotto My Way

It’s been a while since I made my first risotto. I think I learned it from Arguiñano, back when my mom and I used to watch him at lunchtime. I have a feeling I also followed the recipe from some Wii video game once. Anyway, I’ve been tweaking, adapting and improvising on top of the fundamental rule for a good risotto: never stop stirring.

Pics and Cakes

What do we need?

(serves two)

  •   1 ½ cups short-grain rice
    
  •   Warm water
    
  •   2 cloves of garlic
    
  •   A quarter of a large onion
    
  •   Wild mushrooms / button mushrooms
    
  •   100 g (3.5 oz) blue cheese
    
  •   Salt
    

How do we make it?

  • Add a splash of olive oil to a saucepan.

  • Dice the blue cheese into small cubes. Finely chop the garlic and onion.

  • Add the garlic and onion to the pan and turn the heat down a bit so they don’t burn. Once they’ve softened a little, add the mushrooms cut into medium-sized pieces.

  • Let everything cook together for a few minutes and add a pinch of salt.

  • Once the sofrito is ready, add the rice and stir well so the rice soaks up the flavor.

  • Now, the usual thing would be to add twice as much water as rice and let it cook. We’re going to add just a bit of water — about half a cup (120 ml / 4 fl oz) if we used a cup and a half of rice.

  • While stirring, add salt and a bit of blue cheese. Once everything is well mixed and the water has reduced, lower the heat a little.

  • Without stopping stirring, keep adding more water (as much as your risotto asks for) and blue cheese.

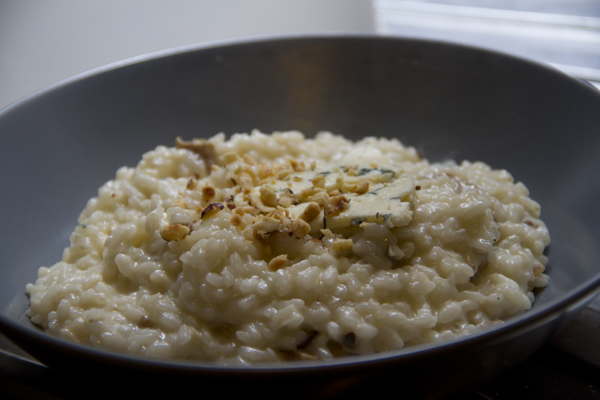
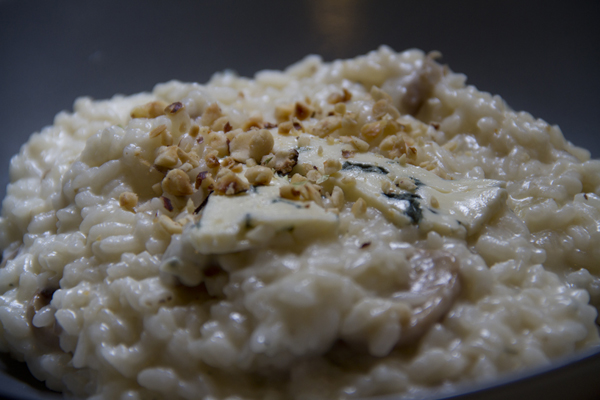
  • When you see the rice is cooked, turn off the heat, cover, and let it rest for as long as it takes you to slice some thin strips of blue cheese to decorate the plate.

Tips:

  • We used blue cheese, but you can use any other kind. If you don’t like strong cheese, an aged cheese will thicken it more and barely taste of cheese.
  • For decoration you can also add hazelnuts, walnuts or almonds.
  • If you don’t have wild mushrooms, you can swap them for button mushrooms.

Pics and Cakes

[English version] RISOTTO MY WAY **Ingredients:- 1 ½ medium-grain rice

  • 3 cups warm water

  • 2 cloves of onion

  • ¼ large onion

  • Mushrooms

  • 100 g blue cheese

  • Salt

  • Add a splash of olive oil in a sauce pan.

  • Dice blue cheese and chop garlic and onion.

  • Add garlic and onion to the sauce pan and fry slowly to avoid burning. When they have softened, add the mushrooms (if they are too big, you can cut them into medium-size pieces).

  • Cook slowly for some minutes and add a pinch of salt.

  • When ready, add the rice and keep stirring while everything is cooking and flavors are melting.

  • Usually we add 2 parts of water to 1 part of rice. For risotto recipe we will be adding all the water needed progressively.

  • While stirring, add some salt and part of blue cheese. Stir well and turn down the heat to a simmer.

  • Keep stirring and adding the water and blue cheese, allowing each ladle to be absorbed before adding the next.

  • When rice is cooked and soft, place a lid on the pan and allow to sit. Slice some blue cheese for decoration.

    Tips:- You can use any kind of cheese. Blue cheese has quite a strong flavour but you can substitute it by any other softer.

  • For decoration, you can add some walnuts, almonds or nuts.

  • You can use mushrooms (champignons) or any other wild mushrooms.


July 22, 2012 · 3 min · Cesmm

Chicken Pitas

After a two-week delay and a move in between, we’re kicking off this new adventure in the world of food and new technologies. Since I’m a person who loves to eat, I’ll mostly be in charge of the simple recipes — the kind that save you when dinnertime rolls around. And one of those recipes I love most is the chicken pita. Simple and really tasty.

Pics and Cakes

What do we need?

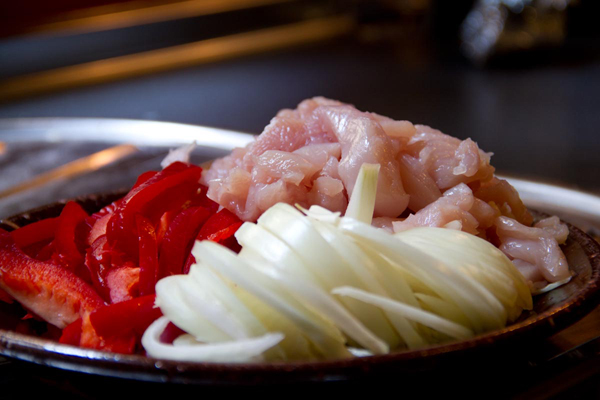
  •   1 chicken breast
    
  •   1/2 red bell pepper (if you have green, throw that in too)
    
  •   1/2 onion
    
  •   3 lettuce leaves
    
  •   Salt and pepper
    

How do we make it?

  • Slice the bell pepper and onion into julienne strips, and cut the chicken into strips.

  • Put a little oil in a frying pan.

  • When it’s hot, add the pepper and onion. Add a pinch of salt.

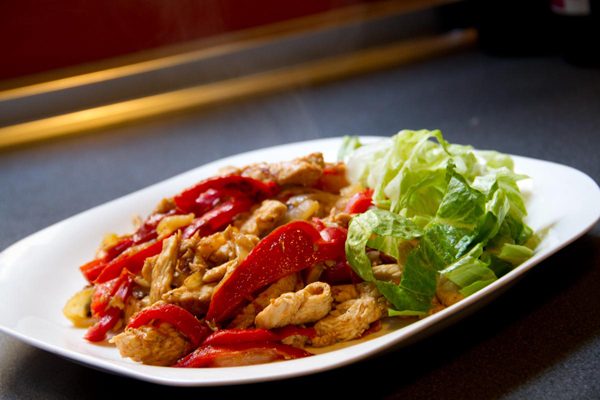
  • When they’re partly cooked — we like the pepper “al dente” — season the chicken with salt and pepper and add it to the pan.

  • While the chicken is cooking, wash and cut the lettuce leaves into strips.

  • Once the chicken is golden, set aside.

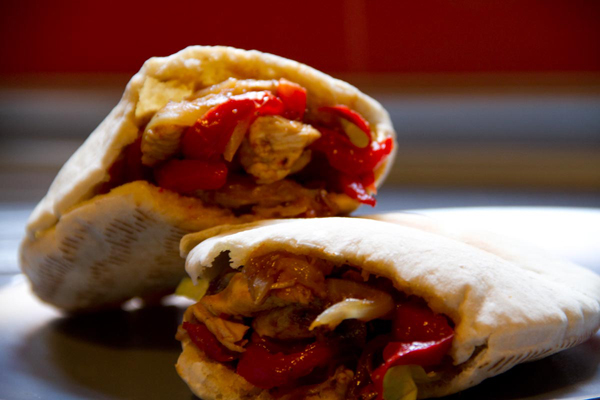
  • Pop two pita breads in the toaster and wait until they’re lightly toasted.

  • Cut off the top of the bread and tuck in the ingredients with the help of a spoon.

Tips:

  • Up to you whether you want to marinate the chicken with lemon or not. To do that, before frying it, put the chicken in a bowl with the juice of one squeezed lemon, salt and pepper for a few hours.
  • You can also add a sauce (mayo, ketchup, mustard thinned with mayo, etc.)

Pics and Cakes

[English version] PITA BREAD FILLED WITH CHICKEN AND PEPPERS **Ingredients:- 1 chicken breast

  • 1/2 red pepper (you can also use green pepper)

  • 1/2 onion

  • 3 lettuce leaves

  • Salt and pepper

  • Slice pepper, onion and chicken into strips.

  • Put some olive oil in a frying pan.

  • Stir fry pepper and onion. Add some salt.

  • Salt and pepper chicken strips and add to the pan.

  • Meanwhile, wash and cut lettuce.

  • When chicken is golden, put it aside.

  • Toast pita bread and fill it with lettuce, chicken and veggies.

    Tips:- You can marinate the chicken by putting it with salt, pepper and fresh lemon juice for some hours before cooking it.- You can add some sauces to your pita sandwich (mayonaise, ketchup, mustard+mayo, etc.) Pics and Cakes


Comments

ReimonStar (2012-07-17 13:20:02):

Cuz, those look great. I make them with fajita wraps instead of pita and I add some really spicy mojo picón from Carrefour and a touch of guacamole from Mercadona and yum yum yum. By the way, the photos are really cool. Keep it up! Next up TVLaElipa

Cesmm (2012-07-17 16:37:37):

Duly noted, Don Reimon.

July 15, 2012 · 3 min · Cesmm

San Isidro Casserole

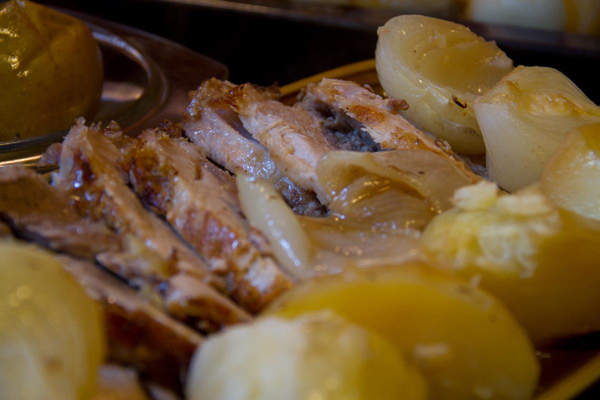
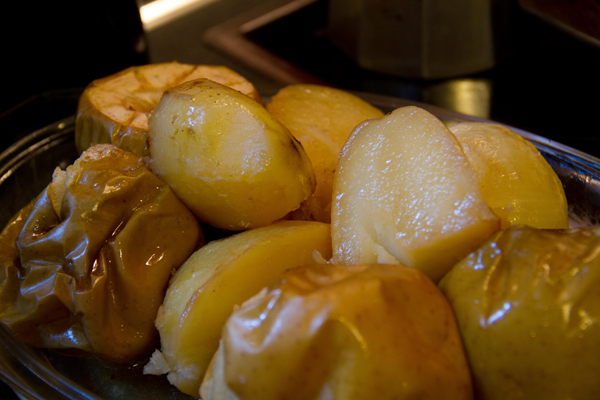
This very traditional Spanish name is just a family nickname for a delicious pork roast served with potatoes, onions, and apples. The tradition behind this dish calls for preparing it in a clay pot bought at the Pradera de San Isidro to celebrate Madrid’s patron saint day. Either way, with or without a clay pot, with or without the saint involved, the result is a super easy dish that’s perfect for a meal with several guests.

Pics and Cakes

What do we need?

  •   1 pork shoulder (bone-in is better)
    
  •   4 apples
    
  •   6 onions
    
  •   8 potatoes
    
  •   300 ml (1.25 cups) beer or white wine
    
  •   Salt and pepper
    

How do we make it?

  • Preheat the oven to 200°C (390°F)

  • Place the pork shoulder on an oven tray or, preferably, in a deep clay dish. Season the whole piece with salt and pepper on both sides.

  • Put the dish in the oven. Leave it for about 30 minutes so it browns at high heat, then flip the meat over. From this point on, whenever the meat looks too dry, we’ll baste it with beer or white wine.

  • Meanwhile, take the chance to peel the onions and potatoes. Cut the onions in half and the potatoes into large chunks.

  • Finally, add the potatoes, onions, and whole apples to the dish with the meat and lower the oven to 180°C (355°F) so it cooks slowly for about another hour and a half.

Tips:

  • Every oven is its own world, so temperature and time can vary from one to another. We recommend keeping an eye on it, especially at the beginning, so the temperature stays high but doesn’t burn the meat.
  • The amount of liquid you’ll need to add depends on how fast it evaporates and how much the shoulder absorbs.
  • To serve, we recommend slicing the roasted meat and plating it alongside the rest of the ingredients.

Pics and Cakes

[English version] ROAST PORK WITH ONIONS, POTATOES AND APPLES **Ingredients:- Pork shoulder arm roast

  • 4 apples

  • 6 onions

  • 8 potatoes

  • 300 ml (1.25 cups) beer or white wine

  • Salt and pepper

  • Preheat oven at 200°C (390°F)

  • Put the piece of meat in a deep oven plate. Salt and pepper evenly the piece of meat

  • Enter the plate in the oven and leave for 30 minutes approximately until it golden brown. Then turn upside the piece of meat. From now, start adding some white wine or beer when the meat seems to be too dry.

  • Meanwhile, peal and cut the potatoes and onions. Cut half the onions and leave the potatoes in big portions.

  • Finally, add potatoes, onions and apples to the oven plate with the meat and decrease the oven temperature (180°C / 355°F). Leave it baking slowly for 1h30 more approximately.

    Tips:- Every oven is different, so temperature and baking time may differ from some to others. We advice you to watch it carefully, especially at the beginning because high temperature is needed but not so much to have it burnt.

  • The amount of liquid will depend on how fast it will be absorbed by the meat or evaporated.

  • For serving, we recommend you to slice the meet and serve with the rest of ingredients.


July 15, 2012 · 3 min · Palstelera