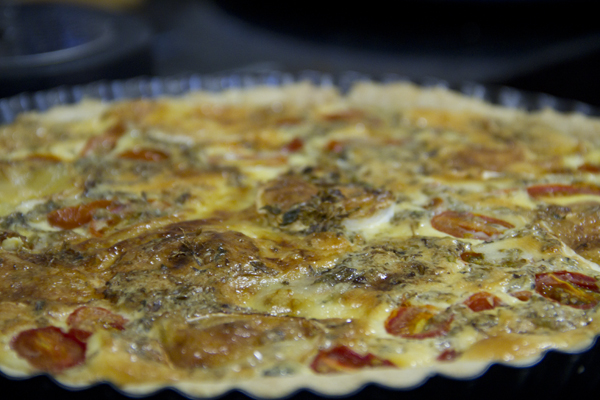
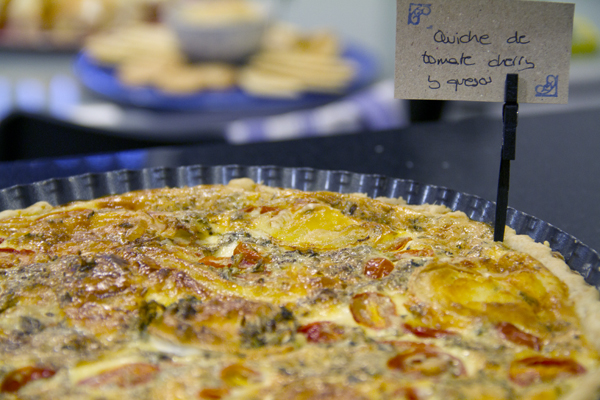
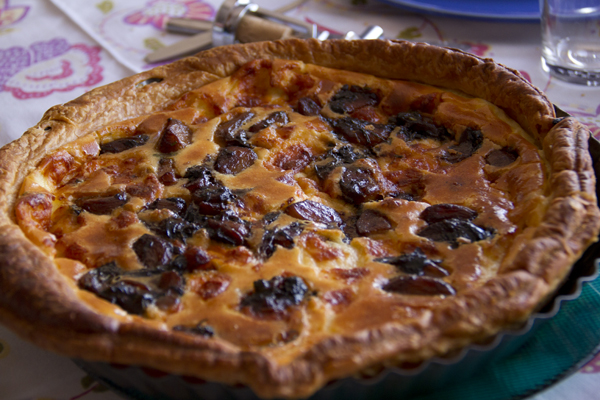
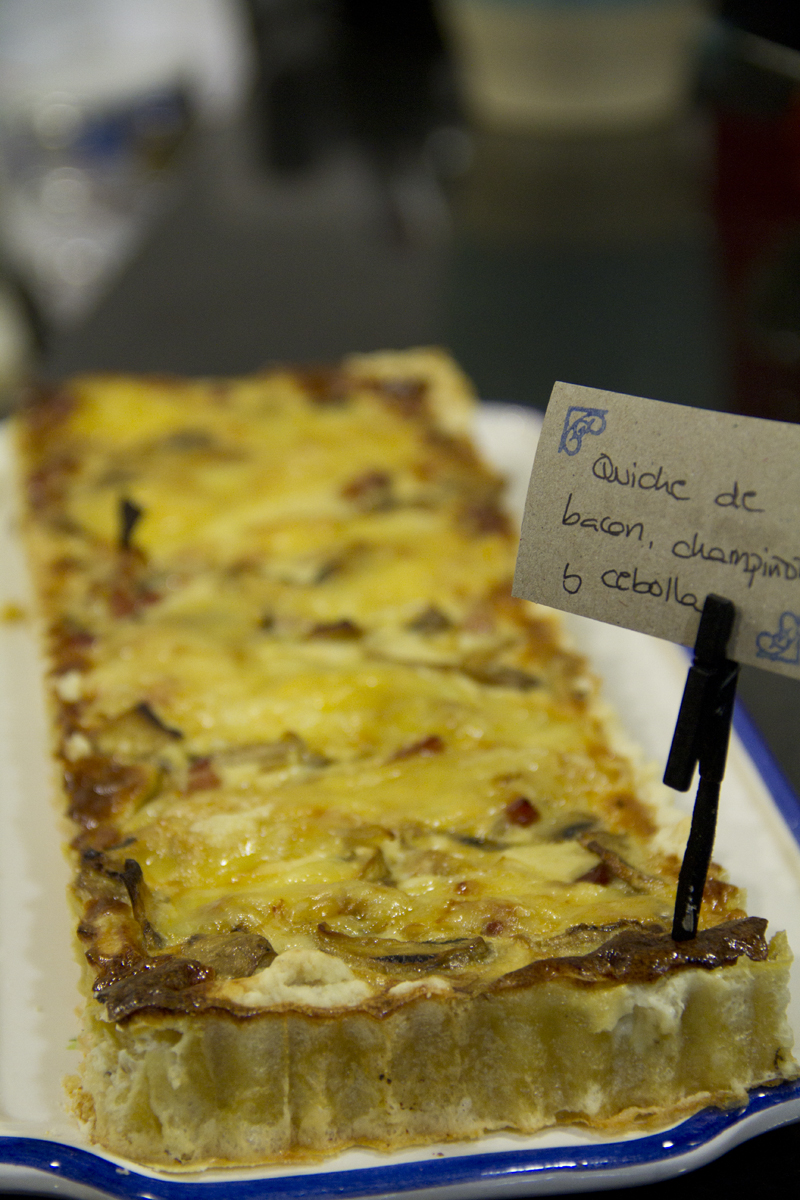
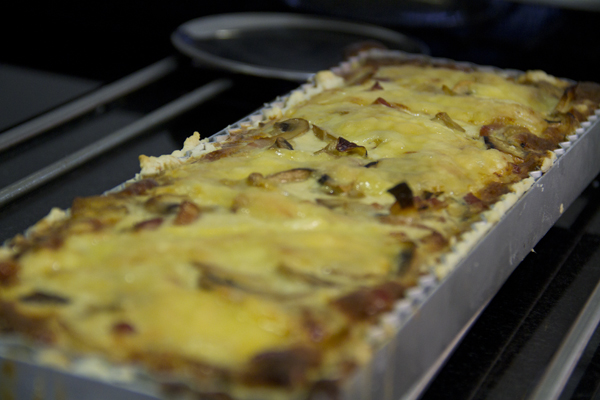
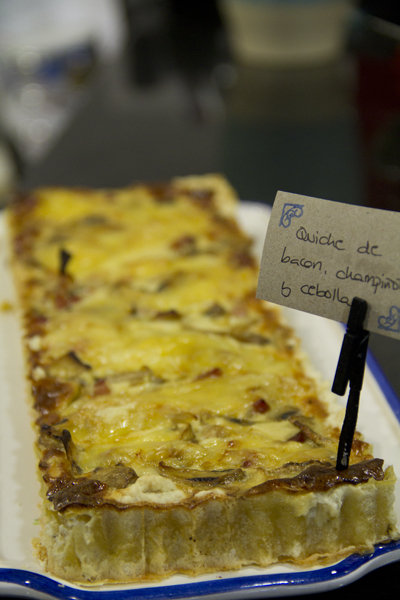
Quiche Lorraine

As part of the campaign “No newly-independent young adult shall go hungry, even if they don’t like cooking,” here’s another easy recipe — one of those that almost everyone knows, but just in case, I don’t want to hear that you’re not eating well just because you couldn’t be bothered to do a couple of little things in the kitchen.
Pics and Cakes

What do we need?

For the shortcrust pastry:

  • 200 g (1 ⅔ cups) flour

  • 100 g (7 tbsp) cold butter

  • 1 egg

  • A pinch of salt

  • A pinch of sugar

For the filling:

  • 200 g (7 oz) bacon

  • 100 g (3.5 oz) emmental cheese

  • 50 g (1.75 oz) mushrooms

  • 200 ml (¾ cup) heavy cream

  • 4 medium eggs

  • Half an onion

  • Salt and pepper.

How do we make it?

  • As you know, for the shortcrust pastry you can check here.

  • While we’re making the dough, preheat the oven to 180°C (350°F).

  • Once the dough is ready, place it in a baking pan and pop it in the oven for about fifteen minutes. Before putting it in the oven, prick it with a fork so it doesn’t puff up.

  • With the pastry in the oven, heat a frying pan with a splash of oil. When it’s hot, add the onion and mushrooms, all sliced beforehand. Once they’ve softened a bit, add the bacon cut into strips and cook to your liking. Set aside.

  • Beat the eggs in a large bowl and mix them with the cream. Season with salt and pepper.

  • Add the sautéed ingredients to the bowl.

  • When the pastry is partially cooked, take it out of the oven and pour in the mixture. Spread it evenly across the surface and sprinkle the cheese on top.

  • Put it back in the oven and bake for around half an hour.

Tips:

  • Just like we mentioned here, you can pick any kind of cheese you like or whatever you have at home.

  • Shortcrust pastry isn’t hard to make, but if you’d rather, you can buy it pre-made at any supermarket. That way we make sure “No newly-independent young adult goes hungry, even if they don’t like cooking.”
Pics and Cakes

[English version] QUICHE LORRAINE* Ingredients: *Shortbread pastry:

  • 200 g flour

  • 1oo g cold butter

  • 1 egg

  • A pinch of salt

  • A pinch of sugar


Filling:

  • 200 g bacon

  • 100 g emmental cheese

  • 50 g mushrooms

  • 200 ml cream

  • 4 eggs

  • 1/2 onion

  • Salt and pepper

  • *Prepare the shortbread pastry. You can see here our recipe. *

  • Preheat oven at 180º C.

  • Roll out the pastry and place into a baking pan. Bake for 15 minutes. If we bake directly with the filling on it, the pastry will be underdone. To avoid the pastry to ‘grow’ in the oven, you can place a baking paper and fill up with baking beans. You can also pierce the pastry with a fork.

  • While the pastry is baking in the oven, heat a bit of olive oil in a frying pan. Chop onion and mushrooms and place them into the hot frying pan. After a few minutes, add the bacon cut into strips and keep stir frying for a few extra minutes. Take it out from heat and set aside.

  • In a large bowl, beat eggs and cream together. Add salt and pepper.

  • Add the stir fried ingredients and mix well.

  • The pastry will be already slightly cooked, so take it out from oven and pour evenly the cream mix inside. Sprinkle with some cheese on the top.

  • Bake into the oven for around 30 minutes.

Tips:

*- As we said before here you can choose any kind of cheese you like. *

- Shortbread pastry is not a difficult task but you can also buy it in any supermarket.


Comments

yolanda del pozo (2013-04-19 09:44:08):

All the recipes on this site are easy, cheap, quick and tasty — what more could you ask for? And the photos are amazing too, just looking at them makes you want to make the dish and, above all, eat it. Congrats, great work!

silvia (2015-01-14 20:34:14):

The other day I bought shortcrust pastry by mistake… so checking out this great website, I’m bookmarking this recipe.

Just one question: what’s that about pricking the pastry before baking… do you have to pierce it? And what kind of pan works best? Like a non-stick one?

Kisses
April 16, 2013 · 4 min · Cesmm

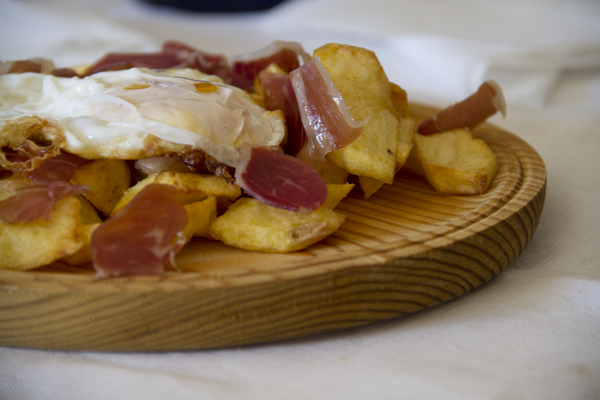
Broken Eggs (Huevos Rotos)

We’re back with a simple recipe, one of those everyone knows how to make, but that we wanted to share with you for two simple reasons: first and most important, it’s a really easy dish that you usually eat when you’re out for drinks but not at home (this is our way of encouraging you to make it yourself), and second because we’ve got a little tip about how to fry the potatoes. Want to know what it is? You’ll have to read the rest of the recipe.

Pics and Cakes

What do we need?

  • Good quality cured ham

  • 3 large potatoes

  • 2 farm-fresh eggs

  • Olive oil

  • Salt

How do we make it?

  • While we heat the oil in a pan (preferably a deep one), we separate or cut up the ham.

  • Peel the potatoes and cut them into irregular bite-sized pieces.

  • Once the oil is nice and hot, lower it to medium heat and add the potatoes. Let them cook more than fry.

  • When they’re soft, take them out and set aside on a plate. Turn the heat back up.

  • Fry the eggs and set them aside.

  • Now with the heat high, put the potatoes back in to brown them. This way they’ll be crispy on the outside and soft on the inside.

  • After draining them on a paper towel, arrange them on a plate or platter, add the ham and eggs, and enjoy.

[English version] HUEVOS ROTOS (FRENCH FRIES WITH EGGS AND SPANISH HAM)* *Ingredients:

  • Spanish cured ham

  • 3 potatoes

  • 2 free-range eggs

  • Olive oil

  • Salt

  • Heat the olive oil in a deep saucepan. In the meanwhile, cut the ham into medium size pieces and the potatoes in irregular pieces the size of a mouthful.

  • *When olive oil is very hot, reduce heat into medium and put the potatoes. Let them simmer. *

  • *When the potatoes are cooked (soft but white), take them out of the pan. Increase heat again. *

  • Fry the eggs and set aside.

  • When the heat is high again, fry again the potatoes until golden brown. They will be soft in the inside and crusty in the outside.

  • *Take them out into a plate with kitchen paper to remove the extra oil. Place the potatoes into a large plate, the eggs and ham over them and enjoy! *


March 16, 2013 · 3 min · Cesmm

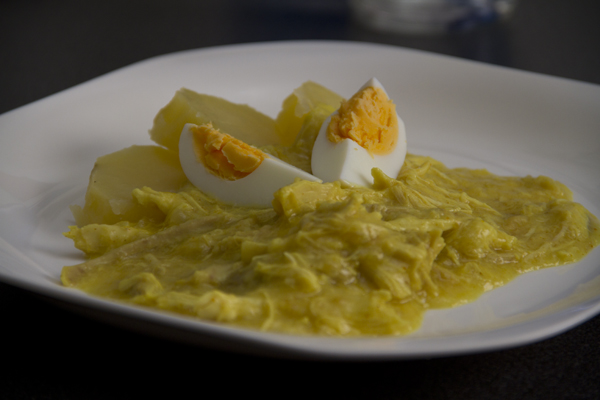
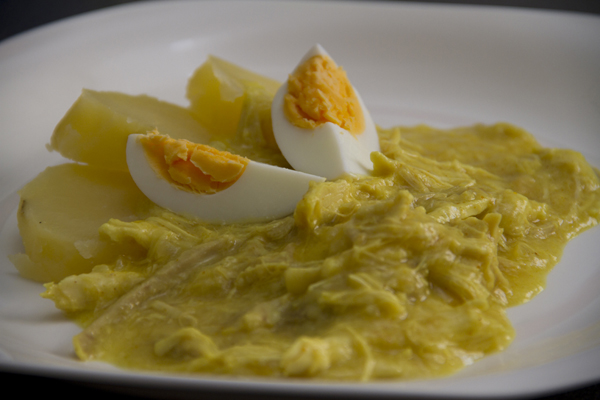
Ají de Gallina

This dish is a classic of Peruvian cuisine. I’m not claiming this recipe is the authentic or one true version — it’s simply the one my mother and her family have made all their lives. They brought this recipe with them from Peru and honestly, I love it. I’ve tried ají de gallina at several Peruvian restaurants and the recipe isn’t even the same in all of them. So, as the saying goes, “to each their own,” and here I’m offering you a finger-licking-good Peruvian ají de gallina.

Pics and Cakes

What do we need?

  • 1 chicken

  • 4 onions

  • 4 slices of sandwich bread

  • A splash of milk

  • Turmeric

  • Ground ají paste (Peruvian hot pepper)

  • 4 potatoes

  • 4 eggs

  • Salt

How do we make it?

  • First, cook the chicken in a large pot with plenty of water and a bit of salt. Cook it until it’s nice and tender (you’ll know it’s done when the meat falls off the bone easily).

  • Take the chicken out, strain the broth, and set it aside.

  • Once the chicken has cooled down a bit, remove the skin and bones and shred it. Set the shredded chicken aside.

  • Boil the potatoes and eggs and set aside.

  • Meanwhile, crumble the slices of sandwich bread and soak them in milk.

  • Chop the onions very finely and toss them into a pan with olive oil to sweat them down. Cook them over medium-low heat slowly so they soften without browning. We want them really soft, almost like a yellow paste.

  • Once the onion is ready, add the milk-soaked bread and stir well.

  • Slowly add the chicken broth bit by bit, stirring continuously so it all comes together.

  • Add a couple of teaspoons of turmeric, which will give it that signature yellow color.

  • Add the shredded chicken and stir again. If it looks too thick, add a bit more chicken broth. The texture shouldn’t be like mashed potatoes, but not like soup either — somewhere in between.

  • Adjust the salt and add a bit of heat (ground ají paste).

  • On the side, peel the potatoes and cut them into thick slices. Peel the eggs and cut them into quarters.

  • And there you have it — your ají de gallina. All that’s left is to serve it alongside the boiled potatoes and hard-boiled eggs. Now dig in, nomás!

Tips:

  • A whole chicken makes a pretty generous amount of ají de gallina, so if you’d like, you can use half of the cooked chicken for this recipe and save the other half for a delicious chicken and pineapple salad, for example. :-)

  • At some restaurants I’ve had this dish served with white rice instead of boiled potatoes.

Pics and Cakes

March 4, 2013 · 3 min · Palstelera

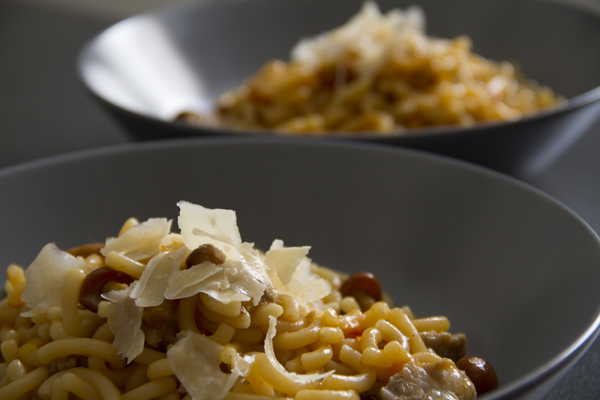
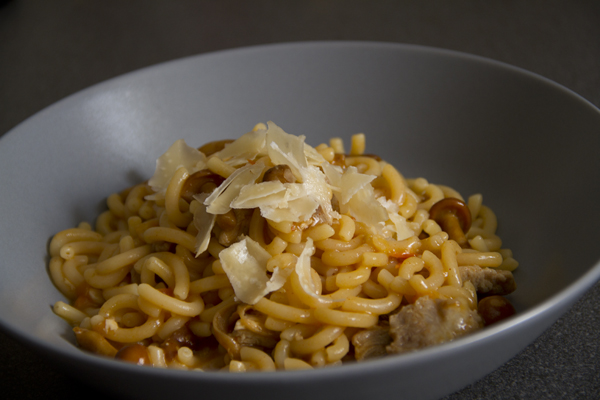
Fideuá

Today we bring you an adaptation of the fideuá from Spain’s eastern coast, which is mainly made with fish and seafood. Everyone knows my dislike for fish, so when my mom made this dish, swapping the fish for pork secreto, I jumped right on it.

Pics and Cakes

What do we need?

  • 200 g (7 oz) pork secreto

  • 200 g (7 oz) fideuá pasta

  • Water

  • Mushrooms

  • Saffron

  • Salt

  • Olive oil

  • Paprika

  • Garlic

  • Parmesan cheese

How do we make it?

  • Pour a splash of olive oil into a large pot, sauté the garlic, add the meat and mushrooms with a pinch of salt, and cook everything together. Add a bit of paprika.

  • Once it’s nicely sautéed, toss in the noodles and stir everything together so they pick up the flavor.

  • Add twice as much water as pasta (or a bit more if you want it slightly brothy).

  • Let it cook for about 15-20 minutes, adding a pinch of saffron and a little more paprika along the way.

  • When plating, shave a few slices of parmesan cheese and lay them on top.

Tips:

  • We used shiitake mushrooms, but it turns out great with any kind of mushroom.

  • If you don’t have pork secreto, you can use any tender cut of pork.

  • The original recipe calls for ñoras (dried sweet red peppers), which are crushed and added to the sofrito. If you can find them (and don’t get scared off by the price), they give the dish a special touch.

Pics and Cakes *[English version] FIDEUÁ ** *Ingredients:

  • 200 g (7 oz) pork meat

  • 200 g (7 oz) fideuá pasta

  • Water

  • Mushrooms

  • Saffron

  • Salt

  • Olive oil

  • Paprika

  • Garlic

  • Parmesan cheese

  • Gently fry the chopped garlic with a bit of olive oil in a cooking pot. Add meat and mushrooms, some salt, and cook. Add paprika.

  • When it is slightly cooked, add the pasta and gently fry all the ingredients together to mix the flavors.

  • Add the water (twice the amount of pasta. For instance, if you used 2 cups of pasta, add 4 cups of water. You can add a bit of extra water if you like a soupy dish.)

  • Add some saffron and a bit more paprika and cook for around 15-20 minutes.

  • Slice parmesan cheese and place it over the fideuá before serving.

Tips:

- We used shiitake mushrooms, but any kind of mushroom will be delicious.

- The original recipe uses ‘ñora’ (dried red spicy pepper). You can use it if you like spicy flavors. Add it when slightly frying all the ingredients (step 1).


Comments

la enana (2013-03-04 13:40:11):

The recipe was delicious! I made it the other day and we loved it! I used paprika instead of pimentón because I haven’t been able to find it around here, and although the result was very good, in my opinion the flavor pimentón gives is even better.

February 27, 2013 · 3 min · Cesmm

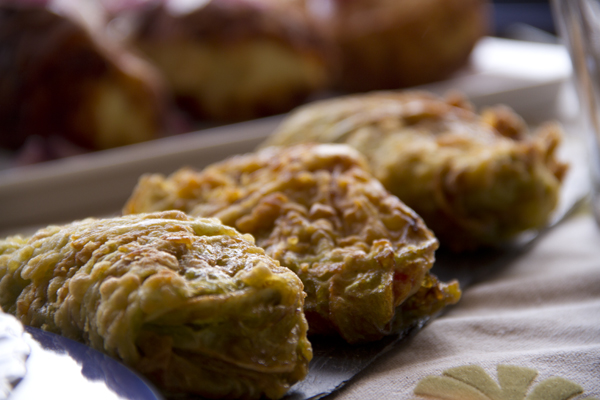
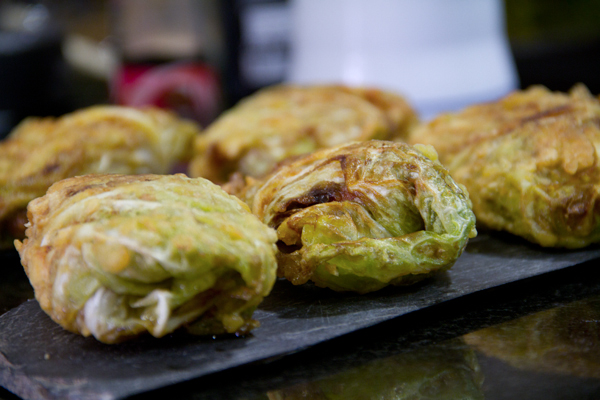
Cabbage Rolls

I know, we’ve gone ages without posting (as Palstelera would say), but we have an excuse: we were studying because we’re cultured people XD. That’s why today we’re going to introduce you to two new recipes so you can see that even though we’ve set the page aside a bit, we’re always ready and thinking about what new recipes we can share with you.

Pics and Cakes

What do we need?

  • 4 cabbage leaves

  • 1 chicken breast

  • Half an onion

  • Half a green bell pepper

  • Oil

  • Salt

  • Moroccan spices

  • Flour for coating

How do we make it?

  • Separate the largest cabbage leaves and blanch them in boiling water with salt.

  • After three minutes, take them out and lay them on paper towels to dry. Set aside.

  • Cut the onion into julienne strips and the bell pepper into small strips. Pour some oil into a frying pan and add the ingredients.

  • Cut the chicken into strips and season. Add to the pan.

  • Throw in some Moroccan spices, for example Ras el hanout, into the mix.

  • Once the chicken is cooked, remove from the heat and set aside.

  • Spread out the leaves and fill them with the mixture.

  • Coat the rolls in flour and deep-fry them in plenty of oil.

  • Leave them in for just a short time, turning them carefully so they don’t open up.

Tips:

  • If you see the rolls opening up, you can use a toothpick to help — just remember to remove it before eating… — or a piece of string to tie them up.

  • You can swap the chicken for ground meat.

Pics and Cakes

February 19, 2013 · 2 min · Cesmm

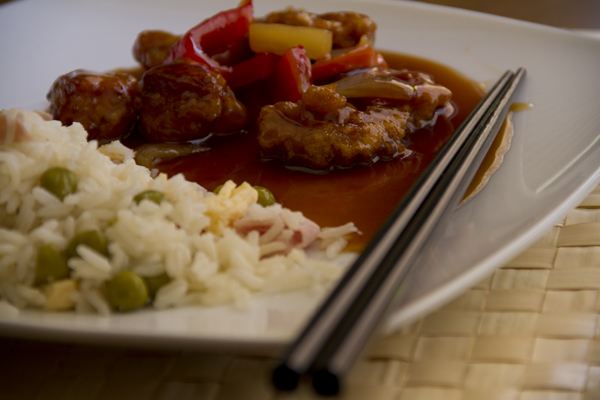
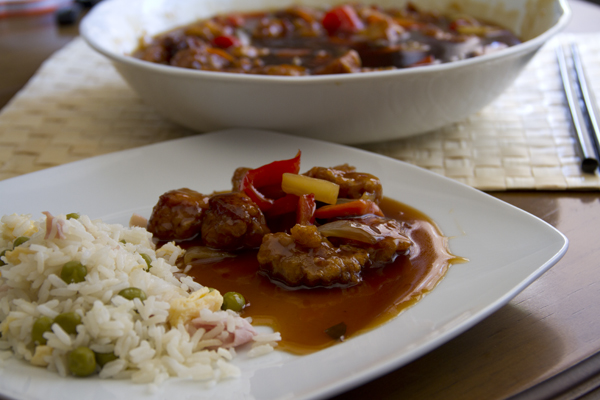
Sweet and Sour Pork

Whole Kitchen, in their Savory Proposal for January, invites us to make a Chinese classic: sweet and sour pork.

**For us, this is THE go-to dish whenever we have Chinese food, so it couldn’t be missing from our blog. To be honest, I don’t even know exactly where I got the recipe from, because I ended up mashing together a bunch of different websites and now I can’t recall the exact source. But hey, like with any dish, the trick is to give it a go, and if there’s something you don’t love, tweak it to your taste — that’s what your own kitchen is for.

Pics and Cakes

What do we need?

  • 400 g (14 oz) lean pork

  • 1 large onion

  • 1 red bell pepper

  • 1 carrot

  • 4 pineapple slices

  • Oil

  • Salt

For the batter:

  • 3 tablespoons all-purpose flour

  • 2 tablespoons cornstarch

  • 1 egg

  • 1 teaspoon baking powder

  • Water

For the sweet and sour sauce:

  • 3/4 cup sugar

  • 1/3 cup apple cider vinegar

  • 2/3 cup water

  • 1/4 cup soy sauce

  • 2 tablespoons ketchup

  • 2 tablespoons Worcestershire sauce

  • 2 tablespoons cornstarch

Pics and Cakes

How do we make it?

  • First, we make the sweet and sour sauce. Put all the ingredients except the cornstarch into a medium saucepan and cook over high heat so that everything mixes and dissolves well.

  • Let it come to a boil and then simmer over medium heat for a few minutes so the sauce reduces and thickens. Dissolve the cornstarch in a cup with a little water and add it to the sauce. Once it has the consistency you want, take it off the heat.

  • Cut the onion and bell pepper into medium-sized squares (about 1.5 cm / 1/2 inch).

  • Slice the carrot thinly on the diagonal.

  • Cut the pineapple into chunks.

  • In a pan with a little oil, stir-fry all the veggies (add the pineapple last). Don’t overcook them — we want them to stay crunchy.

  • Once they’re ready, take them out and add them to the saucepan with the sweet and sour sauce.

  • Cut the pork into bite-sized cubes (similar in size to the veggies) and season with salt.

  • In a bowl, mix the two flours and the baking powder, then add the egg and very cold water. The amount of water varies, so it’s better to add it little by little until you get the texture of a light béchamel.

  • While the oil heats up in a frying pan, drop the pieces of pork into the bowl with the batter.

  • Once the oil is good and hot, fry the coated pieces one by one. When they’re golden, take them out onto a plate lined with paper towels.

  • Finally, add the fried pork to the saucepan with the sweet and sour sauce and veggies. If the sauce has cooled down by now, warm it back up before adding the meat.

  • Serve with white rice, basmati rice, or three delights fried rice.

Tips:

  • When making the sweet and sour sauce, I’d recommend not pouring in all the vinegar at once, as it can come out really strong. Better to add it bit by bit, to taste.

  • If the pineapple you used is canned (in its own juice), you can add that juice to the sweet and sour sauce.

  • The battered meat goes in right at the end so the coating stays crispy. That’s why I recommend serving and eating it right away.

January 18, 2013 · 3 min · Palstelera

Stuffed Potatoes

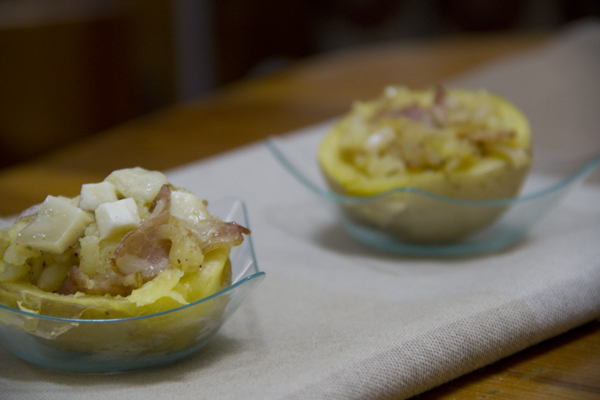
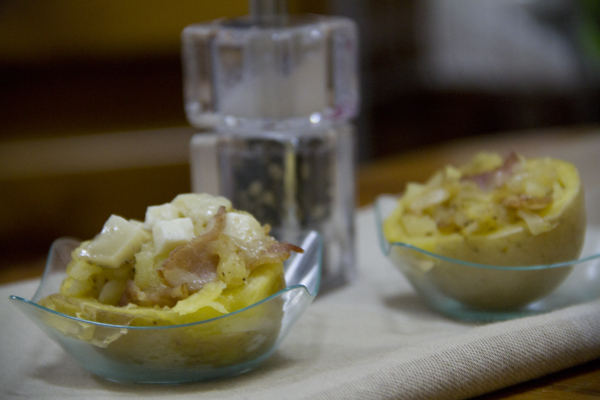
I have to admit we’re a bit like sponges — anything we see and like, we try to make at home. That’s exactly what happened with today’s recipe. A few years ago we went with friends to spend Easter week in Camposancos, a lovely little village in Pontevedra, and there Ana (with Germán’s help) made us some delicious stuffed potatoes that could have fed a regiment (well, maybe we weren’t quite that many…). The thing is, we loved the idea and ever since it’s been part of our recipe book.

Pics and Cakes

What do we need?

  • 4 medium potatoes

  • 5 slices of bacon

  • 1 onion

  • Cheese

  • Salt

  • Pepper

How do we make it?

  • Bake the potatoes in the oven. (You can check here if you’re not sure how to do it.)

  • Meanwhile, chop the bacon and onion and sauté them in a pan with a little olive oil.

  • When the potatoes are ready — you can check by poking them with a kitchen skewer — take them out of the oven and cut them in half.

  • Carefully, with the help of a spoon, scoop out the halves, leaving the skin with a thin layer of potato.

  • Mix the scooped-out potato with the sautéed bacon and onion. Season with salt and pepper.

  • Fill the potato halves with the mixture, add a bit of cheese on top, and put them in the oven to broil.

Tips:

  • Any kind of cheese works. We like it with Emmental (elementary, my dear Watson).

  • If you don’t feel like baking the potatoes, you can boil them instead, but we recommend at least broiling them with the cheese in the oven.

  • This is just our take on the filling. Feel free to adapt it to your taste.

Pics and Cakes

December 27, 2012 · 2 min · Cesmm

Blue Cheese Burger

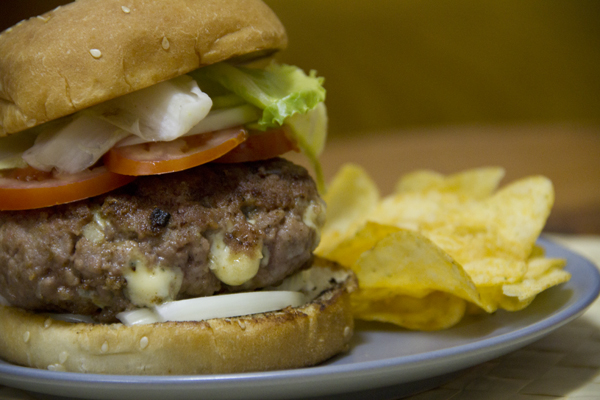
Good and freezing morning. Today we’re bringing you a really simple recipe, the kind that even Jesús will be able to pull off without having to call twenty times :p The thing is, I’m a huge fan of making burgers at home. They’re usually way better than the ones you eat out, plus you make them to your own taste and load them with the ingredients you like best. This time we made the burger with blue cheese mixed right into the patty.

Pics and Cakes

What do we need?

(For each big-eater burger)

  • 200 g (7 oz) ground beef

  • 25-30 g (1 oz) blue cheese

  • 1 egg

  • Pepper

  • Salt

  • Breadcrumbs

  • Tomato

  • Lettuce

  • Onion

  • Burger bun

How do we make it?

  • Take the ground beef and dump it into a large bowl, since you’re going to be getting your hands in there.

  • Add the egg, a bit of freshly ground pepper, salt to taste, and a little breadcrumbs to give the meat some consistency.

  • Mix everything together with your hands.

  • Once all the ingredients are well combined, add the blue cheese cut into cubes. Try to work it into the meat but without pressing too hard so the cheese doesn’t break apart.

  • Wrap in cling film and shape into a burger.

  • Let the burger rest in the fridge for a couple of hours.

  • When you’re ready to eat, put a frying pan with a splash of oil over the heat and, while it’s warming up, start chopping the rest of the ingredients.

  • Cut the onion into rings, the lettuce into fairly large leaves (that way it’s easier to eat), and the tomato into slices.

  • Once the oil is hot, lower the heat a bit so the burger doesn’t burn on the outside while staying raw inside. Cook it to your liking (I like mine rare).

  • When it’s done, set it aside, wipe the pan clean with kitchen paper, and toast the bun for about half a minute.

  • Build your burger and enjoy.

Tips:

  • If you’re not going to use all the ground beef you bought, you can keep the formed patties in the freezer.

  • For me, as I said, I really enjoy a good burger, so 150 to 200 grams (5-7 oz) of ground beef is the “standard” size. Yes, that’s on the generous side, but hey, it’s a burger. Obviously you can make it with less.

  • If you want, you can dust the patty in flour before cooking it.

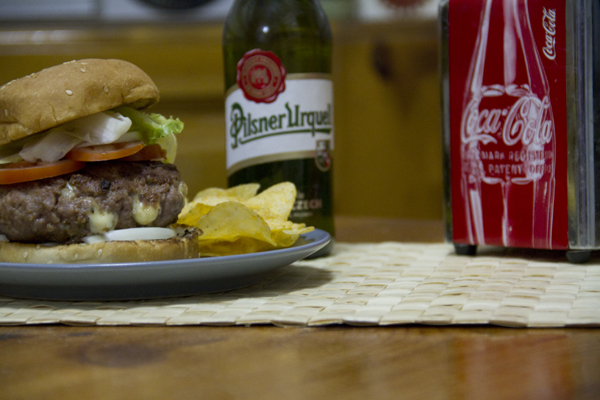
  • As my dad says when we play tute, “side dish requested.” A good beer or a cold Coke with fries (homemade or store-bought) is a must.

Pics and Cakes

[English version] **Ingredients:

(For each big hamburger)

  • 200 g de minced meat

  • 25-30 g de blue cheese

  • 1 egg

  • Pepper

  • Salt

  • Bread crumbs

  • Tomato

  • Salad

  • Onion

  • Hamburger bun

  • Place minced meat into a large bowl and mix well with your hands.

  • Add the egg, a bit of salt and pepper and some bread crumbs.

  • Mix well all ingredients.

  • Then chop blue cheese into small squares and add to the meat mix. Try to ‘knead’ the mix integrating the cheese but keeping it into pieces.

  • Make a ball, wrap in cling film and and flatten it with your hand to have hamburger shape.

  • Leave for a couple of hours in fridge.

  • Then, pour a bit of olive oil in the frying pan. Let it get warm and start preparing your fresh ingredients (onion, tomato and salad).

  • Cut onion into rings, tomato into slices and salad (lettuce) into big parts (it will be easier to eat).

  • Cook the hamburger according to your preferences (well done, medium or rare).

  • When it’s ready take it out from the pan, clean the frying pan with kitchen paper and toat the bread bun.

  • Prepare you hamburger sandwich with all the ingredients and enjoy it.

Tips:

  • You can freeze the prepared raw hamburgers and you will only need to defrost and cook in the pan whenever you need it.

  • This amount of minced meat is for a big hamburger but it’s up to you the size of your hamburger.

  • You can coat in flour the raw hamburger before cooking it.

  • It’s a must to serve the hamburger with a cold beer and chips or fries.


December 11, 2012 · 4 min · Cesmm

Cherry tomato and cheese quiche

I’m sure you’ve all tried — and many of you have made — the classic quiche lorraine (we’ve got ours ready and we’ll be posting it soon). Today we’re sharing a variation we absolutely loved, easy to make and seriously tasty.

Pics and Cakes

What do we need?

For the shortcrust pastry:

  • 200 g (1 ⅔ cups) flour

  • 100 g (7 tbsp) cold butter

  • 1 egg

  • A pinch of salt

  • A pinch of sugar

For the filling:

  • A dozen cherry tomatoes

  • 100 g (3.5 oz) emmental cheese

  • 50 g (1.75 oz) goat cheese log

  • 200 ml (¾ cup + 1 tbsp) heavy cream

  • 4 medium eggs

  • Oregano, salt and pepper.

How do we make it?

  • First, make the shortcrust pastry. Here you can see how we did it.

  • While the pastry is resting, preheat the oven to 180-200°C (355-390°F).

  • Once the dough is ready, roll it out, place it in a tart pan and bake for about 15 minutes. We do this before adding the filling so the base doesn’t end up raw. To stop it from puffing up, prick it with a fork or weigh it down with dried chickpeas.

  • Cut the tomatoes in half, chop the emmental and slice the goat cheese log into rounds.

  • Beat the eggs and mix with the cream. Add salt and pepper.

  • Stir in the emmental and the oregano.

  • When the pastry is partly baked, take it out of the oven and pour in the mixture. Spread it evenly across the pan.

  • Add the halved cherry tomatoes and the goat cheese on top.

  • Put it back in the oven and bake for another 30 minutes or so.

Tips:

  • You can use any kind of cheese for the filling.

  • If you’re feeling lazy and don’t fancy making the shortcrust pastry, you can buy it at any supermarket, either refrigerated or frozen. If you go for frozen, take it out about 15 minutes before you want to use it so you can work with it — otherwise it’ll crack.

Pics and Cakes


Comments

silvia (2012-11-29 22:13:25):

man… I wish I had an oven so I could follow these recipes… well, the no-bake ones except for the sweet ones, you already know I’m a fan, like that pineapple salad… yum yum

November 16, 2012 · 2 min · Cesmm

Caramelised Garlic Tart

And then we say the poor Brits have nothing in their cuisine beyond fish & chips and porridge… I tried this recipe at my aunt’s house in Edinburgh and it was honestly a surprise. A savoury tart whose main ingredient is garlic but which, contrary to what you might think, isn’t sharp or strong-tasting at all. It’s creamy, smooth and light on the palate. Hope you enjoy it…

Pics and Cakes

What do we need?

  • 1 sheet of puff pastry

  • 3 heads of garlic (cloves separated and peeled)

  • 1 tablespoon olive oil

  • 1 tablespoon balsamic vinegar of Modena

  • 220 ml (¾ cup + 2 tbsp) water

  • 1 teaspoon icing sugar

  • 1 tablespoon chopped rosemary

  • 1 tablespoon chopped thyme, plus a few whole leaves for garnish

  • 120 g (4 oz) soft goat’s cheese

  • 120 g (4 oz) hard, mature goat’s cheese

  • 2 eggs

  • 100 ml (scant ½ cup) heavy cream

  • 100 ml (scant ½ cup) crème fraîche (can be replaced with heavy cream)

  • Salt and pepper

How do we make it?

  • Roll out the sheet of puff pastry over a round, shallow tart tin so it covers the bottom and the sides. Prick the dough with a fork, place a sheet of baking paper on top and add two handfuls of raw chickpeas (this stops the dough from puffing up while baking). Let it rest in the fridge.

  • Preheat the oven to 180°C (355°F). Bake the pastry case for about 20 minutes. Remove the paper and chickpeas and bake for another 5-10 minutes. Take it out of the oven and set aside. Leave the oven on.

  • While the pastry is baking, make the caramelised garlic. Put the garlic cloves in a pan and cover with water. Bring to a boil and blanch for 3 minutes. Drain well.

  • Dry the pan and put the garlic cloves back in with the olive oil. Fry over high heat for 2 minutes. Add the balsamic vinegar and water and bring to a boil. Let it simmer gently for 10 minutes.

  • Add the sugar, rosemary, thyme and salt. Keep cooking over medium heat for another 10 minutes, or until almost all the liquid has evaporated and the garlic cloves are coated in a kind of dark syrup.

  • To assemble the tart, break up both types of cheese and scatter them over the baked pastry case. Then spoon the caramelised garlic and syrup over the whole surface.

  • In a bowl, whisk the eggs, creams, salt and pepper. Pour this mixture into the tart, trying to fill the gaps left between the cheese and the garlic but without completely covering the ingredients (you should still be able to see them).

  • Lower the temperature to 160°C (320°F). Bake for 35-45 minutes or until you see the filling has set and the top has turned golden.

  • Remove from the tin and serve with a little thyme sprinkled on top.

Tips:

  • To unmould the tart easily once it’s done, you can use a loose-bottomed tin, or otherwise place baking paper before lining it with the puff pastry to prevent sticking.

  • It’s delicious served with a salad. Why not with a rocket and mango salad?

The recipe is from this website: http://britishfood.about.com/od/adrecipes/r/caramelisedgarlictart.htm

*[English version] CARAMELISED GARLIC TART

  • **Ingredients:
  • 1 puff pastry sheet

  • 3 medium heads of garlic (cloves separated and peeled)

  • 1 tbsp olive oil

  • 1 tsp balsamic vinegar

  • 220ml water

  • ¾ tbsp fine sugar

  • 1 tsp chopped rosemary

  • 1 tsp chopped thyme, plus a few whole sprigs to finish

  • 120g soft, creamy goat’s cheese

  • 120g hard, mature goat’s cheese

  • 2 free-range eggs

  • 100ml heavy/double cream

  • 100ml crème fraîche

  • salt and black pepper

  • Have ready a shallow, loose-bottomed, 28cm fluted tart tin. Roll out the puff pastry into a circle that will line the bottom and sides of the tin, plus a little extra. Line the tin with the pastry. Place a large circle of greaseproof paper on the bottom and fill up with baking beans. Leave to rest in the fridge.

  • Preheat the oven to 180°C. Place the tart case in the oven and bake blind for 20 minutes. Remove the beans and paper, then bake for a further 5-10 minutes, or until the pastry is golden. Set aside. Leave the oven on.

  • While the tart case is baking, make the caramelized garlic. Put the cloves in a small saucepan and cover with plenty of water. Bring to a simmer and blanch for 3 minutes, then drain well.

  • Dry the saucepan, return the cloves to it and add the olive oil. Fry the garlic cloves on a high heat for 2 minutes. Add the balsamic vinegar and water and bring to the boil, then simmer gently for 10 minutes.

  • Add the sugar, rosemary, chopped thyme and ¼ teaspoon salt. Continue simmering on a medium flame for 10 minutes, or until most of the liquid has evaporated and the garlic cloves are coated in a dark caramel syrup. Set aside.

  • To assemble the tart, break both types of goat’s cheese into pieces and scatter in the pastry case. Spoon the garlic cloves and syrup evenly over the cheese.

  • In a jug whisk together the eggs, creams, ½ teaspoon salt and some black pepper. Pour this custard over the tart filling to fill the gaps, making sure that you can still see the garlic and cheese over the surface.

  • Reduce the oven temperature to 160°C and place the tart inside. Bake for 35-45 minutes, or until the tart filling has set and the top is golden brown. Remove from the oven and leave to cool a little.

  • Then take out of tin, trim the pastry edge if needed, lay a few sprigs of thyme on top and serve warm.

    Tips:- To take it out of tin in an easy way you can use a quiche pan with the bottom removable or you can just place some oven paper on the tin before rolling out the pastry. - Serve with salad. Why not with mango and rocket salad? Recipe from this website: http://britishfood.about.com/od/adrecipes/r/caramelisedgarlictart.htm


Comments

Sergio (2012-11-16 00:32:29):

Wow!!

This looks incredible. Who would have thought — what a surprise from the Brits.

Palstelera (2012-11-22 19:05:14):

Poor things, we really do underestimate them on the food front…

November 9, 2012 · 5 min · Palstelera