Chickpea Salad with Mustard Vinaigrette

Just because summer is over doesn't mean we have to say goodbye to salads. Today, a super simple and quick recipe for a tasty, healthy chickpea salad. Since we're using pre-cooked chickpeas, it takes no more than 5 minutes to put together, so there's no excuse. Enjoy!

ensalada garbanzos

What do we need?

  • 1 can of cooked chickpeas
  • 2 tomatoes
  • 1/2 onion
  • 1 small can of corn
  • Mustard
  • Herbes de Provence
  • Salt and pepper
  • Oil and vinegar

How do we make it?

  1. First, drain the canned chickpeas and rinse them with cold water to get rid of that characteristic canned taste. Place them in a large bowl.
  2. Dice the tomatoes and onion and add them to the bowl with the chickpeas.
  3. Add the corn.
  4. In a glass jar, make a vinaigrette. The usual ratio is three parts oil to one part vinegar. For this salad, you can pour about two finger-widths of oil into the jar, a third of that in vinegar, 1 teaspoon of mustard, 1 teaspoon of herbes de Provence, and a pinch of salt. Close the jar tightly and shake vigorously until the mixture has emulsified. Taste and adjust with whatever ingredient suits your liking.

Tips:

– As with all salads, more than a recipe, this is a suggestion. Feel free to add other ingredients or seasonings you have in the fridge.

img_7702

September 23, 2016 · 2 min · Palstelera

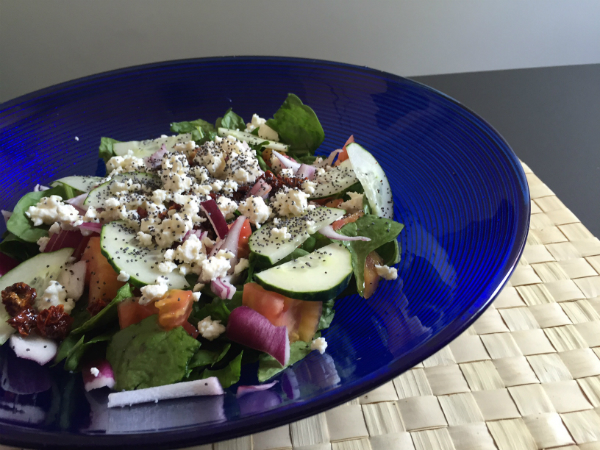
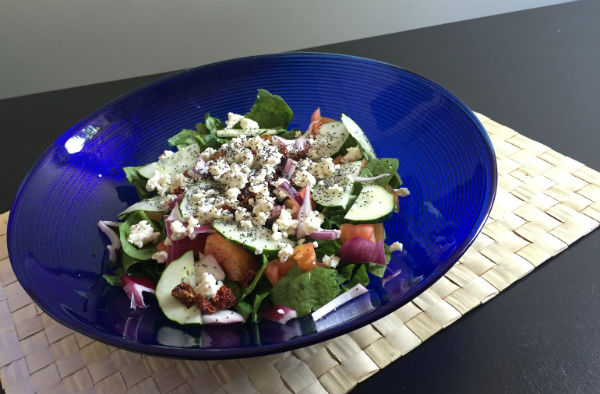
Spinach, Feta and Poppy Seed Salad

Cicadas singing, getting into a car that's 46°C (115°F), sweating like a pig, and not being able to open more windows at night because your house simply doesn't have any — clear signs that summer has arrived and with a vengeance. So, faced with this heat, we're going to fight back with cool, refreshing meals to survive the summer season. Kicking off salad season, today we're bringing you a spinach salad. It's such a simple recipe that you couldn't even call it a recipe — just a suggested combination of ingredients to inspire your next salads.

Pics and Cakes


What do we need?

  • 1 bowl of fresh, washed spinach
  • 1/2 red onion
  • 1 tomato
  • 1/2 cucumber
  • 4 sun-dried tomatoes
  • Poppy seeds
  • Feta-style cheese
  • Oil
  • Vinegar
  • Salt


How do we make it?

  1. Slice the cucumber into rounds, julienne the onion, dice the tomatoes, and pile everything on top of the fresh spinach leaves (if they're very large, tear them with your hands). Add as much feta cheese as you like, crumbled by hand.
  2. Finally, sprinkle on the poppy seeds and dress to taste.


Tips:

– You can whip up a vinaigrette by mixing 1 part vinegar with 3 parts oil and a pinch of salt. Pop it into a jar that seals tightly, shake it vigorously to emulsify, and it's ready to dress your salad. You can add any spice, herb, mustard, or whatever else you can think of to a vinaigrette.

– Watch out with the sun-dried tomatoes because they pack so much flavor that sometimes you can skip the salt altogether.

Pics and Cakes

July 28, 2016 · 2 min · Palstelera

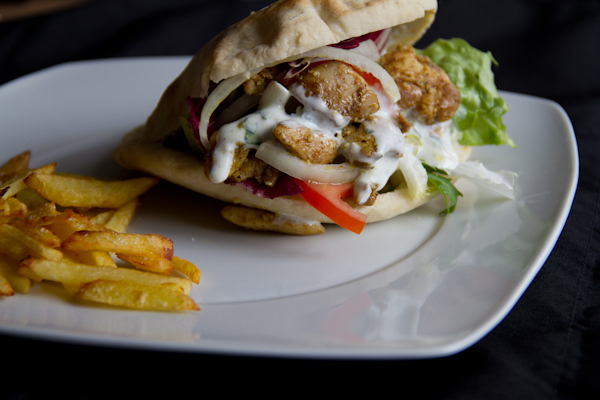
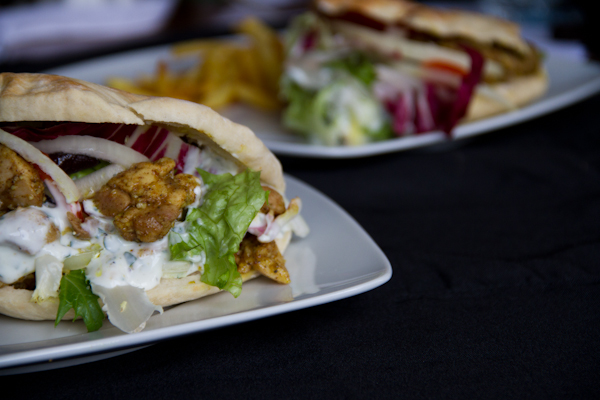
Chicken and Lamb Kebab

Everyone who visits Turkey says that the kebab there is nothing like the ones we eat in Spain, so at this point I'm not entirely sure what to call this. In any case, what I can promise you is that it's delicious and the preparation couldn't be simpler. We discovered this recipe thanks to the YouTube channel Recetas de Cocina, which is always worth a visit. Give these kebabs a try and let us know how it goes.

Pics and Cakes

What do we need?

  • 400 g (14 oz) lamb leg chops
  • 400 g (14 oz) chicken thighs
  • 4 teaspoons garlic powder
  • 4 tablespoons Ras el Hanout (a North African spice blend)
  • Salt and pepper
  • Lettuce (chopped or julienned)
  • Sliced tomato
  • Sliced or finely julienned onion
  • Pita breads


For the yogurt sauce:

  • 2 Greek yogurts
  • 2 tablespoons mayonnaise
  • Juice of 1/2 lemon
  • 1 or 2 garlic cloves
  • 3 teaspoons sugar
  • 1 pinch of cumin
  • Salt, pepper and fresh parsley


How do we make it?

  1. Cut the lamb chops and chicken into bite-sized pieces.
  2. In a bowl, combine 6 tablespoons of olive oil and 2 tablespoons of Ras el Hanout and mix well. Add the chopped chicken, season with salt and pepper, and sprinkle in two teaspoons of garlic powder.
  3. Mix well so all the meat is fully coated and let it marinate for at least 1 hour in the fridge (the longer it sits, the more flavor it will pick up).
  4. Repeat steps 2 and 3 with the chopped lamb.
  5. While the meat rests, let's prepare the yogurt sauce. Mix the yogurt with the mayonnaise. Then add the crushed garlic, the sugar, the cumin, salt, pepper, and finally the lemon juice and chopped fresh parsley. Mix everything thoroughly (no blender needed) and keep it in the fridge until you're ready to use it.
  6. Once the meat has had enough time to marinate, you have two options: cook it in the oven, or in a frying pan or on a griddle.
    a) For the first option, line a baking tray with parchment paper and spread the pieces of meat out separately. Bake at 200°C (390°F) until they look golden. When you take the meat off the tray, drain off any excess oil.
    b) If you prefer, you can sauté them in a pan or cook them on a griddle. There's no need to add oil since the marinade is enough. This option is faster since there's no oven preheating and the cooking time is shorter.
  7. All that's left is to assemble the kebabs. In a pita bread, layer meat, lettuce, tomato, onion and yogurt sauce to taste.

Pics and Cakes

Tips:

– You can adjust the yogurt sauce to taste, but it's better to go light than to overdo any one ingredient, especially garlic and salt, which are hard to fix once you've added too much. I recommend adding little by little and tasting as you go.

– It's better to cook the meats separately so people can choose whether they want their kebab with just one type of meat or mixed. Lamb tends to have a much stronger flavor than chicken, which not everyone enjoys.

– The meat quantities are just a guide. Adjust them depending on how many kebabs you want to make.

June 11, 2015 · 3 min · Palstelera

Crispy Chicken Burger

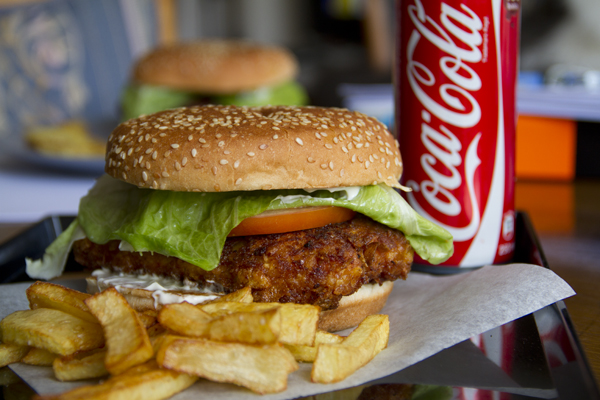
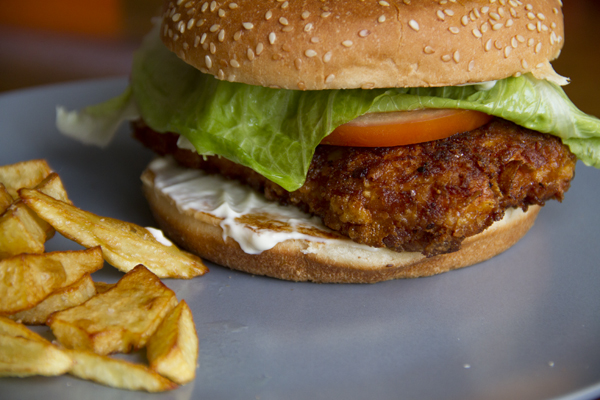
Believe it or not: we’re back! After months (literally) with our blog in some kind of hibernation, we’re back at it and hoping that this time our willpower won’t fade so fast. We’re returning with that recipe that’s been sitting at the top of the blog for so many days now, the one we know plenty of you have been dying to make: the Crispy Chicken. For lovers (or at least, frequenters) of fast food joints, the Crispy Chicken is a Burger King staple, a chicken burger with a spicy kick. But here we’re sharing the upgraded version. Meaning, the one we make with an actual chicken fillet and not some suspicious mystery patty pretending to be one.

Pics and Cakes

What do we need?

  • 4 tablespoons of flour

  • 1 tablespoon of onion powder

  • 1 tablespoon of garlic powder

  • 1/2 tablespoon of paprika

  • Salt

  • Black pepper

  • 2 eggs

  • Cornflakes

  • A splash of white wine

  • 2 chicken breast fillets (not too thin)

  • 2 burger buns

  • 2 tomato slices

  • 2 lettuce leaves

  • Mayonnaise

How do we make it?

  • First, we’ll prep the breading for the chicken. Mix the flour with the onion and garlic powder, paprika, salt and pepper.

  • In another bowl, beat the eggs with a splash of white wine.

  • In a third bowl, add the cornflakes and crush them with your hand. Grab fistfuls and squeeze them little by little. We don’t want the pieces too small, so it won’t take much time.

  • Take your chicken fillets and bread them in the same order as the bowls you prepared: flour, egg, and cornflakes. Let them rest while the oil heats up in a frying pan (or deep fryer).

  • Fry the breaded fillets until golden and transfer them to a plate lined with paper towels to soak up the excess oil.

  • Now all that’s left is to assemble our ‘burger’. Spread a bit of mayo on each half of the bun, add a fillet, a tomato slice, and a lettuce leaf. Ready to eat.

Pics and Cakes

Tips:

  • Instead of onion powder, we used a packet of onion soup mix. A pretty curious ingredient that we’ll use in other recipes like COCA-COLA CHICKEN.

  • The fillets should be a bit thick so they stay juicy, but you have to be careful when frying them to nail the perfect point: golden on the outside and fully cooked on the inside. We recommend cranking up the heat at first and then turning it down a bit to make sure they cook through properly.

September 3, 2014 · 2 min · Palstelera

Camembert with Caramel and Walnuts

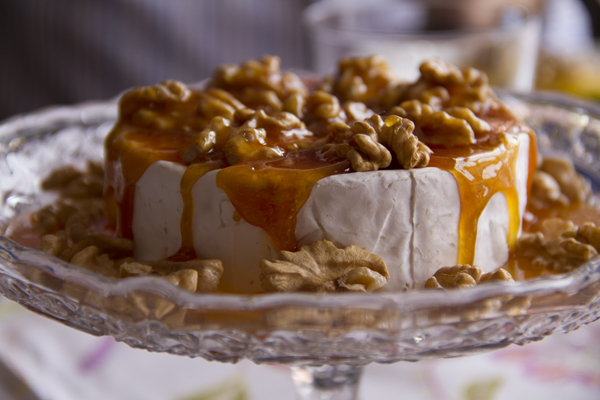
They say good things come to those who wait, and it seems that’s exactly what we’ve been trying to do with this new recipe. But anyway, we’re finally back to posting, and we’re bringing you an easy, quick, and delicious appetizer suggestion, once again borrowed from La Receta de la Felicidad, who recommends it as a Christmas gift. But hey, when it comes to enjoying a good cheese, who cares if it’s Christmas, Easter, or the middle of August, right?

Pics and Cakes

What do we need?

  • 1 Camembert cheese

  • A handful of shelled walnuts

  • 100 g (1/2 cup) sugar

  • 2 tablespoons butter

How do we make it?

  • Place the whole Camembert cheese on a plate and arrange the walnuts on top.

  • In a small saucepan or skillet, heat the sugar over medium heat and let it melt slowly without stirring (even if you feel tempted to).

  • Once the sugar has melted into a kind of thick, pale syrup, you can stir it and let it cook a little longer until it reaches a golden caramel color.

  • Turn off the heat, add the two tablespoons of butter, and stir well.

  • Immediately pour the caramel over the Camembert with walnuts, trying to make a thin layer or even caramel threads.

Tips:

  • Be careful not to leave the caramel on the heat for too long, as it could burn and result in a very dark, bitter caramel.

  • You can cut the cheese into portions right after pouring on the caramel. Otherwise, once it solidifies it can get tricky (that’s another reason why the caramel layer should be thin).

________________ [English version] CAMEMBERT CHEESE WITH NUTS AND CARAMEL* *Ingredients:

  • 1 Camembert cheese

  • Several nuts

  • 100 g sugar

  • 2 tbsp butter

  • Place the cheese into a dish and put the nuts over it.

  • Place the sugar into a sauce pan and cook over medium low heat. Let it melt slowly.

  • When the sugar is totally melt you can use a spoon to stir.

  • Keep cooking until golden brown. Add the butter and stir well.

  • Pour immediately over the cheese with the nuts. Try to create a thin layer.

  • Tips:- Do not overcook the sugar or you’ll get a dark and bitter caramel.* - Cut the cheese into portions right after pouring the caramel. Otherwise, when caramel is hard it could be very difficult (that’s why you have to try to make a thin layer).

June 20, 2013 · 3 min · Palstelera

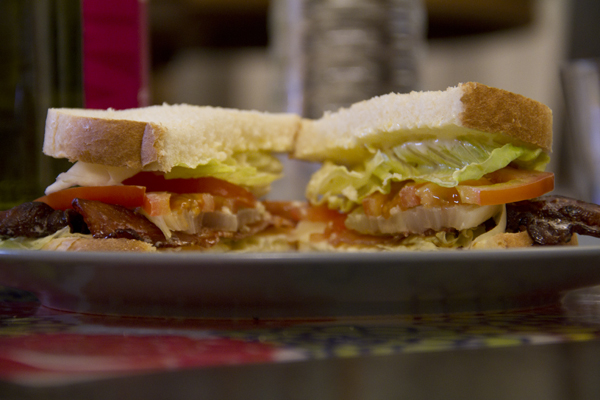
BLT

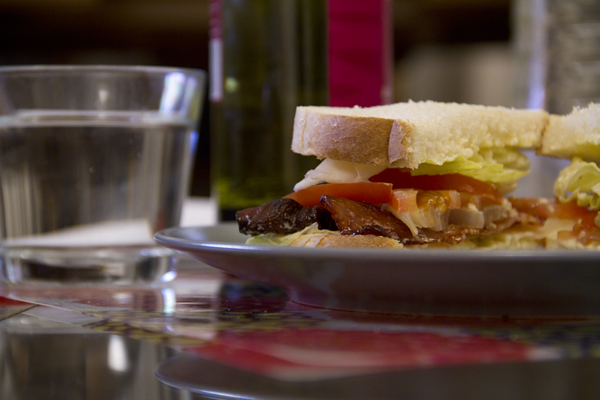
BLT stands for Bacon Lettuce Tomato, which translates to a spectacular combo. Especially if you make the bacon the way we did. Want to know the secret? Keep reading.

Pics and Cakes

What do we need?

  • 4 slices of bacon

  • 4 slices of bread

  • 2 tomatoes

  • A couple of lettuce leaves

  • 2 tablespoons of sugar

  • Cayenne pepper

  • Mayonnaise

How do we make it?

  • Preheat the oven to 200°C (390°F).

  • Meanwhile, wash the lettuce and tomato.

  • On a baking tray, lay out the bacon in a single layer on parchment paper. Grind the cayenne and sprinkle it over the bacon. Sprinkle the sugar on top too, and put it in the oven once it reaches temperature.

  • Let it cook for about 15 minutes, until crispy and quite dark.

  • While the bacon is cooking, slice the tomatoes into rounds and leave the lettuce in big leaves.

  • Toast the bread. Once it’s done to your liking, spread a bit of mayonnaise on it and assemble the sandwich.

Tips:

  • You can add lots of things, even switch up the sauce. The base is the BLT trio. We added onion, but avocado works really well too.

  • You can make it with regular sandwich bread, but we recommend “long-life” bread (long live the king!!!!!). I think you can usually find it in supermarkets labeled as rustic bread (already sliced).

Pics and Cakes [English version] BLT* *Ingredients:

  • 4 bacon slices

  • 4 bread slices

  • 2 tomatoes

  • 2 lettuce leaves

  • 2 tbsp sugar

  • *Chili powder *

  • Mayonnaise

  • Preheat oven at 200º C.

  • *Wash lettuce and tomato. *

  • *In a baking tray, place some baking paper and the bacon (in one layer). Sprinkle with sugar and chili powder. *

  • *Bake for 15-20 minutes until golden and crispy. *

  • *In the meanwhile, cut tomato into slices. *

  • *Toast bread, spread some mayonnaise in each slice and make your sandwich with all the ingredients (tomato, lettuce and bacon). *

  • Tips:- You can add any other ingredient or sauce that you like. The essentials are Bacon Lettuce and Tomato. We added some fresh onion but avocado is also a perfect choice. **- You can prepare the sandwich with any kind of white sandwich bread but we like to prepare it with sliced bread. *

May 17, 2013 · 2 min · Cesmm

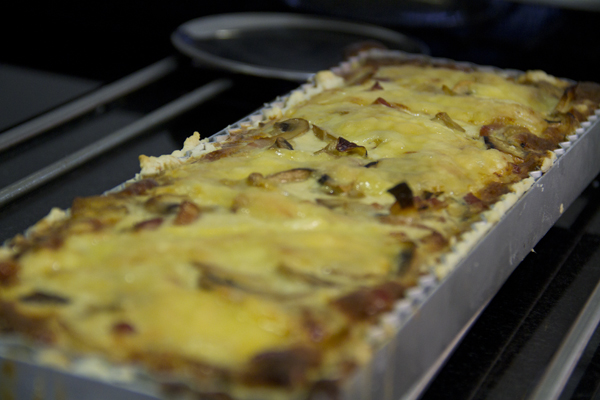
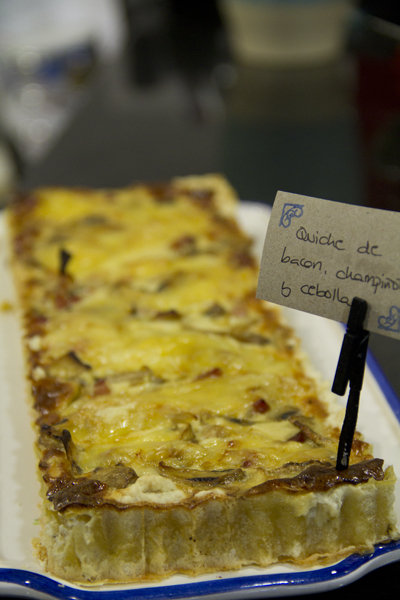
Quiche Lorraine

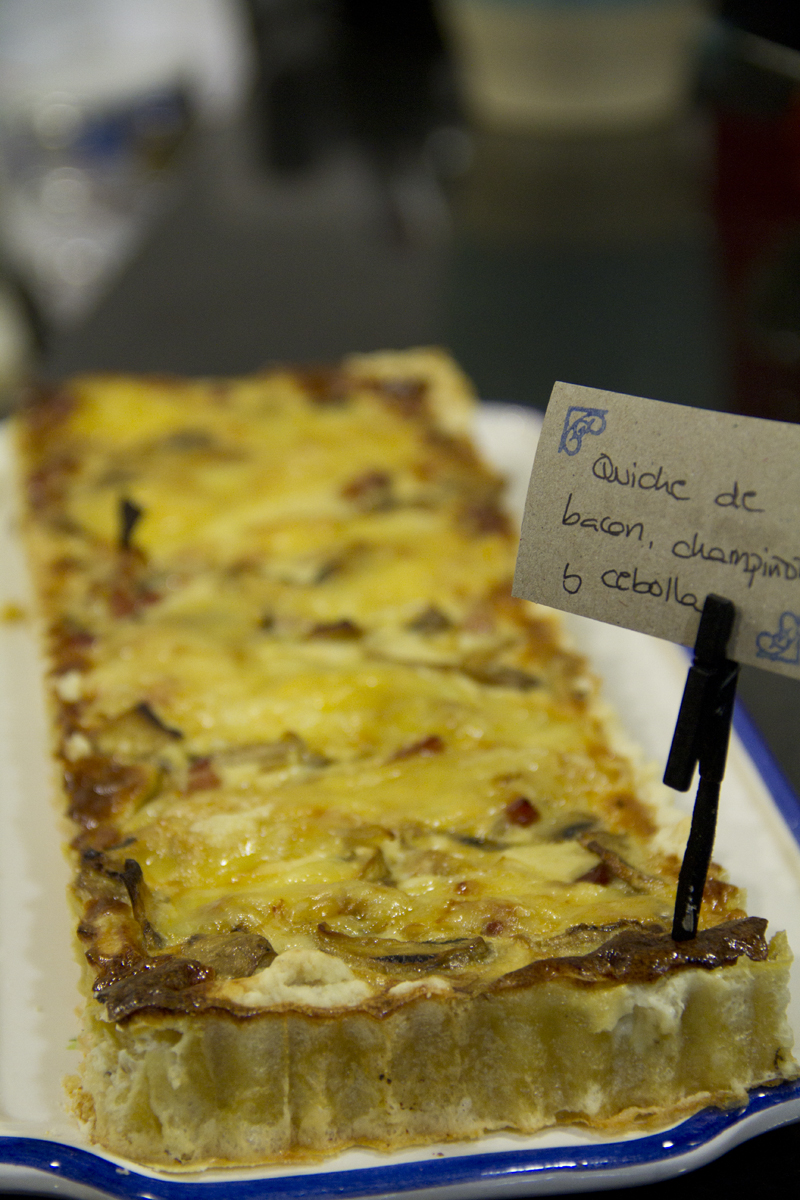
As part of the campaign “No newly-independent young adult shall go hungry, even if they don’t like cooking,” here’s another easy recipe — one of those that almost everyone knows, but just in case, I don’t want to hear that you’re not eating well just because you couldn’t be bothered to do a couple of little things in the kitchen.

Pics and Cakes

What do we need?

For the shortcrust pastry:

  • 200 g (1 ⅔ cups) flour

  • 100 g (7 tbsp) cold butter

  • 1 egg

  • A pinch of salt

  • A pinch of sugar

For the filling:

  • 200 g (7 oz) bacon

  • 100 g (3.5 oz) emmental cheese

  • 50 g (1.75 oz) mushrooms

  • 200 ml (¾ cup) heavy cream

  • 4 medium eggs

  • Half an onion

  • Salt and pepper.

How do we make it?

  • As you know, for the shortcrust pastry you can check here.

  • While we’re making the dough, preheat the oven to 180°C (350°F).

  • Once the dough is ready, place it in a baking pan and pop it in the oven for about fifteen minutes. Before putting it in the oven, prick it with a fork so it doesn’t puff up.

  • With the pastry in the oven, heat a frying pan with a splash of oil. When it’s hot, add the onion and mushrooms, all sliced beforehand. Once they’ve softened a bit, add the bacon cut into strips and cook to your liking. Set aside.

  • Beat the eggs in a large bowl and mix them with the cream. Season with salt and pepper.

  • Add the sautéed ingredients to the bowl.

  • When the pastry is partially cooked, take it out of the oven and pour in the mixture. Spread it evenly across the surface and sprinkle the cheese on top.

  • Put it back in the oven and bake for around half an hour.

Tips:

  • Just like we mentioned here, you can pick any kind of cheese you like or whatever you have at home.

  • Shortcrust pastry isn’t hard to make, but if you’d rather, you can buy it pre-made at any supermarket. That way we make sure “No newly-independent young adult goes hungry, even if they don’t like cooking.”

Pics and Cakes

[English version] QUICHE LORRAINE* Ingredients: *Shortbread pastry:

  • 200 g flour

  • 1oo g cold butter

  • 1 egg

  • A pinch of salt

  • A pinch of sugar


Filling:

  • 200 g bacon

  • 100 g emmental cheese

  • 50 g mushrooms

  • 200 ml cream

  • 4 eggs

  • 1/2 onion

  • Salt and pepper

  • *Prepare the shortbread pastry. You can see here our recipe. *

  • Preheat oven at 180º C.

  • Roll out the pastry and place into a baking pan. Bake for 15 minutes. If we bake directly with the filling on it, the pastry will be underdone. To avoid the pastry to ‘grow’ in the oven, you can place a baking paper and fill up with baking beans. You can also pierce the pastry with a fork.

  • While the pastry is baking in the oven, heat a bit of olive oil in a frying pan. Chop onion and mushrooms and place them into the hot frying pan. After a few minutes, add the bacon cut into strips and keep stir frying for a few extra minutes. Take it out from heat and set aside.

  • In a large bowl, beat eggs and cream together. Add salt and pepper.

  • Add the stir fried ingredients and mix well.

  • The pastry will be already slightly cooked, so take it out from oven and pour evenly the cream mix inside. Sprinkle with some cheese on the top.

  • Bake into the oven for around 30 minutes.

Tips:

*- As we said before here you can choose any kind of cheese you like. *

- Shortbread pastry is not a difficult task but you can also buy it in any supermarket.


Comments

yolanda del pozo (2013-04-19 09:44:08):

All the recipes on this site are easy, cheap, quick and tasty — what more could you ask for? And the photos are amazing too, just looking at them makes you want to make the dish and, above all, eat it. Congrats, great work!

silvia (2015-01-14 20:34:14):

The other day I bought shortcrust pastry by mistake… so checking out this great website, I’m bookmarking this recipe.

Just one question: what’s that about pricking the pastry before baking… do you have to pierce it? And what kind of pan works best? Like a non-stick one?

Kisses

April 16, 2013 · 4 min · Cesmm

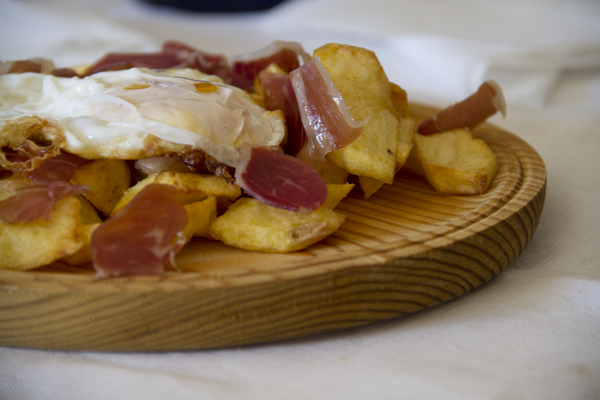
Broken Eggs (Huevos Rotos)

We’re back with a simple recipe, one of those everyone knows how to make, but that we wanted to share with you for two simple reasons: first and most important, it’s a really easy dish that you usually eat when you’re out for drinks but not at home (this is our way of encouraging you to make it yourself), and second because we’ve got a little tip about how to fry the potatoes. Want to know what it is? You’ll have to read the rest of the recipe.

Pics and Cakes

What do we need?

  • Good quality cured ham

  • 3 large potatoes

  • 2 farm-fresh eggs

  • Olive oil

  • Salt

How do we make it?

  • While we heat the oil in a pan (preferably a deep one), we separate or cut up the ham.

  • Peel the potatoes and cut them into irregular bite-sized pieces.

  • Once the oil is nice and hot, lower it to medium heat and add the potatoes. Let them cook more than fry.

  • When they’re soft, take them out and set aside on a plate. Turn the heat back up.

  • Fry the eggs and set them aside.

  • Now with the heat high, put the potatoes back in to brown them. This way they’ll be crispy on the outside and soft on the inside.

  • After draining them on a paper towel, arrange them on a plate or platter, add the ham and eggs, and enjoy.

[English version] HUEVOS ROTOS (FRENCH FRIES WITH EGGS AND SPANISH HAM)* *Ingredients:

  • Spanish cured ham

  • 3 potatoes

  • 2 free-range eggs

  • Olive oil

  • Salt

  • Heat the olive oil in a deep saucepan. In the meanwhile, cut the ham into medium size pieces and the potatoes in irregular pieces the size of a mouthful.

  • *When olive oil is very hot, reduce heat into medium and put the potatoes. Let them simmer. *

  • *When the potatoes are cooked (soft but white), take them out of the pan. Increase heat again. *

  • Fry the eggs and set aside.

  • When the heat is high again, fry again the potatoes until golden brown. They will be soft in the inside and crusty in the outside.

  • *Take them out into a plate with kitchen paper to remove the extra oil. Place the potatoes into a large plate, the eggs and ham over them and enjoy! *


March 16, 2013 · 3 min · Cesmm

Blue Cheese Burger

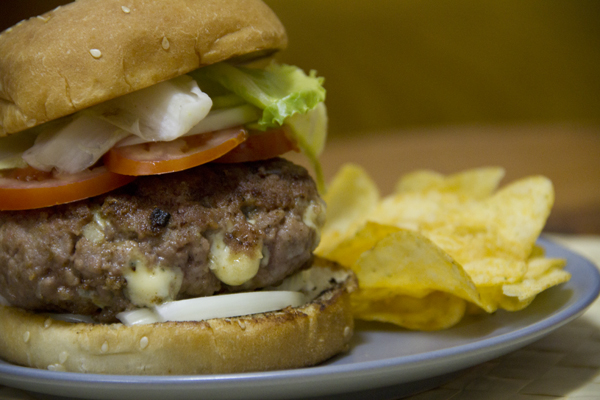
Good and freezing morning. Today we’re bringing you a really simple recipe, the kind that even Jesús will be able to pull off without having to call twenty times :p The thing is, I’m a huge fan of making burgers at home. They’re usually way better than the ones you eat out, plus you make them to your own taste and load them with the ingredients you like best. This time we made the burger with blue cheese mixed right into the patty.

Pics and Cakes

What do we need?

(For each big-eater burger)

  • 200 g (7 oz) ground beef

  • 25-30 g (1 oz) blue cheese

  • 1 egg

  • Pepper

  • Salt

  • Breadcrumbs

  • Tomato

  • Lettuce

  • Onion

  • Burger bun

How do we make it?

  • Take the ground beef and dump it into a large bowl, since you’re going to be getting your hands in there.

  • Add the egg, a bit of freshly ground pepper, salt to taste, and a little breadcrumbs to give the meat some consistency.

  • Mix everything together with your hands.

  • Once all the ingredients are well combined, add the blue cheese cut into cubes. Try to work it into the meat but without pressing too hard so the cheese doesn’t break apart.

  • Wrap in cling film and shape into a burger.

  • Let the burger rest in the fridge for a couple of hours.

  • When you’re ready to eat, put a frying pan with a splash of oil over the heat and, while it’s warming up, start chopping the rest of the ingredients.

  • Cut the onion into rings, the lettuce into fairly large leaves (that way it’s easier to eat), and the tomato into slices.

  • Once the oil is hot, lower the heat a bit so the burger doesn’t burn on the outside while staying raw inside. Cook it to your liking (I like mine rare).

  • When it’s done, set it aside, wipe the pan clean with kitchen paper, and toast the bun for about half a minute.

  • Build your burger and enjoy.

Tips:

  • If you’re not going to use all the ground beef you bought, you can keep the formed patties in the freezer.

  • For me, as I said, I really enjoy a good burger, so 150 to 200 grams (5-7 oz) of ground beef is the “standard” size. Yes, that’s on the generous side, but hey, it’s a burger. Obviously you can make it with less.

  • If you want, you can dust the patty in flour before cooking it.

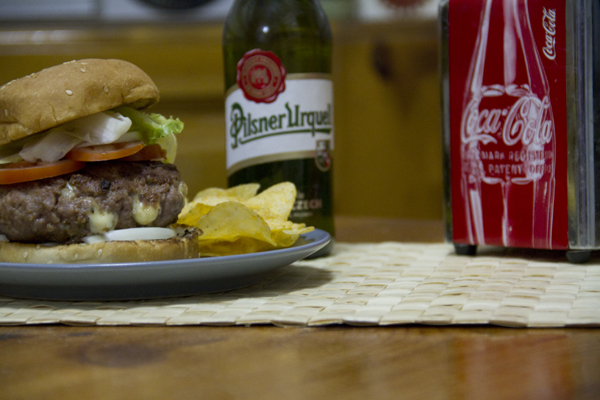
  • As my dad says when we play tute, “side dish requested.” A good beer or a cold Coke with fries (homemade or store-bought) is a must.

Pics and Cakes

[English version] **Ingredients:

(For each big hamburger)

  • 200 g de minced meat

  • 25-30 g de blue cheese

  • 1 egg

  • Pepper

  • Salt

  • Bread crumbs

  • Tomato

  • Salad

  • Onion

  • Hamburger bun

  • Place minced meat into a large bowl and mix well with your hands.

  • Add the egg, a bit of salt and pepper and some bread crumbs.

  • Mix well all ingredients.

  • Then chop blue cheese into small squares and add to the meat mix. Try to ‘knead’ the mix integrating the cheese but keeping it into pieces.

  • Make a ball, wrap in cling film and and flatten it with your hand to have hamburger shape.

  • Leave for a couple of hours in fridge.

  • Then, pour a bit of olive oil in the frying pan. Let it get warm and start preparing your fresh ingredients (onion, tomato and salad).

  • Cut onion into rings, tomato into slices and salad (lettuce) into big parts (it will be easier to eat).

  • Cook the hamburger according to your preferences (well done, medium or rare).

  • When it’s ready take it out from the pan, clean the frying pan with kitchen paper and toat the bread bun.

  • Prepare you hamburger sandwich with all the ingredients and enjoy it.

Tips:

  • You can freeze the prepared raw hamburgers and you will only need to defrost and cook in the pan whenever you need it.

  • This amount of minced meat is for a big hamburger but it’s up to you the size of your hamburger.

  • You can coat in flour the raw hamburger before cooking it.

  • It’s a must to serve the hamburger with a cold beer and chips or fries.


December 11, 2012 · 4 min · Cesmm

Pasta Carbonara

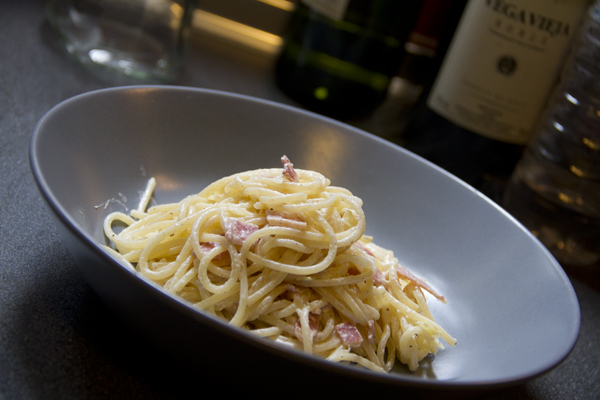
Truth is, this is a recipe we’ve been making for ages and one that I always thought was “the original” — the way I figured this typical Italian dish was prepared by mammas all over Italy. How wrong I was… Every Italian who’s seen us make this dish has been surprised, has laughed, and has gotten outraged in equal measure when watching us prepare “their dish” with cream instead of uovo. Here you can see how they make it, and without further ado I’ll show you our version (having tried both, I’ll stick with ours :p)
Pics and Cakes

What do we need?

(Serves 2)

  • 200 g (7 oz) spaghetti

  • 4 slices of bacon

  • 1/2 onion

  • 200 ml (3/4 cup) cooking cream

  • Salt and pepper

How do we make it?

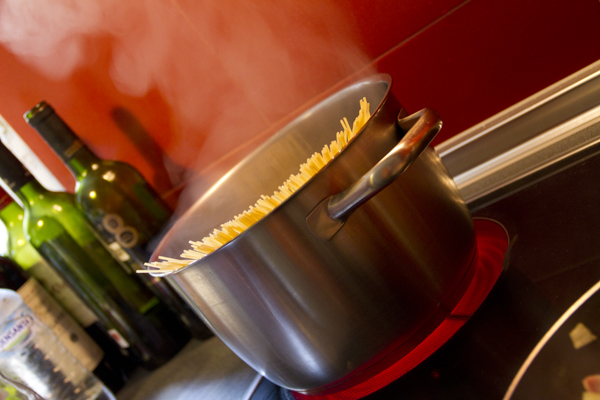
  • Put the spaghetti to cook in plenty of water (once it’s boiling), lightly salted.

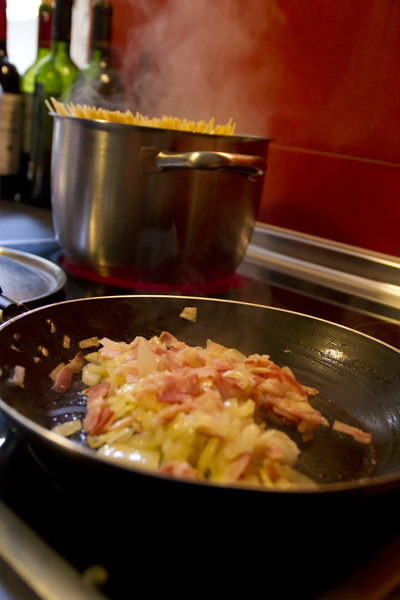
  • While the pasta is cooking — we’ll leave it for around 15 minutes — pour a splash of oil in a frying pan and add the onion.

  • Let it sauté a little and add the bacon.

  • Once it’s done, add the cream and let it come to a boil.

  • Add a pinch of salt — careful not to overdo it since the bacon already gives flavor to the sauce — and a bit of pepper. Set aside if the pasta isn’t ready yet.

  • Drain the pasta and mix with the carbonara sauce.
Pics and Cakes

Tips:

  • Depending on your stove, pot, and pasta, it may be ready a little before the fifteen minutes or a little after. Keep an eye on it if you like your pasta “al dente”.

  • The bacon can be swapped for pancetta.

  • You can sprinkle a bit of Parmesan cheese on top when you serve the pasta.
Pics and Cakes


Comments

Miguel (2012-11-07 12:01:29):

I usually make this same recipe, but when I add the salt and pepper, I take the chance to throw in a tiny bit (very, very little) of nutmeg.

And I also prefer the cream version over the egg one.

tía pi (2012-11-07 23:41:40):

For me, carbonara is without onion, with bacon, cream and egg, but I’ll give yours a try.

Palstelera (2012-11-09 21:26:49):

I love nutmeg. Truth is I always add it to béchamel but never to carbonara — I’ll try it next time :-)

Palstelera (2012-11-09 21:27:17):

Without onion? Try it, it’s delicious!

Vio (2012-12-07 20:44:34):

Boo! I love the blog, but you also know I couldn’t stay quiet knowing you call this carbonara. Maledetti!

I’ll take the chance to tell you that, aside from the amazing recipes, the site is super pretty and the photos rock ;-)

Big kiss!

Palstelera (2012-12-11 13:04:25):

hehe, Vio. It’s not that we call it carbonara… it’s that half of Spain does! That’s why, to avoid hurting any feelings, we started the post by making clear that what’s called carbonara in Spain has nothing to do with the Italian recipe… But honestly, I love the Spanish version :-)

Vio (2013-03-05 12:39:39):

Haha, sure — you, Spain… it’s all about complaining :-P

The truth is I do really like this version, but I think the Italian one is much tastier when it’s done right, with crispy bacon, lots of pepper, and nice juicy spaghetti. I will say a lot of Italians make a pretty lousy version and it really brings the dish down.
November 6, 2012 · 3 min · Cesmm