Ciabatta Bread

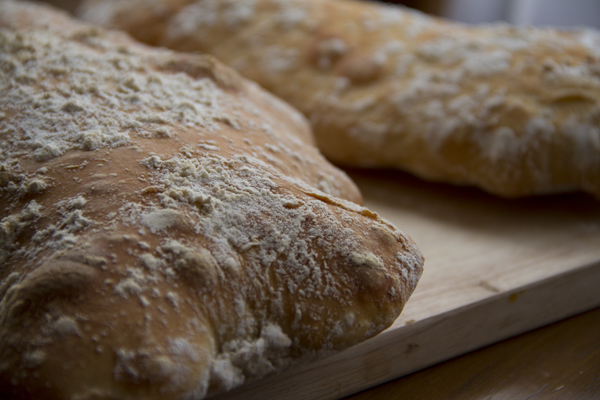
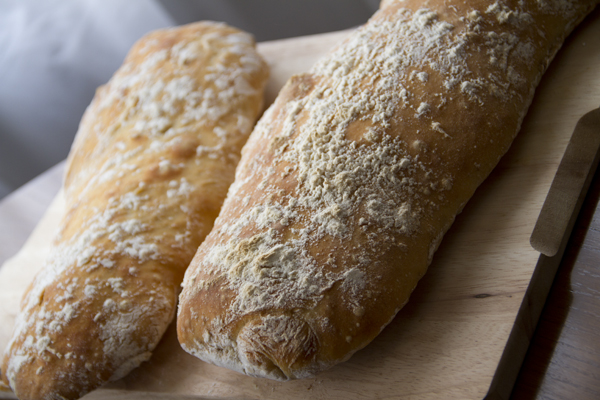
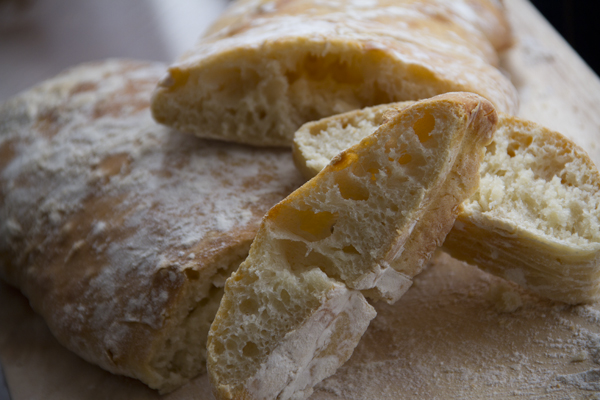
Whole Kitchen in their Savory Challenge for the month of November invites us to prepare an Italian classic: “Ciabatta”. I had been really wanting to make this recipe but I never thought it would turn out well, and… it turned out so well, yes indeed! It even looked like a real ciabatta. The recipe is slow because of the rising times, but it’s simple to make and the result is incredibly good.
Pics and Cakes

What do we need?

(For two loaves)

For the starter:

  • 2.5 g fresh yeast

  • 150 ml (2/3 cup) water

  • 3 tablespoons warm milk

  • 1/4 teaspoon honey or granulated sugar

  • 150 g (1.25 cups) bread flour

For the dough:

  • 2.5 g fresh yeast

  • 250 ml (1 cup) water

  • 1/2 tablespoon olive oil

  • 350 g (2.75 cups) bread flour

  • 1 and 1/2 teaspoons salt

Pics and Cakes

How do we make it?

  • First, we prepare the starter. Sprinkle the yeast into a large bowl with the water and milk. Let it sit for 5 minutes, then add the honey or sugar and stir to dissolve.

  • Add the flour and mix to form a loose dough. Cover the bowl with a kitchen towel and let it ferment for 12 hours or overnight.

  • Once the wait is over, we move on to the dough. Sprinkle the yeast into a small bowl with the water. Let it sit for 5 minutes; stir to dissolve. Add the yeast water and the olive oil to the starter and mix well.

  • Into the bowl, add the flour with the salt and mix to form a wet, sticky dough. Beat continuously with a wooden spoon for 5 minutes; the dough will turn fluffy and start to pull away from the sides, but it will still be too soft to knead.

  • Cover the dough with a kitchen towel. Let it ferment for about 3 hours, until the dough has tripled in size and is full of air bubbles. Generously flour two baking sheets and have extra flour ready to dust your hands.

  • Divide the dough in half while it’s still in the bowl. Tip half of the dough onto one of the sheets.

  • With your hands well coated in flour, shape it into a rectangular loaf about 30 cm (12 inches) long. Dust the loaf and your hands again with flour. Tidy and thicken it by running your fingers along the sides and gently tucking under the bottom of the dough. Repeat the same with the other half.

  • Uncovered, let the loaves rise for about 20 minutes; they will spread out and grow in volume.

  • Put them in the oven, preheated to 220°C (430°F), and bake for 30 minutes until the loaves have risen, are golden brown, and sound hollow when tapped on the bottom. Let cool on a wire rack.

Tips:

  • It’s a very sticky dough that you barely have to work with your hands. That’s why, in the final steps, it’s important to keep your hands well covered in flour and not handle the dough too much, since otherwise half of it will end up stuck to you.

  • I use the pressed baker’s yeast you can find in cubes in the supermarket in the bakery/pastry section, always refrigerated. I buy a bunch and freeze them, so I always have some on hand whenever I need it. That said, it’s important to keep in mind that frozen yeast loses a bit of its “power”, so you’ll need to add a little more than what the recipe calls for.

  • When baking, I put both sheets in at the same time and after 20 minutes I swapped them so that both loaves cooked evenly on both sides.
Pics and Cakes


Comments

Marisa (2012-11-22 12:51:05):

She brought a piece home for me and it’s awesome, delicious, amazing… mmm, I want more!

tía pi (2012-11-22 18:13:13):

It’s a pleasure how well you explain everything and the tips you give. I promise to make it and tell you how it turns out.

Angeles (2012-11-22 22:35:32):

It looks fantastic, just like an authentic Italian ciabatta.

marmota zampona (2012-11-24 19:27:46):

I’m going to give it a try right now.
22 de noviembre de 2012 · 4 min · Palstelera

Pan de chapata

**Whole kitchen en su Propuesta Salada para el mes de noviembre nos invita a preparar un clásico italiano “Ciabatta”. **Tenía muchas ganas de hacer esta receta pero ni de lejos pensé que me iba a quedar bien y… qué bien quedó, ¡sí, señor! Si hasta parecía una chapata de verdad. La receta es lenta por los tiempos de levado pero su elaboración es sencilla y el resultado es increíblemente bueno.

Pics and Cakes

¿Qué necesitamos?

(Para dos panes)

Para la masa madre:

  • 2,5 g de levadura fresca

  • 150 ml de agua

  • 3 cucharadas de leche tibia

  • 1/4 cucharadita de miel o azúcar granulada

  • 150 gr de harina de fuerza

Para la masa:

  • 2,5 g de levadura fresca

  • 250 ml de agua

  • 1/2 cucharada de aceite de oliva

  • 350 g de harina de fuerza

  • 1 y 1/2 cucharadita de sal

Pics and Cakes

¿Cómo lo hacemos?

  • Primero preparamos la masa madre. Esparcimos la levadura en un recipiente grande con agua y leche. Dejamos durante 5 minutos, después añadimos la miel o el azúcar y revolvemos para que se disuelva.

  • Añadimos la harina y mezclamos para formar una masa floja. Tapamos el cuenco con un paño de cocina y dejamos fermentar durante 12 horas o toda la noche.

  • Pasado el tiempo de espera, procedemos a hacer la masa. Esparcimos la levadura en un cuenco pequeño con agua. Dejamos durante 5 minutos; revolvemos para que se disuelva. Añadimos el agua con levadura y el aceite de oliva a la masa madre y mezclamos bien.

  • En el recipiente echamos y mezclamos la harina con la sal para formar una masa húmeda y pegajosa. Batimos sin parar con una cuchara de madera durante 5 minutos; la masa quedará esponjosa y empezará a despegarse, pero seguirá demasiado blanda para amasar.

  • Tapamos la masa con un paño de cocina. Dejamos fermentar durante unas 3 horas, hasta que la masa triplique su tamaño y se llene de burbujas de aire. Enharinamos generosamente dos bandejas de horno y preparamos harina adicional para echárnosla en las manos.

  • Dividimos la masa por la mitad mientras está en el cuenco. Volcamos la mitad de la masa sobre una de las bandejas.

  • Con las manos bien recubiertas de harina, formamos un pan rectangular, de aproximadamente 30 cm. de largo. Espolvoreamos el pan y las manos nuevamente con harina. Acomodamos y engrosamos recorriendo los costados con los dedos y llevando suavemente hacia adentro de la masa por debajo. Repetimos lo mismo con la otra mitad de la masa.

  • Sin tapar, dejamos fermentar los panes unos 20 min; se desparramarán y aumentarán de volumen.

  • Metemos en el horno previamente calentado a 220ºC y dejamos 30 minutos hasta que los panes se hinchen, adquieran un color dorado y suenen a hueco cuando los golpeemos en la base. Dejamos enfriar sobre una rejilla metálica.

Consejos:

  • Es una masa muy pegajosa que apenas hay que trabajar con las manos. Por eso, en los últimos pasos es importante tener las manos bien cubiertas de harina y no manosear mucho la masa ya que sólo conseguiríamos que se nos quedase la mitad de ella pegada a nosotros.

  • Yo utilizo la levadura de panadería prensada que podemos encontrar en cubitos en el supermercado en la parte de panadería/pastelería pero siempre refrigerada. Compro muchos y los congelo, así cada vez que lo necesito lo tengo a mano. Eso sí, es importante tener en cuenta que la levadura congelada pierde un poco de su “poder” así que habrá que echar un poquito más de cantidad de la que nos indica la receta.

  • A la hora de hornear, yo metí las dos bandejas a la vez y pasados 20 minutos las intercambié para que se hicieran bien los dos panes por las dos caras.

 Pics and Cakes

[English version] CIABATTA BREAD* *Ingredients:

(for two loaves)

For the sourdough (starter):

  • 2,5 g fresh yeast

  • 150 ml water

  • 3 tbsp warm milk

  • 1/4 tsp honey or sugar

  • 150 gr strong flour

  • For the dough:*
  • 2,5 g fresh yeast

  • 250 ml water

  • 1/2 tbsp olive oil

  • 350 g strong flour

  • 1 y 1/2 tsp salt

* *

  • *First, start by preparing the sourdough. Put the yeast into a large bowl with water and milk. Let the dough stand for 5 minutes and then add sugar/honey and stir well. *

  • Add the flour until having a loose dough. Cover with a clean cloth and let ferment for 12 hour or the whole night.

  • *After fermentation time, make the dough. Put yeast into a bowl with water. Let it stand for 5 minutes; stir well. Add this water with yeast and the olive oil to the sourdough. Stir well. *

  • *Add flour and salt and stir well using a wooden spoon. The result will be a wet and sticky dough. Keep beating for 5 minutes until getting a fluffy dough a bit less sticky (but still too much to knead). *

  • Cover with a kitchen cloth and let stand for 3 hours (the size will triple and some bubbles will appear inside). Scatter flour into two baking pans and in your hands.

  • Split the dough into two halves. Put one of the part into one baking pan.

  • *With hands covered by flour, shape the ciabatta bread (30 cm long) creating a rectangle. Repeat the same steps with the other half of dough. *

  • *Let it stand uncovered for 20 minutes. They will become bigger and lose its perfect shape. *

  • *Put into oven (preheated to 220ºC) and bake for 30 minutes until they are golden brown and bigger. Tap the bottom of the bread with your fingers and the bread will sound hollow when it’s done. Leave cool on a rack. *

* *

Tips:

*- It’s a very sticky dough very difficult to knead. It’s needed to have hands covered by flour and not kneading the dough too much. *

-  I usually use fresh yeast in cubes (sold in supermarkets). I buy several cubes and freeze them to use them whenever I want. However, you should take into account that frozen yeast will lose part of its “power” so you will need to use an amount slightly bigger than the amount indicated in the recipe.

*- For baking, I put both baking pans at the same time. After first 20 minutes I swaped their positions to have both loaves well done. *


22 de noviembre de 2012 · 6 min · Palstelera

Donuts

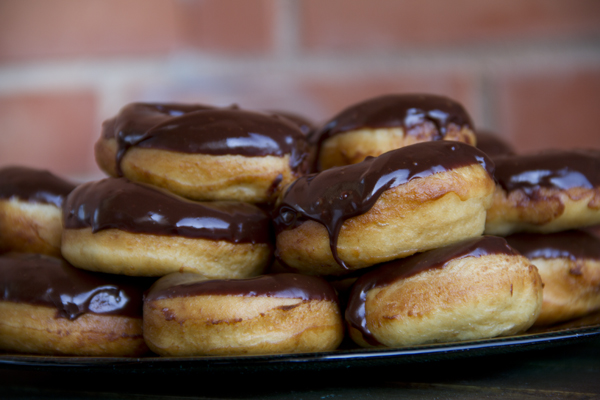
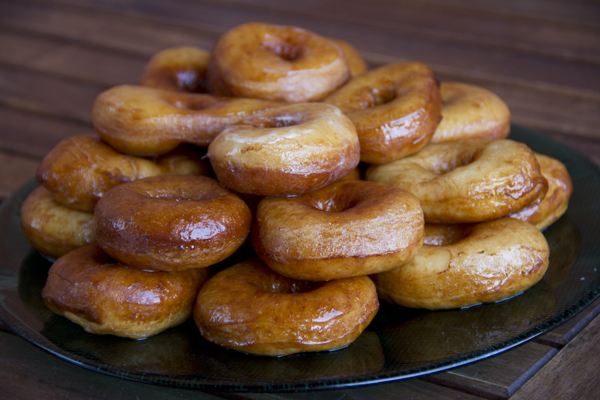
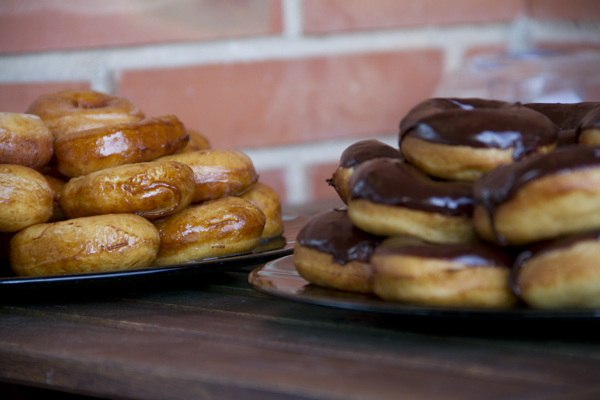
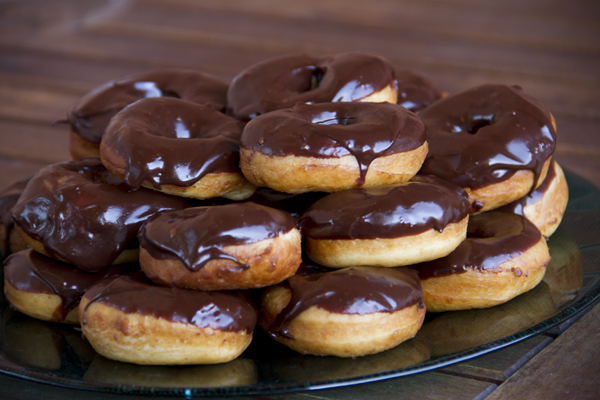
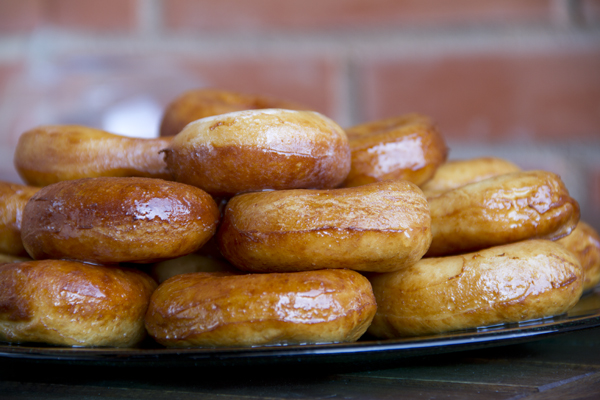
Creo que sin duda alguna éste es uno de los mejores descubrimientos culinarios que he hecho en mi vida. Por increíble que parezca el sabor es muy parecido a los comerciales, la masa es muy esponjosa, no se siente grasienta como la de algunos donuts de panadería y la cobertura de chocolate es sencillamente, magnífica. El único problema que tienen, es que son altamente adictivos… Os lo advierto, una vez que los probéis querréis repetir y repetir. Pero bueno, creo que merece la pena.

Pics and Cakes

¿Qué necesitamos?

  • 300 gr. de harina de fuerza

  • 200 gr de harina normal

  • 80 gr. de azúcar

  • 5 gr. de sal

  • 20 gr. de leche en polvo

  • 2 sobres de levadura de panadería

  • 230 gr. de agua templada

  • 1 huevo mediano

  • 40 gr. de manteca o margarina (nosotros usamos Crisco que es una grasa vegetal inolora e insípida)

  • 2 cucharaditas de esencia de naranja


Para el glaseado de azúcar:

  • 200 g azúcar glas

  • 1 cucharadita de mantequilla

  • Un chorrito de zumo de limón

  • Agua

Para el glaseado de chocolate:

  • 200 g azúcar glas

  • 1 cucharadita de mantequilla

  • 150 g chocolate para postres

  • Agua


Pics and Cakes

¿Cómo lo hacemos?

  • Mezclamos bien los ingredientes secos: harinas, azúcar, sal, leche en polvo y la levadura.

  • Añadimos el agua, ni caliente ni demasiado fría, a temperatura ambiente, el huevo batido y la esencia de naranja. Recordad, si el agua está caliente “matará la levadura”, si está muy fría tardará más tiempo en fermentar. Amasamos durante 8 minutos aproximadamente.

  • Añadimos la materia grasa y amasamos hasta que no se nos pegue a las manos. Es posible que necesitemos añadir más harina pero no lo sabremos hasta que no hayamos incorporado la manteca del todo. La textura resultante debe ser homogénea y elástica.

  • Formamos una bola y dejamos reposar unos 45 min. No pasa nada si lo dejamos más tiempo.

  • Pasado ese tiempo, amasamos un poco y estiramos del tamaño de 1 cm. de espesor. Si tenemos un cortapastas de donuts, perfecto. Si no con un cortador redondo (o con un vaso) hacemos los círculos y con un cortador más pequeño el círculo interior. Para el agujero del centro, nosotros hicimos el agujero con el dedo y lo agrandamos un poco (la masa es muy elástica así que no se notará la irregularidad).

  • Dejamos reposar en una bandeja sobre papel de hornear durante 1 hora mínimo para que vuelvan a crecer.

  • Freímos en aceite de girasol (si utilizamos aceite de oliva le dará demasiado sabor). El aceite no tiene que estar muy caliente ya que se queman enseguida. En cuanto los echemos a la sartén empezarán a hincharse. Los dejamos unos segundos y les damos la vuelta para que se doren por la otra parte.

  • Los sacamos y escurrimos en papel absorbente y todavía calientes, los bañamos con el glaseado de azúcar. Si los bañamos en glaseado de chocolate no hace falta que estén calientes.

  • Para hacer el glaseado de azúcar, derretimos un poco la mantequilla en el microondas y la mezclamos bien con el azúcar glas y un chorrito de limón. Añadimos unas cucharadas de agua hasta obtener una papilla ligera de color blanquecino.

  • Para el glaseado de chocolate, mezclamos el azúcar glas con unas cucharadas de agua (que nos quede de nuevo una papilla ligera). Derretimos el chocolate con la mantequilla en el microondas y una vez deshecho, lo añadimos a nuestra papilla de agua y azúcar. Si está demasiado espeso podemos añadir un poco más de agua. Si por el contrario, está demasiado duro, lo podemos dejar enfriar.

  • Para bañar los donuts en el glaseado de azúcar los sumergimos en el bol con el glaseado para que se pegue por todas partes. En cambio, para el glaseado de chocolate, sólo los bañaremos por una cara.


Pics and Cakes

Consejos:

  • Parece complicado pero no lo es. Simplemente hay que disponer de tiempo para hacerlos ya que es muy importante respetar los tiempos de ‘subida’ de la masa.

  • Es importante que la levadura sea de panadería y que la leche sea en polvo ya que si no, variarán nuestras proporciones de ingredientes secos y no obtendremos el mismo resultado.

  • A la hora de freír los donuts, hazlo de uno en uno o si es una sartén grande puedes poner 2 ó 3 máximo. De lo contrario, corres el riesgo de que se te quemen.


Pics and Cakes

*[English version] DOUGHNUTS ** *Ingredients:

  • 300 g strong flour

  • 200 g flour

  • 80 g sugar

  • 5 g salt

  • 20 g powdered milk

  • 2 sachets of dry yeast

  • 230 g warm water

  • 1 medium size egg

  • 40 g fat or margarine (we use Crisco)

  • 2 tsps orange flavour

  • *For sugar icing:
  • 200 g confectioners’ sugar

  • 1 tsp butter

  • Lemon juice

  • Water

For chocolate icing:

  • 200 g confectioners’ sugar

  • 1 tsp butter

  • 150 g chocolate

  • Water


  • Mix dry ingredients into a large bowl (flours, sugar, salt, powdered milk and yeast).

  • Add warm water, whisked egg and orange flavour. Remember, too hot water will ‘kill’ the yeast, too cold water will make fermentation slower. Knead for 8 minutes.

  • Add fat and keep kneading until having a non-sticky dough. You may need to add some more flour. The resulting texture should be a homogenous and elastic dough.

  • Make a ball and set aside for 45 minutes or more.

  • After this time, knead it and roll it out (1 cm). Use a round biscuit cutter to make the circles and use a smaller one to make the inner circle. You can also make the inner hole with your fingers. If you have a special doughnut cutter, it will be perfect.

  • Let the dough stand (already on the doughnut shape) again for 45 minutes on a baking tray covered by baking paper.

    • Deep fry in sunflower oil (don’t use olive oil because it will give them too strong flavour). Be careful, it will be fried very soon. Leave them some seconds and then turn them around until golden brown.*
  • Take them out and place on kitchen paper. Still hot, covered them with the sugar icing. If you use chocolate icing, they don’t need to be hot.

  • For sugar icing, melt butter in the microwave and mix with confectioners’ sugar and a trickle of lemon juice. Add some tbsp of water and stir well. You need a white thick soup.

  • For chocolate icing, mix confectioners’ sugar with some tbsp of water (you will need again a white thick soup). Melt chocolate with butter in the microwave and mix with the sugar mixture. If it’s too thick, you can add some more water. However, if it’s too liquid, you can let it cool for a while.

  • To cover the doughnuts with the sugar icing, plunge them into the bowl and cover both sides. However, for the chocolate icing, cover only one side of the doughnut.

    • Tips:*

*- It may seem complicated but it’s not. You only need time to do it because the rising times for the dough are essential for the success of the recipe. *

*- You need dry yeast and powdered milk to keep the proportion of dry ingredients and get perfect results. *

- When frying the doughnuts, take your time. Fry only one by one or, if you are using a large pan, 2 or 3 at the same time maximum. Otherwise, you risk to have them all burnt.


Pics and Cakes


1 de noviembre de 2012 · 8 min · Palstelera

Doughnuts

I think this is hands-down one of the best culinary discoveries I’ve made in my life. As unbelievable as it sounds, the flavor is really close to the store-bought ones — the dough is super fluffy, it doesn’t feel greasy like some bakery doughnuts, and the chocolate glaze is simply magnificent. The only problem is that they’re highly addictive… I’m warning you: once you try them, you’ll want to make them again and again. But hey, I think it’s worth it.

Pics and Cakes

What do we need?

  • 300 g (2.5 cups) bread flour

  • 200 g (1.5 cups) all-purpose flour

  • 80 g (1/3 cup + 1 tbsp) sugar

  • 5 g (1 tsp) salt

  • 20 g (3 tbsp) powdered milk

  • 2 packets of active dry yeast

  • 230 g (1 cup) warm water

  • 1 medium egg

  • 40 g (3 tbsp) shortening or margarine (we use Crisco, which is an odorless and tasteless vegetable fat)

  • 2 teaspoons orange extract

For the sugar glaze:

  • 200 g (1.75 cups) confectioners’ sugar

  • 1 teaspoon butter

  • A splash of lemon juice

  • Water

For the chocolate glaze:

  • 200 g (1.75 cups) confectioners’ sugar

  • 1 teaspoon butter

  • 150 g (5.3 oz) baking chocolate

  • Water

Pics and Cakes

How do we make them?

  • Mix the dry ingredients well: flours, sugar, salt, powdered milk and yeast.

  • Add the water — neither hot nor too cold, at room temperature — along with the beaten egg and the orange extract. Remember: if the water is hot it will “kill the yeast,” and if it’s too cold the dough will take longer to rise. Knead for about 8 minutes.

  • Add the fat and keep kneading until the dough no longer sticks to your hands. You might need to add more flour, but you won’t know until the shortening is fully incorporated. The resulting texture should be smooth and elastic.

  • Form a ball and let it rest for about 45 minutes. It’s fine to let it go longer.

  • After that time, knead it a bit and roll it out to about 1 cm (3/8 inch) thick. If you have a doughnut cutter, perfect. If not, use a round cutter (or a glass) to make the circles, and a smaller one for the inner circle. For the center hole, we just made it with our finger and stretched it a little (the dough is very elastic, so any irregularity won’t show).

  • Let them rest on a tray lined with parchment paper for at least 1 hour so they can rise again.

  • Fry in sunflower oil (if you use olive oil it’ll give them too much flavor). The oil shouldn’t be too hot or they’ll burn right away. As soon as you drop them in the pan they’ll start puffing up. Leave them for a few seconds and flip them so they brown on the other side.

  • Take them out and drain on paper towels, and while they’re still warm, dip them in the sugar glaze. If you’re using the chocolate glaze, they don’t need to be warm.

  • To make the sugar glaze, melt the butter a bit in the microwave and mix it well with the confectioners’ sugar and a splash of lemon. Add a few tablespoons of water until you get a light, whitish slurry.

  • For the chocolate glaze, mix the confectioners’ sugar with a few tablespoons of water (again, you want a light slurry). Melt the chocolate with the butter in the microwave and once melted, add it to the sugar-and-water mixture. If it’s too thick, add a bit more water. If on the other hand it’s too runny, let it cool down.

  • To coat the doughnuts in the sugar glaze, dip them into the bowl so the glaze sticks all over. For the chocolate glaze, only dip one side.

Pics and Cakes

Tips:

  • It looks complicated but it isn’t. You just need time, because respecting the dough’s rising times is really important.

  • It’s important that the yeast is bread yeast (not baking powder) and that the milk is powdered — otherwise your dry ingredient ratios will change and you won’t get the same result.

  • When frying the doughnuts, do them one at a time, or if you have a large pan, 2 or 3 at most. Otherwise you risk burning them.

Pics and Cakes

Pics and Cakes


1 de noviembre de 2012 · 5 min · Palstelera

Brownie

Whole Kitchen’s Sweet Proposal for October invites us to make an American classic: brownies

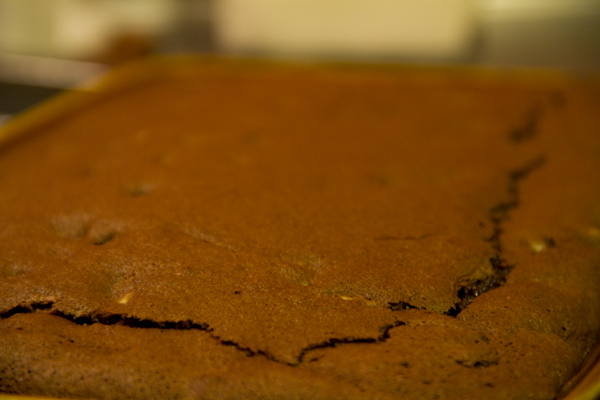
And what a treat, seriously. I’ve made dozens of brownies in my life and I have to confess I almost always pull out a different recipe and they all turn out delicious. The secret is that a brownie is a compact but fluffy cake (sometimes even moist), since it usually doesn’t have any leavening and therefore doesn’t rise. I read somewhere that the brownie was actually discovered thanks to someone forgetting to add the leavening to a chocolate cake. All I can say is… blessed mistake!

Pics and Cakes

What do we need?

  • 200 g (7 oz) baking chocolate

  • 100 g (3.5 oz / 7 tbsp) butter

  • 2 eggs

  • 100 g (1/2 cup) regular sugar

  • 1/2 teaspoon baking soda

  • 1/2 teaspoon salt

  • 80 g (2/3 cup) flour

  • 100 g (3.5 oz / about 1 cup) walnuts

Pics and Cakes

How do we make it?

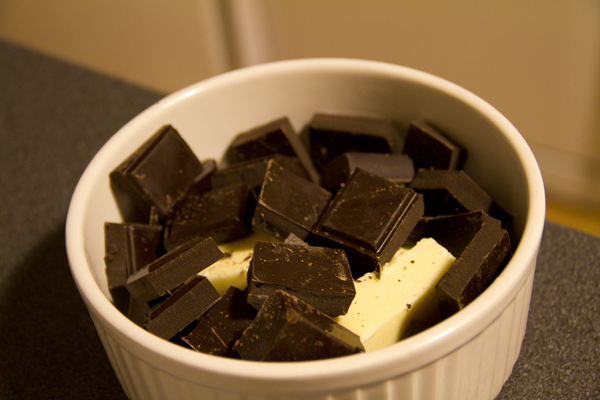
  • Chop the chocolate and put it in a microwave-safe bowl together with the butter. Melt in 20-30 second intervals, stirring each time so it doesn’t burn.

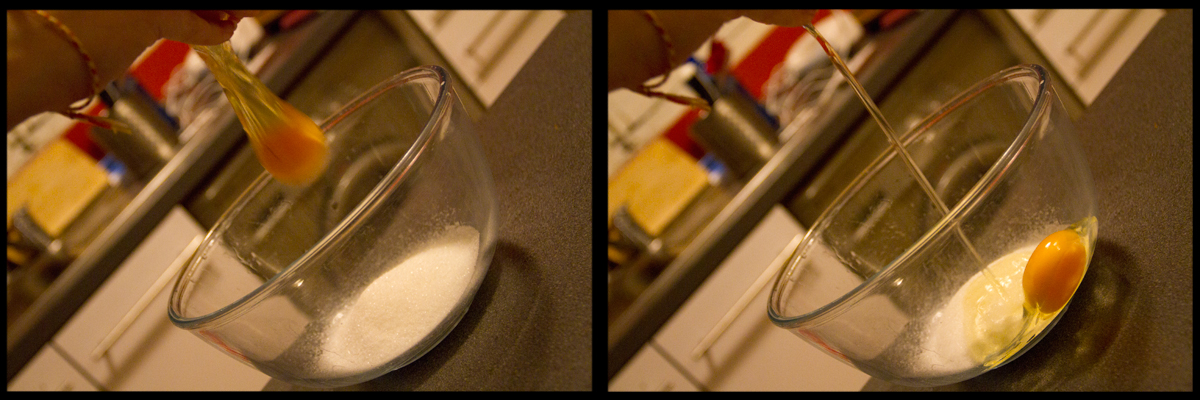
  • In another large bowl, whisk the eggs with the sugar until you get a foamy mixture.

  • Add the chocolate to this foamy mixture and stir well.

  • Mix the flour with the salt and baking soda. Sift it and add it to the previous mixture.

  • Stir well and add the walnuts.

  • Prepare a baking pan, greasing and flouring it so the cake doesn’t stick, and pour the mixture into it.

  • Put it in the oven (preheated to 180°C / 350°F) and bake for about 30 minutes.

  • It’ll be ready when you see a light brown crust has formed on top. Remember that the toothpick won’t come out perfectly clean since this is a moist cake. The important thing is that it’s not completely liquid.

Pics and Cakes

Tips:

  • Even though brownie batter is pretty dense and it’s usually not necessary, a trick to keep the walnuts from sinking to the bottom of the pan is to coat them in flour or cocoa first.

  • To turn the brownie into a proper dessert, serve it with a scoop of vanilla ice cream and hot chocolate sauce on top.

Pics and Cakes

[English version] BROWNIES* *Ingredients:

  • 200 g chocolate

  • 100 g butter

  • 2 eggs

  • 100 g sugar (sugar or confectioners’ sugar)

  • 1/2 tsp baking soda

  • 1/2 tsp salt

  • 80 g flor

  • *100 g walnuts *

  • Cut chocolate into chunks and put into a microwave bowl with butter. Melt it slowly (stop every 20-30 seconds and stir with a spoon).

  • *In a large bowl, whisk the eggs and the sugar together to get a fluffy mix. *

  • Add chocolate cream and stir well.

  • *Mix flour, salt and baking soda. Sift the flour mix and add to the previous cream. *

  • *Stir well and add walnuts. *

  • *Prepare the baking pan (butter and flour it!) and pour the mixture on it. *

  • *Put into oven (preheated at 180ºC) and bake for 30 minutes. *

  • *It will be ready when you see a brown crust created on the top. If you insert a needle or knife to check the baking, it might not be clean because it’s supposed to be a ‘wet’ cake. *

  • ** Tips:- Normally this tip is not needed with brownies recipe because the dough is very thick. However, when you add nuts to a cake and you don’t want to have all of them at the bottom of your baking pan, you can coat the walnuts in flour or cocoa powder. *- For a perfect dessert result, serve the brownie with a scoop of vanilla ice-cream and hot chocolate sauce over it!

25 de octubre de 2012 · 4 min · Palstelera

Brownie

Whole Kitchen en su Propuesta Dulce para el mes de octubre nos invita a preparar un clásico estadounidense: brownies

Y qué cosa más rica, por favor. He hecho decenas de brownies en mi vida y he de confesar que casi siempre rescato una receta diferente y todas salen riquísimas. El secreto es que el brownie es un bizcocho compacto pero esponjoso (en ocasiones, incluso húmedo) ya que no suele llevar levadura y por tanto no crece. En algún he leído que el descubrimiento del brownie fue precisamente gracias a haberse olvidado echar la levadura a un bizcocho de chocolate. Sólo me queda decir… ¡bendito error!

Pics and Cakes


¿Qué necesitamos?

  • 200 g de chocolate para postres

  • 100 g de mantequilla

  • 2 huevos

  • 100 g de azúcar normal

  • 1/2 cucharadita de postre de bicarbonato

  • 1/2 cucharadita de sal

  • 80 g de harina

  • 100 g de nueces

Pics and Cakes

¿Cómo lo hacemos?

  • Troceamos el chocolate y lo ponemos junto con la mantequilla en un bol apto para microondas. Lo derretimos en intervalos de 20-30 segundos, removiendo cada vez para evitar que se nos queme.

  • En otro bol grande, batimos los huevos con el azúcar con ayuda de unas varillas para que nos quede una mezcla espumosa.

  • Agregamos el chocolate a esta mezcla espumosa y removemos bien.

  • Mezclamos la harina con la sal y el bicarbonato. Lo tamizamos y echamos sobre la mezcla anterior.

  • Removemos bien y añadimos las nueces.

  • Preparamos un molde de horno, engrasándolo y enharinándolo para que no se nos pegue y vertemos la mezcla en él.

  • Lo introducimos al horno (precalentado a 180º) y lo horneamos durante 30 minutos aproximadamente.

  • Estará listo cuando veamos que se ha formado una costra por encima de color marrón claro. Recordad que la aguja no saldrá perfectamente limpia ya que se trata de un bizcocho húmedo. Lo importante es que no esté completamente líquido.

 Pics and Cakes

Consejos:

  • Aunque la masa del brownie es bastante densa y no suele hacer falta, un truco para que las nueces no se vayan al fondo del molde consiste en rebozarlas antes en harina o cacao.

  • Para hacer del brownie un auténtico postre se puede servir con una bola de helado de vainilla y chocolate caliente por encima.

Pics and Cakes

 [English version] BROWNIES* *Ingredients:

  • 200 g chocolate

  • 100 g butter

  • 2 eggs

  • 100 g sugar (sugar or confectioners’ sugar)

  • 1/2 tsp baking soda

  • 1/2 tsp salt

  • 80 g flor

  • *100 g walnuts *

* *

  • Cut chocolate into chunks and put into a microwave bowl with butter.  Melt it slowly (stop every 20-30 seconds and stir with a spoon).

  • *In a large bowl, whisk the eggs and the sugar together to get a fluffy mix. *

  • Add chocolate cream and stir well.

  • *Mix flour, salt and baking soda. Sift the flour mix and add to the previous cream. *

  • *Stir well and add walnuts. *

  • *Prepare the baking pan (butter and flour it!) and pour the mixture on it. *

  • *Put into oven (preheated at 180ºC) and bake for 30 minutes. *

  • *It will be ready when you see a brown crust created on the top. If you insert a needle or knife to check the baking, it might not be clean because it’s supposed to be a ‘wet’ cake. *

* **  Tips:- Normally this tip is not needed with brownies recipe because the dough is very thick. However, when you add nuts to a cake and you don’t want to have all of them at the bottom of your baking pan, you can coat the walnuts in flour or cocoa powder. *- For a perfect dessert result, serve the brownie with a scoop of vanilla ice-cream and hot chocolate sauce over it!


25 de octubre de 2012 · 4 min · Palstelera

Piononos

Whole kitchen, in their Sweet Proposal for September, invites us to make a Spanish classic: “Piononos”. And honestly, this challenge made me really happy because I think these little pastries are an absolute delight. I’d actually come across them before, though under the popular nickname ‘Vicksvaporub’ at Confitería Rufino in Aracena. Apparently they’re typical of Granada, and legend has it they got their name because they were made in honor of Pope Pius IX. Of course, like with every recipe, the origin and authorship are still up for debate, but whoever made them first, these little pastries are wonderful.

Pics and Cakes

What do we need?

(10-12 units)

For the sponge cake:

  • 2 large eggs

  • 2 tablespoons of sugar

  • 1 tablespoon of flour

  • 1 tablespoon of cornstarch

  • 2 tablespoons of milk

  • a pinch of salt

  • Butter for greasing

For the syrup:

  • 150 g (5.3 oz) sugar

  • 150 ml (2/3 cup) water

  • A cinnamon stick

  • A splash of rum (optional)

For the yolk cream:

  • 4 egg yolks

  • The weight of the yolks in sugar

  • The volume of the sugar in water

  • A pinch of cornstarch

How do we make them?

  • We start with the yolk cream so it has time to cool down.

  • First, make a syrup with equal parts water and sugar. Put both ingredients in a small saucepan and bring to a boil. How thick the yolk cream ends up depends, in part, on how much you cook the syrup down. For a filling-cream texture, let the syrup reach the soft-ball stage (reduce it down to the original water volume — that is, if you used 250 ml (1 cup) of water and 250 ml (1 cup) of sugar, take it off the heat once it’s reduced to 250 ml (1 cup) of syrup).

  • Let the syrup cool a bit. Meanwhile, separate the yolks and whisk them lightly. Once the syrup is lukewarm, add it to the yolks slowly, whisking constantly (off the heat), until you’ve added all the syrup.

  • Put it on low heat and cook, stirring constantly, until it thickens. (The longer you cook it, the thicker it gets.) You can add half a teaspoon of cornstarch dissolved in a tablespoon of cold water.

  • Make the syrup by boiling all the ingredients for 5 minutes.

  • Line the baking tray with parchment paper and grease it with butter.

  • Preheat the oven to 180°C (355°F) and start preparing the sponge cake.

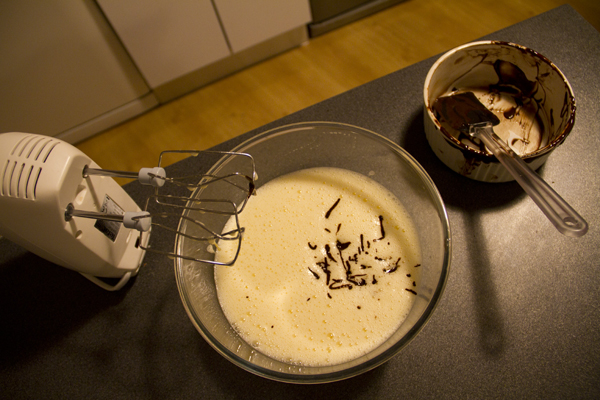
  • Whip the egg whites with a pinch of salt. Once they’re stiff, add the sugar little by little while still whisking, until it’s fully dissolved and the meringue is firm and glossy. Set aside.

  • In a bowl, combine the flour and cornstarch (sifted together), add the yolks and mix, then gradually add the milk to get a smooth, lump-free cream.

  • Add the yolk mixture to the meringue in several stages, folding gently with a spatula.

  • Carefully spread the batter on the prepared baking tray in a 4-5 mm (about 1/5 inch) thick layer. Place in the preheated oven on the middle rack. Pull it out as soon as it picks up a bit of color (about 7-8 minutes). Flip it onto another sheet of parchment paper. Let it cool slightly and brush it with the syrup.

  • Once it’s cool, spread a thin layer of yolk cream over the sponge sheet.

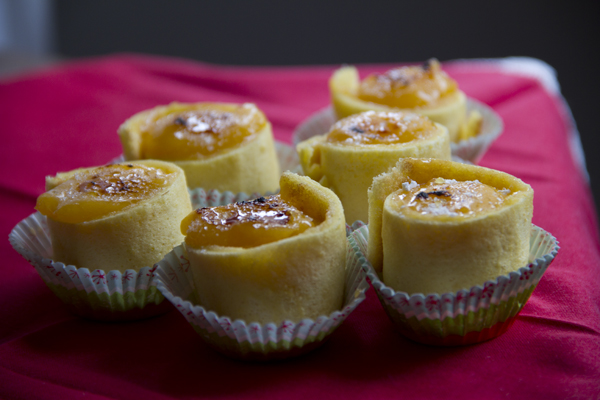
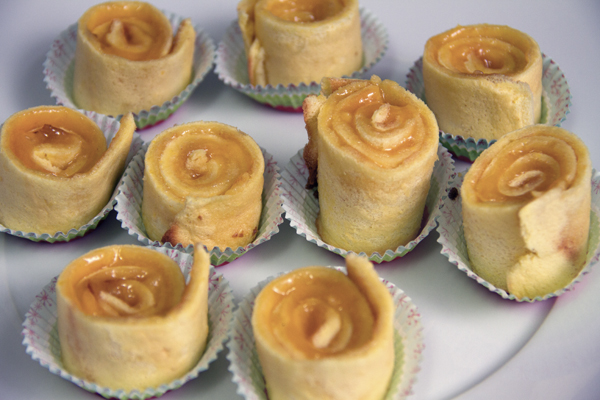
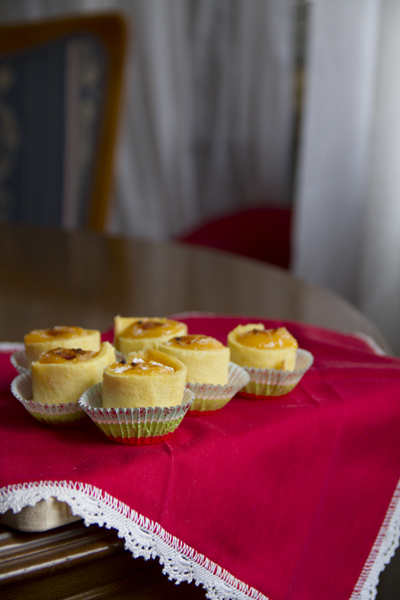
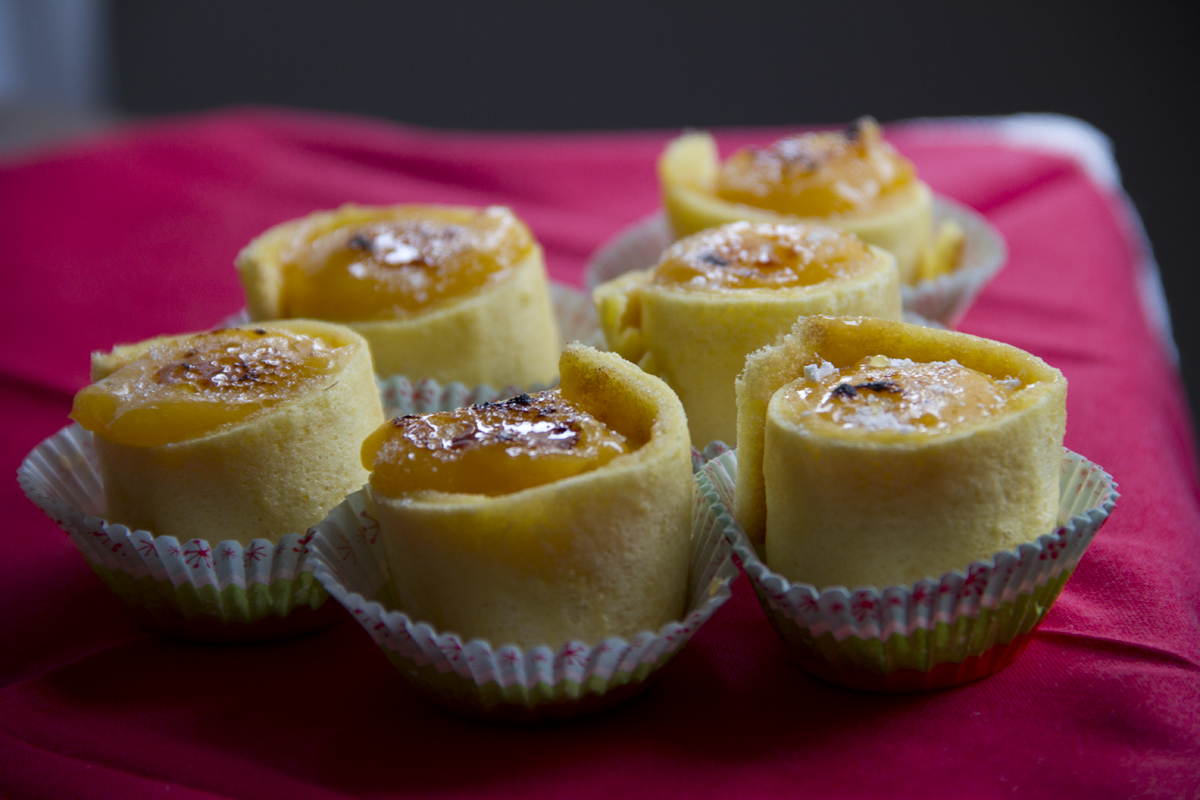
  • Cut strips about 3-4 cm (1.2-1.6 inches) wide and roll them up in a spiral. Place the little pastries vertically into paper cupcake liners. Add a teaspoon of cream on top of each one. Sprinkle with sugar and torch it with a kitchen blowtorch.

Pics and Cakes

Tips:

  • The sponge cake has to be very thin. These quantities worked for me with my oven, which has a square tray that’s smaller than usual. I think if you double the amounts you’ll have enough for a regular-size tray. In any case, if it’s too much batter, better not to use it all or the sponge will end up too thick.

  • In principle, the sponge doesn’t need any baking powder because the whipped egg whites give it enough volume. Even so, next time I’ll try adding a pinch to see how it turns out.

  • Don’t forget to grease the parchment paper with butter — the sponge sheet is very thin and could easily tear when you try to peel it off.

  • The recipe we followed is from Belenciaga, but using it as inspiration you can come up with all kinds of variations.

Pics and Cakes


25 de septiembre de 2012 · 4 min · Palstelera

Piononos

Whole kitchen en su Propuesta Dulce para el mes de Septiembre nos invita a preparar un clásico español, “Piononos”. Y la verdad es que este reto me ha encantado porque estos pastelitos me parecen una delicia. Lo cierto es que ya  los conocía aunque con el nombre popular de ‘Vicksvaporub’ en la Confitería Rufino de Aracena. Al parecer son típicos de Granada y cuenta la leyenda que reciben este nombre porque se hicieron en honor del papa Pío IX. Evidentemente como toda receta, el origen y la autoría siguen siendo objeto de disputa pero fuera quien fuera el que los hizo por primera vez, estos pastelitos son una maravilla.

 Pics and Cakes

¿Qué necesitamos?

(10-12 unidades)

Para el bizcocho:

  • 2 huevos grandes

  • 2 cucharadas de azúcar

  • 1 cucharada de harina

  • 1 cucharada de maizena

  • 2 cucharadas de leche.

  • una pizca de sal

  • Mantequilla para untar

Para el almíbar:

  • 150 g de azúcar

  • 150 ml agua

  • Un palo de canela

  • Un chorrito de ron (opcional)

Para la crema de yema:

  • 4 yemas

  • El peso de las yemas en azúcar

  • El volumen del azúcar en agua

  • Una pizca de maizena

¿Cómo lo hacemos?

  • Empezamos haciendo la crema de yema para que enfríe.

  • Lo primero es hacer un almíbar a partes iguales de agua y azúcar. Para ello, ponemos los dos ingredientes en una cazuela pequeña y lo llevamos a ebullición. Del grado de cocción del almíbar va a depender, en parte, lo espesa que nos quede la yema.Para una textura de crema de relleno dejamos que el almíbar alcance el punto de bola.(reducir al volumen original de agua. es decir si hemos usado 250 cc de agua y 250cc de azúcar, cuando haya reducido a 250cc de almíbar retiramos del fuego)

  • Dejamos templar el almíbar. Mientras separamos las yemas y las batimos ligeramente con las varillas. Una vez esté el almibar tibio lo vamos añadiendo a las yemas sin dejar de mover con las varillas, (fuera del fuego), hasta añadir todo el almíbar.

  • Llevamos al fuego bajo y sin dejar de remover cocemos hasta que espese. ( si prolongamos la cocción quedará más espesa). Le podemos añadir media cucharadita de maizena disuelta en una cucharada de agua fría.

  • Preparamos el almíbar hirviendo 5 minutos los ingredientes.

  • Forramos la bandeja de horno con papel vegetal y lo untamos con mantequilla.

  • Calentamos el horno a 180ºC y empezamos a preparar el bizcocho.

  • Montamos las claras con una pizca de sal. Cuando ya estén subidas añadimos el azúcar poco a poco sin dejar de batir, hasta que se disuelva bien y el merengue esté firme y brillante. Reservamos.

  • En un bol ponemos la harina y la maizena mezcladas y tamizadas, añadimos las yemas y mezclamos, vamos añadiendo la leche para conseguir una crema lisa y sin grumos.

  • Vamos añadiendo en varias veces la mezcla de yemas sobre el merengue mezclando con una espátula con movimientos envolventes.

  • Extendemos con cuidado la masa sobre la bandeja de horno preparada en una capa de 4 - 5 mm. Metemos al horno precalentado a media altura. en cuanto coja un poco de color lo sacamos ( unos 7-8 minutos). Volcamos sobre otro papel de horno. Dejamos que entibie un poco y calamos con el almíbar pincelándolo con la brocha

  • Cuando haya enfriado, extendemos una capa fina de crema sobre la plancha de bizcocho.

  • Se cortan tiras de unos 3- 4 cm y las enrollamos en espiral. Colocamos los pastelitos en cápsulas de papel, verticalmente. Se pone una cucharadita de crema encima de cada pastel. Se espolvorea con azúcar y se quema con el soplete.

Pics and Cakes

Consejos:

  • El bizcocho tiene que ser muy fino. con estas cantidades a mí me ha servido para mi horno cuya bandeja cuadrada es más pequeña de lo habitual. Creo que si dobláis las cantidades tendréis suficiente para una bandeja grande. De todas formas si es demasiada cantidad, mejor no utilizarla toda o el bizcocho quedará demasiado grueso.

  • En principio el bizcocho no necesita levadura porque al tener las claras montadas le da el volumen necesario. De todas formas, la próxima vez probaré a echarle una pizca a ver cuál es el resultado.

  • No olvidéis untar el papel de horno con mantequilla ya que la plancha de bizcocho resultante será muy fina y se os podría romper al despegarla.

  • La receta que hemos seguido es de Belenciaga pero inspirándonos en ella podemos hacer multitud de variaciones.

 Pics and Cakes

[English version] ‘PIONONOS’: YOLK-CREAM SWEET TREATS* **Ingredients (10-12 units): *For the sponge cake:

  • 2 large eggs

  • 2 tbsp sugar

  • 1 tbsp flour

  • 1 tbsp white corn flour (Maizena)

  • 2 tbsp milk

  • A pinch of salt

  • Butter

For the syrup:

  • 150 g sugar

  • 150 ml water

  • Cinnamon stick

  • A splash of rum

For the yolk cream:

  • 4 egg yolks

  • Same yolk weight in sugar

  • Same sugar volume in water

  • A pinch of white corn flour (Maizena)

* *

  • Start with the yolk cream to get it cold.

  • *Make a syrup with sugar and water. Put both ingredients in a sauce pan and cook over a high heat. We need a thick texture, so keep cooking until reducing to the original amount of water. *

  • Leave to cool. Separate the yolks and whisk them with the blender (provided with whisk attachment). Add slowly the syrup while whisking.

  • Put it again on to the heat and cook over a low heat, stirring constantly. You can add a bit of white corn flour to have a thicker cream.

  • *Let’s prepare the syrup. Simmer all the ingredients for 5 minutes and set aside. *

  • *Place bakery paper into the baking tray and butter it. *

  • *Preheat oven at 180ºC and let’s start with the sponge cake. *

  • *Whisk the egg whites with a pinch of salt until. Add progressively the sugar and whisk until the mixture is thick and glossy. Set aside. *

  • Place flour and corn flour into a large bowl, add egg yolks and stir well. Add the milk and mix thoroughly until the mixture is smooth.

  • Add slowly the yolk cream to the meringue and slowly stir.

  • Pour the mixture in the prepared baking tray creating a thin layer (4-5 mm). Bake until slightly golden brown (7-8 minutes).

  • Place into a new baking paper and remove the old one. Brush it with the syrup.

  • *Spread a thin layer of yolk cream over the sponge cake. *

  • *Cut into strips (3-4 cm) and roll them one by one. Place each sweet treat into small paper cupcakes molds in vertical position. *

  • Add a tsp of yolk cream on the top. Spread some sugar and burn it with a kitchen blowtorch.

* * * * *  Tips:*

- The sponge cake layer has to be really thin. These amounts work for a small baking tray. If you use the baking tray of a conventional oven, double the amounts. If you feel it’s too much don’t pour all the mixture. Otherwise, the resulting spong cake will be too thick.

- This spong cake doesn’t need baking powder because we have made a meringue first. However, next time I’ll try and add a pinch of it to see the result.

- Don’t forget buttering the baking paper. Otherwise, you risk to break the sponge cake when removing from it.


25 de septiembre de 2012 · 7 min · Palstelera

Milk Bread Buns

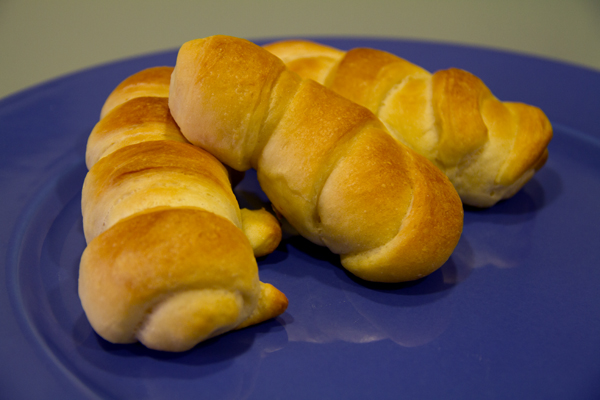
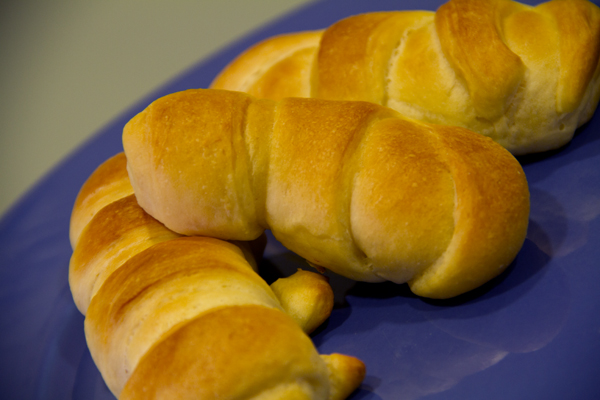
We were putting together a surprise afternoon snack where we wanted everything to be absolutely homemade, so we couldn’t even allow ourselves to buy the bread. One of the things we wanted to make was little savory sandwiches and, once again, we turned to the La Receta de la Felicidad blog to follow their steps and make some great milk bread buns. Honestly, we thought it would be pretty complicated, but how wrong we were…

Pics and Cakes

What do we need?

(16 buns)

  •   500 g (about 4 cups) bread flour
    
  •   25 g (about 1 oz) fresh yeast (or two sachets of dry baker's yeast)
    
  •   250 ml (1 cup) milk
    
  •   70 g (about 5 tbsp) butter, softened (i.e. nice and soft)
    
  •   40 g (about 3 tbsp) sugar
    
  •   1 egg
    
  •   2 tablespoons of honey
    
  •   A pinch of salt
    

How do we do it?

  • Mix the flour and yeast in a large bowl and add the egg and milk.

  • Add the sugar, honey and salt, and mix well using a spoon or fork.

  • Add the butter, and knead for 10-15 minutes, until you get a soft, pliable, slightly shiny dough.

  • Form the dough into a ball by turning it and folding it inwards, and let it rest in a lightly floured bowl, covered with a cloth, for about two hours so it doubles in volume.

  • Take the dough out of the bowl and lightly press it down with your fingers to ‘deflate’ it.

  • Cut the dough into 16 portions, and shape them into buns.

  • To do this, we have two methods. The first one is to take each piece of dough and roll it on itself, as if the bun were swallowing itself up. (Since my explanation leaves a lot to be desired, you can watch it in this video). The second method is to roll out each piece of dough into a rectangular shape. On one of the ends, make three or four cuts with a sharp knife to create some fringes. Finally, roll up the dough starting from the side opposite the fringes, so that when you finish, the fringes end up on the outside and give that distinctive look of milk buns.

  • Brush the buns with a little milk, let them rest on a baking tray lined with parchment paper for about 20 minutes, and meanwhile preheat the oven to 180°C (355°F).

  • Bake the buns for 10-12 minutes, and let them cool to room temperature on a wire rack.

Tips:

  • If you let the dough rest longer, nothing happens except that it might grow out of control (like what happened to us, when we discovered a mutant dough trying to escape from the bowl).
  • To shape the buns, we used the two methods we found at La Receta de la Felicidad, since we made two batches of dough and one of them (despite following the same steps) came out stickier, so the first method was easier for us.
  • The flavor in my opinion isn’t exactly the same as store-bought milk buns, but they are delicious, very fluffy, and you can fill them with both sweet and savory fillings.

Pics and Cakes

*[English version] MILK BREAD BUNS ** *Ingredients:

- 500 g strong bread flour - 25 g fresh yeast (or two sachets dry yeast) - 250 ml milk - 70 g butter, room temperature - 40 g sugar - 1 egg - 2 tbs honey - A pinch of salt

  • Combine flour and yeast in a bowl. Add the egg, honey, milk, sugar and salt and mix well.

  • Add butter and use a large spoon or fork to mix everything together.

  • Take the dough out of the bowl and knead. You will feel the dough become elastic after kneading for about 5 minutes. Knead the dough for 5-10 minutes more or until the dough is soft, pliable, smooth and slightly shiny-

  • Put the dough into a lightly floured bowl and cover with a cloth. Let the dough rise in a warm place until its size doubles (aprox. two hours)

  • Take the dough out of the bowl, deflate it by touching lightly.

  • Cut the dough into 16 pieces, and roll each of them into an oval shape. Or alternatively, roll out each piece of dough forming a rectangle 1 cm thick. Cut 1/3 the length of the rectangle into 4/5 strips of equal width and roll up the dough similar to a Swiss roll.

  • Preheat oven to 180ºC and let the milk buns rest for 20 minutes.

  • Glaze the buns with some milk, and bake them for 10-12 minutes. Let them cool on a wire rack

  • Tips:**- Nothing wrong if you leave the dough more time covered with a cloth, it will just rise even more! * - We made the bun shape following the two different methods. For sticky doughs is easier the first method (just forming the oval shape). *- You won’t achieve exactly the same flavor than the milk buns of the supermarket but it is absolutely delicious, spongy and can be filled with sweet or savory ingredients. *


Comments

marmota zampona (2012-09-12 08:16:25):

we’ll make them. thanks

8 de septiembre de 2012 · 4 min · Palstelera

Panes de leche

Estábamos preparando una merienda sorpresa en la que queríamos que todo fuese absolutamente casero, así que no podíamos permitirnos comprar ni siquiera el pan. Una de las cosas que queríamos hacer eran pequeños bocadillitos salados y, una vez más, recurrimos al blog de La Receta de la Felicidad para seguir sus pasos y hacer unos estupendos panes de leche. Lo cierto es que pensábamos que sería bastante complicado pero qué equivocados estábamos…

Pics and Cakes

¿Qué necesitamos?

(16 panecillos)

  •       500 g de harina de fuerza
  •       25 g de levadura fresca (o dos sobres de levadura seca de panadería)
  •       250 ml de leche
  •       70 g de mantequilla, en pomada (o sea, blandita)
  •       40 g de azúcar
  •       1 huevo
  •       2 cucharadas de miel
  •       1 pizca de sal

¿Cómo lo hacemos?

  • Mezclamos la harina con la levadura en un bol grande y añadimos el huevo y la leche.

  • Agregamos azúcar, miel y sal, mezclamos bien con la ayuda de una cuchara o tenedor.

  • Agregamos la mantequilla, y amasamos 10-15 minutos, hasta que obtengamos una masa suave, plegable, y ligeramente brillante

  • Formamos una bola con la masa, girándola y doblándola hacia el interior, y la dejamos reposar en un bol ligeramente enharinado, tapada con un paño, durante unas dos horas para que duplique su volumen.

  • Sacamos la masa del bol, y la aplastamos un poco con los dedos para ‘desinflarla’.

  • Cortamos la masa en 16 porciones, y les damos forma de panecillo.

  • Para ello, tenemos dos métodos. El primero consiste en coger cada porción de masa e ir enrollando la masa sobre sí misma como si el propio bollo se auto-engullese. (Como mi explicación deja mucho que desear podéis verlo en este vídeo). El segundo método consistiría en estirar cada porción de masa hasta tener una forma rectangular. En uno de los extremos, hacemos tres o cuatro cortes con un cuchillo afilado para crear unos flecos. Por último enrollamos la masa empezando por el lado contrario a los flecos para que al acabar sean éstos los que queden hacia afuera y den ese aspecto tan característico de los panes de leche.

  • Pincelamos los panecillos con un poco de leche, los dejamos reposar sobre una bandeja de horno forrada de papel de hornear unos 20 min, y mientras precalentamos el horno a 180 ºC.

  • Horneamos los panecillos entre 10-12 minutos, y dejamos enfriar a temperatura ambiente sobre una rejilla.

Consejos:

  • Si dejáis reposar más tiempo la masa, no pasa nada excepto que puede crecer desmesuradamente (como nos pasó a nosotros que descubrimos una masa mutante tratando de escaparse del cuenco).
  • Para formar los panecillos, seguimos los dos métodos que encontramos en La Receta de la Felicidad, ya que hicimos dos medidas de masa y una de ellas (pese a seguir los mismos pasos) nos quedó más pegajosa así que nos resultó más fácil el primer método.
  • El sabor conseguido en mi opinión no es exactamente igual que el de los panes de leche comprados pero es están deliciosos, son muy esponjosos y los podéis rellenar tanto de dulce como de salado.

Pics and Cakes

*[English version] MILK BREAD BUNS ** *Ingredients:

- 500 g strong bread flour - 25 g fresh yeast (or two sachets dry yeast) - 250 ml milk - 70 g butter, room temperature - 40 g sugar - 1 egg - 2 tbs honey - A pinch of salt

* *

  • Combine flour and yeast in a bowl. Add the egg, honey, milk, sugar and salt and mix well.

  • Add butter and use a large spoon or fork to mix everything together.

  • Take the dough out of the bowl and knead. You will feel the dough become elastic after kneading for about 5 minutes. Knead the dough for 5-10 minutes more or until the dough is soft, pliable, smooth and slightly shiny-

  • Put the dough into a lightly floured bowl and cover with a cloth. Let the dough rise in a warm place until its size doubles (aprox. two hours)

  • Take the dough out of the bowl, deflate it by touching lightly.

  • Cut the dough into 16 pieces, and roll each of them into an oval shape. Or alternatively, roll out each piece of dough forming a rectangle 1 cm thick. Cut 1/3 the length of the rectangle into 4/5 strips of equal width and roll up the dough similar to a Swiss roll.

  • Preheat oven to 180ºC and let the milk buns rest for 20 minutes.

  • Glaze the buns with some milk, and bake them for 10-12 minutes. Let them cool on a wire rack

* *

*  Tips:**- Nothing wrong if you leave the dough more time covered with a cloth, it will just rise even more! * - We made the bun shape following the two different methods. For sticky doughs is easier the first method (just forming the oval shape). *- You won’t achieve exactly the same flavor than the milk buns of the supermarket but it is absolutely delicious, spongy and can be filled with sweet or savory ingredients. *


8 de septiembre de 2012 · 4 min · Palstelera