Lemon Pay

You might be wondering about the name and why I’m not just calling it lemon tart or lemon pie. The thing is, I made this tart for my mom and for her it brought back childhood memories. Apparently, when they were kids in Peru they used to eat this tart and they called it “pay de limón.” If we already use more and more anglicisms in Spain, you can imagine how common they are in Latin American countries and the kind of Spanglish that reigns there. In any case, whether or not this is the authentic Peruvian recipe, and whether you call it tart, pie, or pay, this dessert turned out absolutely delicious.
Pics and Cakes

What do we need?

  • 150 g (5.3 oz) ground digestive-style biscuits

  • 110 g (1/2 cup) butter

  • 400 g (14 oz) condensed milk

  • Half a cup of lemon juice

  • 4 egg yolks

  • 4 egg whites

  • 85 g (3/4 cup) powdered sugar

How do we make it?

  • First, melt the butter in the microwave and mix it with the ground biscuits until you get a uniform paste. Put this mixture into a shallow oven-safe pie pan. Press with your fingers until you’ve covered the bottom and sides of the pan well.

  • Pop it in the oven (preheated to 180°C / 350°F) and bake for 15 minutes. Take it out and let it cool.

  • To prepare the filling, mix the condensed milk well with the lemon juice and egg yolks. Pour the mixture over the biscuit base in the pan and put it back in the oven for another 15 minutes. Take it out and let it cool.

  • To make the meringue, whip the egg whites to stiff peaks with a pinch of salt using a whisk (electric is better; it’ll save you time and sore arms). Gradually add the sugar until you get a firm consistency.

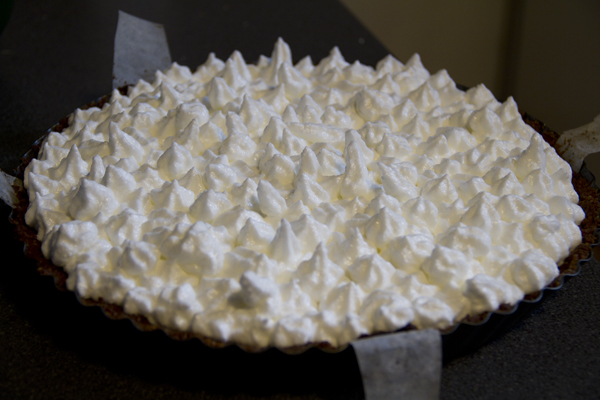
  • Now all that’s left is to put the meringue on top of the lemon tart. You can use a piping bag or just spoon it on, forming peaks.

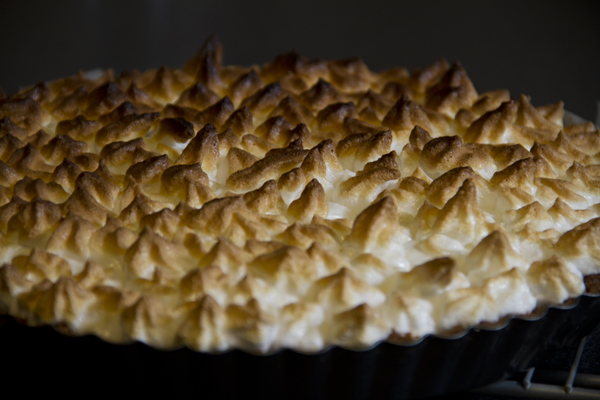
  • Finally, when it’s completely covered, put it back in the oven for a few minutes so the meringue browns slightly.

Tips:

  • If you don’t love the tangy lemon flavor, you can reduce the amount of juice.

  • When you make the meringue, you need to get it really firm (you should even be able to flip the bowl upside down and have it stay put). It’s really important that neither the bowl nor the whisk have any grease on them so the whites whip up properly. Also, be careful in the oven because meringue burns really quickly, so never leave it unattended.

  • If you prefer, you can make a shortcrust pastry for the base.
Pics and Cakes

[English version] LEMON PIE* *Ingredients:

  • *2 cups ground biscuits *

  • 1/2 cup butter

  • 400 g condensed milk

  • 1/2 cup lemon juice

  • 4 egg yolks

  • 4 egg whites

  • 3/4 confectioner’s sugar

  • *First, melt butter in the microwave and stir well with ground biscuits. Put this mix into a pie mould using your fingers to press. Cover the bottom and the sides of the mould. *

  • Bake in preheated oven (to 180º) for 15 minutes.

  • *For the filling, mix together condensed milk, lemon juice and egg yolks. Pour the lemon mixture into the baked biscuit pastry. Bake in oven for 15 minutes. *

  • *Whip egg whites with a pinch of salt (use an electric whisk for better results and saving time). Add sugar gradually and keep whipping until getting a firm meringue. *

  • *Pour the meringue over the lemon pie. You can use a piping bag or use a spoon to make peaks. *

  • *Bake in oven for a few minutes until slightly golden brown. *

Tips:

- If you don’t like strong lemon flavour, you can reduce the amount of lemon juice.

- When making meringue you need a firm mixture (you could even put the mixing bowl upside down and it will keep there). To get good results, the mixing bowl has to be completely free of grease. Be careful when baking meringue because it get burnt very easily.

- You can also make shortbread pastry instead of biscuit pastry.


Comments

Marisa (2013-04-03 10:48:50):

Yum! I love this tart. Make it for me one day, please. :)
19 de febrero de 2013 · 4 min · Palstelera

Pay de limón

Tal vez os preguntaréis el porqué del nombre y por qué no llamarlo simplemente tarta de limón o en inglés* lemon pie*. El caso es que esta tarta se la hice a mi madre y para ella suponía un recuerdo de infancia. Al parecer cuando eran pequeños tomaban esta tarta en Perú y la llamaban así: pay de limón. Si ya en España cada vez utilizamos más anglicismos, os podréis hacer una idea de lo usados que son en países de América latina y del Spanglish que allí reina. En cualquier caso, sea o no la receta auténtica de Perú y se llame tarta, pie o pay, este postre quedó buenísimo.

Pics and Cakes

¿Qué necesitamos?

  • 150 g galletas tipo digestive molidas

  • 110 g de mantequilla

  • 400 g de leche condensada

  • Media taza de zumo de limón

  • 4 yemas de huevo

  • 4 claras de huevo

  • 85 g de azúcar glas


¿Cómo lo hacemos?

  • En primer lugar, derretimos la mantequilla en el microondas y la mezclamos con la galleta molida hasta que quede una pasta uniforme. Ponemos esta mezcla en un molde bajito para tartas apto para el horno. Presionamos con los dedos hasta cubrir bien el fondo y los laterales del molde.

  • Lo metemos en el horno (previamente calentado a 180º) y lo horneamos durante 15 minutos. Lo retiramos y dejamos enfriar.

  • Para preparar el relleno, mezclamos bien la leche condensada con el zumo de limón y las yemas de huevo. Vertemos la mezcla sobre nuestro molde con base de galleta y lo volvemos a introducir en el horno durante otros 15 minutos. Lo sacamos y dejamos enfriar.

  • Para preparar el merengue montamos las claras a punto de nieve con una pizca de sal con ayuda de unas varillas (si son eléctricas, mejor; nos ahorrarán tiempo y agujetas). Vamos añadiendo poco a poco el azúcar hasta conseguir una consistencia firme.

  • Ahora sólo queda poner el merengue sobre la tarta de limón. Para ello, podemos utilizar una manga pastelera o bien ir echándolo con una cuchara e ir formando picos.

  • Por último, cuando esté totalmente cubierta, volvemos a meterla en el horno y la dejamos unos minutos para que se dore ligeramente el merengue.


Consejos:

  • Si no os gusta el sabor tan ácido del limón podéis reducir la cantidad de zumo.

  • Cuando hagáis el merengue tenéis que conseguir que quede bien consistente (incluso podríais dar la vuelta al bol y no se caería). Es muy importante que ni el bol ni las varillas tengan nada de grasa para que se monten bien las claras. Además, hay que tener cuidado en el horno porque el merengue se quema muy rápido, así que nunca lo dejéis desatendido.

  • Si lo preferis podéis hacer una masa quebrada para la base.

Pics and Cakes

 [English version] LEMON PIE* *Ingredients:

  • *2 cups ground biscuits *

  • 1/2 cup butter

  • 400 g condensed milk

  • 1/2 cup lemon juice

  • 4 egg yolks

  • 4 egg whites

  • 3/4 confectioner’s sugar

* *

  • *First, melt butter in the microwave and stir well with ground biscuits. Put this mix into a pie mould using your fingers to press. Cover the bottom and the sides of the mould. *

  • Bake in preheated oven (to 180º) for 15 minutes.

  • *For the filling, mix together condensed milk, lemon juice and egg yolks. Pour the lemon mixture into the baked biscuit pastry. Bake in oven for 15 minutes. *

  • *Whip egg whites with a pinch of salt (use an electric whisk for better results and saving time). Add sugar gradually and keep whipping until getting a firm meringue. *

  • *Pour the meringue over the lemon pie. You can use a piping bag or use a spoon to make peaks. *

  • *Bake in oven for a few minutes until slightly golden brown. *

* *

Tips:

- If you don’t like strong lemon flavour, you can reduce the amount of lemon juice.

- When making meringue you need a firm mixture (you could even put the mixing bowl upside down and it will keep there). To get good results, the mixing bowl has to be completely free of grease. Be careful when baking meringue because it get burnt very easily.

- You can also make shortbread pastry instead of biscuit pastry.


19 de febrero de 2013 · 4 min · Palstelera

Scones

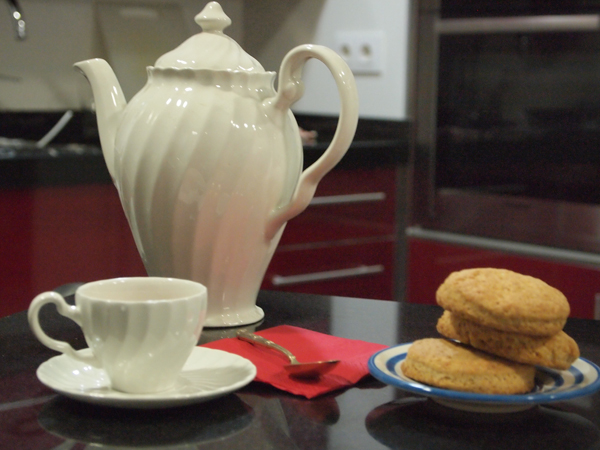
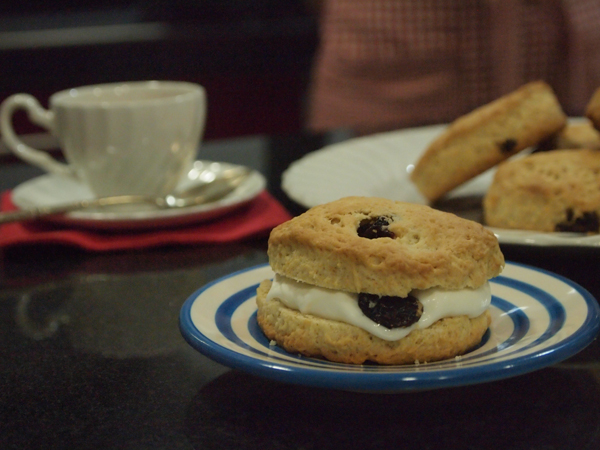
Whole Kitchen, in their Sweet Proposal for January, invites us to make a Scottish classic: Scones

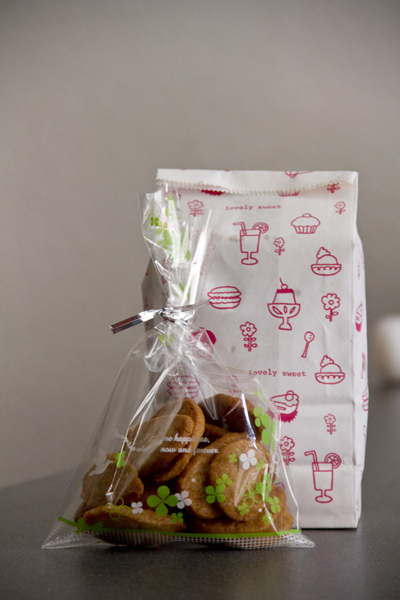
We almost ran out of time with this recipe because — unusual for us — we made it the same day it was published. Luckily, it’s super easy and takes very little time. As usual, the baking time is what stretches the recipe out the most, but hey, the little wait is well worth it. We followed the recipe from www.joyofbaking.com

Pics and Cakes

What do we need?

  • 260 g (2 cups) all-purpose flour

  • 50 g (¼ cup) sugar

  • 1 sachet of Royal baking powder

  • a pinch of salt

  • 75 g (5 tbsp) very cold butter, cubed

  • 1 beaten egg

  • 120 ml (½ cup) heavy cream

How do we make it?

  • Preheat the oven to 190°C (375°F).

  • In a bowl, mix the flour with the sugar, baking powder and salt. Add the butter and rub it in with your fingertips — it should look like crumbs. Set aside.

  • In a separate bowl, mix the egg with the cream.

  • Combine both mixtures until well integrated, but don’t overwork the dough.

  • Roll out lightly until you have a fairly thick dough (about 1.5 cm / ½ inch). (Our first ones came out too thin.) Using a cookie cutter or a glass, cut out circles about 6 cm (2.5 inches) wide.

  • Place them on a baking tray lined with parchment paper and brush with a little milk.

  • Bake for 15 to 18 minutes, until golden.

  • Take them out of the oven and let them cool on a wire rack.

Tips:

  • We forgot to brush the scones with milk and they still turned out delicious, so if you forget too, it’s not the end of the world.

  • You can add chocolate chips, nuts, raisins… to the dough. This time we used dried cranberries.

  • To eat them, just split them in half and spread on butter and jam, whipped cream, lemon curd or anything else you fancy.

Pics and Cakes

[English version] SCONES* Ingredients: *

  • 260 g all-purpose flour

  • 50 g granulated white sugar

  • *1 sachet baking powder *

  • 1/4 teaspoon salt

  • 75 g cold unsalted butter

  • 1 large egg

  • 120 ml milk, half-and-half, or heavy cream

  • *Preheat oven to 190 degrees C. Line a baking sheet with parchment paper. *

  • In a large bowl, whisk or sift together the flour, sugar, baking powder and salt. Cut the butter into small pieces and blend into the flour mixture with a pastry blender, two knives, or with your fingertips. (The mixture should look like coarse crumbs.) In a small measuring cup whisk together the milk or cream and beaten egg. Add this mixture to the flour mixture. Stir just until combined. Do not over mix.

  • Transfer to a lightly floured surface and knead the dough gently four or five times and then pat into a 1,5cm of thickness. Then, using a 6 cm round cookie cutter, cut the dough into rounds. Place the rounds on the prepared cookie sheet, spacing a few centimetres apart. Brush the tops of the scones with a little cream.(This helps to brown the tops of the scones during baking.)

  • *Bake for about 15 -18 minutes or until nicely browned and a toothpick inserted into the center of a scone comes out clean. Remove from oven and transfer to a wire rack to cool. *

Tips:

*- We forgot brushing the scones with milk before baking. The result was wonderful anyway, so in case you forget it too, don’t panic! *

- You can add to the dough chocolate chips, nuts, raisins… We used dried cranberries.

*- You can serve them with butter and jam, marmalade, whipped cream, lemon curd or anything you like. *


Comments

Marivi (2013-01-26 00:39:22):

They look fantastic, and with the filling I’m sure they were even better.

Cristina (2013-01-26 00:55:54):

I really like your version, with cranberries they must be really good ;) and judging by the photos they look delicious!

A kiss!

PIlarHG (2013-01-26 00:59:03):

The same thing happened to me! I ended up making the recipe today too! Lucky it’s a quick one! They turned out great! ;)

Apfelstrudelkuchen (2013-01-26 01:55:06):

Hi!!!

Yeah, it’s true that nothing happens if you don’t brush them, because those scones look absolutely delicious.

A little kiss, Sandra von Cake

Palstelera (2013-01-26 12:48:42):

The truth is they were really tasty, and since I used the leftover cream to whip it up with a bit of sugar, even better. :-)

Palstelera (2013-01-26 12:49:39):

So glad you like them. The cranberries were a last-minute decision and they worked out really well.

Palstelera (2013-01-26 12:50:13):

Yes! Thank goodness they were quick :-)

Palstelera (2013-01-26 12:51:02):

Although now I’ll have to make them again to make them thicker and brushed with milk to see how they turn out :-)

Gri (2013-01-28 11:20:08):

I love your scones… they look fantastic!

A hug Gri http://eltallerdelosviernes.blogspot.com.es/2013/01/hoy-toca-receta-del-cwk.html

mara (2013-01-28 16:49:19):

They turned out so well and look so good with cranberries. I made mine plain because my daughters don’t like them. Here’s my version http://masdulcequesaladopuntocom.blogspot.com.es/2013/01/scones.html

zordor (2013-01-30 05:45:23):

This had a rhyme to it, but honestly I can’t remember what it was right now… :P

guillus (2013-02-27 20:27:45):

Scones! Do we also have to explain how to eat them? :P

guillus (2013-02-27 20:28:47):

Scones! Do we also have to explain how to eat them? :P And with clotted cream they’re even better…

25 de enero de 2013 · 5 min · Palstelera

Scones

Whole Kitchen en su Propuesta Dulce para el mes de enero nos invita a preparar un clásico escocés: Scones

Casi nos pilla el toro con la preparación de esta receta porque, raro en nosotros, pero la hemos hecho el mismo día de su publicación. Por suerte, la elaboración es sencillísima y se tarda muy poco tiempo. Como de costumbre, el tiempo de horneado es lo que más alarga nuestra receta pero bueno, la pequeña espera merece la pena. Hemos seguido la receta de www.joyofbaking.com

 Pics and Cakes


¿Qué necesitamos?

  • 260 g de harina

  • 50 g de azúcar

  • 1 sobre de levadura Royal 

  • una pizca de sal 

  • 75 g de mantequilla en cubitos muy fría 

  • 1 huevo batido 

  • 120 ml de nata


¿Cómo lo hacemos?

  •  Precalentamos el horno a 190ºC.

  • En un bol mezclamos la harina, con el azúcar, la levadura y la sal. Añadimos la mantequilla y mezclamos con ayuda de los dedos, deben parecer migas. Reservamos.

  • Por otro lado mezclamos los huevos con la nata.

  • Mezclamos ambos preparados hasta que estén bien integrados pero sin amasar demasiado.

  • Estiramos ligeramente con el rodillo hasta tener una masa más bien gordita (1'5 cm aprox.). (A nosotros nos quedaron los primeros demasiado finos). Con un cortante o un vaso cortamos círculos de unos 6 cm.

  • Colocamos en la bandeja del horno forrada con el papel para hornear y pintamos con un poco de leche.

  • Horneamos de 15 a 18 minutos, hasta que esté dorado.

  • Retiramos del horno y dejamos enfriar en una rejilla.


Consejos:

  • A nosotros se nos olvidó pintar los scones con leche y quedaron igualmente ricos así que si se os olvida no es el fin del mundo.

  • A la masa podéis añadirle pepitas de chocolate, nueces, pasas… En esta ocasión le hemos puesto arándanos rojos deshidratados.

  • Para comerlos, basta con abrirlos por la mitad y untar mantequilla y mermelada, nata montada, *lemon curd *o cualquier otra cosa que os guste.

Pics and Cakes

[English version] SCONESIngredients: *

  • 260 g all-purpose flour

  • 50 g granulated white sugar

  • *1 sachet baking powder *

  • 1/4 teaspoon salt

  • 75 g cold unsalted butter

  • 1 large egg

  • 120 ml milk, half-and-half, or heavy cream

* *

  • *Preheat oven to 190 degrees C. Line a baking sheet with parchment paper. *

  • In a large bowl, whisk or sift together the flour, sugar, baking powder and salt. Cut the butter into small pieces and blend into the flour mixture with a pastry blender, two knives, or with your fingertips. (The mixture should look like coarse crumbs.) In a small measuring cup whisk together the milk or cream and beaten egg. Add this mixture to the flour mixture. Stir just until combined. Do not over mix.

  • Transfer to a lightly floured surface and knead the dough gently four or five times and then pat into a 1,5cm of thickness. Then, using a 6 cm round cookie cutter, cut the dough into rounds. Place the rounds on the prepared cookie sheet, spacing a few centimetres apart. Brush the tops of the scones with a little cream.(This helps to brown the tops of the scones during baking.)

  • *Bake for about 15 -18 minutes or until nicely browned and a toothpick inserted into the center of a scone comes out clean. Remove from oven and transfer to a wire rack to cool. *


Tips:

*- We forgot brushing the scones with milk before baking. The result was wonderful anyway, so in case you forget it too, don’t panic!  *

- You can add to the dough chocolate chips, nuts, raisins… We used dried cranberries.

*- You can serve them with butter and jam, marmalade, whipped cream, lemon curd or anything you like. *


25 de enero de 2013 · 5 min · Palstelera

Galletas speculoos

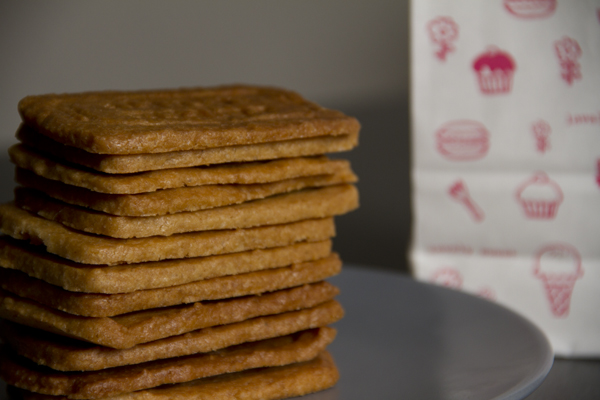
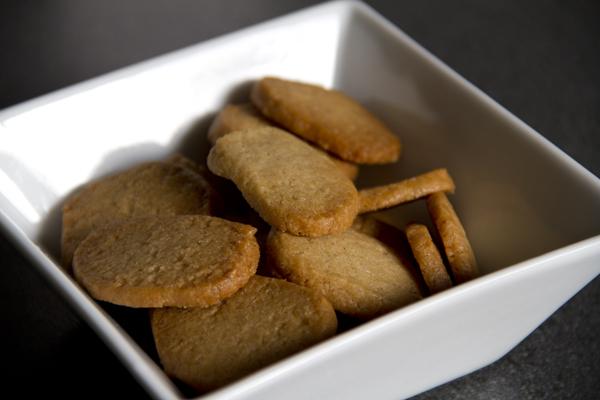
Estas galletas son típicas de Bélgica, Francia y Holanda y se caracterizan por su intenso aroma y sabor a diversas especias. Este aroma suele invadir los mercados navideños ya que tradicionalmente era San Nicolás quien las regalaba a los niños por aquellas tierras. Hoy en día en España las podemos encontrar bajo el nombre de galletas caramelizadas de la marca Lotus pero en Francia y Bélgica, al menos, es posible encontrarlas en diversos formatos y de un sinfín de marcas. Por ejemplo, si tenéis la oportunidad no dejéis de probar la crema de speculoos (pâte à tartiner) o el helado de speculoos.

  Pics and Cakes

¿Qué necesitamos?

  • 250 g de harina

  • 170 g de azúcar moreno

  • 150 g de mantequilla

  • 1 cucharadita de bicarbonato

  • 1 huevo ligeramente batido

  • 1 pizca de sal

  • 2 cucharaditas de café de mezcla de especias*

¿Cómo lo hacemos?

  • En un bol echamos la harina, el bicarbonato, la sal y las especias. Lo removemos un poco.

  • En otro la mantequilla a temperatura ambiente, el azúcar y el huevo. Añadimos todo esto a la mezcla de harina y lo mezclamos bien hasta obtener una masa uniforme. Lo metemos en la nevera tapado en film durante al menos dos horas, o toda la noche.

  • Precalentamos el horno a 170ºC.

  • Al sacarlas de la nevera las estiramos con un rodillo entre dos plásticos para que no se nos pegue con un grosor aproximado de medio centímetro. Las cortamos con ayuda de los cortadores deseados o si no tenemos, hacemos rectángulos con un cuchillo.

  • Horneamos durante unos 15 minutos.

  • La mezcla de especias ya hecha no es muy fácil de encontrar así que la podéis hacer con estas proporciones: 2 cucharadas de canela molida, 5 clavos de esencia rallados, una cucharada nuez moscada pequeña rallada, una cucharadita de café de pimienta molida, una cucharada pequeña de jengibre molido y 3 semillas de cardamomo rallado.

 Pics and Cakes

Consejos:

  • Las galletas de mantequilla es preferible que las horneemos cuando la masa está fría. De lo contrario, se desparramarán demasiado en el horno y perderán la forma que les hayamos dado. Lo que podéis hacer, es meter la masa estirada en la nevera, cortarla sin manipularla demasiado y directas al horno.

  • Si buscáis recetas de galletas speculoos encontraréis muchísimas y todas varían en algo. De hecho, en las recetas belgas y francesas utilizan tipos de azúcar que aquí no tenemos (vergeoise y cassonade) y solemos sustituirla por azúcar moreno. Os aconsejo probar vuestra receta e ir introduciendo las modificaciones a vuestro gusto.

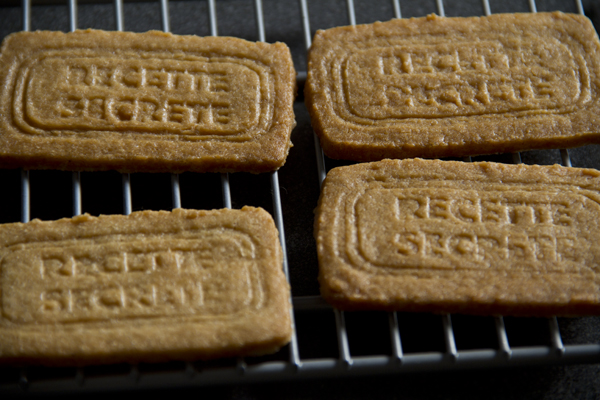
  • Las galletas tradicionales se hacían con unos moldes de madera y por eso tienen motivos estampados. Yo utilicé unos tampones de galletas que compré en Francia pero hay que tener cuidado porque la masa es un poco pegajosa.

 Pics and Cakes


[English version]* *Ingredients:

* *

  • *250 g flour *

  • 170 g brown sugar

  • 150 g butter

  • 1 tsp bicarbonate of soda

  • 1 egg

  • 1 pinch of salt

  • 2 tsps of speculoos spices mix*

* *

* *

  • *Mix flour, bicarbonate, salt and spices into a large bowl. *

  • *In other bowl, mix butter, sugar and egg. Add it to the previous mix and batter until getting a homogeneus dough. Cover with cling film and leave cool in the fridge for 2 hours or the whole night.  *

  • Preheat oven 170ºC.

  • *Roll out the dough (0,5 cm thick) with a rolling pin. Put the dough between two plastic sheets (or cling film) to avoid it to get stuck. Cut with cookie cutters or with a knife. *

  • Bake for 15 minutes.

* *** Speculoos spices mix:  2 tbsp cinnamon, 5 cloves, 1 tbsp nutmeg, 1tsp pepper, 1tsp ginger and 1 tsp cardamome.*

*  *

Tips:

- When making butter biscuits, we have to bake them when the dough is cold. Otherwise, they will lose their shape in the oven. After rolling out the dough you can leave it in the fridge for a while, then cut the biscuits quickly and immediately place into oven.

*- There are many different recipes for these biscuits. Actually in France and Belgium they use some kinds of sugar (vergeoise and cassonade) that we don’t have in Spain and has to be substituted by brown sugar. Make the recipe and add your improvements! *

*- Traditional speculoos biscuits were shaped with wooden molds to make their designs. I used some stamps I bought in France but be carefuel when using them because the dough is quite sticky. *

Pics and Cakes


19 de diciembre de 2012 · 4 min · Palstelera

Speculoos Cookies

These cookies are typical of Belgium, France, and the Netherlands, and they’re known for their intense aroma and flavor packed with spices. That smell tends to take over Christmas markets, since traditionally it was Saint Nicholas who handed them out to the kids over there. Nowadays in Spain you can find them under the name “galletas caramelizadas” by the Lotus brand, but in France and Belgium, at least, you can find them in all sorts of shapes and from a ton of different brands. For example, if you ever get the chance, don’t miss out on trying speculoos spread (pâte à tartiner) or speculoos ice cream.

Pics and Cakes

What do we need?

  • 250 g (2 cups) flour

  • 170 g (3/4 cup) brown sugar

  • 150 g (2/3 cup) butter

  • 1 teaspoon baking soda

  • 1 egg, lightly beaten

  • 1 pinch of salt

  • 2 teaspoons of spice mix*

How do we make it?

  • In a bowl, add the flour, baking soda, salt, and spices. Stir a bit.

  • In another bowl, the room-temperature butter, the sugar, and the egg. Add all of this to the flour mix and combine well until you get a smooth, even dough. Pop it in the fridge, covered with plastic wrap, for at least two hours or overnight.

  • Preheat the oven to 170°C (340°F).

  • Once you take it out of the fridge, roll the dough between two plastic sheets so it doesn’t stick, to about half a centimeter (1/5 inch) thick. Cut it out with whatever cookie cutters you like, or if you don’t have any, just make rectangles with a knife.

  • Bake for about 15 minutes.

  • The pre-made spice mix isn’t easy to find, so you can make your own with these proportions: 2 tablespoons ground cinnamon, 5 grated cloves, 1 small tablespoon grated nutmeg, 1 teaspoon ground pepper, 1 small tablespoon ground ginger, and 3 grated cardamom seeds.

Pics and Cakes

Tips:

  • Butter cookies are best baked when the dough is cold. Otherwise, they’ll spread too much in the oven and lose whatever shape you gave them. What you can do is put the rolled-out dough in the fridge, cut it without handling it too much, and straight into the oven.

  • If you go looking for speculoos cookie recipes, you’ll find tons, and they all vary in some way. In fact, Belgian and French recipes use kinds of sugar we don’t have here (vergeoise and cassonade), and we usually swap them out for brown sugar. My advice is to try out your recipe and tweak it to your taste.

  • Traditional cookies were made using wooden molds, which is why they have stamped designs on them. I used some cookie stamps I bought in France, but you have to be careful because the dough is a bit sticky.

Pics and Cakes

Pics and Cakes


Comments

La Enana (2012-12-19 11:20:58):

Wow!! So easy to make!!!! :) I love them!!!

Esther (2012-12-29 14:21:45):

The dough is already in the fridge! In a few hours we’ll be tasting your recipe… I can already tell you the dough is super yummy!!!!

Palstelera (2012-12-30 21:09:47):

How did they turn out?

Esther (2012-12-31 17:23:31):

Really good… they didn’t last long, honestly! The oven I put them in runs hot, and at 170 they got a bit scorched, so afterwards I dropped it down to 150. As for the spice mix, total success! HAPPY 2013, Picsandcakes!!!

Palstelera (2013-01-05 00:17:16):

So glad to hear it!

19 de diciembre de 2012 · 3 min · Palstelera

Petal Cake

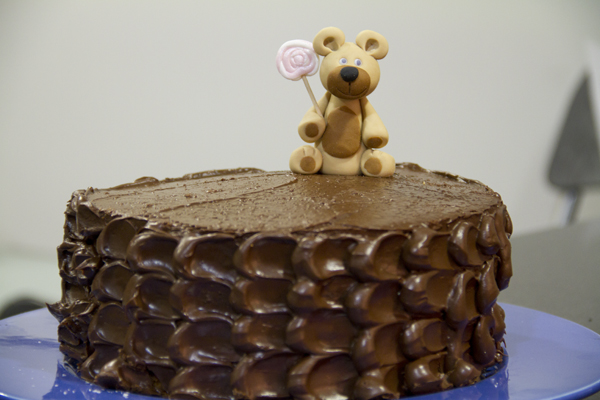
We’ve had this recipe pending for a few days now, but since in the meantime we published our Whole Kitchen challenges, it had to be pushed back to this week. And well, what better week for a birthday cake… :-D I made the recipe following exactly the one @SandeeA did at La Receta de la Felicidad. So all credit for the explanation this time goes to her. My personal touch was just the little sugar bear.

Pics and Cakes

What do we need?

For the sponge cake (to make a tall cake, we’ll need to bake two sponges like this one, so double the quantities):

  • 250 g (about 1 cup + 2 tbsp) butter, room temperature

  • 250 g (1 ¼ cups) sugar

  • 4 eggs

  • 225 g (1 ¾ cups) all-purpose flour

  • 25 g (about 3 tbsp) cornstarch

  • half a packet of Royal-style baking powder (8 g, about 2 tsp)

For the chocolate buttercream:

  • 750 g (about 1 ⅔ lb) melting chocolate

  • 375 g (about 1 ⅔ cups) butter, room temperature

  • 100 g (about ¾ cup) powdered sugar

How do we make it?

  • Preheat the oven to 180 ºC (355 ºF).

  • Prepare a cake pan by greasing it with butter and dusting it lightly with flour.

  • In a large bowl, using a whisk or a spoon, mix the butter and sugar well until you get a smooth, creamy mixture.

  • Add the eggs one at a time, not adding the next one until the previous one is fully incorporated.

  • Add the flour, cornstarch, and baking powder and mix with a spatula or spoon until everything is well combined.

  • Pour the batter into the prepared pan, spreading it evenly.

  • Bake for 25-30 minutes at 180 ºC (355 ºF).

  • Take it out of the oven and wait a few minutes before unmolding.

  • Repeat these steps to make a second sponge cake just like the first one. (If you have two identical pans, you can make all the batter at once and divide it between both pans.)

  • Slice each sponge into two layers, trying to make them as even as possible.

  • Next, we start preparing the chocolate buttercream. First, we’ll melt the chocolate.

  • Chop it up and place it in a microwave-safe bowl. Heat it in 30-second intervals, stirring each time, until the chocolate is fully liquid. Let it cool for a few minutes.

  • Meanwhile, in another large bowl, beat the butter and sugar at top speed with a whisk until you get a fluffy, pale, smooth mixture (about 5 minutes).

  • Check that the chocolate you melted earlier has cooled down, and add it to the butter mixture. Beat a bit more until fully combined, and then move on to filling and decorating the cake.

  • Place the first sponge layer — the least perfect of the ones you made — on the plate you’ll be serving on, covered with some strips of parchment paper or printer paper, so it doesn’t get stained and you can pull them out easily afterwards.

  • Place a couple of spoonfuls of filling on this sponge layer and spread it evenly — it’s fine if some spills over the sides.

  • Place another sponge layer on top, pressing down gently and making sure it’s well aligned with the layer below. Add another two spoonfuls of filling and proceed as before.

  • Continue the same way with the rest of the layers. On top, place the most perfect sponge, with the bottom side facing up (it’s always the prettiest). If you don’t want the sponge layers to shift, since we’re about to cover and decorate the cake, you can stick a skewer down through the center of the cake, which you’ll remove once you’re done decorating.

  • Cover the cake with a first, very thin layer of chocolate buttercream — this is just to set things in place and hide any imperfections in the sponge layers.

  • Leave the chocolate cake in the fridge for 15 minutes so this layer firms up.

  • Using a piping bag fitted with a medium-sized round tip, pipe dots of buttercream onto the cake, forming a vertical line (4 dots, in my case).

  • Place a spatula on top of each dot and slide it to the right in a single motion (or to the left if you’re left-handed). Wipe the spatula clean and continue doing the same with the rest of the dots, remembering to always wipe the spatula between strokes.

  • Each time you finish a row of dots, grab the piping bag, create a new line of dots, and repeat the pattern across the whole cake. The spot where you finish the last row of petals will have some imperfections, and that should be the “back” of your cake.

  • If you’re not going to eat it the same day, store the chocolate cake preferably outside the fridge so the chocolate buttercream stays creamy, since the fridge tends to harden it.

Tips:

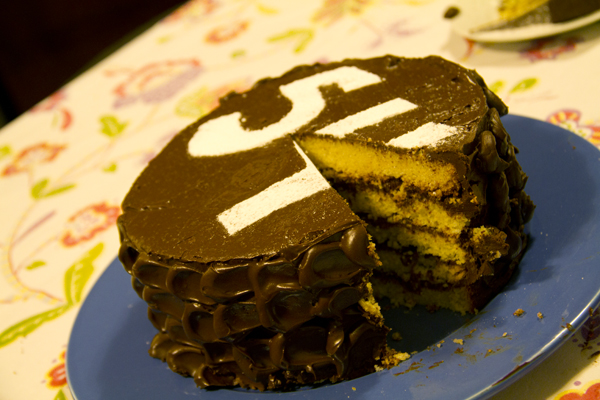
  • To decorate it, you can make a stencil out of a sheet of paper, cutting out the number of years the birthday person is turning, and dust it with powdered sugar.

  • I made this sugar bear out of modeling paste to crown the cake. I’ll do a tutorial soon so you can see how easy it is.

Pics and Cakes

[English version] PETALS CAKE* *Ingredients:

  • *250 g butter, room temperature *

  • *250 g sugar *

  • 4 eggs

  • *225 g all purpose flour *

  • *25 g corstarch *

  • *8 g baking powder *

For the chocolate buttercream:

  • 750 g dark chocolate, melted

  • *375 g butter, room temperature *

  • *100 g confectioners’ sugar *

  • Preheat oven to 180ºC

  • Prepare a cake pan (butter and flour the bottom and the sides of the pan).

  • In a large bowl, place butter and sugar, and mix well.

  • Add eggs one by one.

  • Add flour, cornstarch and baking powder, and beat until combined.

  • Pour batter into pan and bake for 25 minutes.

  • Leave the cake in its pan on a wire rack for 10 minutes and then turn out to cool.

  • Repeat the whole process to make another similar cake.

  • Now we are going to prepare the chocolate buttercream.

  • Using and electric mixer, cream butter and sugar, until light and fluffy (about 5 minutes). Add melted chocolate, that shall be cool, and mix well. Now the buttercream is ready to use.

  • Fill the cake layers with chocolate buttercream, and then frost it with a thin layer of buttercream.

  • Place the cake in the fridge for 15 minutes to set.

  • Place the remaining chocolate buttercream on a piping bag fitted with a medium sized round tip.

  • Create a row of dots (vertical), as shown on the pictures.

  • Using a spatula, spread every dot to the right, in one motion (or to the left if you are left-handed). Clean the spatula between every swipe.

  • Once you have spread one row of dots, add another row of dots and repeat the pattern until the whole cake is covered with “petals”.

  • If you are not going to eat the cake on the same day, please avoid keeping it in the fridge if possible, so that the chocolate buttercream remains creamy.

Tips:

  • You can create a template showing the number of the age that the special person is turning and then sprinkle with confectioners’ sugar.

  • On the top, I placed this sugar bear made by myself. Soon I will post a tutorial about how to make it with gum paste.


29 de noviembre de 2012 · 6 min · Palstelera

Tarta de pétalos

Teníamos pendiente publicar esta receta ya hace algunos días pero como entre medias publicamos nuestros retos de Whole Kitchen, ha quedado obligatoriamente pospuesta a esta semana. Y bueno, qué mejor semana para una tarta de cumpleaños… :-D La receta la hice siguiendo exactamente la que hizo @SandeeA en La Receta de la Felicidad. Así que todo mérito en la explicación esta vez se lo debemos a ella. Mi toque particular sólo fue el osito de azúcar.

Pics and Cakes

¿Qué necesitamos?

Para el bizcocho (para hacer una tarta alta, necesitaremos hacer dos bizcochos como éste, así que duplicad las cantidades):

  • 250 g mantequilla, a temperatura ambiente

  • 250 g azúcar

  • 4 huevos

  • 225 g harina normal

  • 25 g Maizena

  • medio sobre de levadura química tipo Royal (8 g)

Para la crema de chocolate:

  • 750 g de chocolate para fundir

  • 375 g de mantequilla a temperatura ambiente

  • 100 g de azúcar glass

¿Cómo lo hacemos?

  • Precalentamos el horno a 180 ºC

  • Preparamos un molde engrasándolo con mantequilla, y enharinándolo ligeramente.

  • En un bol amplio, con un batidor de varillas o con una cuchara, mezclamos bien la mantequilla con el azúcar, hasta obtener una mezcla homogénea y cremosa.

  • Añadimos los huevos de uno en uno, sin agregar el siguiente hasta que el anterior esté perfectamente integrado.

  • Añadimos la harina, la maizena y la levadura química y mezclamos con una espátula o cuchara, hasta que estén todos los ingrediente bien integrados.

  • Vertemos la mezcla en el molde que hemos preparado, distribuyéndola uniformemente.

  • Horneamos 25-30 minutos a 180º C.

  • Sacamos del horno, y esperamos unos minutos antes de desmoldar.

  • Repetimos estos pasos para hacer otro bizcocho igual. (Si tenéis dos moldes iguales podéis hacer toda la mezcla a la vez y repartirla entre los dos moldes).

  • Dividimos cada bizcocho en dos capas tratando de hacerlas lo más rectas posibles.

  • A continuación, comenzamos a preparar la crema de chocolate. Para ello, en primer lugar fundiremos el chocolate.

  • Lo troceamos y lo ponemos en un bol apto para microondas. Vamos programando de 30 en 30 segundos, removiendo de cada vez, hasta que el chocolate esté totalmente líquido. Dejamos enfriar unos minutos.

  • Mientras, en otro bol amplio, vamos batiendo la mantequilla con el azúcar a máxima velocidad con un batidor de varillas, hasta que obtengamos una masa esponjosa, blanquecina, y homogénea (unos 5 minutos)

  • Comprobamos que el chocolate que hemos fundido anteriormete esté ya frío, y lo agregamos a la crema de mantequilla. Batimos un poco más hasta integrarlo completamente, y procedemos a rellenar y decorar la tarta

  • Colocaremos el primer bizcocho, el menos perfecto de los que hayamos hecho, sobre el plato en el que vayamos a servir, cubierto con algunos recortes de papel de hornear o folios, para que no se manche y podamos retirarlos después con facilidad.

  • Colocamos sobre esta capa de bizcocho un par de cucharadas de relleno, y distribuimos uniformemente, no pasa nada porque se salga por los lados.

  • Ponemos otra capa de bizcocho encima, presionando ligeramente, y asegurándonos de que está bien alineado con el bizcocho inferior. Agregamos otras dos cucharadas de relleno, y procedemos igual que anteriormente.

  • Seguimos igual con el resto de capas. Arriba del todo colocamos el bizcocho que nos haya quedado más perfecto, con la parte de abajo hacia arriba (siempre es la más bonita). Si no queremos que se muevan las capas de bizcocho ya que a continuación vamos a cubrir y decorar la tarta, podemos usar una brocheta clavada en el centro de la tarta, que retiraremos cuando hayamos terminado de decorar.

  • Cubrimos nuestra tarta con una primera capa de crema de chocolate, muy fina, que servirá únicamente para fijar, y que se oculten las imperfecciones de las capas de bizcocho.

  • Dejamos la tarta de chocolate 15 minutos en el frigorífico, para que se solidifique esta capa.

  • Con una manga pastelera con boquilla redonda, de tamaño mediano, vamos depositando botones de crema en la tarta, formando una línea vertical (de 4 botones, en mi caso).

  • Colocamos una espátula sobre cada montoncito, y la deslizamos hacia la derecha, en un solo movimiento (o hacia la izquierda si sois zurdos). Limpiamos la espátula, y continuamos haciendo lo mismo con el resto de montoncitos, recordando limpiar siempre la espátula entre pasada y pasada.

  • Cada vez que terminemos con una fila de puntos, cogemos la manga, creamos una nueva línea de puntos, y repetimos el patrón a lo largo de toda la tarta. El punto donde finalicemos la última fila de pétalos quedará con imperfecciones, y deberá ser la “trasera” de nuestra tarta.

  • Si no la vamos a consumir en el día, conservamos la tarta de chocolate preferiblemente fuera del frigorífico, para que la crema de chocolate siga estando cremosa, ya que en el frigo tiende a endurecerse.

Consejos:

  • Para decorarla podéis hacer una plantilla con un folio, recortando el número de años que cumple el homenajeado y espolvorearla con azúcar glas.

  • Yo hice este oso de azúcar con pasta de modelar para coronar la tarta. Próximamente haré algún tutorial para que veáis lo fácil que es.

Pics and Cakes

[English version]  PETALS CAKE* *Ingredients:

  • *250 g butter, room temperature *

  • *250 g sugar *

  • 4 eggs

  • *225 g all purpose flour *

  • *25 g corstarch *

  • *8 g baking powder *

For the chocolate buttercream:

  • 750 g dark chocolate, melted

  • *375 g butter, room temperature *

  • *100 g confectioners’ sugar *

* *

  • Preheat oven to 180ºC

  • Prepare a cake pan (butter and flour the bottom and the sides of the pan).

  • In a large bowl, place butter and sugar, and mix well.

  • Add eggs one by one.

  • Add flour, cornstarch and baking powder, and beat until combined.

  • Pour batter into pan and bake for 25 minutes.

  • Leave the cake in its pan on a wire rack for 10 minutes and then turn out to cool.

  • Repeat the whole process to make another similar cake.

  • Now we are going to prepare the chocolate buttercream.

  • Using and electric mixer, cream butter and sugar, until light and fluffy (about 5 minutes). Add melted chocolate, that shall be cool, and mix well. Now the buttercream is ready to use.

  • Fill the cake layers with chocolate buttercream, and then frost it with a thin layer of buttercream.

  • Place the cake in the fridge for 15 minutes to set.

  • Place the remaining chocolate buttercream on a piping bag fitted with a medium sized round tip.

  • Create a row of dots (vertical), as shown on the pictures.

  • Using a spatula, spread every dot to the right, in one motion (or to the left if you are left-handed). Clean the spatula between every swipe.

  • Once you have spread one row of dots, add another row of dots and repeat the pattern until the whole cake is covered with “petals”.

  • If you are not going to eat the cake on the same day, please avoid keeping it in the fridge if possible, so that the chocolate buttercream remains creamy.

Tips:

  • You can create a template showing the number of the age that the special person is turning and then sprinkle with confectioners’ sugar.

  • On the top, I placed this sugar bear made by myself. Soon I will post a tutorial about how to make it with gum paste.


29 de noviembre de 2012 · 6 min · Palstelera

Baklava

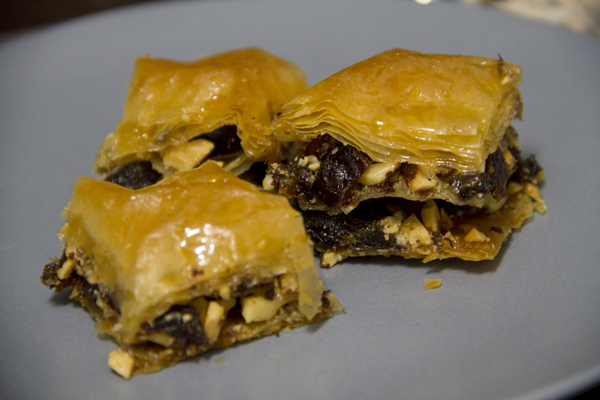
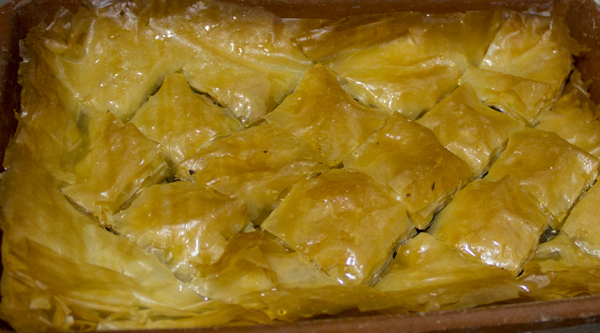
Whole kitchen, for their Sweet Proposal for the month of November, invites us to prepare a Persian classic: Baklava. Apparently this little pastry has its origins in ancient Mesopotamia, although several cultures and civilizations are still fighting over who actually invented it. Persian, Greek or Arab — it’s delicious. This time we’ve made two versions: one with dates and toasted almonds, and another with hazelnuts and chocolate. Filo pastry is a wonder of the kitchen that you really have to try, both for sweet and savory.

Pics and Cakes

What do we need?

  • 1 package of filo pastry

  • 100 g (3.5 oz) butter

For the syrup:

  • 210 ml (scant 1 cup) water

  • 180 g (about 3/4 cup) sugar

  • 30 g (1 tbsp) honey

  • Juice of half a lemon

  • A cinnamon stick

For the filling:

  • 18 dates

  • 50 g (1.75 oz) toasted almonds

  • 50 g (1.75 oz) chocolate (drops or chips)

  • 50 g (1.75 oz) hazelnuts

Pics and Cakes

How do we make it?

  • We start by making the syrup. Put all the ingredients in a saucepan and, over high heat, bring to a boil. Lower the heat a bit and let it simmer for about 15 minutes so it thickens.

  • Preheat the oven to 180°C (355°F).

  • Prepare the filling: pit the dates and cut them into small pieces. Chop the almonds and hazelnuts as well. In one bowl mix the dates with the almonds, and in another mix the hazelnuts with the chocolate.

  • Melt the butter for a few seconds in the microwave.

  • Grease the baking dish you’re going to use with butter and cut all the filo sheets to the size of your tray.

  • Lay down a sheet of filo and, with a brush or your hands, smear it with butter on one side. Add another layer and brush it with butter again. Keep going until you have 8 layers.

  • Spread half of the date-and-almond filling over the filo.

  • Add more filo on top — this time, 4 layers (always brushed with butter so they stay separate after baking).

  • Add the rest of the date-and-almond filling.

  • Make another batch of 8 filo layers (always buttered).

  • With a sharp knife, cut the baklava into squares.

  • Bake for 45 minutes total: the first 20 minutes uncovered, and the next 25 minutes with a sheet of aluminum foil over the baklava so it doesn’t brown too much.

  • As soon as you take it out of the oven, let it rest for 5 minutes, then pour the cold syrup over the hot baklava (this way it’ll stay crispy).

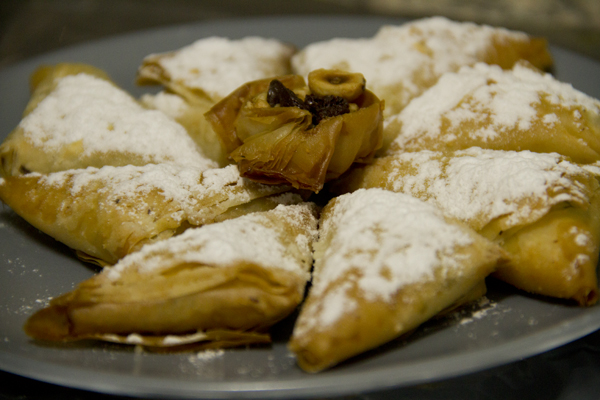
  • For the hazelnut-and-chocolate version you can repeat the same process in another baking dish, or make triangles. To do that, cut the filo into strips of about 5 cm by 20 cm (2 in by 8 in). Brush each layer with butter and stack 4 strips together.

  • Place a teaspoon of filling at one end and fold a corner over to form a triangle with the filling tucked inside. Take the other end and keep folding the triangle over itself. (Since it’s a bit tricky to explain, I found [this video](

{{}}

) where you can easily see how to do it.)

  • Bake them at 180°C (355°F) too, but they’ll be ready in 10–15 minutes.

  • Once out of the oven, you can dust them with powdered sugar.

Tips:

  • Filo pastry dries out very quickly, so whenever you’re not using it, keep it well wrapped in a plastic bag.

  • It’s important to add butter between each layer, but you don’t need to “drown” it either.

  • It’s quite a rich, filling sweet, so it’s better to cut the squares small.

Pics and Cakes

[English version] BAKLAVA* *Ingredients:

  • 1 package of filo pastry

  • 100 g butter

For the syrup:

  • 210 ml water

  • 180 g sugar

  • 30 g honey

  • Juice of 1/2 lemon

  • Cinnammon stick

For the filling:

  • 18 dates

  • 50 g almonds

  • 50 g chocolate (drops or chips)

  • 50 g hazelnuts

  • Combine the syrup ingredients in a medium saucepan and bring to boil. Let the syrup simmer on low heat for about 15 minutes

  • Preheat oven at 180ºC.

  • *Now prepare the filling: pit the dates and chop into small pieces. Chop almonds and hazelnuts. Mix almonds and dates into a bowl and chocolate and hazelnut in other. *

  • Melt the butter in the microwave for a few seconds.

  • Butter the baking pan and cut the filo pastry sheets into the size of the baking pan.

  • *Place a sheet of filo pastry and butter it. Place another sheet over it and butter again. Do it again until having 8 layers. *

  • *Scatter half of the dates-almonds filling. *

  • *Place more filo pastry. This time, only 4 layers but always buttered. It will make to have separate layers once the baklava is baked. *

  • *Add the other half of the filling. *

  • *Create another pack of 8 layers of filo pastry (always buttered). *

  • *With sharp knife cut baklava into small squares. *

  • *Bake for 45 minutes. The first 20 minutes uncovered and then you can cover with aluminium foil to prevent it from browning too much. *

  • When you take it out from oven, let stand for 5 minutes and then pour the cold syrup.

  • For the hazelnut-chocolate version, you can follow the same steps or make small triangles of filo pastry. For the triangles, cut the pastry into stripes (4 x 20 cm aprox.). Butter each stripe and put 4 of them together.

  • *Add a tsp of the filling in one of the sides and proceed to fold into triangle shape. You can see how to do it easily in [this video](

{{}}

).*

  • Bake at 180ºC only for 10-15 minutes.

  • You can powder some confectioners’ sugar when you take them out from oven.

Tips:

*- Filo pastry dries very fast, so when you are not using it, keep it in a plastic bag. *

- It’s important to butter every single sheet (layer) of filo pastry but don’t “over butter” (otherwise, it will be too greasy).

- It’s a filling sweet, so make small squares when cutting the baklava.


Comments

Apfelstrudelkuchen (2012-11-26 00:03:04):

Hi!!

Your baklava-as-triangles version turned out really original!! And with dates it must be amazing.

Hugs,

Mara (2012-11-26 17:34:08):

So good with the chocolate touch. I love the idea of making individual portions, because when you cut it the filo sheets tend to come apart a bit. Since everyone at home liked it so much I’ll make it again, and I’m going to do it your way, in the individual triangle version. This is my version: http://masdulcequesaladopuntocom.blogspot.com.es/

tía pi (2012-11-27 17:48:26):

This Friday I have guests over for dinner — it’s going to be a light meal, so the baklava is going to be a great dessert. I’ll let you know how it goes.

silvia (2012-11-29 22:09:14):

The little chocolate triangles were really tasty… and that’s saying something, because I’m not really one for sweets…

Palstelera (2012-12-07 19:16:00):

Mara, I’m glad you like the little-triangles version… :-)

25 de noviembre de 2012 · 6 min · Palstelera

Baklava

**Whole kitchen en su Propuesta Dulce para el mes de Noviembre nos invita a preparar un clásico persa Baklava. **Al parecer este pastelito tiene su origen en la antigua Mesopotamia aunque todavía hoy siguen disputándose varias culturas y civilizaciones su creación. Persa, griego o árabe, está buenísimo. En esta ocasión hemos preparado dos versiones; una con dátiles y almendras tostadas y otra con avellanas y chocolate. La pasta filo es una maravilla de la cocina que no podéis dejar de probar tanto para dulce como para salado.

 Pics and Cakes

¿Qué necesitamos?

  • 1 paquete de pasta filo

  • 100 g de mantequilla

Para el almíbar:

  • 210 ml de agua

  • 180 g de azúcar

  • 30 g de miel

  • Zumo de medio limón

  • Una ramita de canela

 Para el relleno:

  • 18 dátiles

  • 50 g de almendras tostadas

  • 50 g de chocolate (en gotas o perlas)

  • 50 g de avellanas

 Pics and Cakes

¿Cómo lo hacemos?

  • Empezamos haciendo ****el almíbar. Ponemos todos los ingredientes en una cazuela y, a fuego fuerte, lo llevamos a ebullición. Bajamos un poco el fuego y dejamos cocer durante 15 minutos aproximadamente para que espese.

  • Precalentamos el horno a 180ºC.

  • Preparamos el relleno: deshuesamos los dátiles y los partimos en trozos pequeños. Troceamos también las almendras y las avellanas. Mezclamos en un cuenco los dátiles con las almendras y en otro las avellanas con el chocolate.

  • Derretimos la mantequilla unos segundos en el microondas.

  • Untamos la fuente que vayamos a usar con mantequilla  y cortamos todas las láminas de pasta filo del tamaño de nuestra bandeja.

  • Ponemos una lámina de pasta filo, y con un pincel, o con las manos, la embadurnamos de mantequilla por una cara. Ponemos otra capa y volvemos a untarla con la mantequilla. Así hasta tener 8 capas.

  • Ponemos la mitad de nuestro relleno de dátiles y almendras y lo extendemos sobre la pasta filo.

  • Volvemos a poner pasta filo. Esta vez, 4 capas (siempre untándolas con mantequilla para que al hornearlas se queden separadas).

  • Echamos el resto del relleno de dátiles y almendras.

  • Hacemos otra tanda de 8 capas de pasta filo (siempre untadas con mantequilla).

  • Con un cuchillo afilado cortamos el baklava en cuadrados.

  • Horneamos 45 minutos en total, los 20 primeros destapado, y los 25 siguientes colocando papel de aluminio sobre el baklava para que no se dore demasiado.

  • Nada más sacarlo del horno, dejamos reposar 5 minutos, y vertemos el almíbar frío sobre el baklava caliente (así seguirá estando crujiente).

  • Para la versión de avellanas y chocolate podéis repetir el mismo proceso en otra fuente de horno o bien hacer triángulos. Para ello cortamos la pasta filo en tiras de 5 cm por 20 cm (aproximadamente). Embadurnamos con mantequilla cada capa y ponemos 4 tiras juntas.

  • Ponemos una cucharadita de relleno en un extremo y doblamos una esquina para formar un triángulo con el relleno en el interior. Cogemos el otro extremo y vamos plegando el triángulo sobre sí mismo. (Como es un tanto complicado de explicar, he encontrado [este vídeo](

{{}}

) donde podéis ver fácilmente cómo hacerlo).

  • Los horneamos también a 180ºC pero en 10-15 minutos estarán listos.

  • Al sacarlos los podemos espolvorear con azúcar glas por encima.


Consejos:

  • La pasta filo se seca enseguida así que cuando no la estés utilizando, guárdala bien en una bolsa de plástico.

  • Es importante echar la mantequilla entre cada capa pero tampoco es necesario “ahogarla”.

  • Es un dulce bastante contundente así que es preferible hacer los cuadraditos pequeños.

Pics and Cakes

[English version] BAKLAVA* *Ingredients:

  • 1 package of filo pastry

  • 100 g  butter


For the syrup:

  • 210 ml water

  • 180 g sugar

  • 30 g honey

  • Juice of 1/2 lemon

  • Cinnammon stick


For the filling:

  • 18 dates

  • 50 g almonds

  • 50 g chocolate (drops or chips)

  • 50 g hazelnuts

* *

  • Combine the syrup ingredients in a medium saucepan and bring to boil. Let the syrup simmer on low heat for about 15 minutes

  • Preheat oven at 180ºC.

  • *Now prepare the filling: pit the dates and chop into small pieces. Chop almonds and hazelnuts. Mix almonds and dates into a bowl and chocolate and hazelnut in other. *

  • Melt the butter in the microwave for a few seconds.

  • Butter the baking pan and cut the filo pastry sheets into the size of the baking pan.

  • *Place a sheet of filo pastry and butter it. Place another sheet over it and butter again. Do it again until having 8 layers. *

  • *Scatter half of the dates-almonds filling. *

  • *Place more filo pastry. This time, only 4 layers but always buttered. It will make to have separate layers once the baklava is baked. *

  • *Add the other half of the filling. *

  • *Create another pack of 8 layers of filo pastry (always buttered). *

  • *With sharp knife cut baklava into small squares. *

  • *Bake for 45 minutes. The first 20 minutes uncovered and then you can cover with aluminium foil to prevent it from browning too much. *

  • When you take it out from oven, let stand for 5 minutes and then pour the cold syrup.

  • For the hazelnut-chocolate version, you can follow the same steps or make small triangles of filo pastry. For the triangles, cut the pastry into stripes (4 x 20 cm aprox.). Butter each stripe and put 4 of them together.

  • *Add a tsp of the filling in one of the sides and proceed to fold into triangle shape. You can see how to do it easily in [this video](

{{}}

).*

  • Bake at 180ºC only for 10-15 minutes.

  • You can powder some confectioners’ sugar when you take them out from oven.

* *

Tips:

*- Filo pastry dries very fast, so when you are not using it, keep it in a plastic bag. *

- It’s important to butter every single sheet (layer) of filo pastry but don’t “over butter” (otherwise, it will be too greasy).

- It’s a filling sweet, so make small squares when cutting the baklava.


25 de noviembre de 2012 · 6 min · Palstelera