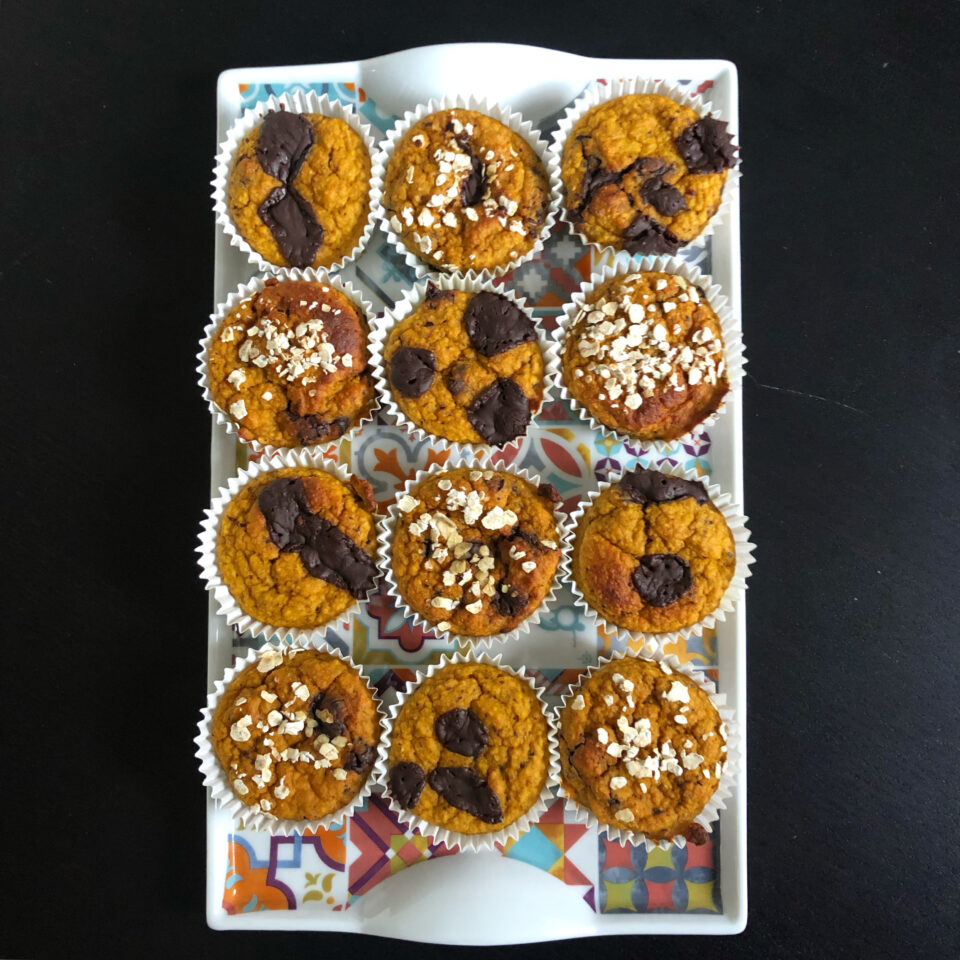
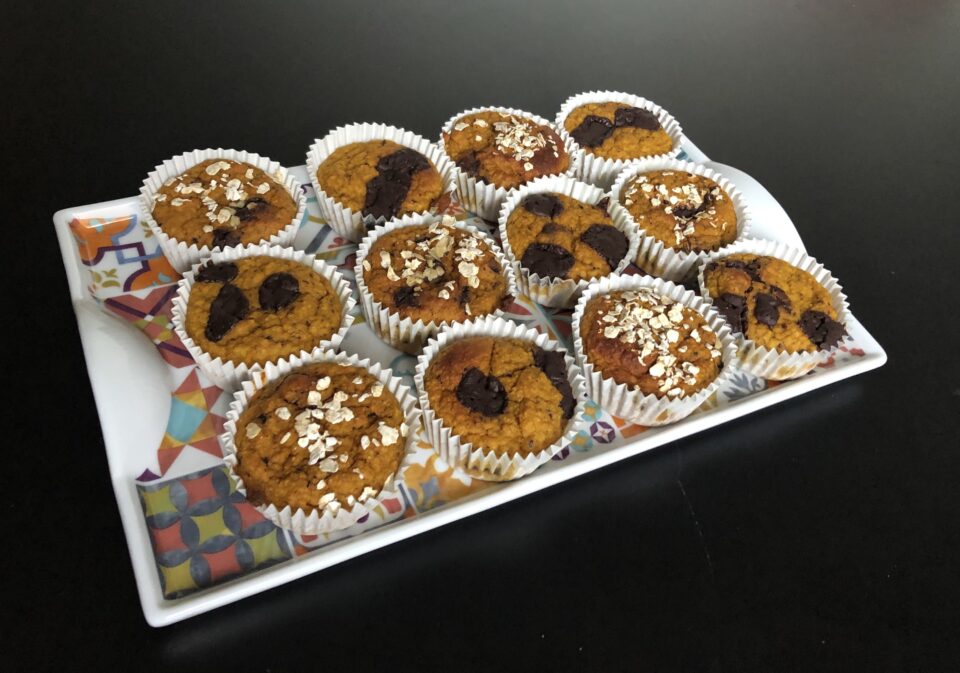
Esta receta vuelve a ser una de esas saludables ya que prescinde de azúcares, harinas refinadas y grasas. El resultado es un dulce bastante decente y sabroso pero, aunque es esponjoso, la textura es un poco «chiclosa» para mi gusto y un poco húmeda como sucede con recetas que llevan otras verduras (calabacín, zanahoria, etc.). En conclusión, para mí es un dulce que viene bien para poder consumir con menos remordimientos y de forma más saludable pero no son los muffins que haría para una ocasión especial ni cuando quiera deleitarme o deleitar a otros especialmente.
Ingredientes
150 g de avena molida
250 g de puré de calabaza
150 g de yogur natural
1 cucharada de miel
6 dátiles (previamente hidratados)
2 huevos
1,5 cucharaditas de levadura química
1 cucharadita de canela
1 pizca de sal
2 cucharadas de leche
100 g de chocolate 70% cortado en trocitos
Elaboración
Pelamos y partimos la calabaza en trozos y la ponemos a cocer hasta que esté blanda. La escurrimos y la machacamos con un tenedor para hacer un puré.
Precalentamos el horno a 180C.
Trituramos los dátiles hidratados con un robot de cocina para hacer una pasta. Añadimos el puré de calabaza y lo trituramos para que quede una mezcla suave
Mezclamos en un bol los ingredientes húmedos (huevos, miel, la leche y el puré de calabaza con dátiles).
Por otro lado, mezclamos los ingredientes secos (avena, sal, levadura) y los añadimos a la mezcla húmeda.
Integramos bien y añadimos los trozos de chocolate.
Repartimos en las cápsulas de magdalenas y horneamos 25 minutos.
Consejos PiC
Podéis espolvorear unos copos de avena o más chocolate por encima antes de hornearlos.
Si utilizáis moldes de silicona o metal no olvidéis engrasarlos previamente. En los de papel quedan un poco pegados (así que no son los muffins más bonitos que haréis en vuestra vida).
Lo ideal para endulzar con dátiles es usar dátiles Medjoul que son más carnosos pero si no tenéis podéis usar los normales.
Pumpkin, Oat and Chocolate Muffins
This recipe is another one of those healthy ones, since it skips refined sugars, refined flours and fats. The result is a fairly decent and tasty treat but, although it's fluffy, the texture is a little "chewy" for my taste and a bit moist, as tends to happen with recipes that include other vegetables (zucchini, carrot, etc.). All in all, for me this is a treat that works well for eating with less guilt and in a healthier way, but they're not the muffins I'd make for a special occasion or when I really want to treat myself or someone else.
Ingredients
150 g (1.5 cups) ground oats
250 g (1 cup) pumpkin purée
150 g (2/3 cup) plain yogurt
1 tablespoon honey
6 dates (pre-soaked)
2 eggs
1.5 teaspoons baking powder
1 teaspoon cinnamon
1 pinch of salt
2 tablespoons milk
100 g (3.5 oz) 70% dark chocolate, chopped into small pieces
Method
Peel and chop the pumpkin into chunks and boil until soft. Drain and mash with a fork to make a purée.
Preheat the oven to 180°C (355°F).
Blitz the soaked dates in a food processor to make a paste. Add the pumpkin purée and blend again until you get a smooth mixture.
In a bowl, combine the wet ingredients (eggs, honey, milk and the pumpkin-date purée).
Separately, mix the dry ingredients (oats, salt, baking powder) and add them to the wet mixture.
Mix well and fold in the chocolate pieces.
Divide between muffin liners and bake for 25 minutes.
PiC Tips
You can sprinkle some oat flakes or extra chocolate on top before baking.
If you use silicone or metal molds, don't forget to grease them first. With paper liners they stick a bit (so they won't be the prettiest muffins you'll ever make).
The best dates for sweetening are Medjool dates, which are meatier, but if you don't have any you can use regular ones.
Cinnamon Pull-Apart Bread
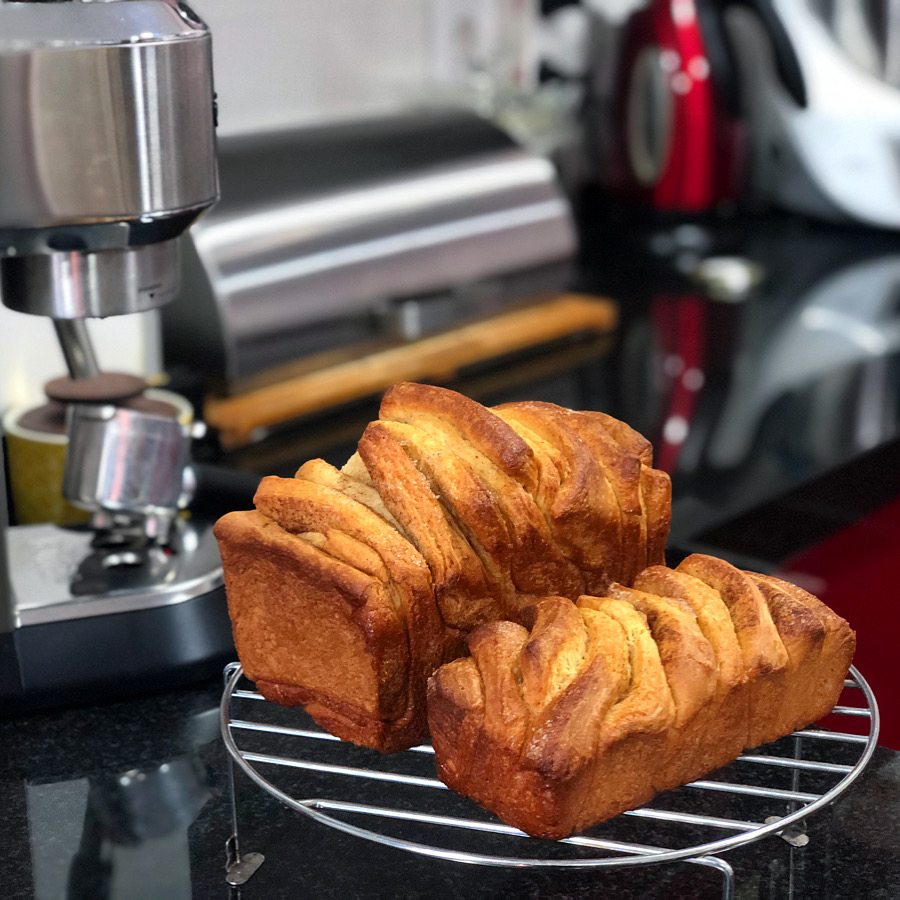
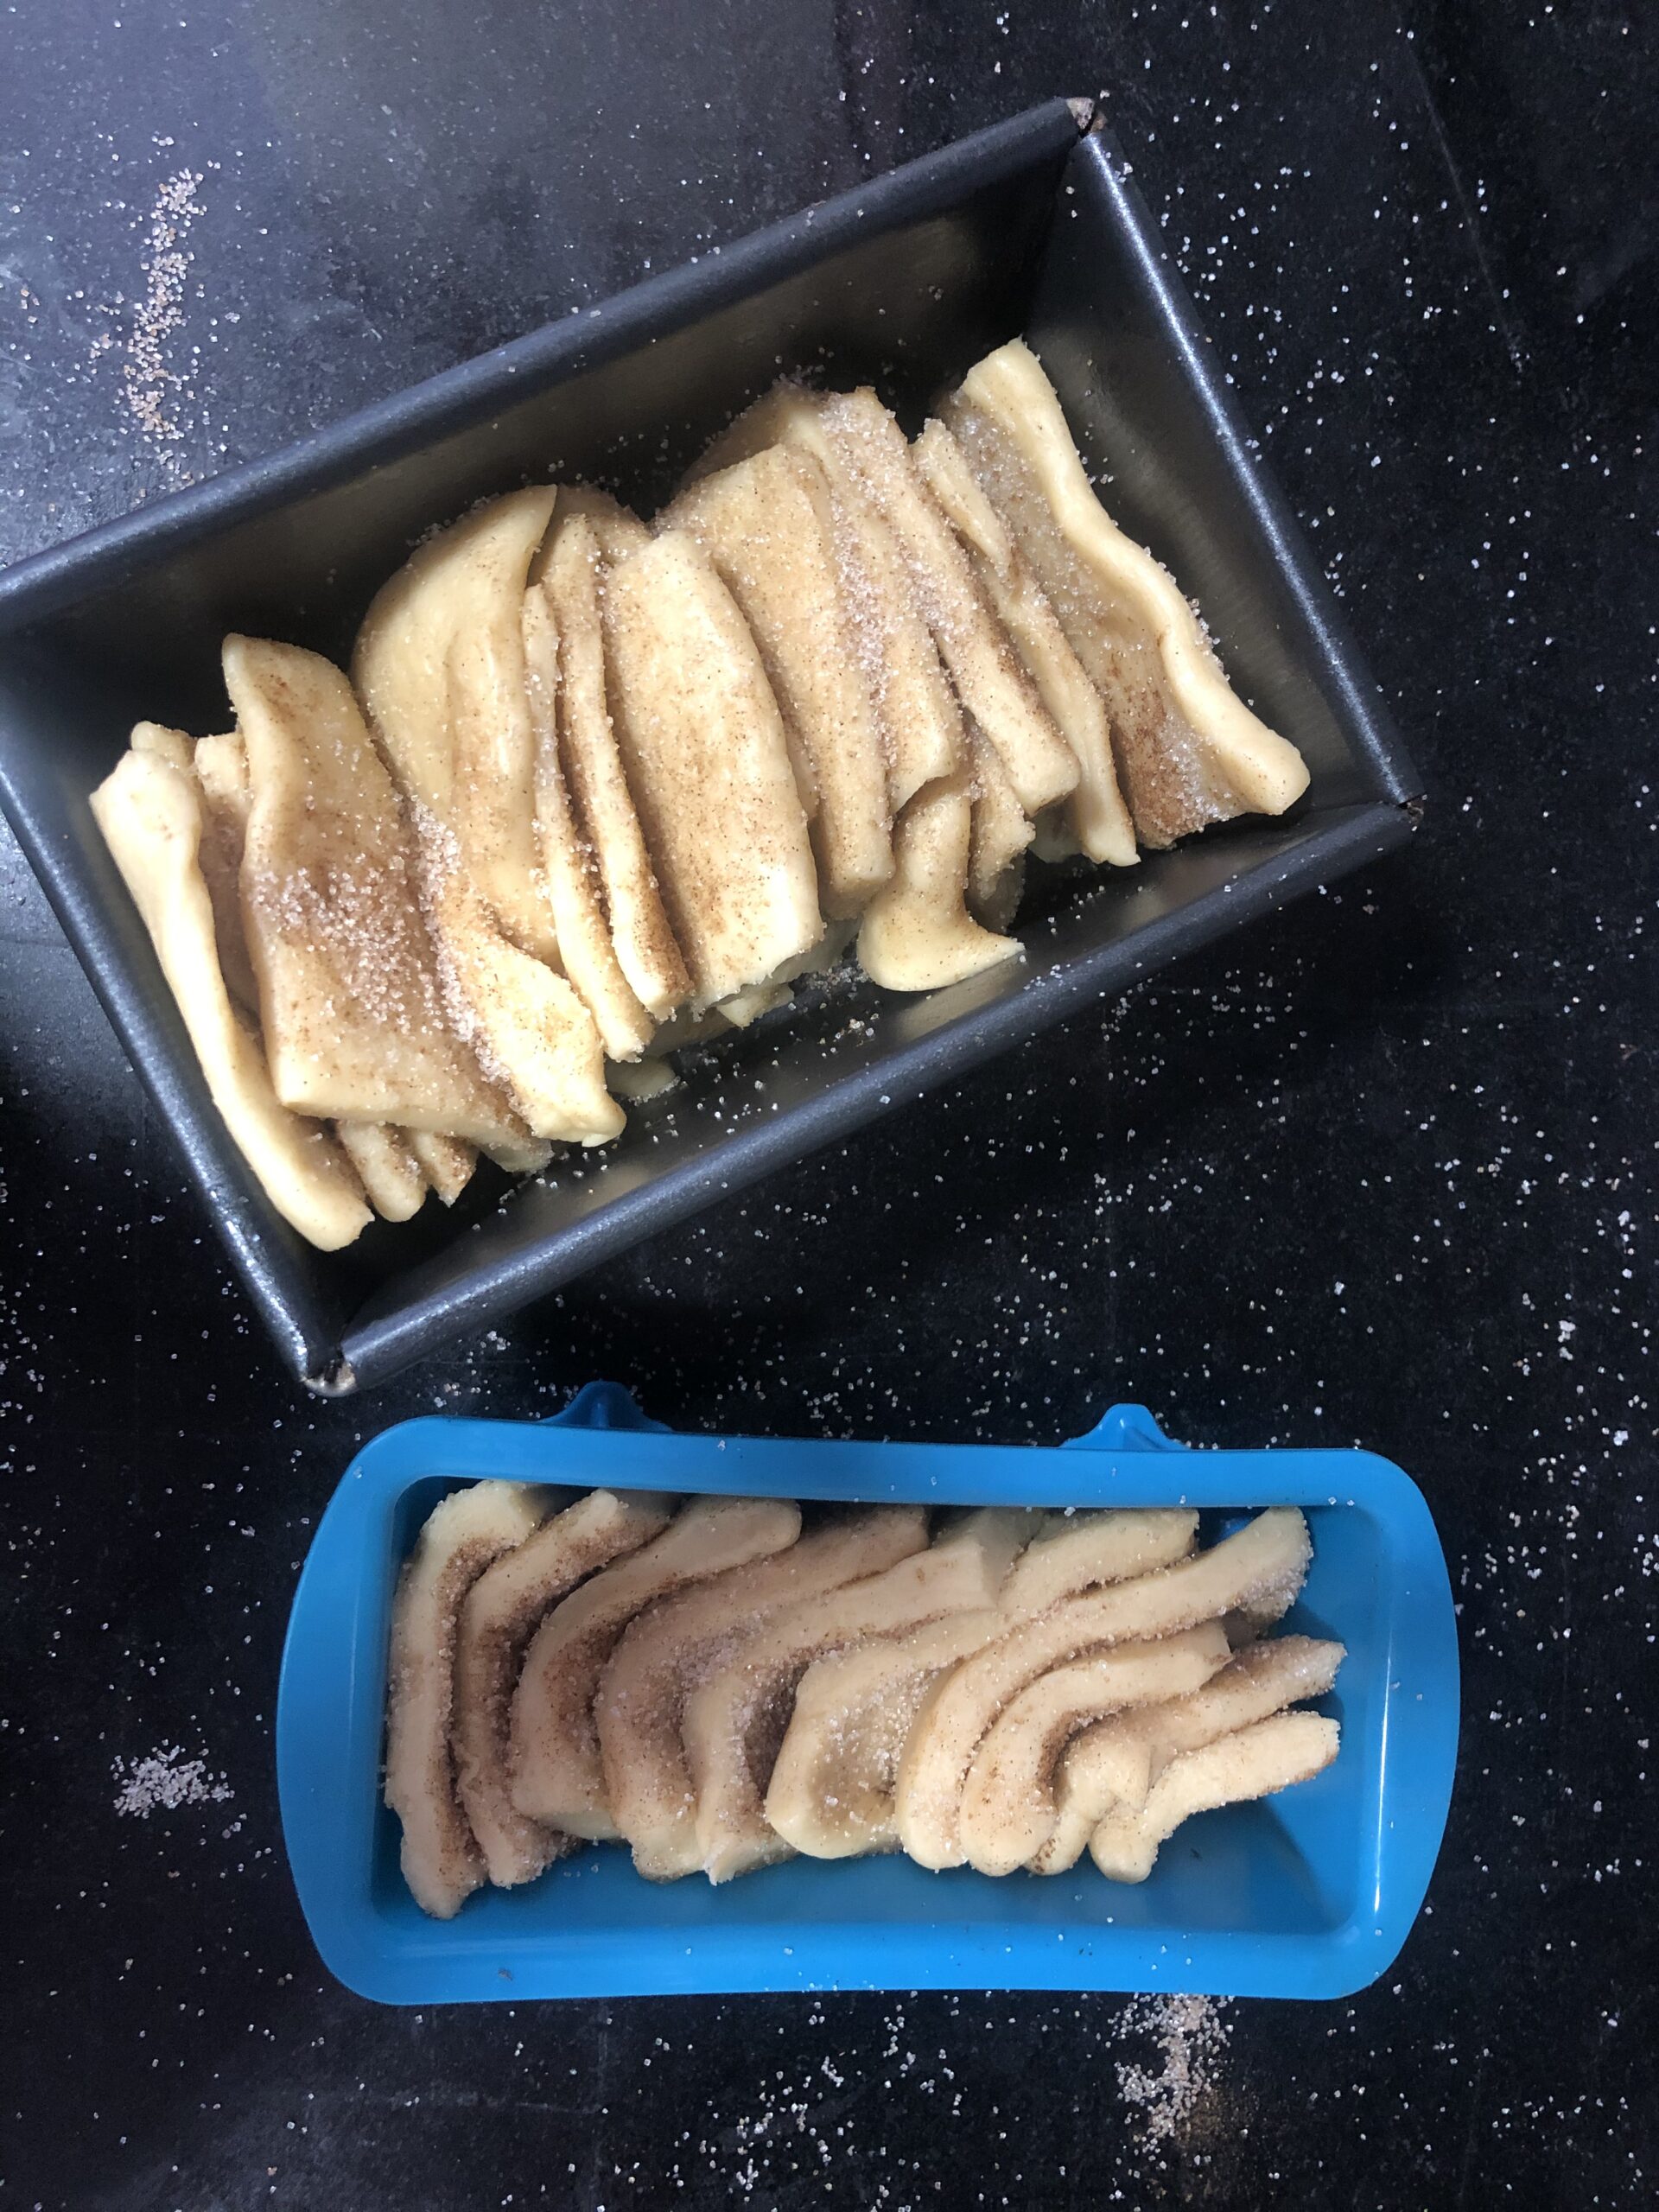
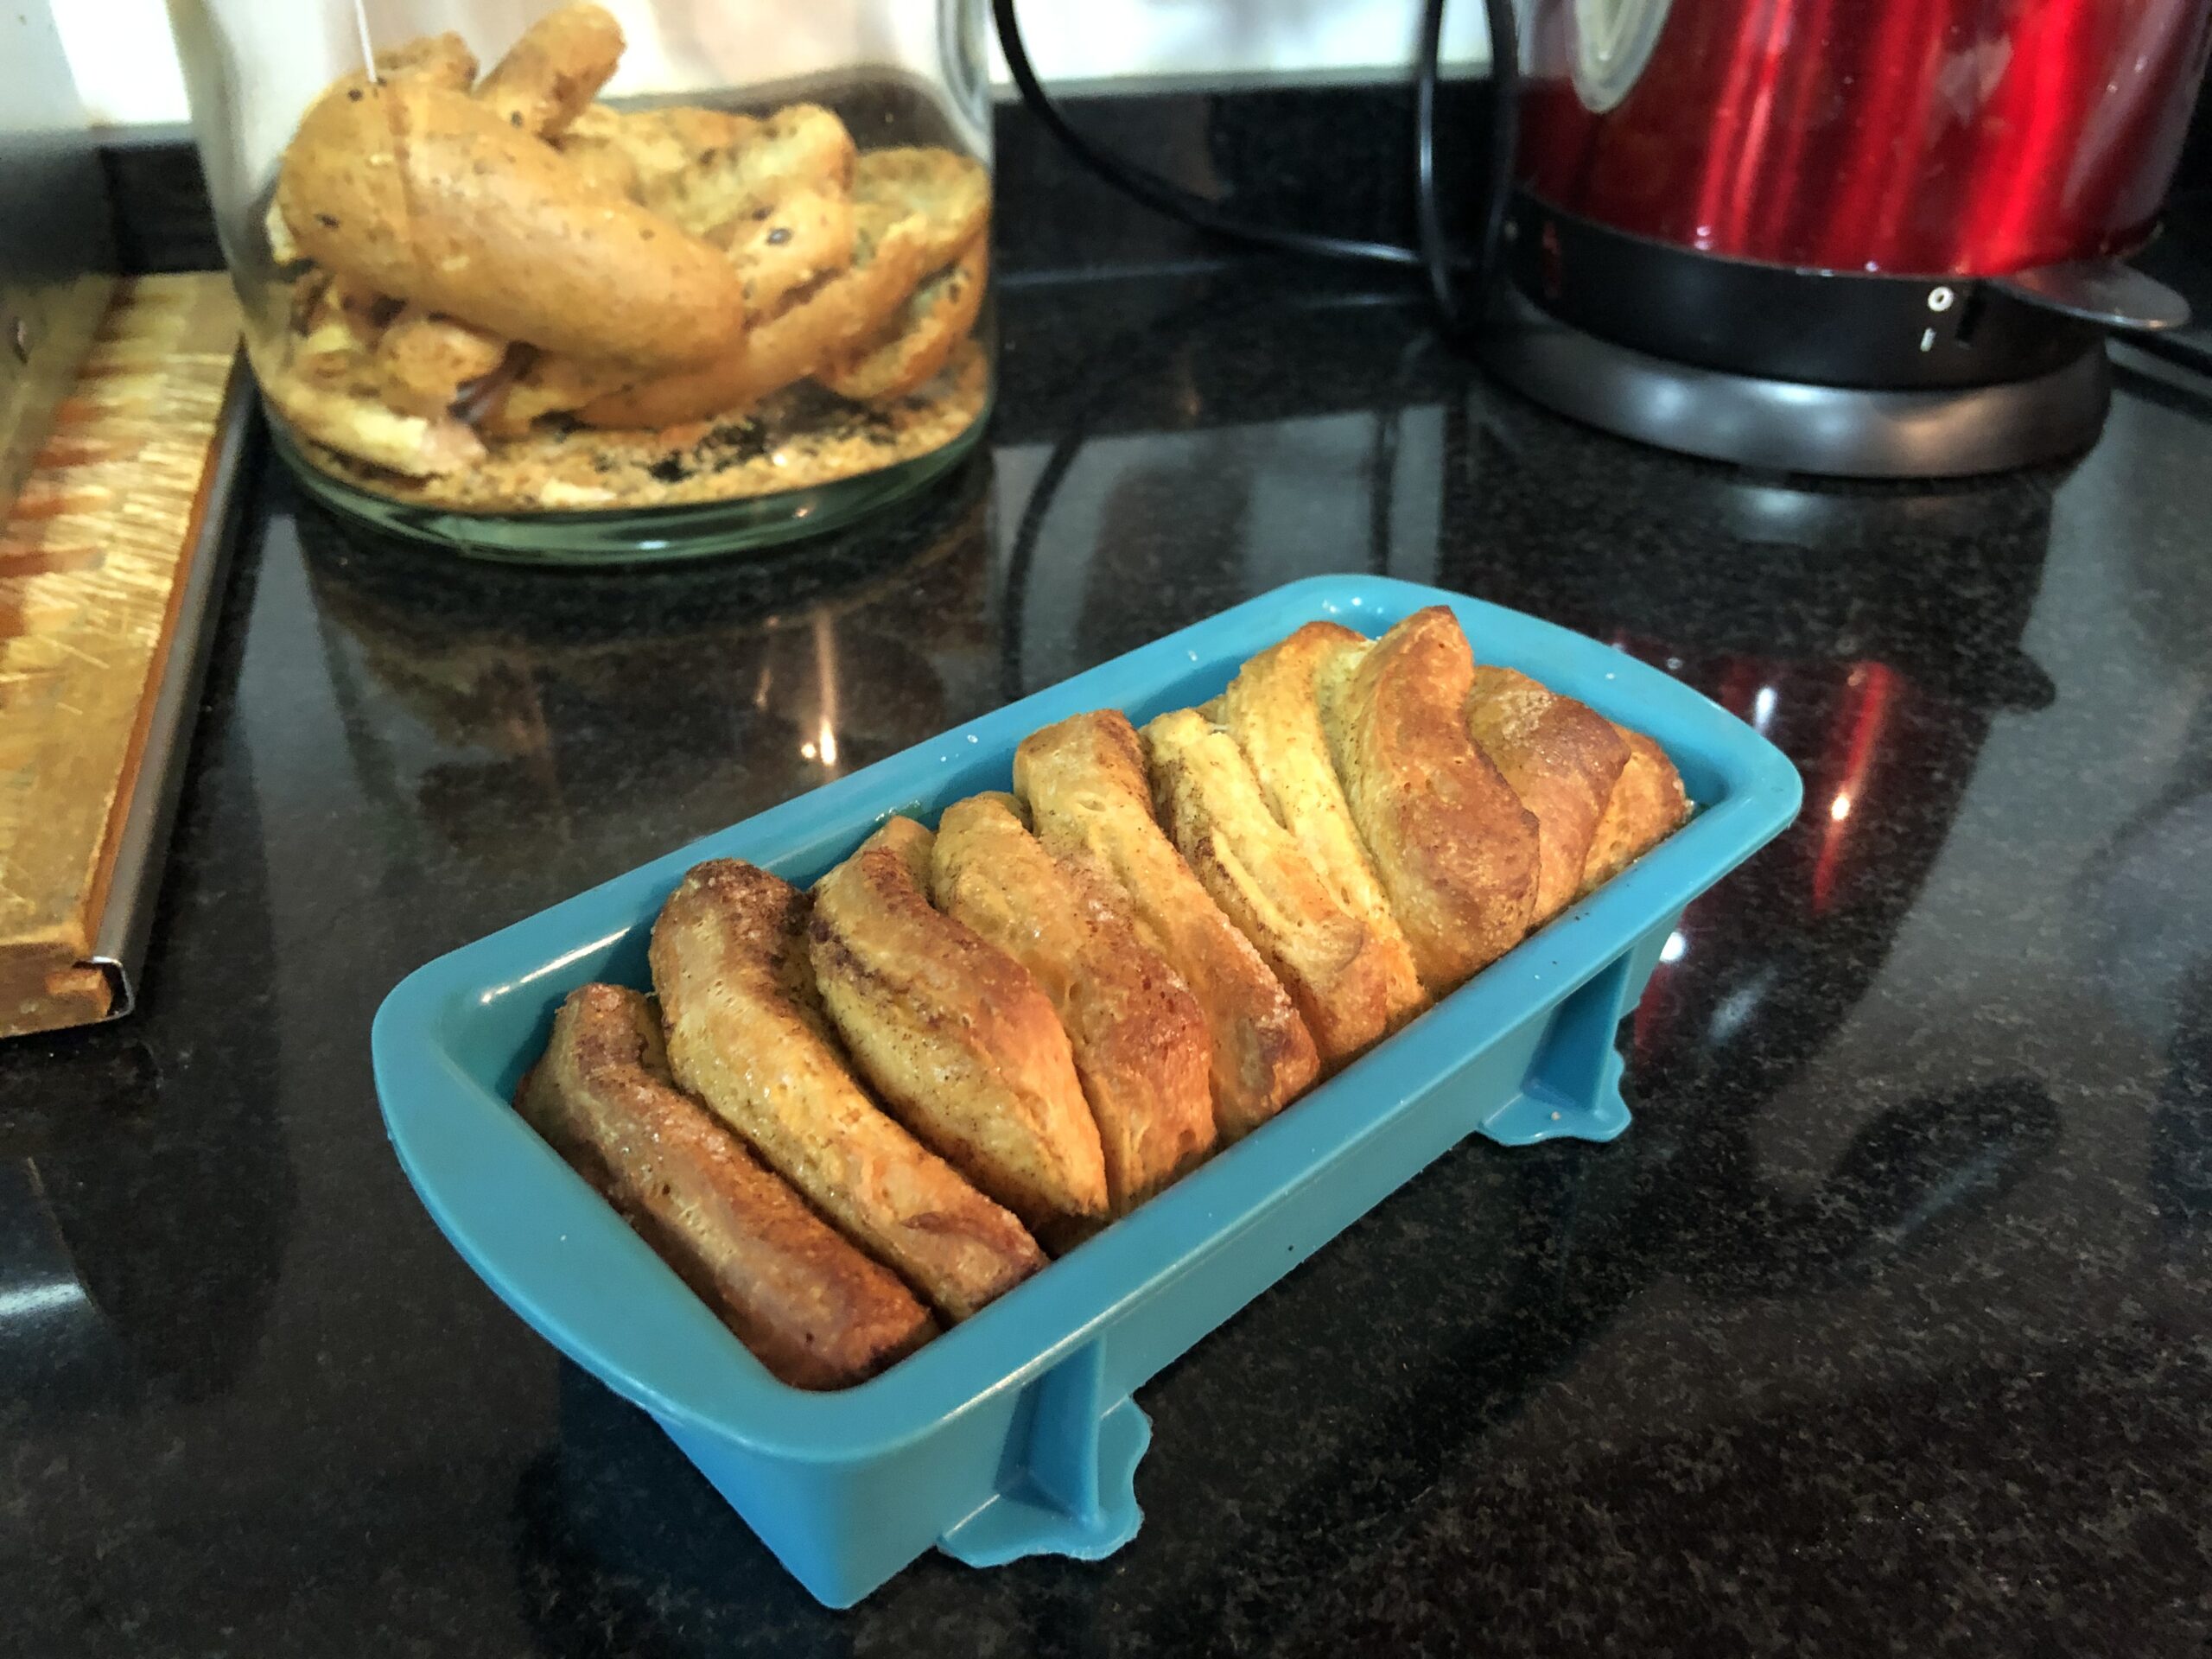
One day I woke up, saw this gorgeous brioche-style sweet bread on Claudia&Julia's Instagram, and knew I had to make it. In my case, I made two loaves, a medium one and a small one to give away. I really liked the texture, though I think I should have been more patient with the first proof of the dough so it would rise more and be fluffier. My taste-testers loved it; I'll have to make it again to truly enjoy it once my brain decides to start picking up the aroma and flavor of cinnamon again, after fully recovering from the aftereffects of damn COVID-19.
Ingredients
330 g (2.6 cups) bread flour
4 g (1.25 tsp) active dry yeast
125 ml (1/2 cup) milk
2 eggs
75 g (6 tbsp) sugar
1/2 teaspoon salt
60 g (4 tbsp) butter (at room temperature)
1 teaspoon ground cinnamon
Method
Mix the bread flour and dry yeast in a bowl. Make a well in the center and add the lightly beaten eggs, the warm milk, 30 g (2 tbsp) of the sugar (reserve the rest), and the salt.
Whisk the wet ingredients with a fork while gradually incorporating the flour and yeast mixture. Stir until the dough gets too stiff, then turn it out onto a clean work surface and knead for 10 minutes. You want to end up with a smooth dough.
Next, add the butter, cut into small cubes, and keep kneading until it's fully incorporated.
Grease a deep, roomy bowl with a touch of oil and let the dough rest inside it, covered with a clean dry kitchen towel, until it doubles in size (it'll depend on room temperature, but easily two hours).
Once the first rise is done, punch it down by pressing with your fingers a few times. Roll the dough out with a rolling pin to about one centimeter (about 3/8 inch) thick.
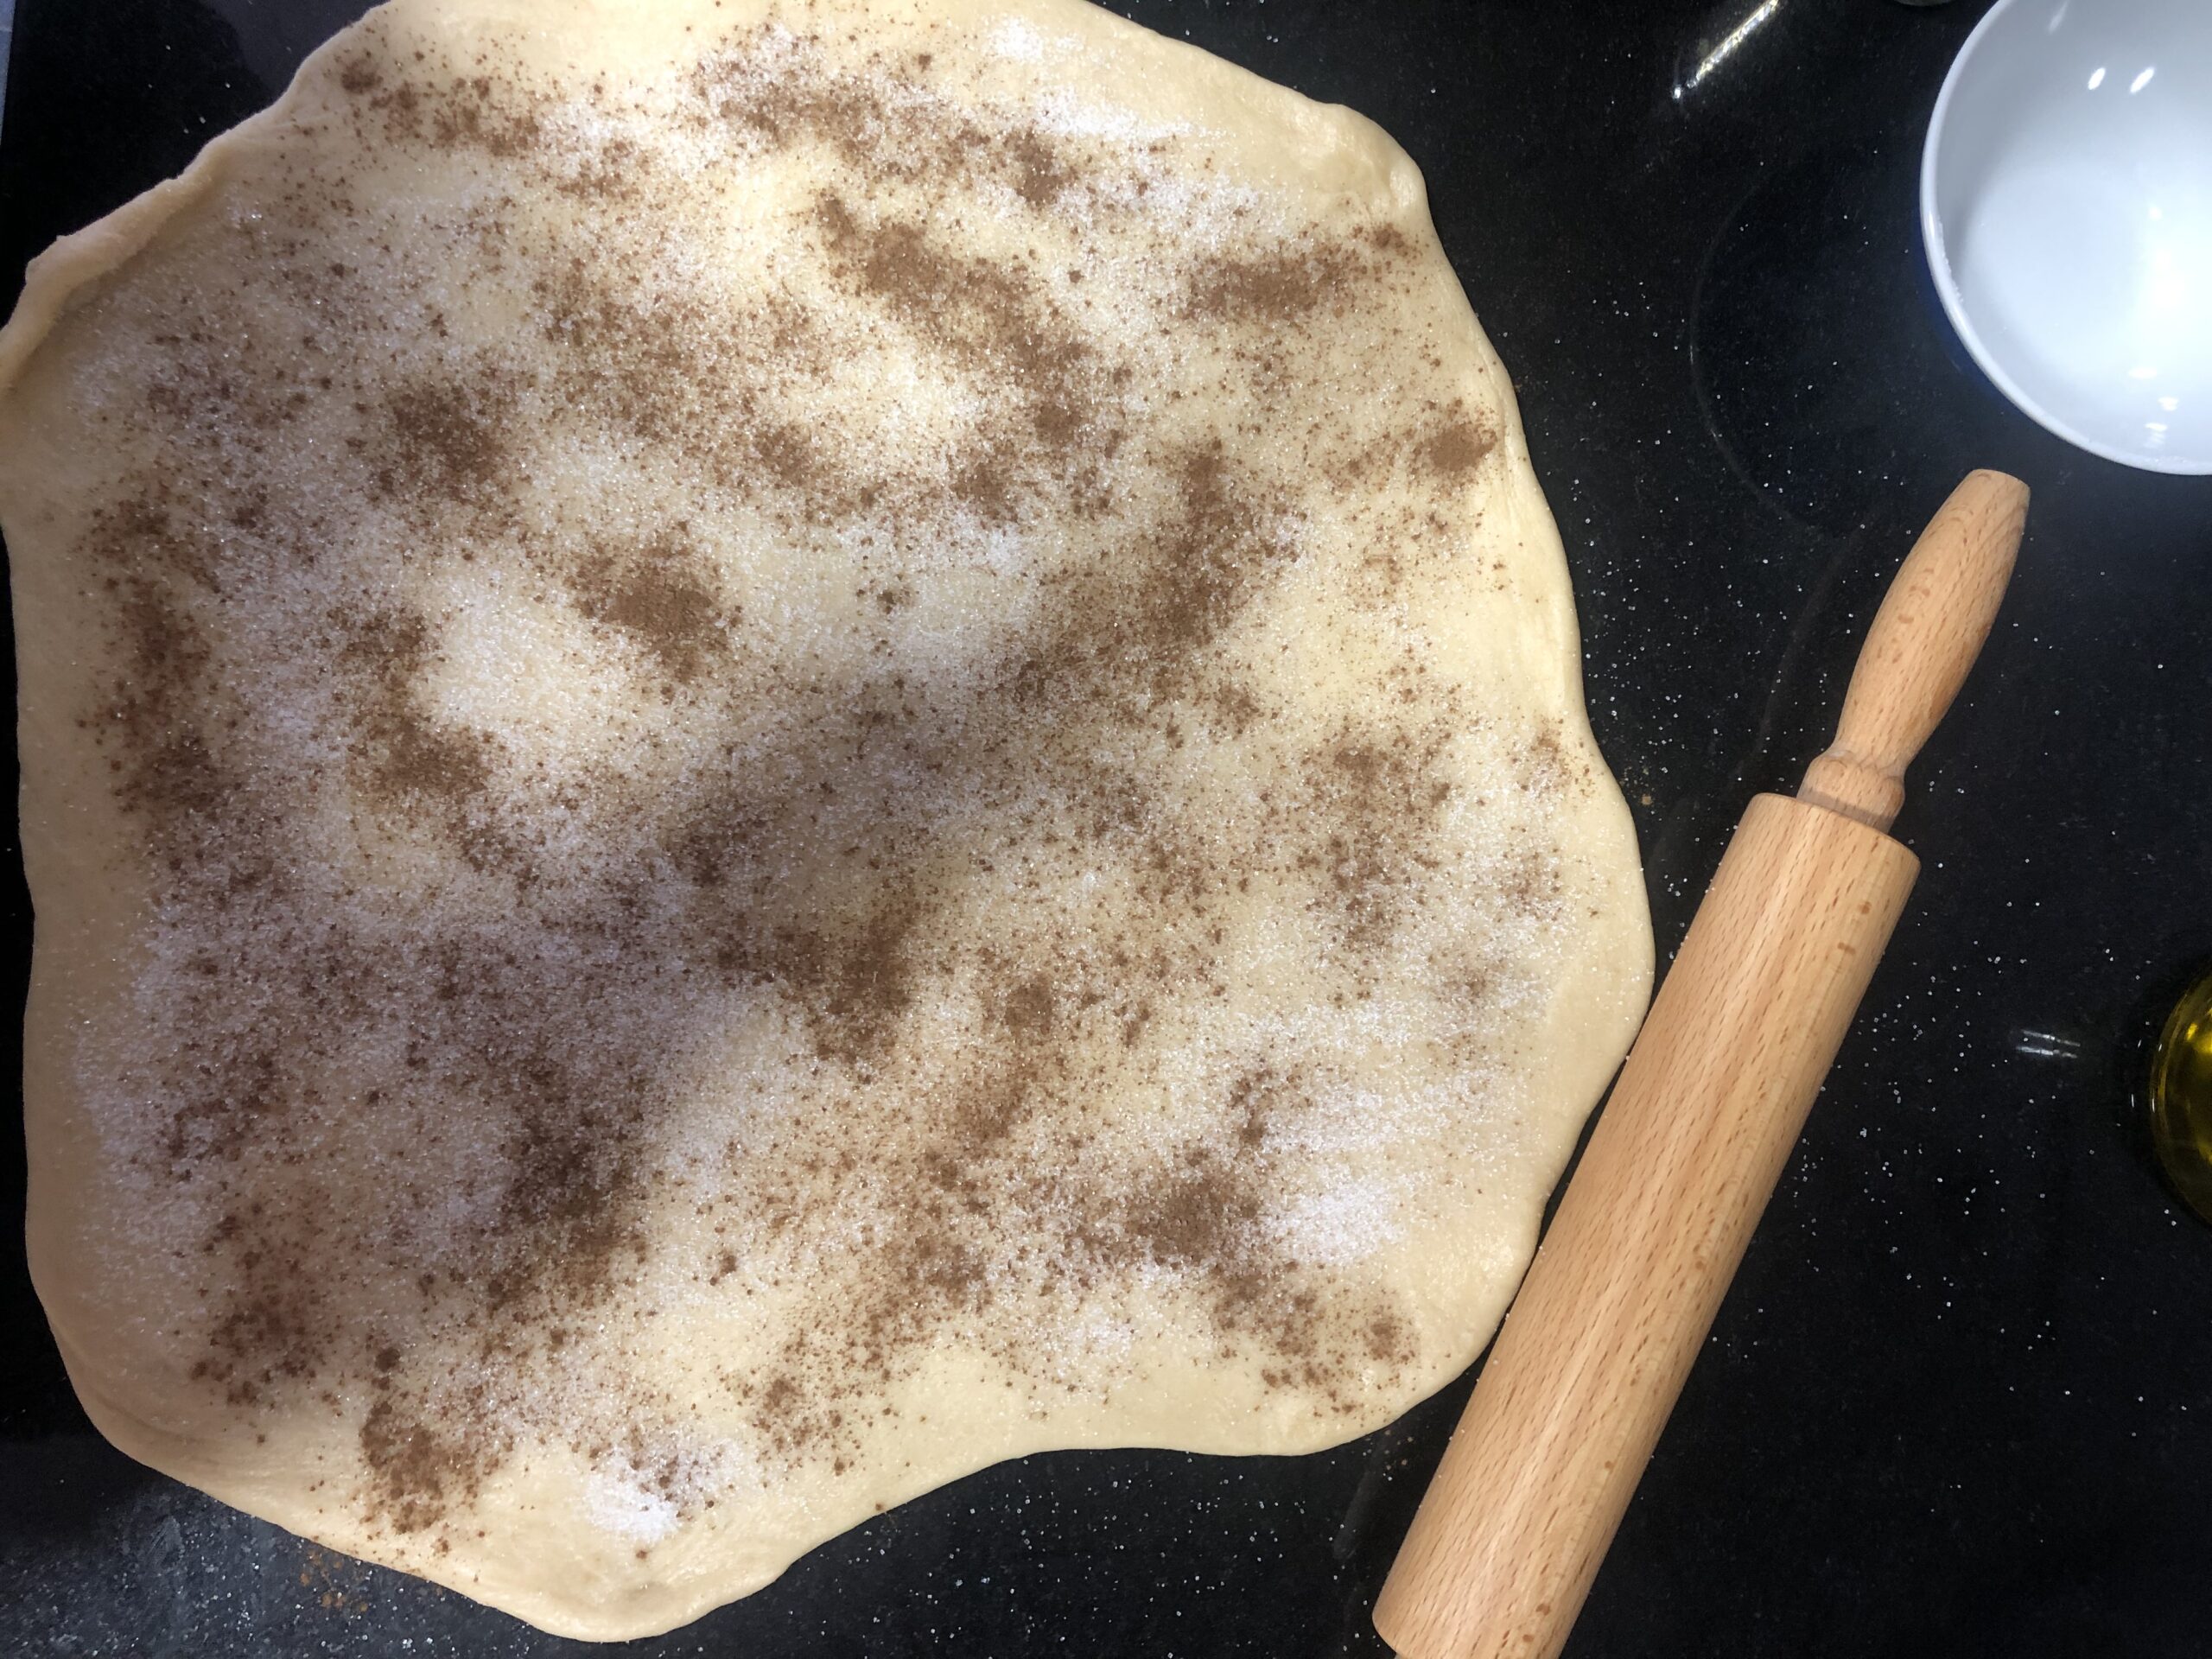
Sprinkle with the rest of the sugar and the ground cinnamon and press down with your hands or the rolling pin so it sticks well.
Cut the dough into squares slightly narrower than the loaf pan you're going to bake it in. Don't worry if they're a bit uneven.
Place the squares of dough vertically inside the previously greased loaf pan. Any sugar and cinnamon left on the counter from falling off the dough as you arranged it can be sprinkled over the top of the bread.
Cover the pan with a clean dry kitchen towel and let it rise again for about 60 minutes, or until it nearly reaches the rim of the pan.
Put the pan in the oven, preheated to 180°C (350°F) with top and bottom heat, and bake for 45-50 minutes. If you see it browning too much, cover with foil.
Take it out of the oven and let it cool before unmolding and serving.
PiC Tips
Be patient with the proofing times — they depend on room temperature, so in winter it'll take longer, but not waiting long enough can completely ruin the recipe.
If you don't like cinnamon, leave it out or swap it for something else. It won't be a cinnamon pull-apart bread anymore, but it'll be just as delicious.
Pull-apart bread de canela
Un día me levanté, vi esta hermosura de pan dulce tipo brioche en el Instagram de Claudia&Julia y supe que tenía que hacerlo. En mi caso hice dos panes, uno mediano y otro pequeño para regalar. Me gustó mucho la textura aunque creo que tendría que haber sido más paciente con el primer levado de la masa para que creciera más y fuera más esponjoso. A mis catadores les gustó, yo tendré que repetirlo para degustarlo bien cuando mi cerebro decida volver a percibir el aroma y sabor de la canela tras haber superado totalmente las secuelas de la maldita COVID-19.
Ingredientes
330 g de harina de fuerza
4 g de levadura seca de panadería
125 ml de leche
2 huevos
75 g de azúcar
1/2 cucharadita de sal
60 g de mantequilla (a temperatura ambiente)
1 cucharadita de canela en polvo
Elaboración
Mezclamos la harina de fuerza y la levadura seca de panadería en un bol. Hacemos un hueco en el centro en el que añadimos los huevos, ligeramente batidos, la leche templada, 30 g de azúcar (reservamos el resto) y la sal.
Batimos los ingredientes líquidos con un tenedor al tiempo que incorporamos, poco a poco, la mezcla de harina y levadura. Removemos hasta que la masa nos lo permita, entonces la pasamos a una superficie de trabajo limpia y amasamos durante 10 minutos. Tenemos que conseguir una masa lisa.
A continuación añadimos la mantequilla, cortada en pequeños dados, y continuamos amasando hasta que quede bien incorporada.
Engrasamos un recipiente hondo y amplio con una pizca de aceite y dejamos reposar la masa en su interior, cubierta con un trapo limpio y seco hasta que doble su volumen (dependerá de la temperatura ambiente pero podrán ser dos horas fácilmente).
Pasado el tiempo del primer levado, desgasificamos presionando con los dedos varias veces. Extendemos la masa con un rodillo hasta obtener un altura de un centímetro de grosor aproximadamente.
Espolvoreamos con el resto del azúcar y la canela molida y aplastamos con las manos o con el rodillo para que se incruste bien.
Cortamos la masa en cuadrados un poco más estrechos que el molde en el que vayamos a hornearlo. No importa si son un poco irregulares.
Colocamos los cuadrados de masa en el interior del molde previamente engrasado, en vertical. El azúcar y canela que te quede en la encimera porque se haya caído de la masa al colocarla, puedes echarla por encima del pan.
Tapamos el molde con un trapo limpio y seco y dejamos levar nuevamente durante, aproximadamente, 60 minutos o hasta que casi alcance el borde del molde.
Introducimos el molde en el horno, precalentado a 180ºC con calor arriba y abajo, y cocemos durante 45-50 minutos. Si vemos que se dora demasiado cubrimos con papel de aluminio.
Retiramos del horno y dejamos enfriar antes de desmoldar y servir.
Consejos PiC
Ten paciencia con los tiempos de levado, dependerá de la temperatura ambiente así que en invierno te llevará más tiempo pero no esperar lo suficiente puede arruinarte la receta por completo.
Si no te gusta la canela, omítela o sustitúyela. Ya no será un pull-apart bread de canela pero estará igual de rico.
Banana, Cocoa and Peanut Butter Loaf
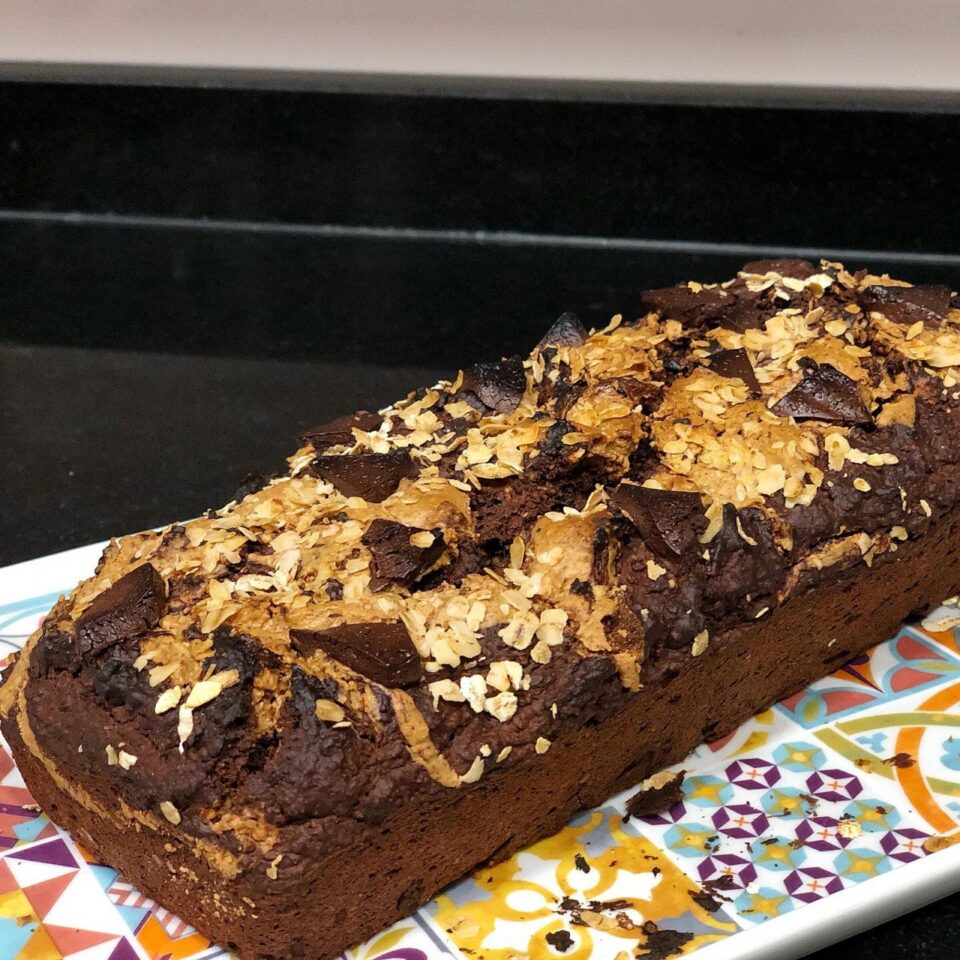
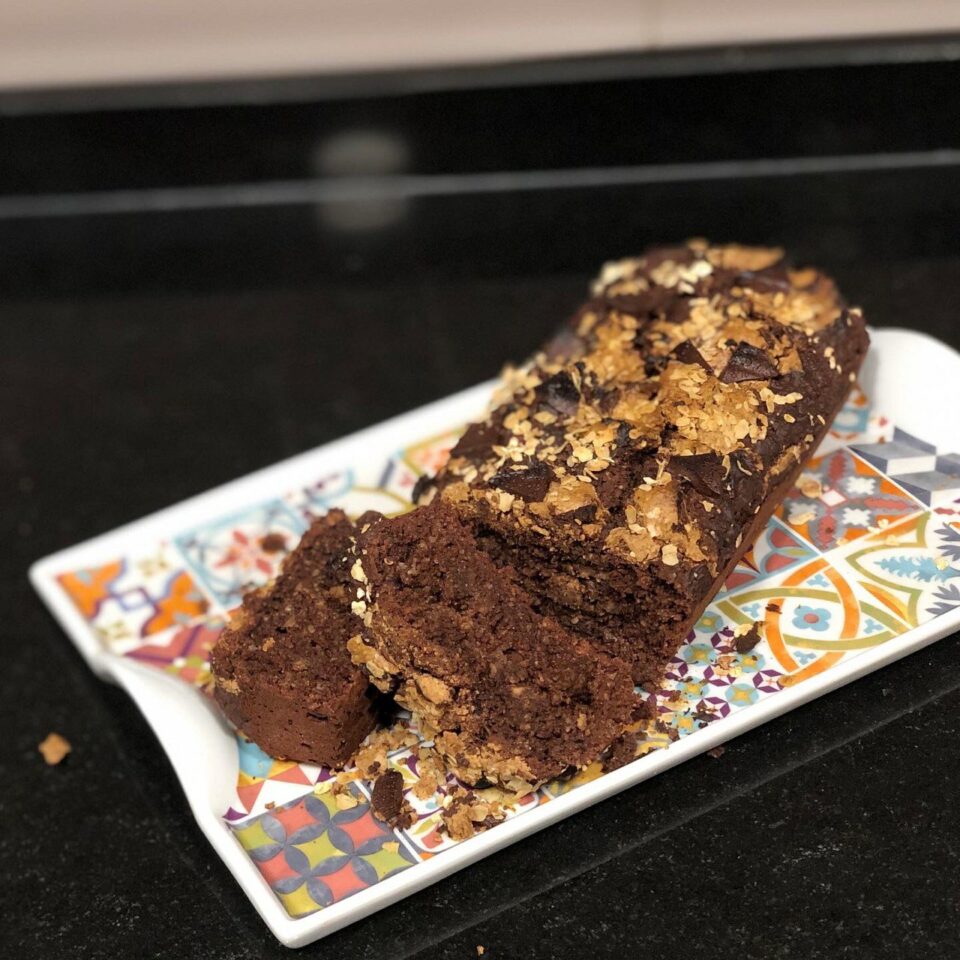
A healthy loaf cake with a moist texture and a strong peanut butter flavor. Definitely not for everyone, but I'm crazy about it. These flavors are addictive for me and I can't really hold back. The good news is that the ingredients are healthy and, even though we can't really call it diet food — especially because of the peanut butter — we know it's a pretty moderate treat.
I got the recipe from @petit_fit's Instagram profile, but I tweaked it a little. Here's my version. Hope you like it.
Ingredients
3 ripe bananas
50 g (1.75 oz) honey
40 g (1.4 oz) extra virgin olive oil
50 ml (3.5 tbsp) milk
1 egg
4 tablespoons peanut butter
175 g (6 oz / about 1.75 cups) ground oats or oat flour
50 g (1.75 oz) pure unsweetened cocoa powder
5 g (1 tsp) baking powder (Royal-type)
A pinch of salt
A couple of squares of dark chocolate and some oat flakes (for topping)
Method
Preheat the oven to 180°C (355°F).
Mash the bananas in a bowl with a fork and add the wet ingredients (honey, milk, oil and the lightly beaten egg).
Stir until everything comes together.
Add the dry ingredients (oats, cocoa, salt and baking powder) and mix well.
Grab a loaf pan (plumcake-style) and grease it with a bit of oil.
Pour half of the batter into the pan and drop two tablespoons of peanut butter on top. Then, using a knife, swirl the peanut butter into the batter to get a kind of marbled effect.
Add the other half of the reserved batter and another two tablespoons of peanut butter. Repeat the marbling process.
Finally, chop the chocolate into chunks and scatter them on top along with a few oat flakes.
Bake for about 45-50 minutes and it's ready to enjoy (technically you should wait for it to cool… I never can).
PiC Tips
Try to use peanut butter that's 100% peanuts, with no added sugar, salt or weird stuff, because it doesn't need any of that. It's pretty easy to find this kind these days at Mercadona, Ahorramás or sports/nutrition supplement shops.
Same goes for the cocoa. It's really easy to find pure 100% cocoa (I usually use Mercadona's store brand). Don't be fooled by advertising for "intense" cocoas because they tend to contain added sugars, sweeteners or even some kind of flour as a thickener.
If you don't have oat flour but do have oat flakes, you can blitz them in a food processor or Thermomix. You can choose how fine you want them. In my case, I used roughly ground oats.
As always, you can swap the honey for another sweetener of your choice, or for dates that have been soaked and blended into a paste. Also keep in mind that the riper the bananas, the more sweetness they'll add.
Bizcocho de plátano, cacao y mantequilla de cacahuete
Un bizcocho saludable, de textura húmeda y con sabor intenso a mantequilla de cacahuete. Desde luego, no apto para todos los gustos pero a mí me chifla. Estos sabores me generan adicción y no puedo contenerme mucho. Lo bueno es que sus ingredientes son saludables y, aunque no lo podamos considerar dietético – sobre todo por la mantequilla de cacahuete-, sabemos que es un capricho muy moderado.
La receta la saqué del perfil de @petit_fit en Instagram pero la modifiqué un poquito. Aquí tenéis mi versión. Espero que os guste.
Ingredientes
3 plátanos maduros
50 g de miel
40 g de AOVE
50 ml de leche
1 huevo
4 cucharadas de mantequilla de cacahuete
175 g de avena molida o harina de avena
50 g de cacao puro desgrasado en polvo
5 g de levadura química (tipo Royal)
Una pizca de sal
Un par de onzas de chocolate negro y copos de avena (para decorar)
Elaboración
Precalentamos el horno a 180°C.
Machacamos los plátanos en un bol con ayuda de un tenedor y añadimos los ingredientes húmedos (miel, leche, aceite y el huevo ligeramente batido).
Removemos hasta integrar.
Añadimos los ingredientes secos (avena, cacao, sal y levadura) e integramos bien.
Cogemos un molde tipo plumcake y embadurnamos con un poco de aceite.
Echamos la mitad de la mezcla en el molde y ponemos dos cucharadas de mantequilla de cacahuete encima. A continuación, con un cuchillo mezclamos la mantequilla con la masa del bizcocho para que quede un poco marmolado.
Añadimos la otra mitad de la masa reservada y otras dos cucharadas de mantequilla de cacahuete. Repetimos el proceso de marmolado.
Por último, cortamos el chocolate en trozos y los echamos por encima junto con unos cuantos copos de avena.
Horneamos durante unos 45-50 minutos y listo para disfrutar (técnicamente habría que esperar a que se enfriase… yo no soy capaz nunca).
Consejos PiC
La mantequilla de cacahuete intenta que sea 100% cacahuete, sin azúcar ni sal ni cosas raras porque no lo necesita. Ahora es bastante fácil encontrarla así en Mercadona, Ahorramás o tiendas de suplementos alimenticios o deportivos.
Lo mismo con el cacao. Es muy fácil encontrarlo puro, 100% cacao (yo suelo usar el de la marca blanca de Mercadona). No os dejéis engañar por publicidades de cacaos intensos porque suelen llevar azúcares, edulcorantes o incluso algún tipo de harina como espesante.
Si no tienes harina de avena pero sí copos de avena los puedes triturar con un robot de cocina o Thermomix. Puedes elegir lo fina que quieres que quede. En mi caso, lo hice con avena poco triturada.
Como siempre, la miel la puedes sustituir por otro edulcorante a tu gusto o por dátiles previamente hidratados y triturados hasta conseguir una pasta. Ten en cuenta también que los plátanos cuanto más maduros estén, más dulzor le aportarán.
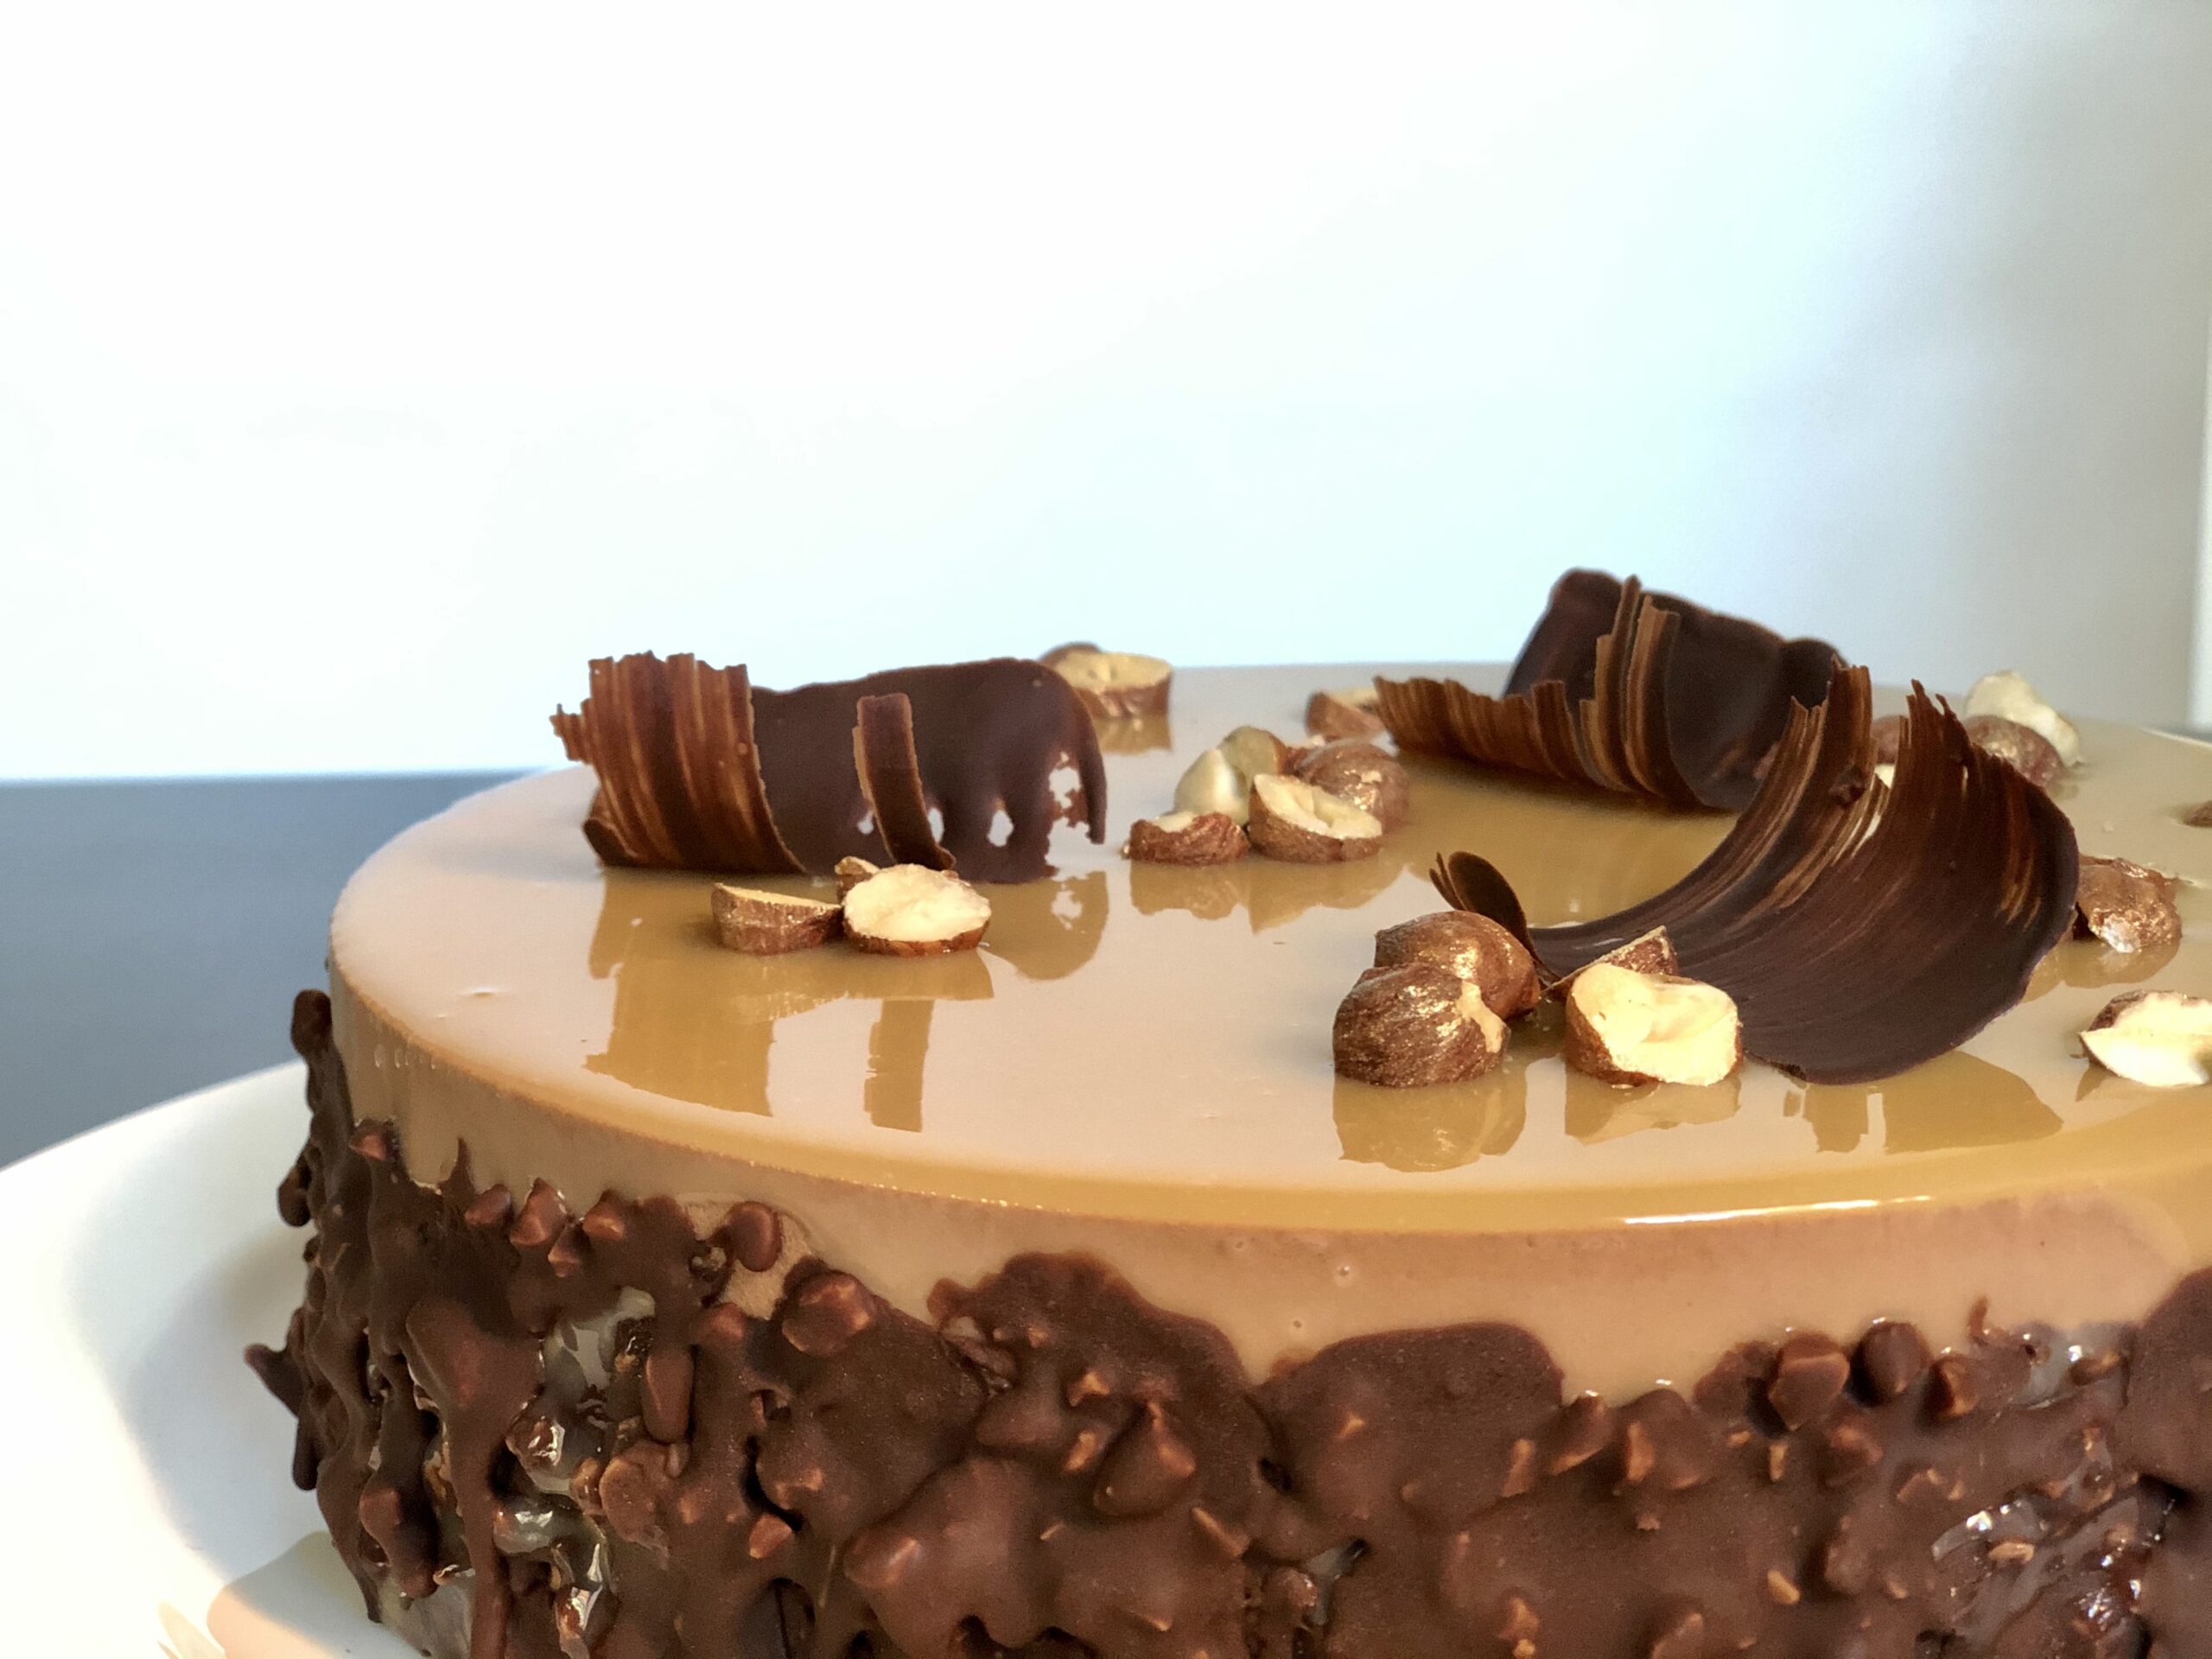
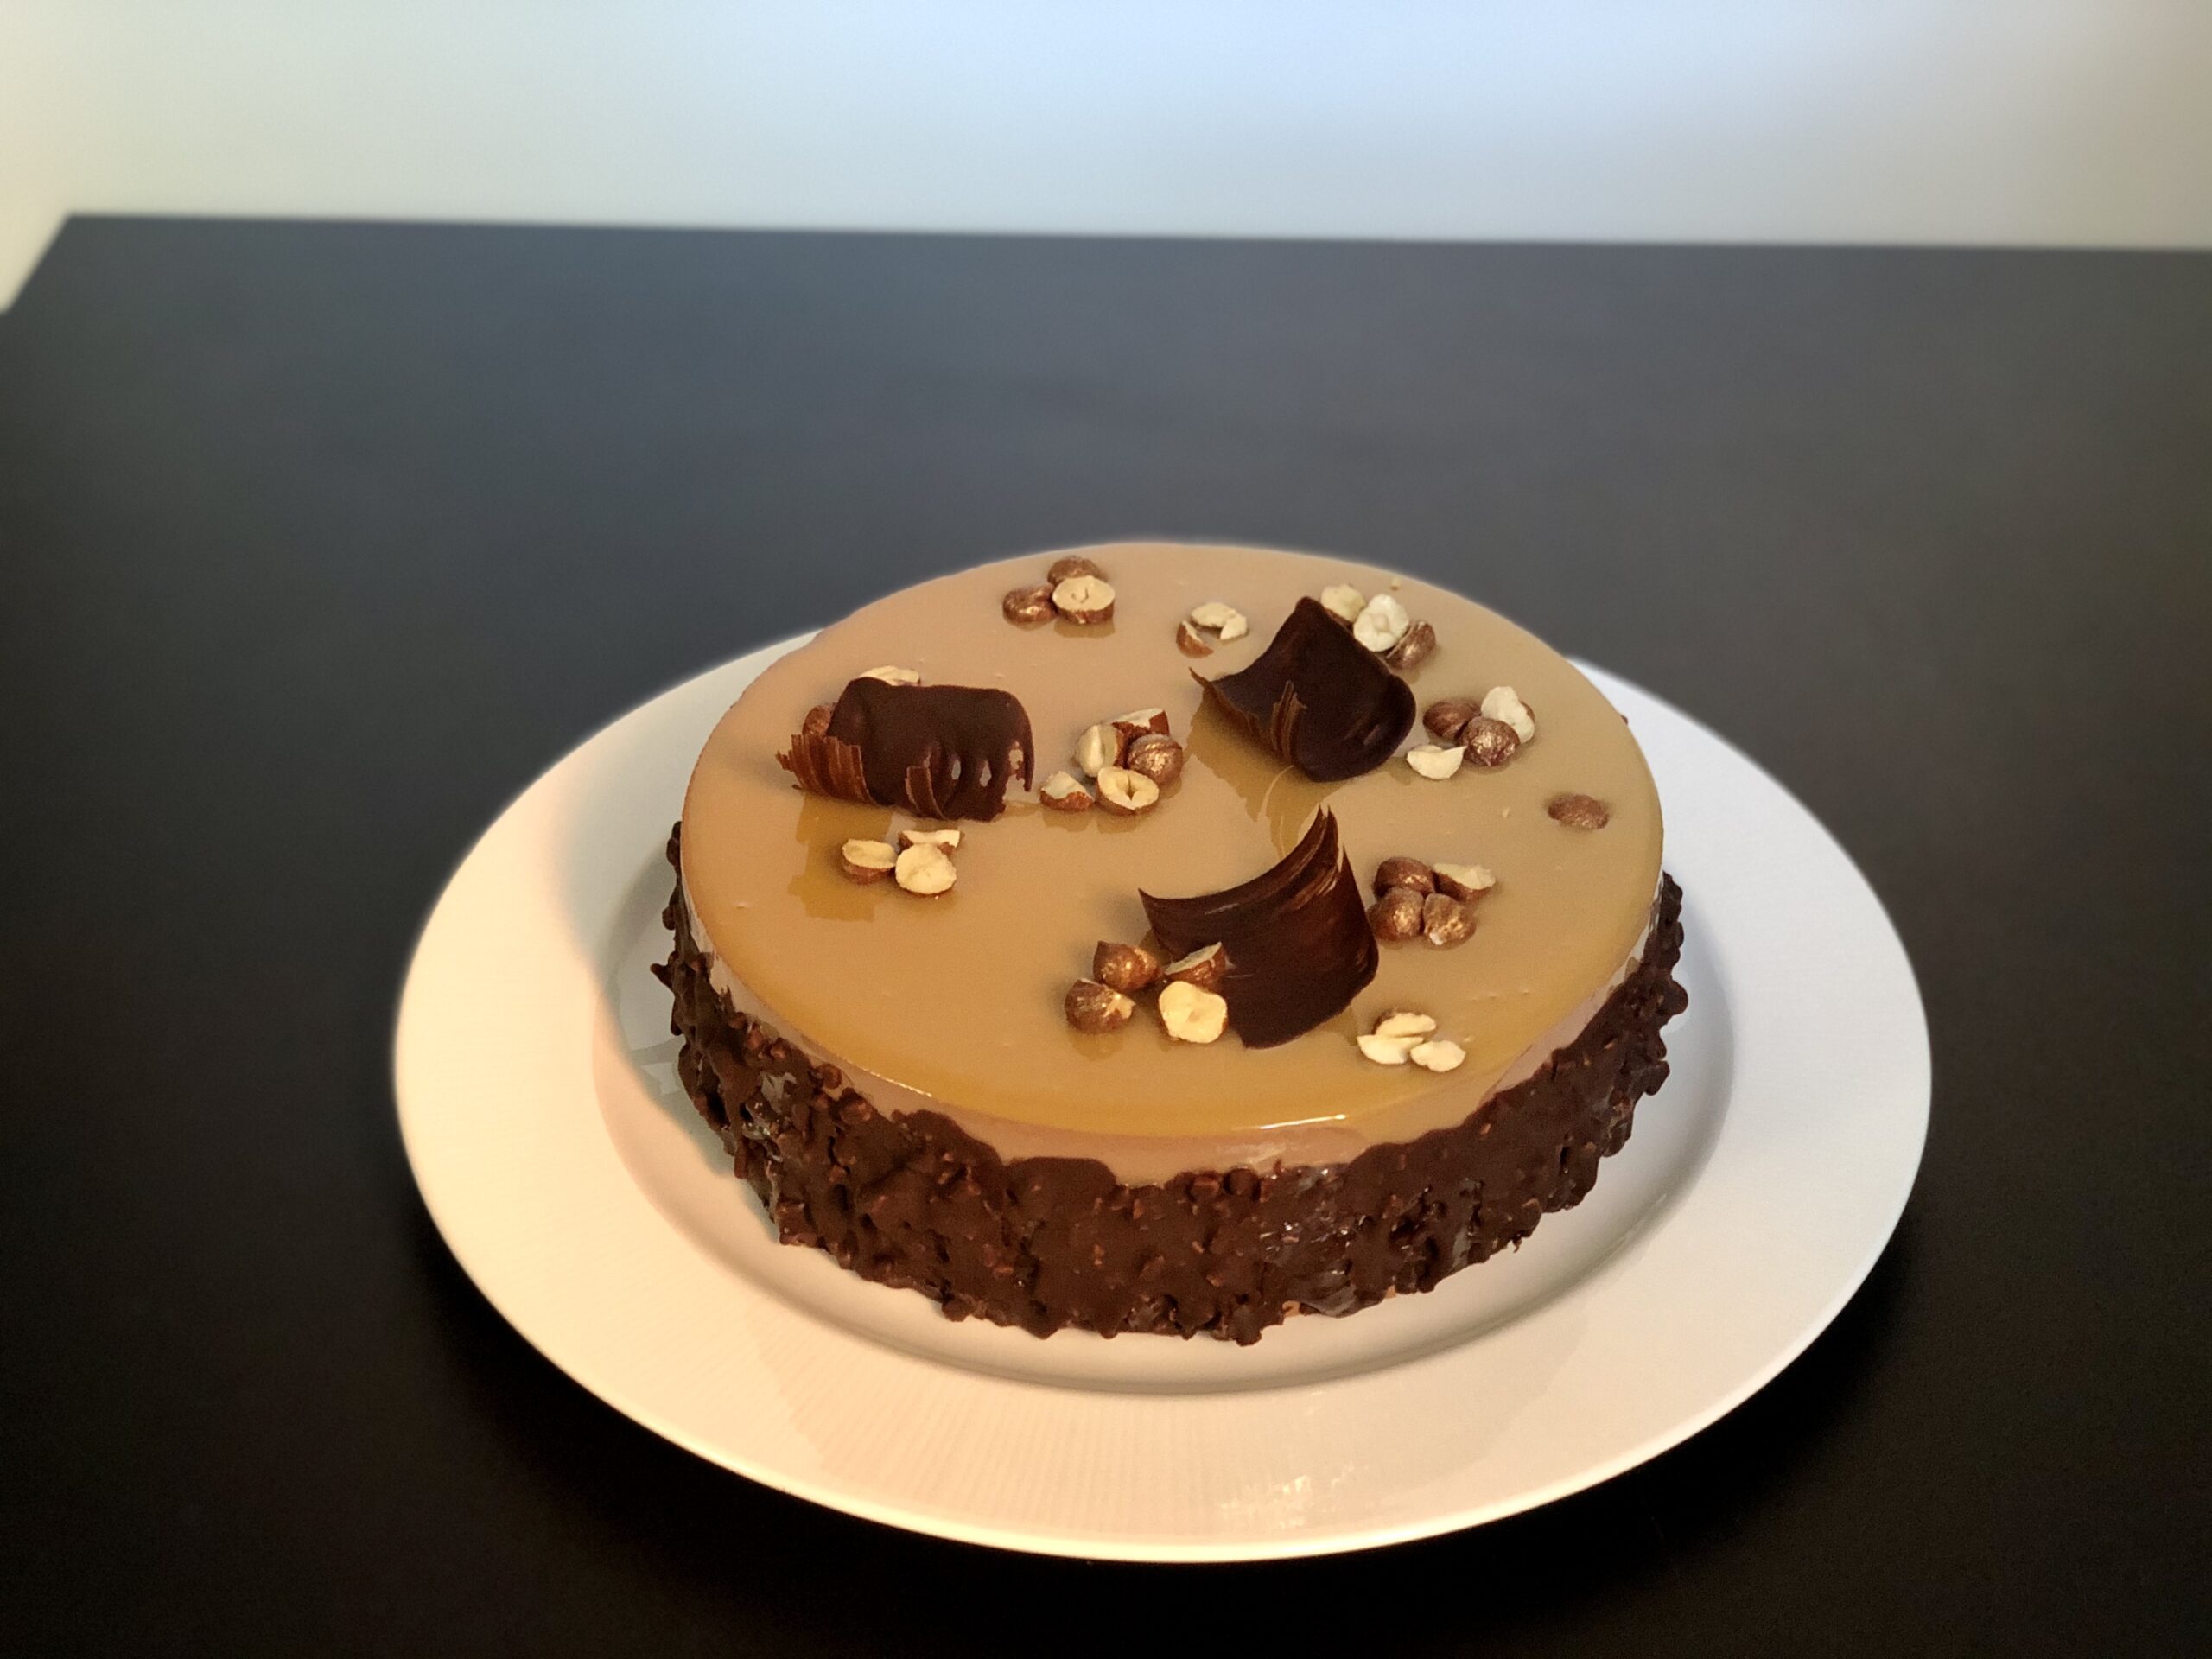
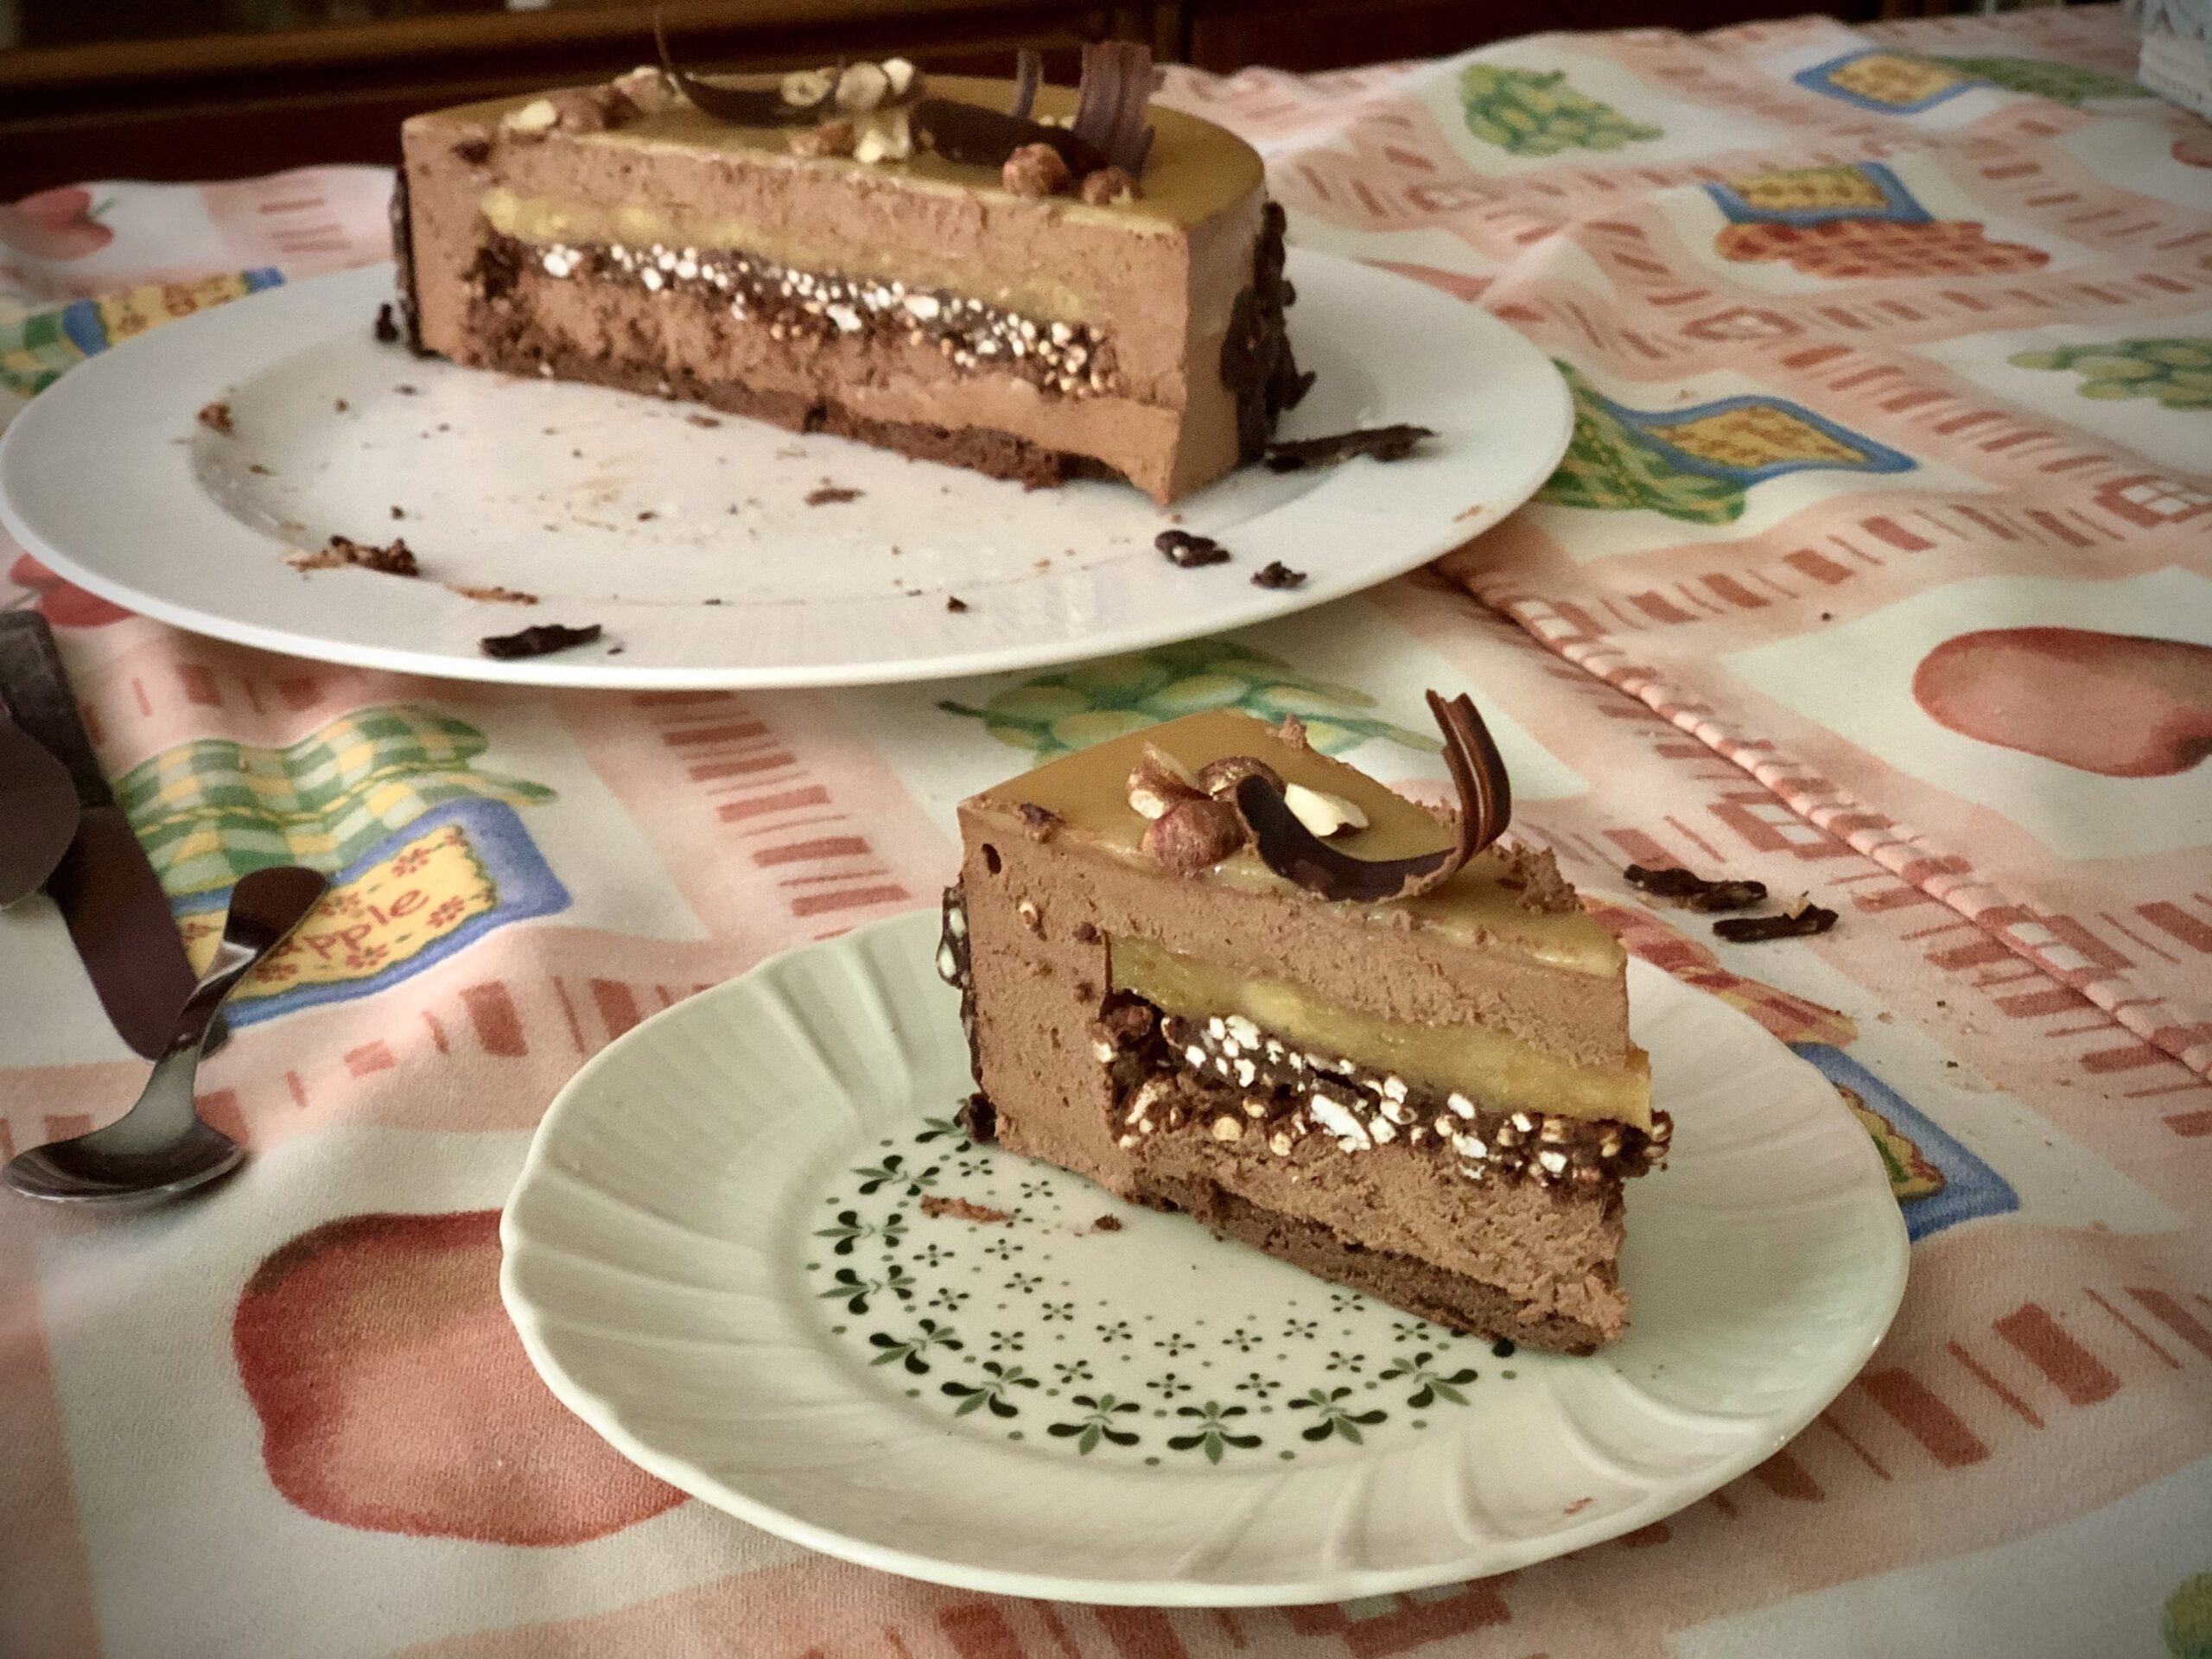
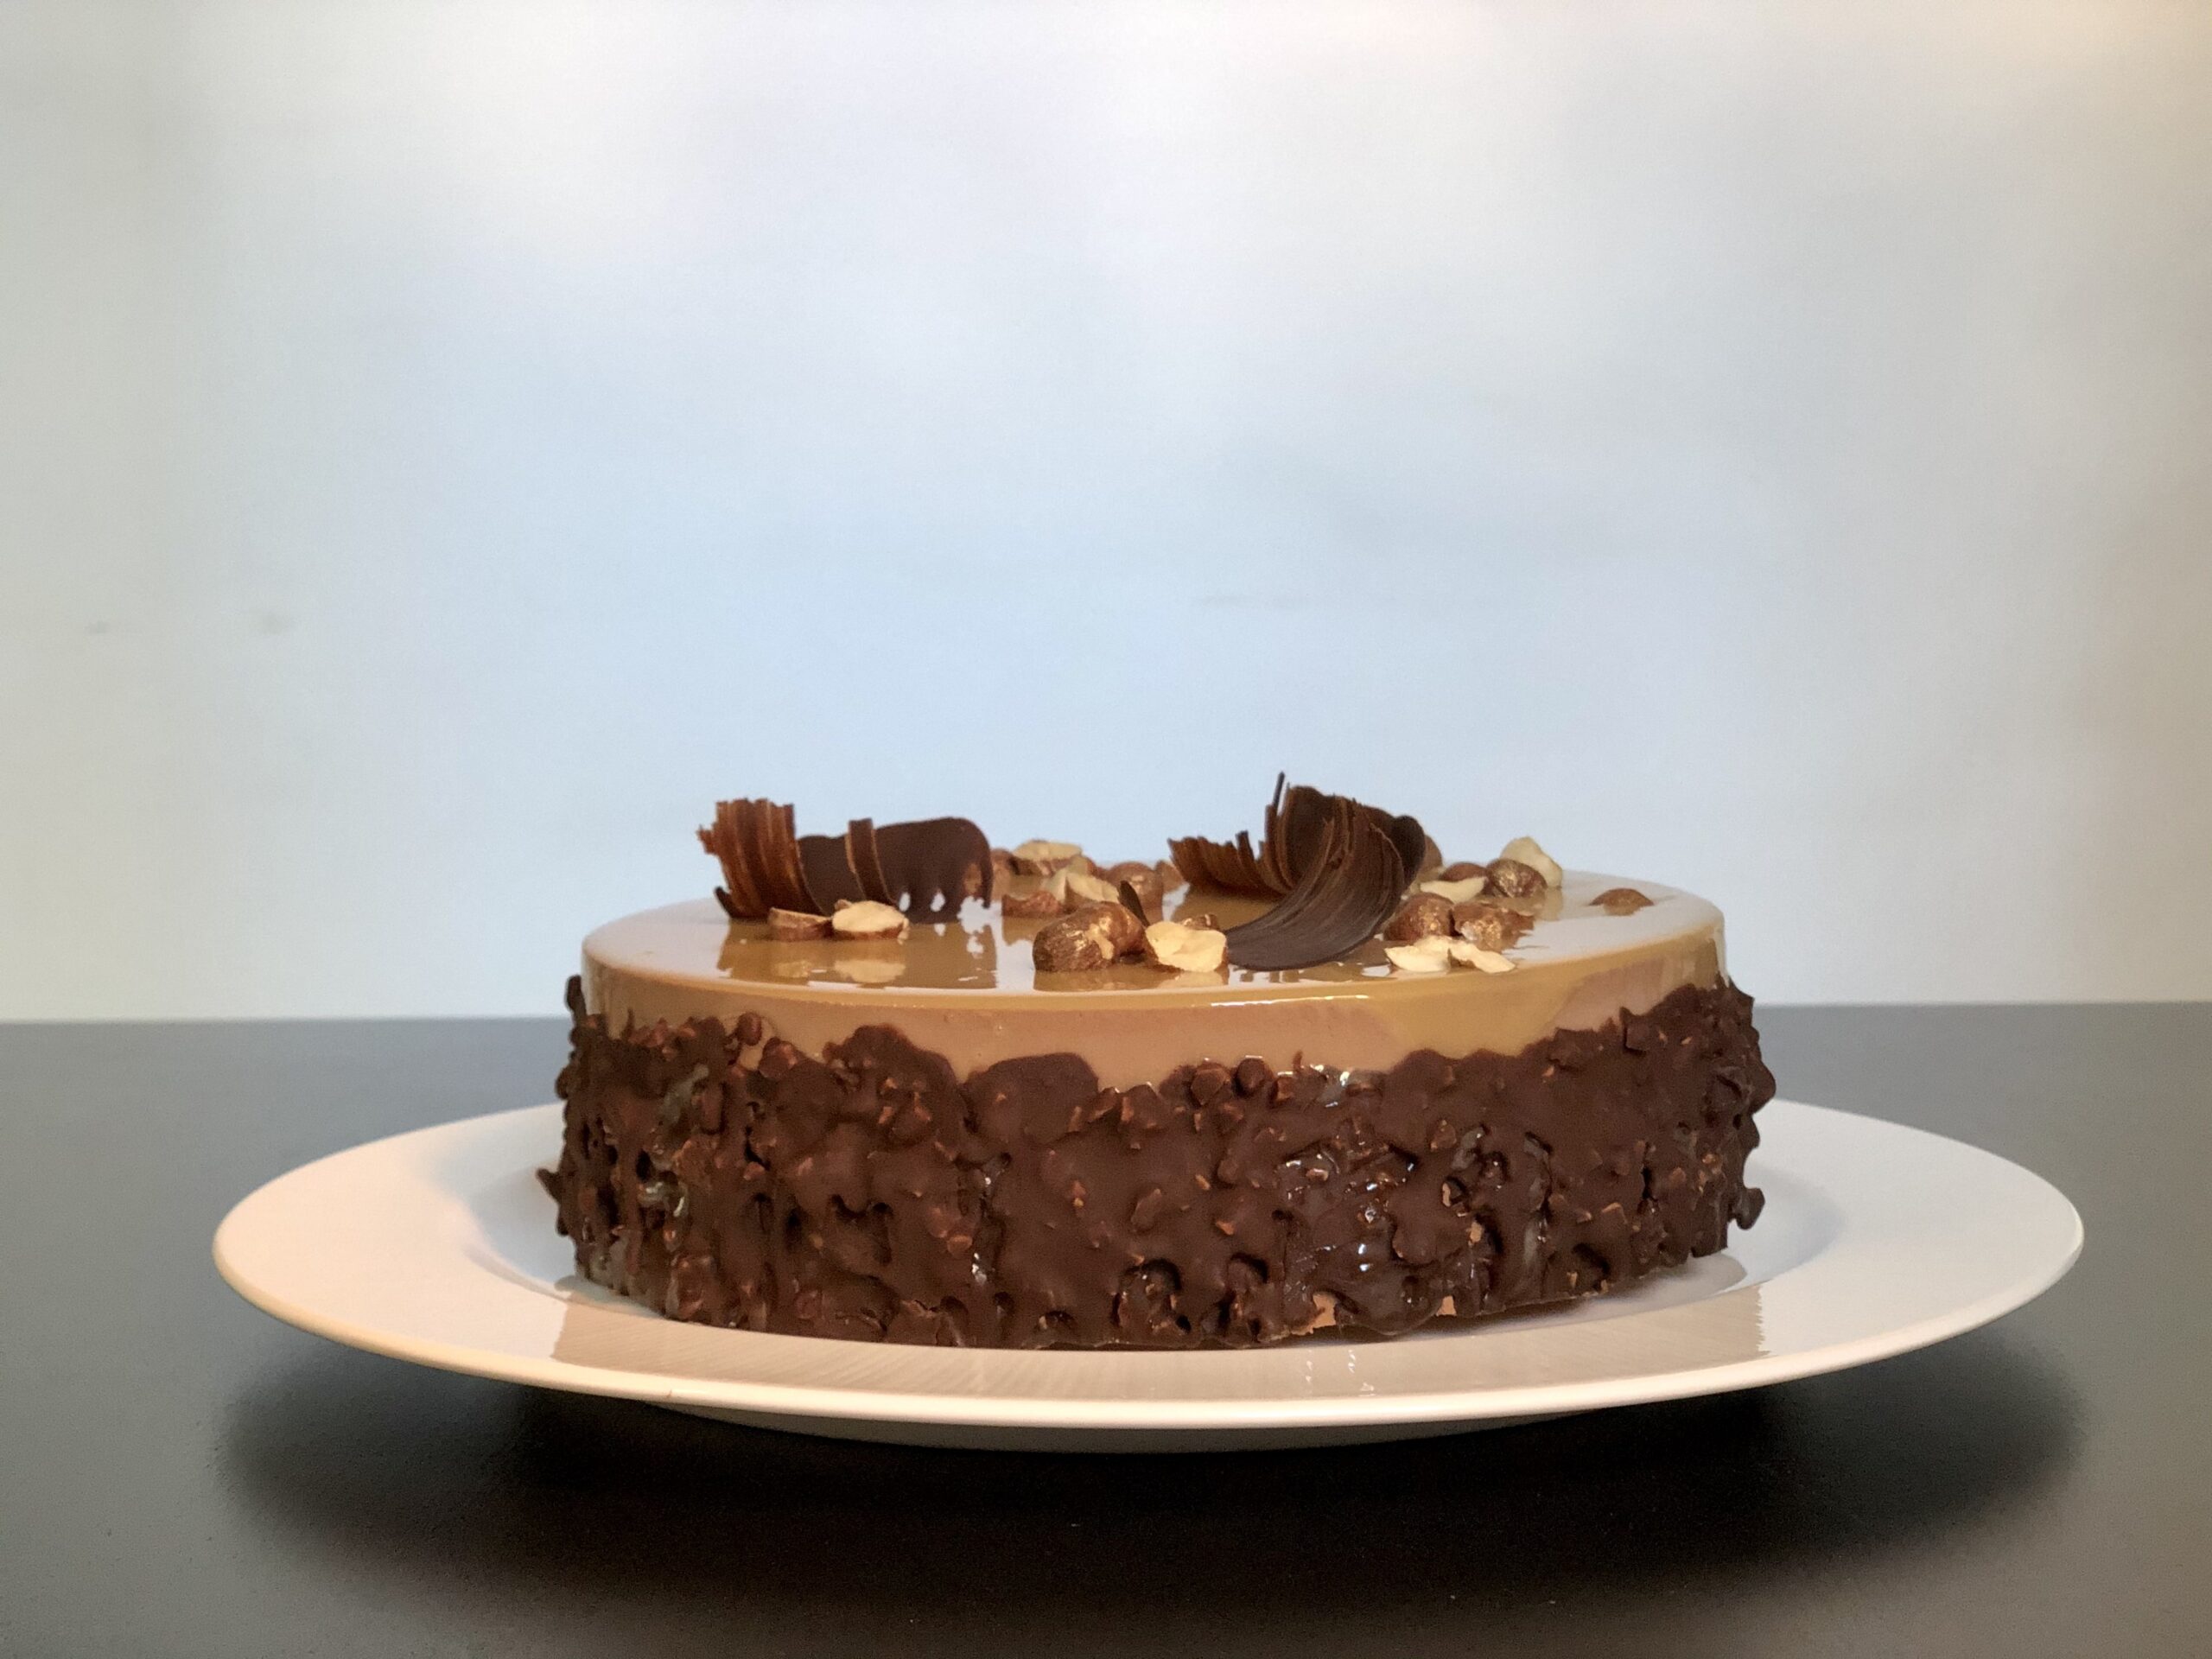
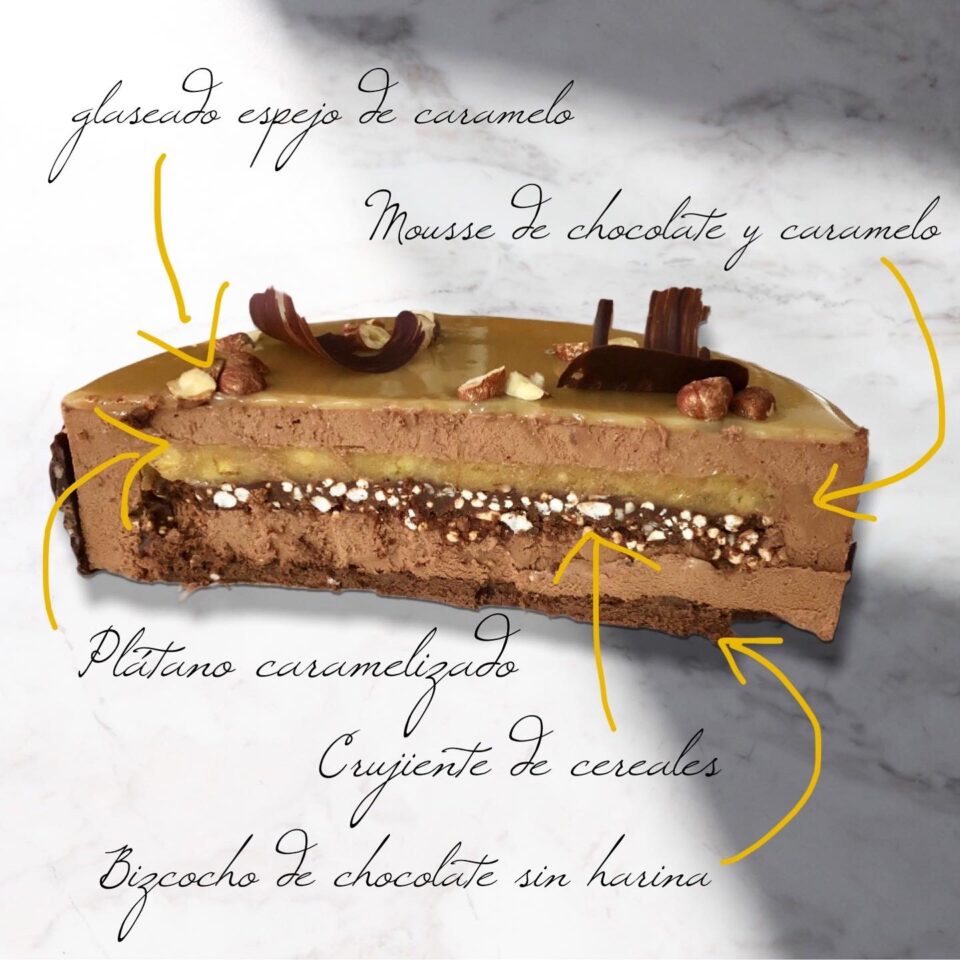
Chocolate and caramel cake with banana and crunchy cereal layer
This time I wanted to make a chocolate cake that didn't have a super intense pure-chocolate flavor, since some of my taste-testers aren't huge fans of that level of intensity. The banana filling won me over as a way to balance out all that sweetness, and the crunchy layer adds a bit of joy to creamy desserts.
The recipe is from Ettore Cioccia, although I made several changes to the filling and decoration because I wanted to use up ingredients I had at home and try out some new things. So here's my version of this delicious cake — I hope you like it. It's not a complicated cake, but it does have several components and requires patience and planning to give yourself enough time, considering all the chilling/freezing times involved.
Ingredients
Crunchy cereal layer
60 g (2.1 oz) almond butter
35 g (1.2 oz) chocolate
20 g (0.7 oz) raw chopped hazelnuts
15 g (0.5 oz) puffed rice
15 g (0.5 oz) puffed quinoa
Caramelized banana
30 g (2 tbsp) sugar
15 g (1 tbsp) butter
3 bananas (210 g / 7.4 oz)
Lemon juice
2 g gelatin (1 sheet)
Flourless chocolate sponge
60 g (2.1 oz) 65% dark chocolate
20 g (1.5 tbsp) unsalted butter
2 egg whites at room temperature
2 egg yolks
20 g (1.5 tbsp) sugar
Chocolate and caramel mousse
200 g (7 oz) 65% chocolate
6 g gelatin (3 sheets)
60 g (1/4 cup) sugar
100 ml (1/2 cup) heavy whipping cream
4 egg yolks, beaten
400 g (14 oz) heavy cream whipped to soft peaks
Ferrero-style coating
215 g (7.6 oz) 65% chocolate
40 g (3 tbsp) sunflower oil
45 g (1.6 oz) chopped almonds (almond brittle)
Caramel mirror glaze
300 g (1.5 cups) sugar
300 g (1 cup) glucose syrup, slightly warmed in the microwave
375 ml (1.5 cups) water
200 g (7 oz) sweetened condensed milk
300 g (10.6 oz) white couverture chocolate, finely chopped
18 g gelatin, hydrated beforehand and then dissolved in 108 ml (about 1/2 cup) of hot water
Method
We start by making the crunchy cereal layer. Melt the chocolate in the microwave in short bursts to keep it from burning. Next, add the almond butter and mix well. Finally, add the cereals and hazelnuts and mix again until everything comes together.
Line the bottom of a 17 cm (6.7 in) springform ring or pan with plastic wrap and a strip of acetate around the edge. Pour in the chocolate mixture and smooth out the surface with a spoon. Pop it into the freezer.
For the caramelized banana, hydrate the gelatin in a bowl of cold water.
Cut the bananas into small dice and add a splash of lemon juice so they don't oxidize.
Put the sugar in a saucepan and let it melt until it forms an amber-colored caramel. Add the butter, and once it's incorporated, add the banana. Cook for a few minutes over low heat, stirring frequently (the mixture is likely to get more liquid as the fruit releases its juice).
Drain the gelatin well and stir it into the saucepan after turning off the heat. Stir well so it dissolves completely.
Take the crunchy layer out of the freezer and pour the caramelized banana on top, forming another even layer. Put it back in the freezer.
To make the chocolate sponge, preheat the oven to 180°C (355°F).
Melt the chocolate and butter in short bursts in the microwave.
In another bowl, whip the egg whites to stiff peaks with a pinch of salt and the sugar. Once they're firm, fold in the beaten yolks gently.
Next, add the melted chocolate, also folding gently so it doesn't deflate, until you have a smooth batter.
Spread it onto a parchment-lined baking sheet (it's not a lot of batter and it's not very runny) until it's about 1 cm (0.4 in) thick. The important thing is that you'll be able to cut a 17 cm (6.7 in) circle out of it later.
Bake for 8 minutes.
To make the chocolate and caramel mousse, hydrate the gelatin sheets in very cold water.
Melt the chocolate in the microwave in short bursts and set aside.
In a saucepan, melt the sugar and let it cook until you get a light caramel. Add 100 ml (1/2 cup) of cream (warmed in the microwave so there isn't a big temperature difference). Pour it in a little at a time, stirring constantly to keep crystals from forming, and very carefully so it doesn't splash you.
Pour the mixture over the beaten egg yolks while stirring constantly, then return it to the heat until it reaches 82–84°C (180–183°F).
Take it off the heat and add the well-drained gelatin, stirring until it dissolves.
Next, blend with an immersion blender until smooth, and pour this hot cream over the melted chocolate. Mix well and let cool to 40–45°C (104–113°F).
Finally, fold in a third of the soft-peak whipped cream and mix. Add the rest and fold gently again.
For the assembly, take a 20 cm (8 in) springform pan (or ring) and line the edge with a strip of acetate and the bottom with plastic wrap.
Now we're going to layer everything. First, spread a generous layer of chocolate and caramel mousse in the bottom and use a spatula to coat the sides too. Then unmold the banana and hazelnut crunch insert and place it on top of the mousse with the crunchy side facing up. Fill with more mousse, and finally lay down the chocolate sponge disc. Put the cake in the freezer for at least 3–4 hours (I leave it overnight and finish the decoration the next day).
Now we're going to prepare the glazes. For the Ferrero-style coating, melt the chocolate in the microwave and then add the oil. Once it's well combined, add the chopped almonds. Set aside until it cools to 35°C (95°F).
To make the caramel mirror glaze, hydrate the gelatin in a bowl of cold water. Heat the water, drain the gelatin, and dissolve it in this hot water. Set aside.
In a saucepan, make a dry caramel using just the sugar — no water. When it turns a dark golden color, turn off the heat and pull the pan off the burner. Immediately and very carefully, slowly pour in the 375 ml (1.5 cups) of water while whisking. (Be very careful — it splatters and burns badly.)
Then add the glucose, stir well until it dissolves, and next add the condensed milk and white chocolate, whisking until the chocolate dissolves and is fully incorporated.
Finally, add the dissolved gelatin and mix until combined. Let it rest until the caramel cools to 25–30°C (77–86°F).
All that's left is the final assembly. Take the frozen cake out of the freezer and remove the pan, the acetate strip, and the plastic wrap. Set the cake on top of a smaller mold or bowl so it's elevated and you can glaze it well. It's a good idea to put a plate or tray underneath to catch the drippings of glaze so you can reuse them.
First we're going to glaze the sides with the Ferrero coating. The easiest way is to put the coating in a pitcher and pour it over the sides. Since the cake is frozen, the chocolate will set almost instantly. If you have any gaps, you can patch them up with the help of a spoon.
Finally, pour the mirror glaze over the top of the cake. You want to use just the right amount so it only covers the top and doesn't drip down the sides. You can finish decorating it with broken hazelnuts and chocolate.
Carefully transfer it to a flat plate and store in the fridge. Before serving, you'll need to give it 2 or 3 hours to defrost slowly.
PiC tips
The amounts I give for the mirror glaze are enough to cover the entire cake (top and sides). In that case, you wouldn't need the Ferrero-style coating, and it would also look beautiful. Any leftover glaze (that hasn't been contaminated with other components of the cake) can be stored in the fridge for a few days, or longer in the freezer, and reheated whenever you want to glaze another dessert. In fact, that's what I did. This glaze had been frozen — it was leftover from a previous cake. You can also choose to halve the quantities.
I used almond butter, but you can use any other nut butter or even praline like Ettore does in his original recipe.
Tarta de chocolate y caramelo con plátano y crujiente de cereales
En esta ocasión quería hacer una tarta de chocolate que no tuviera un sabor muy intenso a chocolate puro ya que algunos de los catadores no son muy fan de esos niveles de intensidad. El relleno de plátano me convenció como matiz para compensar tanto dulzor y la capa crujiente le da un poco de alegría a los postres cremosos.
La receta es de Ettore Cioccia aunque introduje varios cambios en el relleno y en la decoración porque quería aprovechar ingredientes que tenía en casa y experimentar cosas nuevas. Así que aquí os dejo mi versión de esta deliciosa tarta que espero que os guste. No es una tarta complicada pero sí tiene varias elaboraciones y requiere paciencia y planificación para hacerla con tiempo suficiente teniendo en cuenta los tiempos de enfriado/congelado necesarios.
Ingredientes
Crujiente de cereales
60 g mantequilla de almendra
35 g chocolate
20 g avellanas crudas troceadas
15 g de arroz inflado
15 g de quinoa inflada
Banana caramelizada
30 g azúcar
15 g mantequilla
3 plátanos (210 g)
Zumo de limón
2 g de gelatina (1 hoja)
Bizcocho de chocolate sin harina
60 g chocolate negro 65%
20 g mantequilla sin sal
2 claras de huevo a temperatura ambiente
2 yemas de huevo
20 g azúcar
Mousse de chocolate y caramelo
200 g chocolate 65%
6 g gelatina (3 hojas)
60 g azúcar
100 ml nata para montar
4 yemas de huevo batidas
400 g nata montada en picos suaves
Cobertura tipo Ferrero
215 g chocolate 65%
40 g aceite de girasol
45 g almendra granillo
Glaseado espejo de caramelo
300 g azúcar
300 g glucosa calentada ligeramente en el microondas
375 ml agua
200 g leche condensada
300 g chocolate blanco de cobertura picado finamente
18 g gelatina hidratada previamente y disuelta después en 108 ml de agua caliente
Elaboración
Empezamos preparando el crujiente de cereales. Para ello, derretimos el chocolate en el microondas en intervalos de pocos segundos para evitar que se nos queme. A continuación, añadimos la mantequilla de almendra y mezclamos bien. Por último, incorporamos los cereales y las avellanas y volvemos a mezclar hasta que se integre.
En un aro o molde desmoldable de 17 cm colocamos film transparente en la parte inferior y una tira de acetato en el borde. Vertemos nuestra mezcla de chocolate y alisamos la superficie con una cuchara. Llevamos al congelador.
Para el plátano caramelizado, hidratamos la gelatina en un bol con agua fría.
Cortamos los plátanos en dados pequeños y les añadimos un chorrito de zumo de limón para que no se oxide.
Ponemos el azúcar en un cazo y dejamos que se derrita hasta formar un caramelo de color ámbar. Incorporamos la mantequilla y cuando esté integrada, añadimos el plátano. Cocinamos unos pocos minutos a fuego lento removiendo frecuentemente (es probable que la mezcla se vuelva más líquida con el jugo que suelte la fruta).
Escurrimos bien la gelatina y la incorporamos al cazo ya con el fuego apagado. Removemos bien para que se disuelva por completo.
Sacamos el crujiente del congelador y echamos el plátano caramelizado encima formando otra capa uniforme. Guardamos de nuevo en el congelador.
Para preparar el bizcocho de chocolate, precalentamos el horno a 180ºC.
Derretimos el chocolate y la mantequilla a intervalos cortos en el microondas.
En otro bol montamos las claras a punto de nieve con una pizca de sal y el azúcar y cuando estén bien firmes añadimos las yemas batidas con movimientos envolventes.
A continuación añadimos el chocolate derretido también con movimientos suaves y envolventes para que no se baje hasta obtener una masa homogénea.
Extendemos sobre una bandeja con papel de horno (no es mucha cantidad ni es una masa muy líquida) hasta obtener un grosor de 1 cm aproximadamente. Lo importante es que luego podamos obtener un círculo de bizcocho de 17 cm.
Horneamos 8 minutos.
Para preparar la mousse de chocolate y caramelo, hidratamos las hojas de gelatina en agua muy fría.
Derretimos el chocolate en el microondas en intervalos cortos y reservamos.
En un cazo ponemos el azúcar y dejamos cocinar hasta obtener un caramelo claro. Le añadimos 100 ml de nata (templada en el microondas para que no haya mucha diferencia de temperatura). Hay que echarla poco a poco y removiendo constantemente para evitar que se formen cristales y con mucho cuidado para que no nos salpique.
Vertemos la preparación sobre las yemas de huevo batidas sin dejar de remover y ponemos de nuevo al fuego hasta que llegue a los 82-84º C.
Retiramos del fuego y añadimos la gelatina bien escurrida, removemos hasta que se disuelva.
A continuación, batimos con la batidora eléctrica hasta obtener una textura homogénea y añadimos esta crema caliente sobre el chocolate derretido. Mezclamos bien y dejamos enfriar hasta los 40-45º C.
Por último, incorporamos un tercio de la nata montada en picos suaves, y mezclamos. Añadimos el resto y mezclamos de nuevo delicadamente.
Para el montaje, cogemos un molde desmoldable (o aro) de 20 cm y colocamos una tira de acetato en el borde y film en la base.
Vamos a insertar todas las preparaciones anteriores. Primero ponemos una generosa capa de mousse de chocolate y caramelo en el fondo y con una espátula lo extendemos por las paredes también. Luego desmoldamos el plátano y el crujiente de avellana y lo colocamos sobre la mousse con el crujiente hacia arriba. Rellenamos con más mousse, y por último colocamos el disco de bizcocho al chocolate. Guardamos la tarta en el congelador mínimo unas 3-4 horas (yo la dejo toda la noche y al día siguiente termino la decoración).
Ahora vamos a preparar los glaseados. Para la cobertura tipo Ferrero derretimos el chocolate en el microondas y añadimos luego el aceite. Cuando esté bien integrado añadimos la almendra en granillo. Reservamos hasta que esté a 35º C.
Para hacer el glaseado espejo de caramelo hidratamos la gelatina en un bol con agua fría. Calentamos el agua, escurrimos la gelatina y la deshacemos en esta agua caliente. Reservamos.
En un cazo hacemos un caramelo solo con el azúcar en seco, sin añadirle agua, cuando tome un color rubio oscuro, apagamos el fuego y apartamos el cazo. Inmediatamente con cuidado y poco a poco vamos añadiendo los 375 ml de agua, mientras vamos removiendo con unas varillas. (Mucho cuidado porque esto salta y quema mucho).
Luego agregamos la glucosa , removemos bien hasta que se disuelva y, a continuación, incorporamos la leche condensada y el chocolate blanco, removiendo con las varillas hasta que el chocolate se disuelva y se integre completamente.
Por último añadimos la gelatina disuelta y mezclamos hasta incorporar. Dejamos reposar hasta que la temperatura del caramelo descienda hasta los 25-30ºC.
Ya solo nos queda el montaje final. Sacamos la tarta congelada del congelador y retiramos el molde y la lámina de acetato y el film. Colocamos la tarta sobre otro molde más pequeño o cuenco para que quede con altura y la podamos glasear bien. Es recomendable que debajo pongas un plato o bandeja para recuperar los restos de glaseado que caiga y lo puedas volver a usar.
Primero vamos a glasear las paredes con la cobertura Ferrero. Para ello lo mejor es poner la cobertura en una jarra e ir echándolo sobre las paredes. Como la tarta está congelada, el chocolate se solidificará casi al instante. Si te quedan huecos sin cobertura puedes ir «parcheando» con ayuda de una cuchara.
Por último, añadimos el glaseado espejo en la parte superior de la tarta. Hay que echar la cantidad exacta para que solo cubra la parte superior y no gotee por las paredes. Puedes terminar de decorarla con avellanas partidas y chocolate.
Con cuidado la pasamos a un plato llano y la guardamos en la nevera. Antes de disfrutarla tendrán que pasar 2 o 3 horas para que se descongele tranquilamente.
Consejos PiC
Las cantidades que pongo para el glaseado espejo dan para cubrir toda la tarta con glaseado espejo (parte superior y paredes). En este caso, no te haría falta la cobertura tipo Ferrero y quedaría preciosa también. El glaseado que te sobre (y que no esté sucio de otras elaboraciones de la tarta) lo puedes guardar en la nevera unos días o en el congelador más tiempo y volver a calentarlo cuando quieras glasear otro postre. De hecho, es lo que yo hice. Este glaseado había estado congelado y era lo que me sobró de otra tarta previa. También puedes optar por reducir las cantidades a la mitad.
Yo utilicé mantequilla de almendras pero puedes usar de cualquier otro fruto seco o incluso praliné como hace Ettore en su receta original.
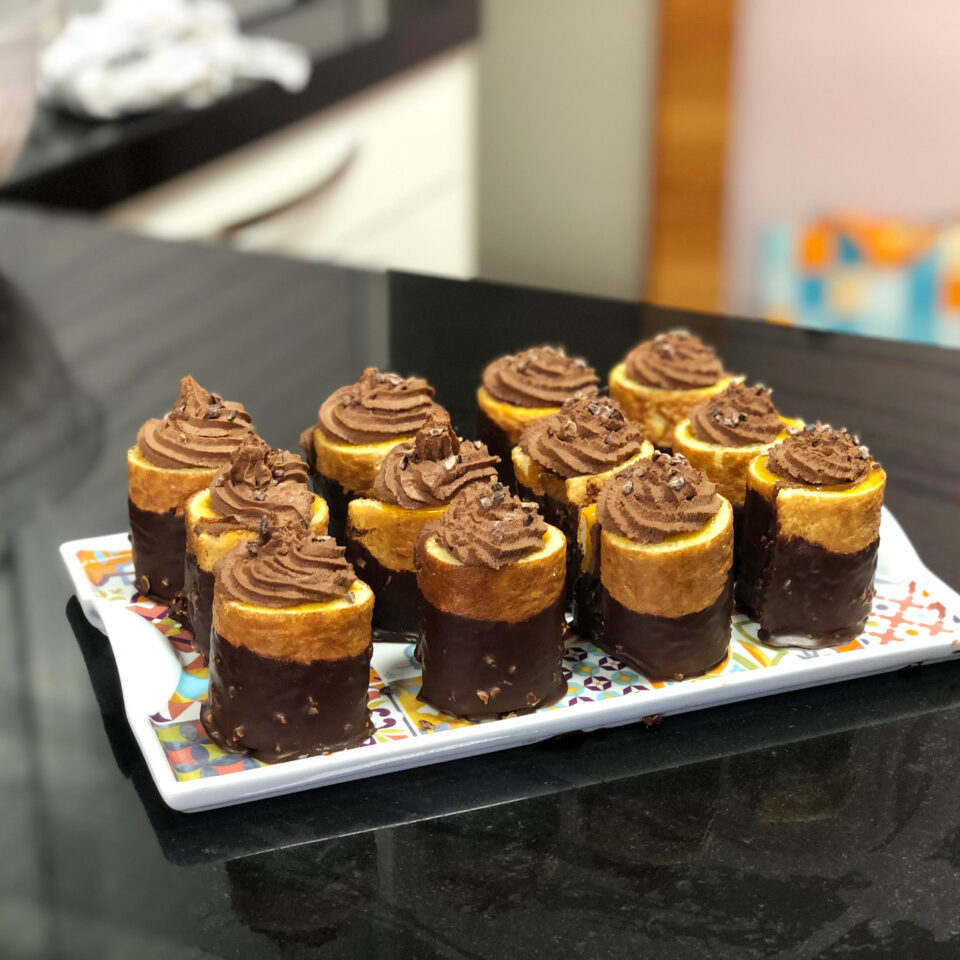
Chocolate and Mango-Passion Roll Cakes
This recipe comes from Ettore Cioccia, who I call "my master" because I've followed several recipes from his blog Bavette and they all turn out amazing. On top of that, I had the luck of attending a pastry course he gave in Madrid and I couldn't have enjoyed it more. So if you feel like making a delicious dessert and spending a good while in the kitchen putting together different components, you can pick any of Ettore's recipes and you'll be guaranteed success. Today I'm sharing my version of his chocolate and mango-passion fruit roll cakes. The only thing I did differently from his recipe was the pionono sponge, since I used the one from another pastry great: Osvaldo Gross.
Ingredients
For the dark chocolate ganache
100 g (3.5 oz) heavy cream (30-35% fat)
100 g (3.5 oz) chocolate (66% cocoa)
210 g (7.4 oz / about 1 cup) cold heavy cream
For the pionono-style sponge
5 eggs
50 g (1.75 oz / about 1/4 cup) sugar
50 g (1.75 oz / about 1/3 cup) flour
A pinch of salt
One tablespoon of honey (about 25 g / 0.9 oz)
For the exotic jam
265 g (9.3 oz) mango purée
85 g (3 oz) passion fruit purée
70 g (2.5 oz / about 1/3 cup) granulated sugar
13 g (0.5 oz) pectin
For the Ferrero Rocher glaze
250 g (8.8 oz) chocolate (60% cocoa)
50 g (1.75 oz / about 1/4 cup) sunflower oil
70 g (2.5 oz / about 1/2 cup) granulated almonds
Method
Dark chocolate ganache
In a small saucepan, bring 100 g (3.5 oz) of cream to a boil. Pour the boiling cream over the chocolate (which we've previously melted in the microwave) in two or three additions, mixing well after each one.
Then add the cold cream and mix until everything is well combined. Cover with cling film pressed against the surface and chill in the fridge for at least 4 hours.
For the pionono-style sponge
Preheat the oven to 190ºC – 200ºC (375ºF – 390ºF).
Put the eggs into the bowl of your stand mixer along with the sugar, salt, and honey, and whisk until you reach what's called "ribbon stage" (this is when you can lift a spoonful of batter and drizzle it over the rest, drawing lines on the surface that don't disappear right away). Since it takes a good while, it's best to use a stand mixer.
Sift the flour and fold it in with the mixer at minimum speed. Bump the speed up to maximum for a few seconds.
Using a spatula, fold everything together with gentle, sweeping motions.
Prepare the oven tray with parchment paper greased with butter or margarine.
Pour the batter onto the prepared tray and spread it out so the surface is level (we want a thin sponge, about 4-5 mm / 1/6 inch thick).
Bake for 8 to 10 minutes until the surface is golden and the bottom is too — you can check by lifting it with the help of the paper (carefully, so you don't burn yourself).
For the exotic jam
Mix the sugar with the pectin.
Gently heat both fruit purées together to about 40ºC (105ºF) and add the sugar-pectin mixture. Bring to a boil for a few seconds.
Remove from the heat and transfer the purée to a clean bowl.
Let it cool to 36ºC (97ºF), stirring frequently.
Finally, spread a thin, even layer of the jam over the sponge sheet. Chill in the fridge until the jam firms up a little.
For the Ferrero Rocher glaze
Melt the chocolate to about 50ºC (120ºF) in the microwave.
Stir in the sunflower oil and mix well.
Add the granulated almonds and mix again so they're evenly distributed.
Let the coating cool down to 35ºC (95ºF).
Assembling the dessert
With electric beaters, whip a little more than half of the chocolate ganache and keep the rest in the fridge. At medium speed, whip just until you get a creamy texture.
Spread a thin, even layer of ganache over the jam we placed on the sponge. Let it firm up in the fridge.
Cut the sponge — with its layers of jam and ganache — into strips. I made mine 5 cm (2 inches) wide.
Roll up each strip with the filling on the inside, being careful not to tear the sponge.
Freeze the rolls for about 10-15 minutes (or you can leave them in the freezer until you need them if you've prepared the recipe ahead).
Take the rolls out of the freezer and dip each one into the chocolate coating we prepared, going about halfway up.
Whip the rest of the ganache with electric beaters at medium speed until you get a medium-firm consistency.
Using a piping bag fitted with a star tip, pipe little chocolate roses on top of each roll. You can decorate with cocoa nibs.
Let them temper a bit and enjoy.
PiC tips
Even though I followed the exact proportions, my jam didn't set as much as I'd have liked (no idea why), so if you see it's too runny, you can add a bit more pectin (that's the ingredient that gels it). I'd also suggest not using all of the jam you make — pay attention to the thickness and aim for a thin layer over the sponge base.
In his recipe, Ettore Cioccia makes 4 large roll cakes; I preferred bite-sized portions — or rather, two- or three-bite ones ;-). You can adjust this however you like when you cut the sponge.
Roll Cakes de chocolate y mango-pasión
Esta receta es de Ettore Cioccia al que yo llamo «mi maestro» porque he seguido varias recetas de su blog Bavette y todas salen genial. Además tuve la suerte de asistir a un curso de pastelería que impartió en Madrid y no pude disfrutarlo más. Así que si tienes ganas de crear un postre delicioso y de pasarte un buen rato en la cocina preparando distintas elaboraciones, puedes elegir cualquiera de las recetas de Ettore y tendrás éxito aseguro. Hoy yo os muestro mi versión de sus rollitos de chocolate y mango-pasión. En este caso lo único que hice diferente de su receta fue la masa de piononos ya que utilicé la de otro grande de la pastelería: Osvaldo Gross.
Ingredientes
Para la ganache de chocolate negro
100 g nata para montar (con 30-35% de materia grasa)
100 g chocolate (66% de cacao)
210 g nata para montar fría
Para el bizcocho tipo pionono
5 huevos
50 g de azúcar
50 g de harina
Una pizca de sal
Una cucharada de miel (aprox. 25 g)
Para la mermelada exótica
265 g puré de mango
85 g puré de fruta de la pasión (maracuyá)
70 g azúcar granulado
13 g pectina
Para el glaseado Ferrero Rocher
250 g chocolate (60% de cacao)
50 g aceite de girasol
70 g almendra granulada
Elaboración
Ganache de chocolate negro
En un pequeño cazo, llevamos a ebullición 100 g de nata. Vertemos la nata hirviendo, sobre el chocolate derretido previamente en el microondas, en dos o tres veces, mezclando bien en cada adición.
Después, añadimos la nata fría y mezclamos también hasta que esté bien homogéneo. Cubrimos con papel film en contacto y reservamos en la nevera, mínimo 4 horas.
Para el bizcocho tipo pionono
Precalentamos el horno a 190 ºC – 200 ºC.
Ponemos los huevos junto con el azúcar, la sal y la miel en el vaso de nuestro robot de cocina y batimos con las varillas hasta obtener el llamado punto letra (esto es cuando al coger una cucharada de masa y verterla sobre el resto podemos dibujar unas líneas en la superficie sin que desaparezcan enseguida). Como es bastante tiempo, es preferible utilizar un robot de cocina.
Tamizamos la harina y con el robot de cocina a velocidad mínima la incorporamos. Subimos unos segundos la velocidad al máximo.
Con ayuda de una lengua integramos todo con movimientos envolventes.
Preparamos la bandeja del horno con un papel que engrasamos con mantequilla o margarina.
Volcamos la preparación sobre la bandeja preparada y extendemos para que quede nivelada la superficie (el bizcocho que queremos es delgado de unos 4-5 mm de grosor).
Horneamos entre 8 y 10 minutos hasta que esté dorada la superficie y también la base que podemos comprobar levantando con ayuda del papel (con cuidado de no quemarnos).
Para la mermelada exótica
Mezclamos el azúcar con la pectina.
Calentamos ligeramente los dos purés de fruta juntos a 40ºC aproximadamente y les añadimos la mezcla de azúcar y pectina. Llevamos a ebullición durante unos segundos.
Retiramos del fuego y pasamos el puré a un bol limpio.
Dejamos enfriar hasta los 36ºC removiendo frecuentemente.
Por último, extendemos una fina capa de la mermelada encima de la plancha de bizcocho de manera uniforme. Reservamos en la nevera hasta que la mermelada solidifique un poco.
Para el glaseado Ferrero Rocher
Derretimos el chocolate a unos 50º C en el microondas.
Incorporamos el aceite de girasol y mezclamos muy bien.
Añadimos la almendra granulada y mezclamos de nuevo para que se repartan bien las almendras.
Dejamos enfriar la cobertura hasta los 35ºC.
Montaje del postre
Batimos con varillas eléctricas un poco más de la mitad de la ganache de chocolate y reservamos el resto en la nevera. A velocidad media, batimos un poco hasta obtener una textura cremosa.
Extendemos una capa fina y uniforme de ganache encima de la mermelada que habíamos puesto en el bizcocho. Dejamos que endurezca en la nevera.
Cortamos en tiras el bizcocho con las capas de mermelada y ganache. Yo las hice en 5 cm de ancho.
Enrollamos cada tira con el relleno hacia dentro y con cuidado de que no se nos rompa el bizcocho.
Congelamos los rollitos unos 10-15 minutos (o podemos dejarlos en el congelador hasta que los vayamos a necesitar si hemos preparado la receta con antelación).
Sacamos los rollitos del congelador y los vamos sumergiendo en la cobertura de chocolate que habíamos preparado hasta más o menos la mitad de su altura.
Batimos el resto de ganache con varillas eléctricas a velocidad media hasta obtener una consistencia media.
Con una manga pastelera y una boquilla de estrella hacemos unas rosas de chocolate sobre cada rollito. Podemos decorar con grué de cacao.
Dejamos que se atempere un poco y a disfrutar.
Consejos PiC
A pesar de seguir las proporciones exactas, la mermelada no me solidificó demasiado (desconozco el motivo) así que si ves que está muy líquida puedes añadir un poco más de pectina (es el elemento que hace que gelifique) y es recomendable que no utilices toda la cantidad que te sale. Fíjate en el grosor y que quede una capa fina sobre la base de bizcocho.
Ettore Cioccia en su receta hace 4 roll cakes grandes, yo preferí hacer unidades más pequeñas de tipo bocado; o mejor dicho, de dos o tres bocados ;-). Tú puedes ajustarlo a lo que prefieras cuando hagas el corte del bizcocho.