Salmorejo

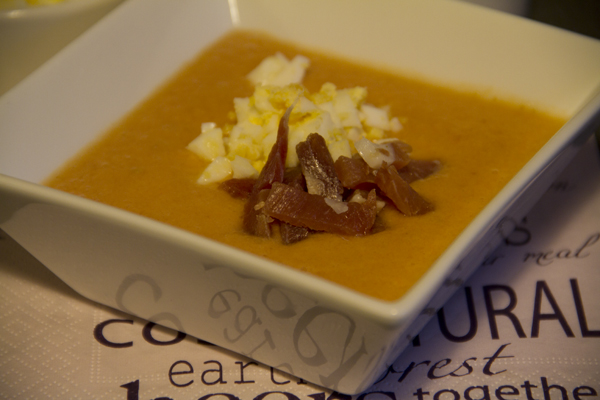
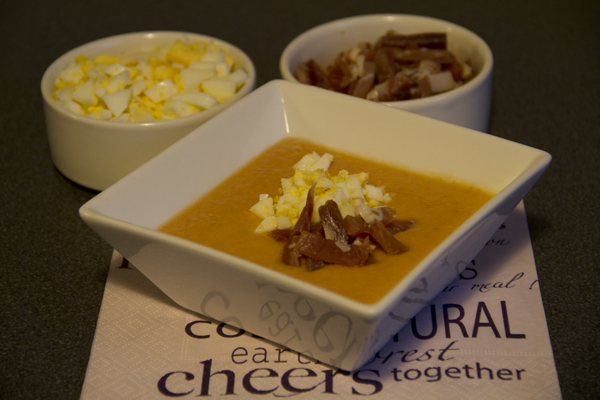
Salmorejo is one of my favorite dishes, and I can vouch for the fact that I’m not the only person in my family who, the moment we get back from a long trip abroad, the first thing we ask for at home is a good salmorejo and a proper Spanish potato omelette. This dish is typical of Córdoba and it shares similarities with gazpacho since, at the end of the day, it’s a kind of cold soup or cream with tomato as its base. Needless to say, the better the tomatoes you use, the better the salmorejo will turn out.
Pics and Cakes

What do we need?

(serves 6)

  •   1 kg (2.2 lb) ripe red tomatoes
    
  •   1 piece of bread
    
  •   150 ml (2/3 cup) olive oil (or to taste)
    
  •   1-2 cloves of garlic
    
  •   Salt
    
  •   Vinegar
    
  •   4 eggs
    
  •   200 g (7 oz) Serrano ham
    

How do we make it?

  • Wash the tomatoes, cut them into pieces and put them in a bowl.

  • Add the bread (it can be stale bread that we’ve soaked in water for a few minutes beforehand to soften it), salt, garlic, vinegar and a little olive oil.

  • Blend with the mixer until you get a smooth cream. Keep adding more olive oil until you get a soft, creamy texture. The amount of olive oil depends on personal taste. The more oil you add, the thicker it will get and the pinker it will look.

  • Taste and adjust the salt and vinegar to your liking. Set aside in the fridge.

  • Boil the eggs, peel them and cut them into small cubes.

  • Chop the Serrano ham into small cubes too.

  • Serve the salmorejo very cold with ham and egg on top.

Tips:

  • Some people prefer to peel the tomatoes for a finer result. To make this easier, you can blanch the tomatoes first to remove the skin comfortably.
  • You can make the salmorejo a bit lighter by skipping the bread and reducing the amount of oil.
  • As always, garlic is up to personal taste, but don’t go overboard or you’ll kill the flavor.
Pics and Cakes

*[English version] SALMOREJO (Spanish cold tomatoe soup)

  • **Ingredients (serves 6):- 1 kg ripe red tomatoes
  • Bread

  • 150 ml olive oil

  • Vinegar

  • Salt

  • 1-2 cloves of garlic- 4 eggs- 200 g cured ham

  • Wash and cut tomatoes into pieces. Place into a large bowl.

  • Add bread (you can use stale bread so put it before with some water in order to soften it), salt, garlic, vinegar and a bit of olive oil.

  • Blend all the ingredients with a mixer or blender until you get a smooth cream. Add more olive oil until creamy and soft. (The amount of olive oil is up to you).

  • Try and add more salt and vinegar if necessary. Place into fridge.

  • Boil the eggs, peel them and cut into small pieces.

  • Cut ham into small pieces.

  • Serve cold salmorejo with some egg and ham in the top.

    Tips:- You can peel the tomatoes. For making it easier, scald tomatoes in boiling water.

  • If you want to prepare a lighter version, avoid adding bread and reduce the amount of olive oil.

  • Use garlic according to your preferences but don’t add too much or you won’t taste the other flavours!


Comments

zordor (2012-08-21 05:56:31):

Haha I can vouch for it, I can vouch that the first thing we need to see on the table is salmorejo and potato omelette :) Ufff you’ve made me so hungry! Well, not even hungry! Salmorejo is something you can eat even when you’re not hungry!

Marisa (2012-08-21 09:26:34):

Yummmm! I’m making it tomorrow
20 de agosto de 2012 · 3 min · Palstelera

Salmorejo

El salmorejo es uno de mis platos favoritos y doy fe de que no soy la única persona en mi familia que nada más volver de un viaje largo por el extranjero, lo primero que pedimos para comer en casa es un buen salmorejo y una tortilla de patata como dios manda. Este plato es típico de Córdoba y tiene similitudes con el gazpacho ya que a fin de cuentas es una especie de sopa o crema fría cuya base es el tomate. Ni qué decir tiene, por tanto, que cuanto mejores sean los tomates que utilicemos mejor nos saldrá el salmorejo.

 Pics and Cakes

¿Qué necesitamos?

(6 personas)

-       1 kg de tomates rojos maduros -       1 trozo de pan -       150 ml de aceite de oliva (o al gusto) -       1-2 dientes de ajo -       Sal -       Vinagre -       4 huevos -       200 g de jamón serrano


¿Cómo lo hacemos?

  • Lavamos los tomates, los cortamos en trozos y los ponemos en un cuenco.

  • Añadimos el pan (puede ser pan duro que habremos puesto a remojar unos minutos antes para que se reblandezca), sal, ajo, vinagre y un poquito de aceite.

  • Batimos con la batidora hasta que se quede una crema fina. Vamos añadiendo más aceite de oliva hasta que se quede una textura suave y cremosa. La cantidad de aceite de oliva depende del gusto de cada uno. Cuanto más aceite añadamos más espeso nos quedará y tendrá un tono más rosita.

  • Probamos y rectificamos la sal y el vinagre al gusto. Reservamos en la nevera.

  • Cocemos los huevos, los pelamos y los cortamos en cuadraditos pequeños.

  • Troceamos el jamón serrano también en pequeños taquitos.

  • Servimos el salmorejo muy frío con jamón y huevo por encima.


Consejos:

  • Hay gente que prefiere pelar los tomates para que el resultado final sea más fino. Para facilitar la tarea podéis escaldar los tomates antes y así quitar la piel cómodamente.
  • Se puede hacer el salmorejo un poco más ligero si no le añadimos pan y reducimos la cantidad de aceite.
  • Como siempre el ajo dependerá del gusto de cada uno pero no conviene echar en exceso para no matar el sabor.


Pics and Cakes

*[English version] SALMOREJO (Spanish cold tomatoe soup) * **Ingredients (serves 6):- 1 kg ripe red tomatoes

  • Bread

  • 150 ml olive oil

  • Vinegar

  • Salt

  • 1-2 cloves of garlic- 4 eggs- 200 g cured ham 

  •  Wash and cut tomatoes into pieces. Place into a large bowl.

  • Add bread (you can use stale bread so put it before with some water in order to soften it), salt, garlic, vinegar and a bit of olive oil.

  • Blend all the ingredients with a mixer or blender until you get a smooth cream. Add more olive oil until creamy and soft. (The amount of olive oil is up to you).

  • Try and add more salt and vinegar if necessary. Place into fridge.

  • Boil the eggs, peel them and cut into small pieces.

  • Cut ham into small pieces.

  • Serve cold salmorejo with some egg and ham in the top.

   Tips:- You can peel the tomatoes. For making it easier, scald tomatoes in boiling water.

  • If you want to prepare a lighter version, avoid adding bread and reduce the amount of olive oil.
  • Use garlic according to your preferences but don’t add too much or you won’t taste the other flavours!

20 de agosto de 2012 · 3 min · Palstelera

Chicken and Pineapple Salad

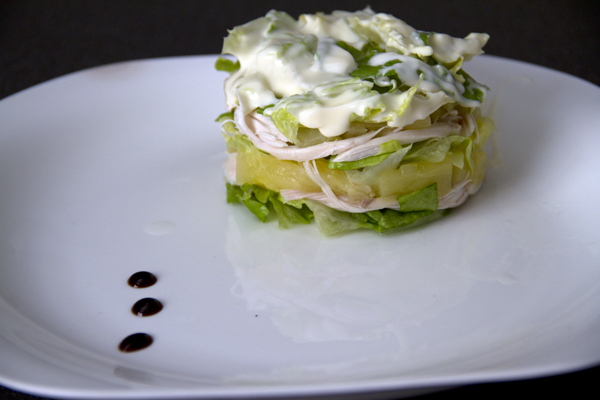
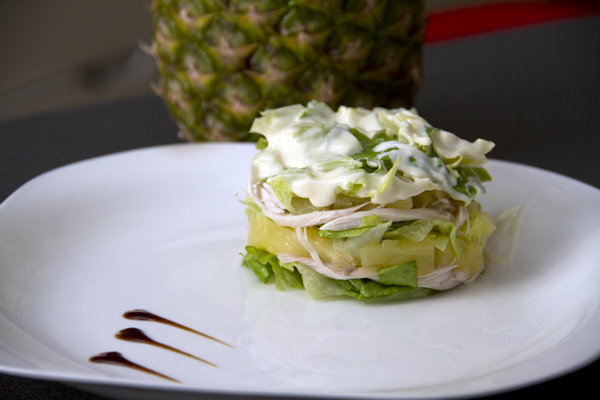
A summer wouldn’t really be summer without this dish. In my family this salad has been around for as long as I can remember, and it feels like an old friend — you might go a while without seeing it, but just thinking about it brings a smile to your face and makes you want to enjoy its company. The first time I offered it to Cesmm, he frowned at the whole pineapple thing, but once he got past those first doubts he became yet another addict of this delicious salad.

Pics and Cakes

What do we need?

(serves 4)

  •   1 whole chicken
    
  •   1 can of pineapple, or fresh pineapple (even better)
    
  •   1 head of lettuce
    
  •   Mayonnaise
    

How do we make it?

  • First, boil the chicken in a pot with water and salt. Let it cook for a good while (2 hours) until you can see it’s well done and the meat practically falls off the thigh bone on its own.

  • Once the chicken is cooked and has cooled down a bit, shred it with your hands into medium-sized pieces (just right for a bite).

  • Wash the lettuce and slice it into very thin strips (julienne).

  • Separately, cut the pineapple slices (or fresh pineapple) into small pieces.

  • Build your salad by laying down a layer of lettuce, then pineapple, then chicken. Repeat the process, pressing down well with your hands so it packs together tightly.

  • Finally, add a layer of mayonnaise on top and let it rest in the fridge.

Tips:

  • It doesn’t matter if there are leftovers — once it’s “rested” the salad is just as good, or even better.
  • Don’t throw away the broth from boiling the chicken; you can use it for rice, soup, etc.
  • You can sprinkle some chopped walnuts or hazelnuts on top of the mayonnaise. They add the perfect finishing touch.

Pics and Cakes

*[English version] CHICKEN & PINEAPPLE SALAD

  • **Ingredients:- 1 whole chicken
  • 1 lettuce

  • Fresh pineapple or canned pineapple

  • Mayonnaise

  • Place chicken in a large pot and add water to cover. Add some salt, cover pot and bring to boil. Cook for about 2 hours or until chicken meat is falling off the bone.

  • When chicken is boiled and cooled shred chicken using your fingers.

  • Wash lettuce and chop finely.

  • Dice pineapple.

  • Place the ingredients by layers: lettuce, pineapple and chicken. Repeat the order and press with your hands.

  • Add some mayonnaise on the top.

    Tips:- If there is some salad left, no problem, it will be even better the day after!

  • Don’t discard the water from boiled chicken, you can use it to cook rice, soup, etc.

  • You can add some chopped nuts or hazelnuts on the top. Simply delicious!


Comments

Marisa (2012-08-07 08:24:55):

What lovely photos! I know this dish — although I don’t plate it as nicely, I chop the lettuce really, really finely and press the layers down as I go.

silvia (2012-08-07 21:39:01):

I’m getting hungry, and it looks so refreshing!! I tried it at Fuentes and I can confirm it was really tasty… maybe I’ll make it tomorrow for lunch…

zordor (2012-08-10 01:55:25):

Without a doubt this recipe is one of the crown jewels of our family wisdom, hehe. For me the best part is that one chicken yields a tooon of salad, it’s super refreshing, and you can make it the day before, for the next day, or even the day after that — just pull it out of the fridge and eat! A really refreshing dish, one of the best things going for summer.

Ociore (2012-08-30 17:23:25):

Oh, if you only knew that your brother revealed this secret family recipe of yours to me years ago, when I was just starting out with my blog (in London)… XD The truth is, looking at the photos, the salad looks amazing! By the way, congrats on your blog!! :) Greetings from Heidiland. ;)

Antz (2012-08-31 09:54:24):

Like Ces, I was wary of the whole pineapple thing… but after trying it last night, I have to say I’ve been converted to the pineapple world!! A 10/10 combo!!! :D

La Enana (2012-09-14 22:54:08):

Mmmmmmh I love this salad!!!!!!! :) I like to top mine with some lightly crushed hazelnuts!!

20 low-calorie salad recipes - Me Siento Guapa (2014-01-07 16:01:33):

[…] Chicken and pineapple salad […]

6 de agosto de 2012 · 4 min · Palstelera

Ensalada de pollo con piña

Un verano no podría ser verano sin este plato. En mi familia esta ensalada ha existido desde que tengo memoria y es como si de un viejo amigo se tratase, puede que pases un tiempo sin saber de él pero con solo recordarlo se te dibuja una sonrisa en la cara y te dan ganas de disfrutar de su compañía. La primera vez que se lo ofrecí a Cesmm, frunció el ceño por aquello de la piña pero superados los primeros recelos se confirmó como un adicto más de esta deliciosa ensalada.

Pics and Cakes


¿Qué necesitamos?

(4 personas)

-       1 pollo entero -       1 lata de piña o piña natural (mejor aún) -       1 lechuga -       Mayonesa

¿Cómo lo hacemos?

  • Lo primero que hacemos es cocer el pollo en una cazuela con agua y sal. Lo dejamos bastante tiempo (2 horas) hasta que veamos que está bien cocido y la carne se desprenda casi sola del hueso del muslo.

  • Cuando el pollo esté cocido y se haya enfriado un poco, lo desmenuzamos con las manos hasta hacer trocitos de tamaño mediano (lo justo para un bocado).

  • Lavamos la lechuga y la cortamos en juliana muy finita.

  • Por otro lado cortamos las rodajas de piña (o la piña natural) en trocitos pequeños.

  • Montamos nuestra ensalada poniendo una capa de lechuga, luego piña y luego pollo. Repetimos el proceso, aplastando bien con las manos para que quede bien prieto.

  • Por último, añadimos una capa de mayonesa y lo dejamos reposar en la nevera.


Consejos:

  • No importa si sobra ensalada, ya que ‘reposada’ está igual de rica o incluso mejor.
  • No tires el caldo de cocer el pollo, puede servirte para algún arroz, sopa, etc.
  • Encima de la mayonesa puedes añadir nueces o avellanas picadas. Le aporta un toque perfecto.


Pics and Cakes


*[English version] CHICKEN & PINEAPPLE SALAD * **Ingredients:- 1 whole chicken

  • 1 lettuce

  • Fresh pineapple or canned pineapple

  • Mayonnaise  

  • Place chicken in a large pot and add water to cover. Add some salt, cover pot and bring to boil. Cook for about 2 hours or until chicken meat is falling off the bone.

  • When chicken is boiled and cooled shred chicken using your fingers.

  • Wash lettuce and chop finely.

  • Dice pineapple.

  • Place the ingredients by layers: lettuce, pineapple and chicken. Repeat the order and press with your hands.

  • Add some mayonnaise on the top.


  Tips:- If there is some salad left, no problem, it will be even better the day after!

  • Don’t discard the water from boiled chicken, you can use it to cook rice, soup, etc.
  • You can add some chopped nuts or hazelnuts on the top. Simply delicious!

6 de agosto de 2012 · 4 min · Palstelera

Risotto my way

Hace ya algún tiempo que hice mi primer risotto. Creo que lo aprendí de Arguiñano, cuando mi madre y yo lo veíamos a la hora de comer. Me suena que otra vez seguí la receta de la Wii, de no sé qué videojuego. El caso es que he ido modificando, adaptando e improvisando sobre la base fundamental para hacer un buen risotto: no dejar de remover.

Pics and Cakes

**¿Qué necesitamos? **

(para dos personas)

-       1 taza y media de arroz de grano corto

  •       Agua templada
  •       2 dientes de ajo
  •       Un cuarto de cebolla grande
  •       Setas/champiñones
  •       100 gramos de queso azul -       Sal


¿Cómo lo hacemos?

  • Ponemos un chorrito de aceite en una cazuela.

  • Cortamos el queso azul en cuadraditos. Picamos los ajos y la cebolla en trozos pequeños.

  • Agregamos el ajo y la cebolla y bajamos un poco el fuego para que no se nos quemen. Cuando estén un poco hechos, agregamos las setas cortadas en trozos de tamaño medio.

  • Dejamos que se haga todo junto durante unos minutos y agregamos un poco de sal.

  • Una vez hecho el sofrito, añadimos el arroz y mezclamos todo bien para que el arroz coja sabor.

  • Ahora lo normal sería agregar el doble de agua que arroz y dejarlo cocer. Nosotros vamos a agregar un poco de agua, media taza si hemos echado taza y media de arroz.

  • Mientras removemos agregamos sal y un poco de queso azul. Cuando esté todo bien mezclado y haya reducido el agua bajamos un  poco el fuego.

  • Sin dejar de remover vamos añadiendo más agua (toda la que nos pida nuestro risotto) y queso azul.

  • Cuando comprobemos que el arroz está cocido, apagamos el fuego, tapamos y dejamos reposar el tiempo que tardamos en cortar unas finas tiras de queso azul para decorar el plato.


Consejos:

  • Nosotros hemos utilizado un queso azul, pero también se puede utilizar cualquier otro. Si no te gusta el queso fuerte, con uno curado espesará más y no tendrá apenas sabor a queso.
  • Para decorar el plato también se puede añadir avellana, nueces o almendras.
  • Si no tenéis setas se puede cambiar por champiñones.


Pics and Cakes


[English version] RISOTTO MY WAY **Ingredients:- 1 ½ medium-grain rice

  • 3 cups warm water

  • 2 cloves of onion

  • ¼ large onion

  • Mushrooms

  • 100 g blue cheese

  • Salt 

  • Add a splash of olive oil in a sauce pan.

  • Dice blue cheese and chop garlic and onion.

  • Add garlic and onion to the sauce pan and fry slowly to avoid burning. When they have softened, add the mushrooms (if they are too big, you can cut them into medium-size pieces).

  • Cook slowly for some minutes and add a pinch of salt.

  • When ready, add the rice and keep stirring while everything is cooking and flavors are melting.

  • Usually we add 2 parts of water to 1 part of rice. For risotto recipe we will be adding all the water needed progressively.

  • While stirring, add some salt and part of blue cheese. Stir well and turn down the heat to a simmer.

  • Keep stirring and adding the water and blue cheese, allowing each ladle to be absorbed before adding the next.

  • When rice is cooked and soft, place a lid on the pan and allow to sit. Slice some blue cheese for decoration.

   Tips:- You can use any kind of cheese. Blue cheese has quite a strong flavour but you can substitute it by any other softer.

  • For decoration, you can add some walnuts, almonds or nuts.
  • You can use mushrooms (champignons) or any other wild mushrooms.

22 de julio de 2012 · 3 min · Cesmm

Risotto My Way

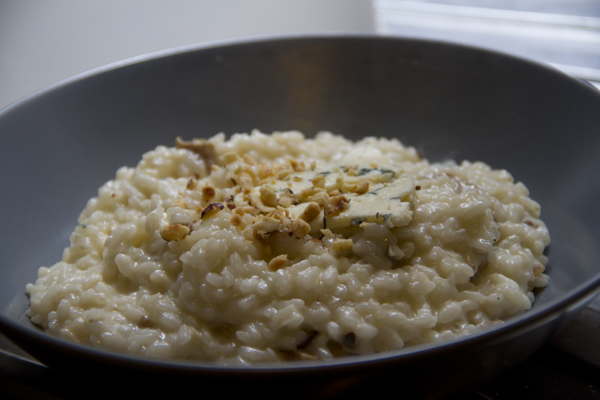
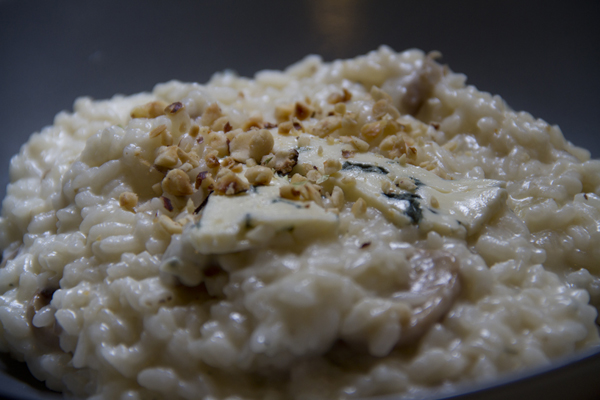
It’s been a while since I made my first risotto. I think I learned it from Arguiñano, back when my mom and I used to watch him at lunchtime. I have a feeling I also followed the recipe from some Wii video game once. Anyway, I’ve been tweaking, adapting and improvising on top of the fundamental rule for a good risotto: never stop stirring.

Pics and Cakes

What do we need?

(serves two)

  •   1 ½ cups short-grain rice
    
  •   Warm water
    
  •   2 cloves of garlic
    
  •   A quarter of a large onion
    
  •   Wild mushrooms / button mushrooms
    
  •   100 g (3.5 oz) blue cheese
    
  •   Salt
    

How do we make it?

  • Add a splash of olive oil to a saucepan.

  • Dice the blue cheese into small cubes. Finely chop the garlic and onion.

  • Add the garlic and onion to the pan and turn the heat down a bit so they don’t burn. Once they’ve softened a little, add the mushrooms cut into medium-sized pieces.

  • Let everything cook together for a few minutes and add a pinch of salt.

  • Once the sofrito is ready, add the rice and stir well so the rice soaks up the flavor.

  • Now, the usual thing would be to add twice as much water as rice and let it cook. We’re going to add just a bit of water — about half a cup (120 ml / 4 fl oz) if we used a cup and a half of rice.

  • While stirring, add salt and a bit of blue cheese. Once everything is well mixed and the water has reduced, lower the heat a little.

  • Without stopping stirring, keep adding more water (as much as your risotto asks for) and blue cheese.

  • When you see the rice is cooked, turn off the heat, cover, and let it rest for as long as it takes you to slice some thin strips of blue cheese to decorate the plate.

Tips:

  • We used blue cheese, but you can use any other kind. If you don’t like strong cheese, an aged cheese will thicken it more and barely taste of cheese.
  • For decoration you can also add hazelnuts, walnuts or almonds.
  • If you don’t have wild mushrooms, you can swap them for button mushrooms.

Pics and Cakes

[English version] RISOTTO MY WAY **Ingredients:- 1 ½ medium-grain rice

  • 3 cups warm water

  • 2 cloves of onion

  • ¼ large onion

  • Mushrooms

  • 100 g blue cheese

  • Salt

  • Add a splash of olive oil in a sauce pan.

  • Dice blue cheese and chop garlic and onion.

  • Add garlic and onion to the sauce pan and fry slowly to avoid burning. When they have softened, add the mushrooms (if they are too big, you can cut them into medium-size pieces).

  • Cook slowly for some minutes and add a pinch of salt.

  • When ready, add the rice and keep stirring while everything is cooking and flavors are melting.

  • Usually we add 2 parts of water to 1 part of rice. For risotto recipe we will be adding all the water needed progressively.

  • While stirring, add some salt and part of blue cheese. Stir well and turn down the heat to a simmer.

  • Keep stirring and adding the water and blue cheese, allowing each ladle to be absorbed before adding the next.

  • When rice is cooked and soft, place a lid on the pan and allow to sit. Slice some blue cheese for decoration.

    Tips:- You can use any kind of cheese. Blue cheese has quite a strong flavour but you can substitute it by any other softer.

  • For decoration, you can add some walnuts, almonds or nuts.

  • You can use mushrooms (champignons) or any other wild mushrooms.


22 de julio de 2012 · 3 min · Cesmm

Chicken Pitas

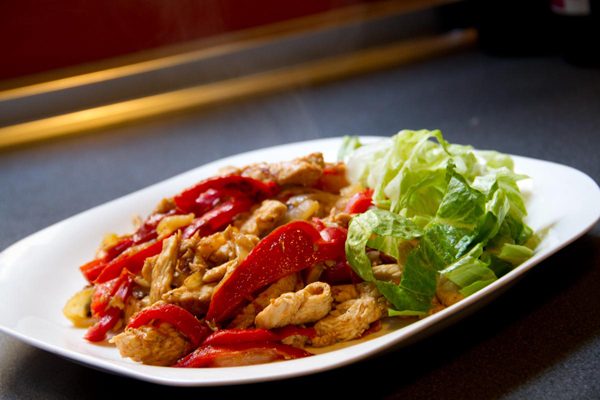
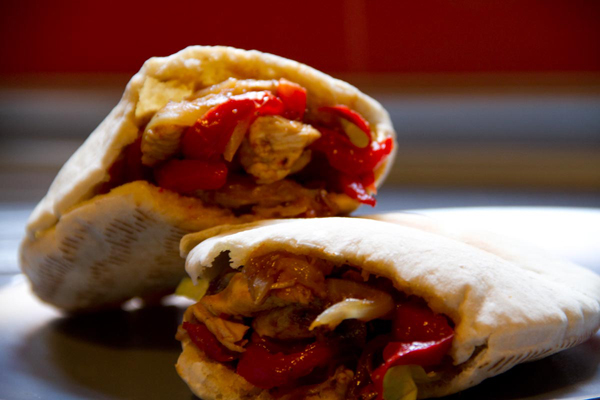
After a two-week delay and a move in between, we’re kicking off this new adventure in the world of food and new technologies. Since I’m a person who loves to eat, I’ll mostly be in charge of the simple recipes — the kind that save you when dinnertime rolls around. And one of those recipes I love most is the chicken pita. Simple and really tasty.

Pics and Cakes

What do we need?

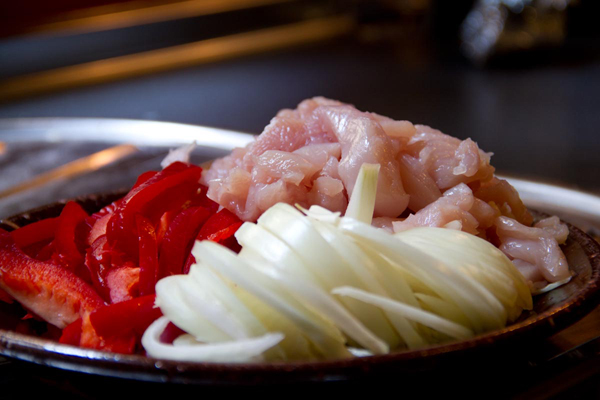
  •   1 chicken breast
    
  •   1/2 red bell pepper (if you have green, throw that in too)
    
  •   1/2 onion
    
  •   3 lettuce leaves
    
  •   Salt and pepper
    

How do we make it?

  • Slice the bell pepper and onion into julienne strips, and cut the chicken into strips.

  • Put a little oil in a frying pan.

  • When it’s hot, add the pepper and onion. Add a pinch of salt.

  • When they’re partly cooked — we like the pepper “al dente” — season the chicken with salt and pepper and add it to the pan.

  • While the chicken is cooking, wash and cut the lettuce leaves into strips.

  • Once the chicken is golden, set aside.

  • Pop two pita breads in the toaster and wait until they’re lightly toasted.

  • Cut off the top of the bread and tuck in the ingredients with the help of a spoon.

Tips:

  • Up to you whether you want to marinate the chicken with lemon or not. To do that, before frying it, put the chicken in a bowl with the juice of one squeezed lemon, salt and pepper for a few hours.
  • You can also add a sauce (mayo, ketchup, mustard thinned with mayo, etc.)

Pics and Cakes

[English version] PITA BREAD FILLED WITH CHICKEN AND PEPPERS **Ingredients:- 1 chicken breast

  • 1/2 red pepper (you can also use green pepper)

  • 1/2 onion

  • 3 lettuce leaves

  • Salt and pepper

  • Slice pepper, onion and chicken into strips.

  • Put some olive oil in a frying pan.

  • Stir fry pepper and onion. Add some salt.

  • Salt and pepper chicken strips and add to the pan.

  • Meanwhile, wash and cut lettuce.

  • When chicken is golden, put it aside.

  • Toast pita bread and fill it with lettuce, chicken and veggies.

    Tips:- You can marinate the chicken by putting it with salt, pepper and fresh lemon juice for some hours before cooking it.- You can add some sauces to your pita sandwich (mayonaise, ketchup, mustard+mayo, etc.) Pics and Cakes


Comments

ReimonStar (2012-07-17 13:20:02):

Cuz, those look great. I make them with fajita wraps instead of pita and I add some really spicy mojo picón from Carrefour and a touch of guacamole from Mercadona and yum yum yum. By the way, the photos are really cool. Keep it up! Next up TVLaElipa

Cesmm (2012-07-17 16:37:37):

Duly noted, Don Reimon.

15 de julio de 2012 · 3 min · Cesmm

Pitas de pollo

Tras dos semanas de retraso, y con una mudanza de por medio, comenzamos con esta nueva andadura en el mundo de la gastronomía y las nuevas tecnologías. Yo, como soy persona de buen comer, me encargaré principalmente de las recetas sencillas, esas que te sacan de un apuro a la hora de cenar. Y una de esas recetas de las que a mí más me gusta es la pita de pollo. Sencilla y bien rica.

Pics and Cakes

¿Qué necesitamos?

-       1 pechuga de pollo

  •       1/2 pimiento rojo (si tenéis verde, también lo echamos)
  •       1/2 cebolla
  •       3 hojas de lechuga -       Sal y pimienta

¿Cómo lo hacemos?

  • Cortamos el pimiento, la cebolla en juliana y el pollo en tiras.

  • Ponemos un poco de aceite en una sartén.

  • Cuando esté caliente echamos el pimiento y la cebolla. Añadimos un poco de sal.

  • Cuando esté un poco hecho, a nosotros nos gusta el pimiento “al dente”,  salpimentamos el pollo y lo añadimos a la sartén.

  • Mientras el pollo se está haciendo, lavamos y cortamos las hojas de lechuga en tiras.

  • Una vez el pollo esté dorado, reservamos.

  • Ponemos en un tostador dos panes de pita y esperamos a que estén un poco tostados.

  • Cortamos la parte superior del pan e introducimos los ingredientes con la ayuda de una cuchara.

Consejos:

  • Al gusto del consumidor, decidid si os apetece macerar el pollo con limón o no. Para ello, antes de freírlo, ponéis el pollo durante unas horas en un recipiente con el zumo de un limón exprimido, sal y pimienta.
  • También se le puede añadir alguna salsa (mayonesa, ketchup, mostaza aligerada con mayonesa, etc.)

 Pics and Cakes


[English version] PITA BREAD FILLED WITH CHICKEN AND PEPPERS **Ingredients:- 1 chicken breast

  • 1/2 red pepper (you can also use green pepper)

  • 1/2 onion

  • 3 lettuce leaves

  • Salt and pepper 

  • Slice pepper, onion and chicken into strips.

  • Put some olive oil in a frying pan.

  • Stir fry pepper and onion. Add some salt.

  • Salt and pepper chicken strips and add to the pan.

  • Meanwhile, wash and cut lettuce.

  • When chicken is golden, put it aside.

  • Toast pita bread and fill it with lettuce, chicken and veggies.

   Tips:- You can marinate the chicken by putting it with salt, pepper and fresh lemon juice for some hours before cooking it.- You can add some sauces to your pita sandwich (mayonaise, ketchup, mustard+mayo, etc.) Pics and Cakes


15 de julio de 2012 · 3 min · Cesmm

Cazuela San Isidro

Este nombre tan castizo no es más que una denominación familiar para un exquisito asado de cerdo acompañado con patatas, cebollas y manzana. La tradición con la que surgió este plato invita a prepararlo en una cazuela de barro comprada en la Pradera de San Isidro para celebrar el día del patrón madrileño. De todas maneras, ya sea con cazuela de barro, con santo de por medio o sin ello, el resultado será un plato facilísimo y perfecto para una comida con varios comensales.

Pics and Cakes

¿Qué necesitamos?

-       1 paletilla de cerdo (mejor con hueso) -       4 manzanas -       6 cebollas -       8 patatas -       300 ml de cerveza o vino blanco -       Sal y pimienta


¿Cómo lo hacemos?

  • Precalentamos el horno a 200ºC

  • Ponemos la paletilla en una bandeja de horno o en una fuente de barro preferiblemente honda. Salpimentamos toda la pieza por ambas partes.

  • Introducimos la fuente en el horno.  Lo dejamos 30 minutos aproximadamente para que se dore a fuego fuerte y luego le daremos la vuelta a la pieza de carne. A partir de este momento cuando veamos que la carne está demasiado seca, iremos regándola con cerveza o vino blanco.

  • Mientras tanto, aprovechamos para pelar las cebollas y patatas. Las cebollas las partiremos a la mitad y las patatas, en trozos grandes.

  • Por último, añadimos las patatas, cebollas y manzanas enteras a la fuente con la carne y bajamos el horno a una temperatura de 180º para que se haga lentamente durante 1 hora y media más aproximadamente.


Consejos:

  • Cada horno es un mundo así que la temperatura y el tiempo pueden variar de unos a otros. Os recomendamos que lo vigiléis sobre todo al principio para que la temperatura sea alta pero que no chamusque la carne.
  • La cantidad de líquido que vayamos a añadir dependerá de lo rápido que se evapore y cuánto absorba la paletilla.
  • Para presentarlo, recomendamos cortar en lonchas la carne asada y servirla junto a los demás ingredientes.

Pics and Cakes


[English version] ROAST PORK WITH ONIONS, POTATOES AND APPLES **Ingredients:- Pork shoulder arm roast

  • 4 apples

  • 6 onions

  • 8 potatoes

  • 300 ml beer or white wine

  • Salt and pepper 

  • Preheat oven at 200º

  • Put the piece of meat in a deep oven plate. Salt and pepper evenly the piece of meat

  • Enter the plate in the oven and leave for 30 minutes approximately until it golden brown. Then turn upside the piece of meat. From now, start adding some white wine or beer when the meat seems to be too dry.

  • Meanwhile, peal and cut the potatoes and onions. Cut half the onions and leave the potatoes in big portions.

  • Finally, add potatoes, onions and apples to the oven plate with the meat and decrease the oven temperature (180ºC). Leave it baking slowly for 1h30 more approximately. 

  Tips:- Every oven is different, so temperature and baking time may differ from some to others. We advice you to watch it carefully, especially at the beginning because high temperature is needed but not so much to have it burnt.

  • The amount of liquid will depend on how fast it will be absorbed by the meat or evaporated.
  • For serving, we recommend you to slice the meet and serve with the rest of ingredients. 


15 de julio de 2012 · 3 min · Palstelera

San Isidro Casserole

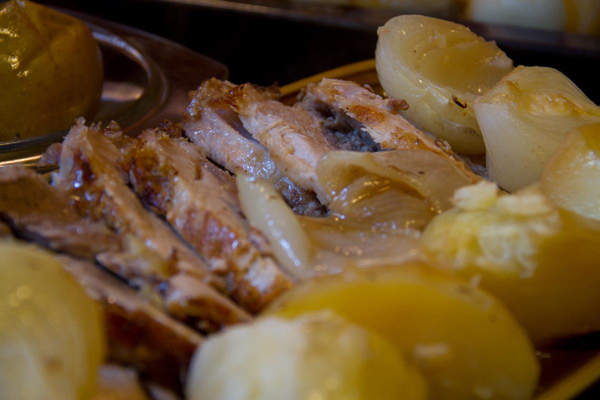
This very traditional Spanish name is just a family nickname for a delicious pork roast served with potatoes, onions, and apples. The tradition behind this dish calls for preparing it in a clay pot bought at the Pradera de San Isidro to celebrate Madrid’s patron saint day. Either way, with or without a clay pot, with or without the saint involved, the result is a super easy dish that’s perfect for a meal with several guests.

Pics and Cakes

What do we need?

  •   1 pork shoulder (bone-in is better)
    
  •   4 apples
    
  •   6 onions
    
  •   8 potatoes
    
  •   300 ml (1.25 cups) beer or white wine
    
  •   Salt and pepper
    

How do we make it?

  • Preheat the oven to 200°C (390°F)

  • Place the pork shoulder on an oven tray or, preferably, in a deep clay dish. Season the whole piece with salt and pepper on both sides.

  • Put the dish in the oven. Leave it for about 30 minutes so it browns at high heat, then flip the meat over. From this point on, whenever the meat looks too dry, we’ll baste it with beer or white wine.

  • Meanwhile, take the chance to peel the onions and potatoes. Cut the onions in half and the potatoes into large chunks.

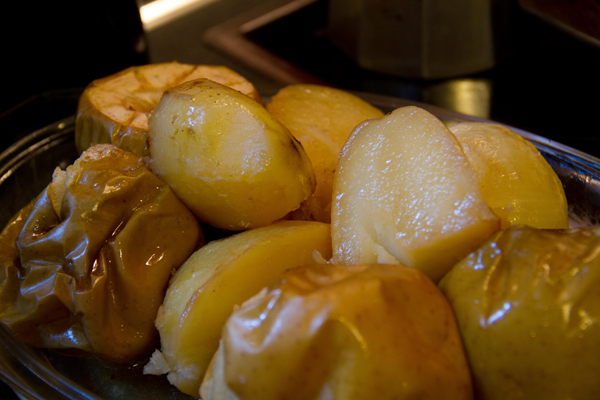
  • Finally, add the potatoes, onions, and whole apples to the dish with the meat and lower the oven to 180°C (355°F) so it cooks slowly for about another hour and a half.

Tips:

  • Every oven is its own world, so temperature and time can vary from one to another. We recommend keeping an eye on it, especially at the beginning, so the temperature stays high but doesn’t burn the meat.
  • The amount of liquid you’ll need to add depends on how fast it evaporates and how much the shoulder absorbs.
  • To serve, we recommend slicing the roasted meat and plating it alongside the rest of the ingredients.

Pics and Cakes

[English version] ROAST PORK WITH ONIONS, POTATOES AND APPLES **Ingredients:- Pork shoulder arm roast

  • 4 apples

  • 6 onions

  • 8 potatoes

  • 300 ml (1.25 cups) beer or white wine

  • Salt and pepper

  • Preheat oven at 200°C (390°F)

  • Put the piece of meat in a deep oven plate. Salt and pepper evenly the piece of meat

  • Enter the plate in the oven and leave for 30 minutes approximately until it golden brown. Then turn upside the piece of meat. From now, start adding some white wine or beer when the meat seems to be too dry.

  • Meanwhile, peal and cut the potatoes and onions. Cut half the onions and leave the potatoes in big portions.

  • Finally, add potatoes, onions and apples to the oven plate with the meat and decrease the oven temperature (180°C / 355°F). Leave it baking slowly for 1h30 more approximately.

    Tips:- Every oven is different, so temperature and baking time may differ from some to others. We advice you to watch it carefully, especially at the beginning because high temperature is needed but not so much to have it burnt.

  • The amount of liquid will depend on how fast it will be absorbed by the meat or evaporated.

  • For serving, we recommend you to slice the meet and serve with the rest of ingredients.


15 de julio de 2012 · 3 min · Palstelera