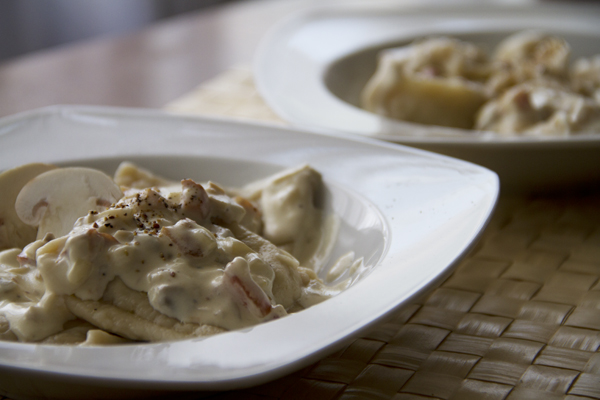
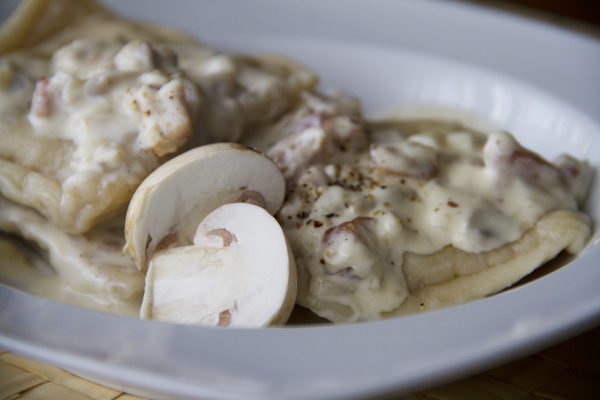
Pasta carbonara

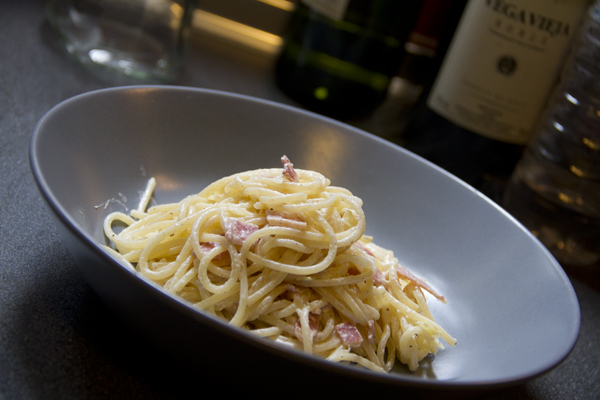
La verdad es que ésta es una receta que llevamos haciendo mucho tiempo y que a mí me parece “la original”, la forma en que pensaba que este plato, típico italiano, era preparado por las *mammas *de toda Italia. Qué equivocado estaba… Todos los italianos que nos han visto preparar este plato se han sorprendido, reído e indignado por partes iguales al vernos preparar “su plato” con nata en lugar de utilizar uovo. Aquí podéis ver cómo lo preparan ellos y yo paso sin más dilación a presentaros nuestra forma (habiendo probado las dos me quedo con la nuestra :p)
Pics and Cakes

**¿Qué necesitamos? **

(Para 2 personas)

  • 200 gr. de espaguetis

  • 4 lonchas de beicon

  • 1/2 cebolla

  • 200 ml. de nata de cocinar

  • Sal y pimienta


¿Cómo lo hacemos?

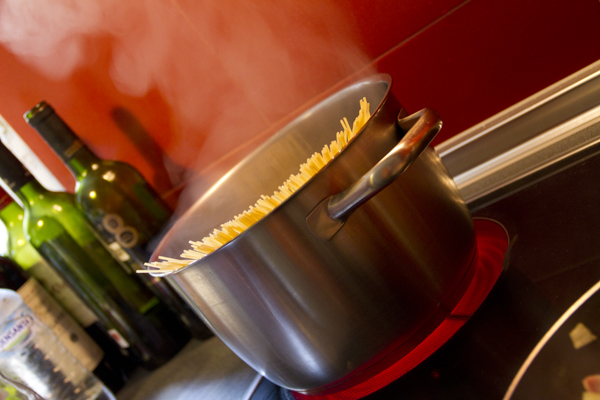
  • Ponemos a cocer los espaguetis en abundante agua (cuando ya esté hirviendo) un poco sazonada.

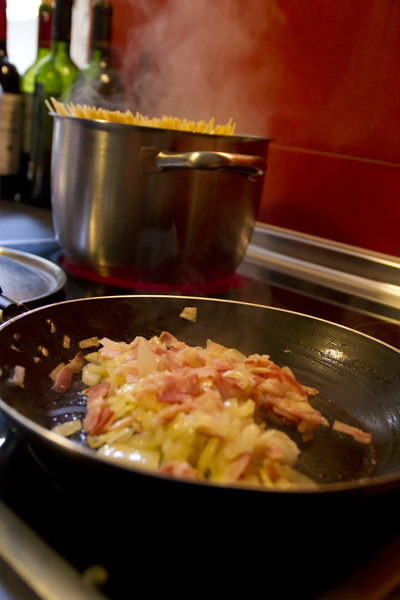
  • Mientras la pasta está cociendo, la dejaremos en torno a los 15 minutos, ponemos un chorrito de aceite en una sartén y echamos la cebolla.

  • Dejamos que se sofría un poco y añadimos el beicon.

  • Cuando esté hecho añadimos la nata y dejamos que hierva.

  • Añadimos una pizca de sal, cuidado con pasarse ya que el bacón da sabor a la salsa, y un poco de pimienta. Reservamos si todavía no está cocida la pasta.

  • Escurrimos la pasta y mezclamos con la salsa carbonara.
 

Pics and Cakes


Consejos:

  • Dependiendo de vuestra cocina, olla y pasta puede que ésta esté lista un poco antes de los quince minutos o un poco más tarde. No dejéis de vigilarla si os gusta la pasta “al dente”.

  • El beicon puede ser sustituido por panceta.

  • Podéis espolvorear un poco de queso parmesano cuando sirváis la pasta.


Pics and Cakes

 [English version] SPAGHETTI CARBONARA* *Ingredients:

  • 200 g spaghetti

  • 4 slices of bacon

  • 1/2 onion

  • 200 ml cream

  • Salt and pepper

* *

  • *Add the spaghetti into a saucepan filled with boiling water with salt. *

  • *In the meanwhile (the pasta will be cooked after 15 minutes aprox.) add a bit of olive oil into a frying pan. Add the onion. *

  • *Fry lightly and add the bacon. *

  • *When it is cooked, add cream and leave simmer for a while. *

  • *Add salt and pepper. Set aside until pasta is ready. *

  • Strain the pasta and mix with the carbonara sauce.

Tips:- Depending on your saucepan, stove, etc. the pasta will need more or less minutes to be cooked. Watch out to get the perfect cooking, specially if you like pasta al dente. *- You can sprinkle the pasta dish with Parmesan cheese.

6 de noviembre de 2012 · 4 min · Cesmm

Pasta Carbonara

Truth is, this is a recipe we’ve been making for ages and one that I always thought was “the original” — the way I figured this typical Italian dish was prepared by mammas all over Italy. How wrong I was… Every Italian who’s seen us make this dish has been surprised, has laughed, and has gotten outraged in equal measure when watching us prepare “their dish” with cream instead of uovo. Here you can see how they make it, and without further ado I’ll show you our version (having tried both, I’ll stick with ours :p)

Pics and Cakes

What do we need?

(Serves 2)

  • 200 g (7 oz) spaghetti

  • 4 slices of bacon

  • 1/2 onion

  • 200 ml (3/4 cup) cooking cream

  • Salt and pepper

How do we make it?

  • Put the spaghetti to cook in plenty of water (once it’s boiling), lightly salted.

  • While the pasta is cooking — we’ll leave it for around 15 minutes — pour a splash of oil in a frying pan and add the onion.

  • Let it sauté a little and add the bacon.

  • Once it’s done, add the cream and let it come to a boil.

  • Add a pinch of salt — careful not to overdo it since the bacon already gives flavor to the sauce — and a bit of pepper. Set aside if the pasta isn’t ready yet.

  • Drain the pasta and mix with the carbonara sauce.

Pics and Cakes

Tips:

  • Depending on your stove, pot, and pasta, it may be ready a little before the fifteen minutes or a little after. Keep an eye on it if you like your pasta “al dente”.

  • The bacon can be swapped for pancetta.

  • You can sprinkle a bit of Parmesan cheese on top when you serve the pasta.

Pics and Cakes


Comments

Miguel (2012-11-07 12:01:29):

I usually make this same recipe, but when I add the salt and pepper, I take the chance to throw in a tiny bit (very, very little) of nutmeg.

And I also prefer the cream version over the egg one.

tía pi (2012-11-07 23:41:40):

For me, carbonara is without onion, with bacon, cream and egg, but I’ll give yours a try.

Palstelera (2012-11-09 21:26:49):

I love nutmeg. Truth is I always add it to béchamel but never to carbonara — I’ll try it next time :-)

Palstelera (2012-11-09 21:27:17):

Without onion? Try it, it’s delicious!

Vio (2012-12-07 20:44:34):

Boo! I love the blog, but you also know I couldn’t stay quiet knowing you call this carbonara. Maledetti!

I’ll take the chance to tell you that, aside from the amazing recipes, the site is super pretty and the photos rock ;-)

Big kiss!

Palstelera (2012-12-11 13:04:25):

hehe, Vio. It’s not that we call it carbonara… it’s that half of Spain does! That’s why, to avoid hurting any feelings, we started the post by making clear that what’s called carbonara in Spain has nothing to do with the Italian recipe… But honestly, I love the Spanish version :-)

Vio (2013-03-05 12:39:39):

Haha, sure — you, Spain… it’s all about complaining :-P

The truth is I do really like this version, but I think the Italian one is much tastier when it’s done right, with crispy bacon, lots of pepper, and nice juicy spaghetti. I will say a lot of Italians make a pretty lousy version and it really brings the dish down.

6 de noviembre de 2012 · 3 min · Cesmm

Mango and Duck Ham Mille-Feuille

Between one thing and another, this delicious recipe seemed to have been forgotten. Luckily, now that we’re getting back into our routine, our weekly posts will too. This recipe, although it sounds fancy and complicated, is really just a salad with slightly unusual ingredients that will delight anyone who tries it.

Pics and Cakes

What do we need?

(serves 4)

  • 2 ripe mangoes

  • 150 g (5.3 oz) duck ham

  • Arugula

  • Pine nuts

  • Oil, salt, and vinegar

How do we make it?

  • Lightly toast the pine nuts in a hot pan, without oil.

  • Peel and slice the mangoes into thin layers.

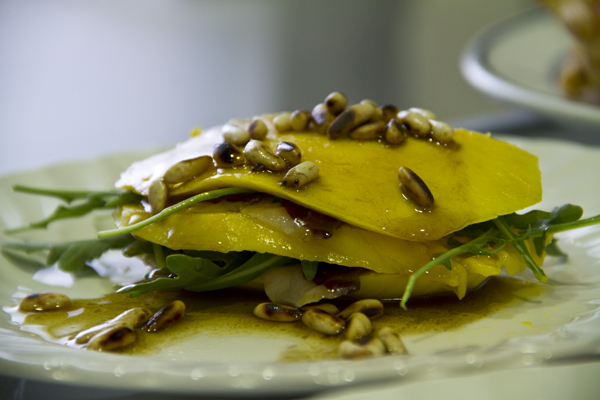
  • Build the mille-feuilles by alternating mango slices with duck ham and arugula.

  • Prepare a vinaigrette to taste and drizzle it on top right before serving.

  • Sprinkle a few toasted pine nuts over each mille-feuille.

Tips:

  • For a more budget-friendly version, you can swap the duck ham for serrano ham and the pine nuts for toasted hazelnuts.

  • Fruit in salads adds a sweet, fresh touch, so feel free to throw mango, pineapple, apple… into your everyday salads.

[English version] SALAD WITH MANGO AND DUCK HAM Ingredients (serving 4):

  • 2 large mangos

  • 150 g duck ham

  • rocket salad

  • pine nuts

  • olive oil, vinegar and salt

  • Grill the pine nuts in a saucepan.

  • Peel and cut into thin slices the mangos.

  • Create the individual salads by alternating layers of mango, rocket salad and duck ham.

  • Make a vinaigrette and pour it over the salad before serving.

  • Add some pine nuts.

    Tips:- For the economic version of this recipe, use cured (pork) ham instead of duck ham and hazelnuts instead of pine nuts.- You can use mango or any other fruit for your ordinary salads, the taste will be fresh and sweet!


22 de octubre de 2012 · 2 min · Palstelera

Milhoja de mango y jamón de pato

Entre unas cosas y otras, esta exquisita receta parecía haber caído en el olvido. Por suerte, ahora que parece que volvemos  a la rutina también lo harán nuestras publicaciones semanales. Esta receta, aunque suene extravagante y complicada, no es más que una ensalada con ingredientes un poco fuera de lo común pero que haran las delicias de aquel que la pruebe.

 Pics and Cakes

¿Qué necesitamos?

(4 personas)

  • 2 mangos maduros

  • 150 g de jamón de pato

  • Rúcula

  • Piñones

  • Aceite, sal y vinagre


¿Cómo lo hacemos?

  • Tostamos ligeramente los piñones en una sartén caliente, sin aceite.

  • Pelamos y cortamos los mangos en láminas finas.

  • Montamos las milhojas alternando las láminas de mango con el jamón de pato y la rúcula.

  • Preparamos una vinagreta al gusto y la echamos por encima justo antes de servir.

  • Echamos algunos piñones tostados sobre cada milhoja.


Consejos:

  • Para una versión más económica se puede sustituir el jamón de pato por jamón serrano y los piñones por avellanas tostadas.

  • Las frutas en las ensaladas dan un toque dulce y fresco, así que os podéis animar a utilizar mango, piña, manzana… en vuestras ensaladas habituales.


[English version] SALAD WITH MANGO AND DUCK HAM Ingredients (serving 4):

  • 2 large mangos

  • 150 g duck ham

  • rocket salad

  • pine nuts

  • olive oil, vinegar and salt


  • Grill the pine nuts in a saucepan.

  • Peel and cut into thin slices the mangos.

  • Create the individual salads by alternating layers of mango, rocket salad and duck ham.

  • Make a vinaigrette and pour it over the salad before serving.

  • Add some pine nuts.


  Tips:- For the economic version of this recipe, use cured (pork) ham instead of duck ham and hazelnuts instead of pine nuts.- You can use mango or any other fruit for your ordinary salads, the taste will be fresh and sweet!


22 de octubre de 2012 · 2 min · Palstelera

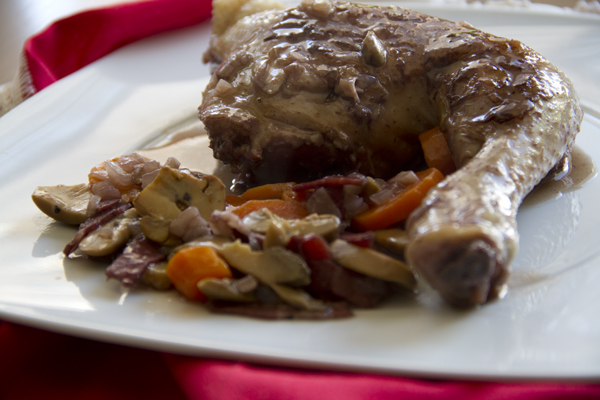
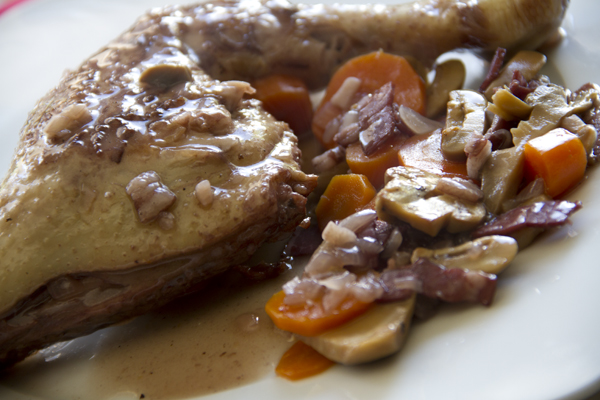
Coq au vin

Whole kitchen in their Savory Proposal for October invites us to prepare a French classic, “Coq au Vin”. Or in other words, chicken in wine — you can tell I learned French at school :p.

Pics and Cakes

What do we need?

(serves 2)

  • 2 chicken thighs

  • 1 large onion

  • 2 carrots

  • 3 slices of bacon

  • 2 cloves of garlic

  • 50 g (1.75 oz) mushrooms

  • 2 glasses of wine

  • 4 glasses of chicken stock

  • Flour and butter

  • Salt and pepper

How do we make it?

  • Start by chopping the onion, carrot and bacon.

  • Heat a little oil over medium heat in a wide, shallow pot. Add the chopped ingredients.

  • Once they’re slightly golden, add the minced garlic, cook for a minute and set aside in a bowl.

  • In a zip-lock plastic bag, add a couple of tablespoons of flour, a pinch of salt and pepper. Drop in one of the thighs and shake to coat. Repeat with the other.

  • Once floured and seasoned, sear the thighs in a pan for about 10 minutes.

  • Remove the chicken, add the wine and let it reduce a bit.

  • Return the thighs to the pan, add the vegetables and pour in the chicken stock.

  • Simmer everything together over low heat for about 50 minutes.

  • Once the chicken is well cooked, remove the chicken and the vegetables.

  • With a tablespoon of flour and one of butter, form a smooth paste and stir it into the sauce.

  • Stirring constantly, cook over low heat for a couple of minutes until the mixture thickens.

  • In a frying pan with a little oil, sauté the mushrooms until golden.

  • Finally, return all the ingredients to the pot and let everything cook together for a couple of minutes so the flavors blend.

Tips:

  • If you have some sauce left over, you can use it to make some tasty meatballs in sauce.

  • If it doesn’t thicken enough, add a tablespoon of cornstarch dissolved in cold water.

Pics and Cakes

[English version] COQ AU VIN* *Ingredients (serving 2):

  • 2 chicken legs an thighs

  • 1 large onion

  • 2 carrots

  • 3 bacon slides

  • 2 cloves of garlic

  • 50 g mushrooms

  • 2 cups of red wine

  • *4 cups of chicken stock *

  • Flour and butter

  • Salt and pepper

  • Chop onion, carrot and bacon.

  • *Place some olive oil into a deep sauce pan and heat it. Add chopped ingredients. *

  • Cook until ingredients are slightly browned, add chopped garlic and keep cooking for one minute. Set aside.

  • *Put a couple of tbsp of flour, a pinch of salt and pepper into a plastic bag. Put the chicken inside and shake it well to create a thin layer on the chicken. *

  • Stir over a high heat for 10 minutes.

  • *Remove chicken, add red wine and simmer to reduce it. *

  • *Put the chicken back into the sauce pan, add chopped vegetables and chicken stock. *

  • *Simmer for round 50 minutes, cooking over a low heat. *

  • When chicken is soft and cooked, remove it from the sauce pan.

  • *In a different bowl, mix some flour and butter and add it to the sauce. *

  • *Keep stiring, cooking over a low heat for a couple of minutes. *

  • *In another pan, stir fry the mushrooms with a bit of olive oil until golden browned. *

  • Add all the ingredients into the sauce pan with the wine sauce and cook for a couple of minutes in order to combine all flavors.

  • Tips:**- If there is some sauce left, you can use for preparing meatballs. It will be delicious!*
    • If you want a thicker sauce, add some corn flour.*

Comments

tía pi (2012-11-18 22:03:03):

Today I made the coq au vin following your recipe — delicious! I didn’t make it with rooster, I used a free-range chicken, one of those that look like they’ve got hepatitis, and honestly it was finger-licking good. I had some sauce left over and I’m planning to poach a few eggs to keep dipping bread. Thanks, piggies.

18 de octubre de 2012 · 4 min · Cesmm

Coq au vin

**Whole kitchen en su Propuesta Salada para el mes de octubre nos invita a preparar un clásico francés “Coq au Vin”. **O lo que es lo mismo Pollo al vino, se nota que aprendí francés en el colegio :p.

Pics and Cakes


**¿Qué necesitamos? **

(2 personas)

  • 2 contramuslos de pollo

  • 1 cebolla grande

  • 2 zanahorias

  • 3 lonchas de beicon

  • 2 dientes de ajo

  • 50gr de champiñones

  • 2 vasos de vino

  • 4 vasos de caldo de pollo

  • Harina y mantequilla

  • Sal y pimienta

¿Cómo lo hacemos?

  • Empezamos cortando la cebolla, la zanahoria y el beicon.

  • Ponemos un poco de aceite a fuego medio en una cazuela baja y ancha. Incorporamos los alimentos cortados.

  • Cuando estén un poco dorados, añadimos los ajos picados, cocinamos un minuto y reservamos en un bol.

  • En una bolsa de plástico con autocierre añadimos un par de cucharadas de harina, una pizca de sal y pimienta. Introducimos uno de los contramuslos y agitamos para que se impregne. Repetimos con el otro.

  • Una vez enharinado y salpimentado marcamos en una sartén los contramuslos durante unos 10 minutos.

  • Retiramos el pollo, añadimos el vino y dejamos que reduzca un poco.

  • Volvemos a introducir los contramuslos, las verduras y agregamos el caldo de pollo.

  • A fuego lento dejamos que se vaya cociendo todo junto durante unos 50 minutos.

  • Cuando el pollo esté bien cocido sacamos el pollo y las verduras.

  • Con una cucharada de harina y otra de mantequilla formamos una masa fina que añadimos a la salsa.

  • Sin dejar de remover, cocinamos a fuego lento durante un par de minutos hasta que la mezcla espese.

  • En una sartén, con un poco de aceite, sofreímos los champiñones hasta que estén dorados.

  • Por último añadimos todos los ingredientes a la cazuela y dejamos que se cocinen todos durante un par de minutos para que se mezclen todos los sabores.

Consejos:

  • Si sobra un poco de salsa podemos aprovechar para hacer unas ricas albóndigas en salsa.

  • Si no espesa lo suficiente añadimos una cucharada de maizena diluida en agua fría.

Pics and Cakes

[English version] COQ AU VIN* *Ingredients (serving 2):

  • 2 chicken legs an thighs

  • 1 large onion

  • 2 carrots

  • 3 bacon slides

  • 2 cloves of garlic

  • 50 g mushrooms

  • 2 cups of red wine

  • *4 cups of chicken stock *

  • Flour and butter

  • Salt and pepper

* *

  • Chop onion, carrot and bacon.

  • *Place some olive oil into a deep sauce pan and heat it. Add chopped ingredients. *

  • Cook until ingredients are slightly browned, add chopped garlic and keep cooking for one minute. Set aside.

  • *Put a couple of tbsp of flour, a pinch of salt and pepper into a plastic bag. Put the chicken inside and shake it well to create a thin layer on the chicken. *

  • Stir over a high heat for 10 minutes.

  • *Remove chicken, add red wine and simmer to reduce it. *

  • *Put the chicken back into the sauce pan, add chopped vegetables and chicken stock. *

  • *Simmer for round 50 minutes, cooking over a low heat. *

  • When chicken is soft and cooked, remove it from the sauce pan.

  • *In a different bowl, mix some flour and butter and add it to the sauce. *

  • *Keep stiring, cooking over a low heat for a couple of minutes. *

  • *In another pan, stir fry the mushrooms with a bit of olive oil until golden browned.  *

  • Add all the ingredients into the sauce pan with the wine sauce and cook for a couple of minutes in order to combine all flavors.

* * *  Tips:**- If there is some sauce left, you can use for preparing meatballs. It will be delicious!*

    • If you want a thicker sauce, add some corn flour.*

18 de octubre de 2012 · 4 min · Cesmm

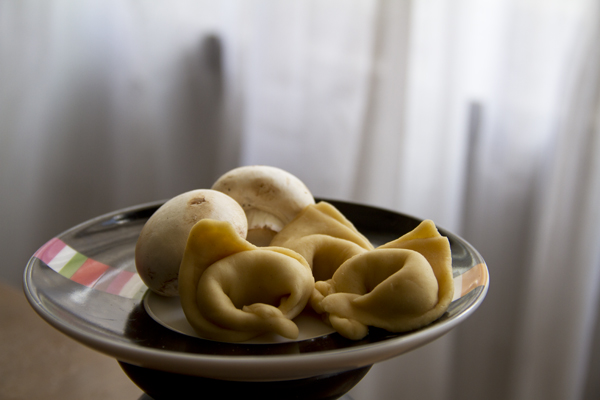
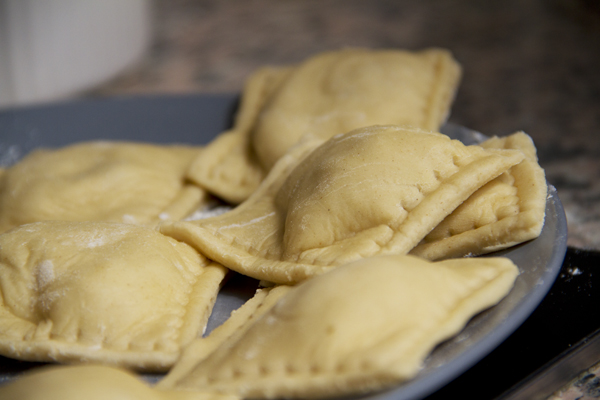
Fresh Stuffed Pasta

Whole Kitchen in their Savory Proposal for the month of September invites us to make an Italian classic: “Stuffed Pasta.” With this recipe we kick off a new adventure on this amazing food blog, where every month we’re challenged to make a savory dish and a sweet one. We love the idea — it’s original and pretty useful, since it pushes you to make dishes you might not normally tackle, and it also lets you check out what the other participants come up with.

Pics and Cakes

What do we need?

(Serves 4)

  • For the dough:
  •   300 g (2.5 cups) flour
    
  •   1 egg and 1 egg white
    
  •   2 tbsp olive oil
    
  •   1/2 tsp salt
    
  •   1 tsp vinegar
    
  • For the filling:
  •   2 small onions, finely chopped
    
  •   1 clove of garlic, finely chopped
    
  •   300 g (10.5 oz) mushrooms
    
  •   2 tbsp parsley
    
  •   Salt
    
  •   40 g (1.5 oz) aged cheese
    
  • For the sauce:
  •   200 ml (3/4 cup + 1 tbsp) heavy cream
    
  •   4 slices of bacon (thick-cut)
    
  •   Salt and pepper
    

Pics and Cakes

How do we do it?

  • Put the flour in a bowl, make a well in the center, and add the egg, the egg white, the salt, the oil, and the vinegar.

  • Knead until you get an elastic dough, adding a splash of water if needed.

  • Wrap the dough in plastic wrap and let it rest in the fridge for at least an hour.

  • Heat a little oil in a large pan, add the onions, garlic, and mushrooms. Cook gently over low heat until all the liquid has evaporated.

  • Stir in the parsley and season. Add the finely chopped aged cheese and mix well (with the heat off). Let it cool.

  • Once the dough has rested, divide it in two and roll out one half with a rolling pin until very thin. Ideally you’d use a pasta machine, but not everyone has one at home, so a rolling pin will do the trick.

  • Place small mounds of filling on the pasta sheet, leaving space between them.

  • Roll out the second half of the dough very thin and lay it over the first one. With your hands, press around the mounds to shape the ravioli.

  • Finally, cut out the ravioli with a round cutter (like a pizza cutter) with fluted edges. Set the ravioli aside while you prepare the sauce.

  • If instead of ravioli you’d rather make tortellini, roll out the dough very thin, fill it, and fold as shown in this [video](

{{}}

).

  • For the sauce, use the leftover filling. Sauté the bacon cut into small cubes, add the leftover filling and the cream, and bring to a boil. Simmer for a few minutes and adjust salt and pepper to taste.

  • Cook the pasta, drain it, add the sauce, and… buon appetito!

Pics and Cakes

Tips:

  • The dough has to be very thin. If you’re using a rolling pin, that means once you think it’s thin enough, roll it out at least three more times. I also recommend making your ravioli or tortellini small, since they’ll grow when cooked.
  • If you don’t have a pasta cutter, you can use a regular knife, but make sure to seal the edges well afterward or you’ll lose the filling during cooking. You can seal them with your fingers, a fork, or the edge of a serrated knife.
  • Our pasta took quite a while to cook (15 minutes) because the pieces were too big and chunky.

Pics and Cakes


18 de septiembre de 2012 · 4 min · Palstelera

Pasta fresca rellena

Whole kitchen en su Propuesta Salada para el mes de septiembre nos invita a preparar un clásico italiano “Pasta Rellena”. Y con esta receta empezamos una nueva andadura de este increíble blog culinario en el que cada mes nos retan a preparar una receta salada y una dulce. La idea nos parece original y bastante útil ya que te anima a hacer platos que, tal vez, no harías normalmente y además te permite ver los resultados de los demás participantes.

 Pics and Cakes

¿Qué necesitamos?

**(4 personas) **

  • Para la masa: -       300 g de harina -       1 huevo y 1 clara de huevo -       2 cucharadas de aceite de oliva -       1/2 cucharita de sal -       1 cucharita de vinagre

  • Para el relleno: -       2 cebollitas muy picadas -       1 diente de ajo muy picado -       300 g de champiñones -       2 cucharadas de perejil -       Sal -       40 g de queso curado

  • Para la salsa: -       200 ml de nata -       4 lonchas de bacon (grueso) -       Sal y pimienta

Pics and Cakes

¿Cómo lo hacemos?

  • Ponemos la harina en un cuenco, hacemos un hueco en el centro y añadimos el huevo, la clara, la sal, el aceite y el vinagre.

  • Amasamos hasta obtener una masa elástica y añadimos un poco de agua si fuera necesario.

  • Envolvemos la masa en film transparente y la dejamos reposar en el frigorífico al menos una hora.

  • Calentamos un poco de aceite en una sartén grande, agregamos las cebollas, ajo y los champiñones. Rehogamos a fuego lento hasta la evaporación total del líquido.

  • Incorporamos el perejil y sazonamos. Añadimos el queso curado bien picado y removemos bien (ya con el fuego apagado). Lo dejamos enfriar.

  • Pasado el tiempo de espera, dividimos la masa en dos y estiramos una mitad con un rodillo la masa hasta dejarla muy fina. Lo ideal sería hacerlo con una máquina de pasta pero no todo el mundo tiene una en casa, así que con un rodillo nos podemos apañar.

  • Ponemos pequeños montoncitos de relleno sobre la pasta dejando espacio entre ellos.

  • Estiramos muy fina la segunda mitad de la masa y la ponemos sobre la primera que hemos preparado. Con las manos, acomodamos esta segunda lámina para ir formando los ravioli.

  • Por último, cortamos los raviolis con un cortador redondo (como el cortapizzas) pero con los bordes ondulados. Dejamos reposar los ravioli mientras preparamos la salsa.

  • Si en lugar de raviolis, queremos hacer tortellini estiramos la masa muy fina y la rellenamos y plegamos como podemos ver en este [video](

{{}}

).

  • Para la salsa utilizaremos la parte del relleno que nos ha sobrado. Para ello, saltearemos el bacon cortado en taquitos,  añadiremos el relleno sobrante y la nata y lo llevaremos a ebullición. Dejamos cocer con unos minutos y rectificamos la sal y pimienta al gusto.

  • Cocemos la pasta, la escurrimos, añadimos la salsa y… buon appetito!

Pics and Cakes

Consejos:

  • La masa tiene que ser muy fina. Si lo hacéis con rodillo quiere decir que cuando creáis que ya está muy fina, la volváis a estirar al menos otras tres veces. Además recomiendo que, ya sean ravioli o tortellini, los hagáis pequeños ya que al cocerlos también aumentarán su tamaño.
  • Si no tenéis el cortador para la masa podéis hacerlo con un cuchillo normal pero aseguraos de sellar bien los bordes después porque si no perderéis el relleno durante la cocción. Podéis sellarlos con los dedos, con un tenedor o con el borde de un cuchillo de sierra.
  • Nuestra pasta tardó bastante en cocerse (15 minutos) porque eran demasiado grandes y gordos.

 Pics and Cakes

[English version] FRESH STUFFED PASTAIngredients (serves 4):* For the pasta:* -       300 g flour -       1 egg and 1 egg white -       2 tbsp olive oil -       1/2 tsp salt -       1 tsp vinegar

** For the filling:*

  • -       2 small onions* -       1 clove of garlic -       300 g mushrooms
  • -       2 tbsp persil*
  • -       Salt*
  • -       40 g mature cheese *

** For the sauce:*

  • -       200 ml cream* -       4 slices of bacon
  • -       Salt and pepper*
  • Place the flour into a large bowl, make a well in the middle and add the egg, the white, the salt, the vinegar and the oil.

  • *Knead  the dough until it is soft and pliable. Add some water if needed. *

  • *Wrap in cling film and place into fridge for 1 hour. *

  • Heat some olive oil into a sauce pan. Add onion, garlic and mushrooms. Cook slowly until all the liquid has evaporated.

  • Add persil and salt. Turn off the heat and add the cheese (finely chopped).

  • Divide the dough into two portions. If you have a pasta machine it will be perfect for the final knead. If not, use a rolling pin to roll the pasta dough very flat.

  • *Place small amounts of filling over the flat pasta dough, leaving some space between them. *

  • *Roll the second portion of pasta dough and place over the first one. *

  • Create the ravioli by cutting the filled dough into small squares. Set them aside.

  • *If you prefer tortellini, here you have a [video](

{{}}

) to learn how to fold the dough.*

  • *For the sauce, use the filling you haven’t used. Stir fry bacon (cut into small pieces) in a sauce pan, add the leftover filling and the cream. Simmer and add salt and pepper. *

  • Boil pasta as usual, add the sauce and enjoy your meal. Buon appetito!

*  Tips:**- You have to roll the dough very, very flat and try to make small ravioli or tortellini given that they will become bigger when cooked.*

    • If you don’t have a pasta cutter, you can use a knife but make sure you seal properly the edges with a fork, knife or your hands. Otherwise, the filling will be lost when boiling the pasta.*
    • Our pasta took quite a long time to cook because they were very big tortellini and ravioli (around 15 minutes).*

18 de septiembre de 2012 · 6 min · Palstelera

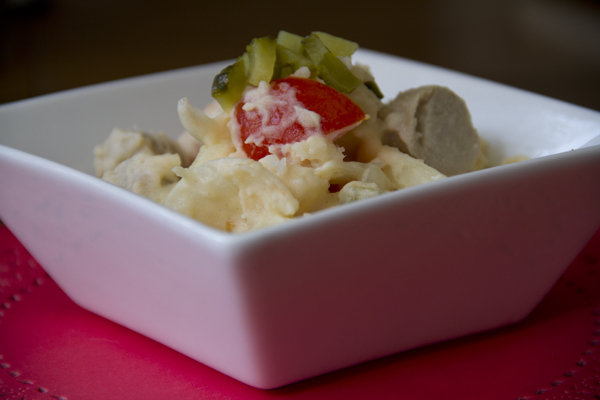
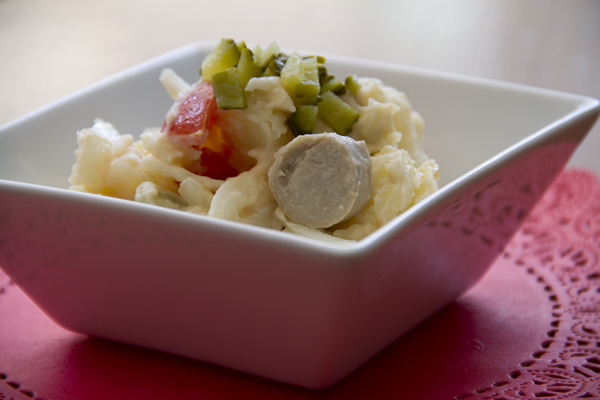
Ensalada alemana

Aprovechando que todavía no hace mucho frío, aunque parece evidente que Winter is Coming, os presentamos una sencilla receta que se puede preparar para cualquier reunión familiar, encuentro con amigos o comida del día a día, incluso dejándola hecha el día anterior.

Pics and Cakes

**¿Qué necesitamos? **

(4-6 personas)

  •       2-3 patatas grandes
  •       3-4 salchichas
  •       1 cebolla
  •       2 tomate -       3-4 pepinillos

¿Cómo lo hacemos?

  • Cocemos las patas lavadas con piel.

  • Pinchamos las patatas con un “pincho catador” (un tenedor o cualquier utensilio que sirva para ver si las patatas están cocidas). Cuando estén listas, retiramos, pelamos, troceamos y reservamos.

  • En una sartén, con un chorro de aceite, ponemos las salchichas y las hacemos y las cortamos en tacos. Una vez listas reservamos.

  • Mientras tanto, podemos aprovechar para partir una cebolla en tiras y picar los tomates en cuadrados.

  • Mezclamos todo en una ensaladera grande y añadimos la salsa mostanesa (mayonesa y mostaza en proporción 4 a 1).

  • Por último, dejamos enfriar en la nevera.

Consejos:

  • A Palstelera le encantan los pepinillos agridulces, así que el consejo es evidente, poned pepinillos agridulces.
  • Las proporciones de mayonesa y mostaza son orientativas. Depende del tipo de mostaza que utilices y de cómo te guste el sabor si más suave o más picante.

Pics and Cakes

[English version] GERMAN-STYLE SALAD **Ingredients:- 2-3 large potatoes

  • 3-4 sausages

  • 1 onion

  • 2 tomatoes

  • 3-4 pickles 

  • Cook the potatoes with peel.

  • Pierce the potatoes with a “pincho catador” (a fork or any other cooking tool to check when the potatoes are boiled). When ready, peel them off and cut into pieces (medium size).

  • Add some olive oil in a saucepan and cook the sausages. Cut into pieces (medium size).

  • Slice onion and chop tomatoes.

  • *Put all the ingredients into a large salad bowl and add the special sauce (mayonnaise and mustard in a proportion 4:1) *

  • *Place into fridge until serving. *

   Tips:- Use sweet and sour pickles (German style) and it will be much better!- The measures for the sauce are up to you and it will depend on the kind of mustard you use.

2 de septiembre de 2012 · 2 min · Cesmm

German-Style Salad

Taking advantage of the fact that it’s not too cold yet, though it’s clearly true that Winter is Coming, here’s a simple recipe you can put together for any family gathering, get-together with friends, or just an everyday meal — you can even make it the day before.

Pics and Cakes

What do we need?

(serves 4-6)

  •   2-3 large potatoes
    
  •   3-4 sausages
    
  •   1 onion
    
  •   2 tomatoes
    
  •   3-4 pickles
    

How do we make it?

  • Boil the potatoes with the skin on, washed.

  • Poke the potatoes with a “pincho catador” (a fork or any utensil that lets you check if the potatoes are done). Once they’re ready, take them out, peel, chop into pieces and set aside.

  • In a frying pan with a splash of oil, cook the sausages and then cut them into chunks. Set aside once done.

  • Meanwhile, slice an onion into strips and dice the tomatoes.

  • Mix everything in a large salad bowl and add the mostanesa sauce (mayonnaise and mustard in a 4-to-1 ratio).

  • Finally, let it chill in the fridge.

Tips:

  • Palstelera loves sweet-and-sour pickles, so the tip is obvious — go with sweet-and-sour pickles.
  • The mayo-to-mustard ratio is just a guideline. It depends on the kind of mustard you’re using and whether you like the flavor milder or with more kick.

Pics and Cakes

2 de septiembre de 2012 · 1 min · Cesmm