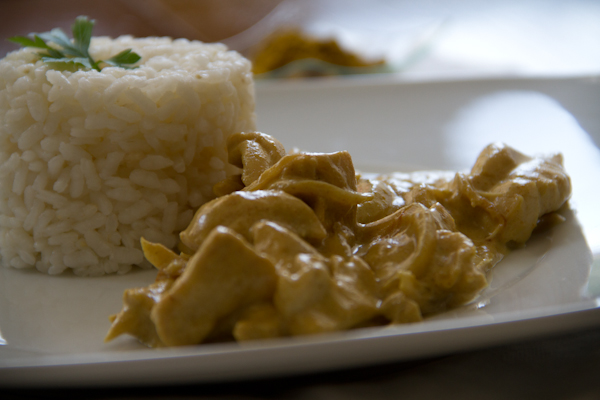
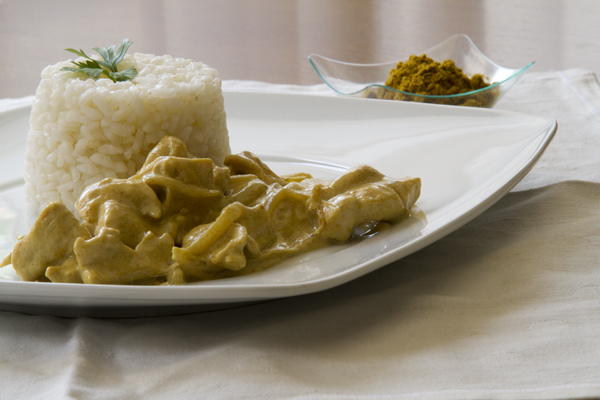
Chicken and Lamb Kebab

Everyone who visits Turkey says that the kebab there is nothing like the ones we eat in Spain, so at this point I'm not entirely sure what to call this. In any case, what I can promise you is that it's delicious and the preparation couldn't be simpler. We discovered this recipe thanks to the YouTube channel Recetas de Cocina, which is always worth a visit. Give these kebabs a try and let us know how it goes.
Pics and Cakes

What do we need?

  • 400 g (14 oz) lamb leg chops
  • 400 g (14 oz) chicken thighs
  • 4 teaspoons garlic powder
  • 4 tablespoons Ras el Hanout (a North African spice blend)
  • Salt and pepper
  • Lettuce (chopped or julienned)
  • Sliced tomato
  • Sliced or finely julienned onion
  • Pita breads


For the yogurt sauce:

  • 2 Greek yogurts
  • 2 tablespoons mayonnaise
  • Juice of 1/2 lemon
  • 1 or 2 garlic cloves
  • 3 teaspoons sugar
  • 1 pinch of cumin
  • Salt, pepper and fresh parsley


How do we make it?

  1. Cut the lamb chops and chicken into bite-sized pieces.
  2. In a bowl, combine 6 tablespoons of olive oil and 2 tablespoons of Ras el Hanout and mix well. Add the chopped chicken, season with salt and pepper, and sprinkle in two teaspoons of garlic powder.
  3. Mix well so all the meat is fully coated and let it marinate for at least 1 hour in the fridge (the longer it sits, the more flavor it will pick up).
  4. Repeat steps 2 and 3 with the chopped lamb.
  5. While the meat rests, let's prepare the yogurt sauce. Mix the yogurt with the mayonnaise. Then add the crushed garlic, the sugar, the cumin, salt, pepper, and finally the lemon juice and chopped fresh parsley. Mix everything thoroughly (no blender needed) and keep it in the fridge until you're ready to use it.
  6. Once the meat has had enough time to marinate, you have two options: cook it in the oven, or in a frying pan or on a griddle.
    a) For the first option, line a baking tray with parchment paper and spread the pieces of meat out separately. Bake at 200°C (390°F) until they look golden. When you take the meat off the tray, drain off any excess oil.
    b) If you prefer, you can sauté them in a pan or cook them on a griddle. There's no need to add oil since the marinade is enough. This option is faster since there's no oven preheating and the cooking time is shorter.
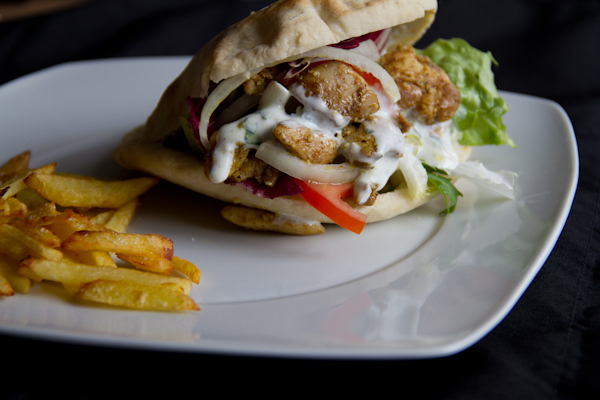
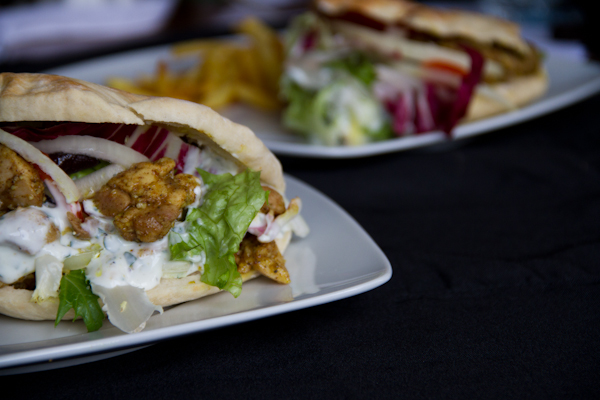
  7. All that's left is to assemble the kebabs. In a pita bread, layer meat, lettuce, tomato, onion and yogurt sauce to taste.
Pics and Cakes

Tips:

– You can adjust the yogurt sauce to taste, but it's better to go light than to overdo any one ingredient, especially garlic and salt, which are hard to fix once you've added too much. I recommend adding little by little and tasting as you go.

– It's better to cook the meats separately so people can choose whether they want their kebab with just one type of meat or mixed. Lamb tends to have a much stronger flavor than chicken, which not everyone enjoys.

– The meat quantities are just a guide. Adjust them depending on how many kebabs you want to make.
11 de junio de 2015 · 3 min · Palstelera

Kebab de pollo y cordero

Todo el mundo que visita Turquía dice que el kebab de allí no tiene nada que ver con los que comemos en España así que, llegados a este punto, no sé exactamente cómo llamar a esto. En cualquier caso lo que os puedo asegurar es que está delicioso y su elaboración no podía ser más sencilla. La receta en este caso la descubrimos gracias al canal de Youtube Recetas de Cocina por el que siempre merece darse una vueltecita. Animaos a preparar estos kebab y nos contáis qué tal la experiencia.

Pics and Cakes

¿Qué necesitamos?

  • 400 gr de chuletas de pierna de cordero
  • 400 g de contramuslos de pollo
  • 4 cucharaditas de ajo en polvo
  • 4 cucharadas de Ras el hanout (mezcla de especias originaria del Magreb)
  • Sal y pimienta
  • Lechuga (en trozos o en juliana)
  • Tomate en rodajas
  • Cebolla en rodajas o juliana fina
  • Panes de pita


Para la salsa de yogur:

  • 2 yogures griegos
  • 2 cucharadas de mayonesa
  • zumo de 1/2 limón
  • 1 o 2 dientes de ajo
  • 3 cucharaditas de azúcar
  • 1 pizca de comino
  • Sal, pimienta y perejil fresco


 ¿Cómo lo hacemos?

  1. Cortamos las chuletas de cordero y el pollo en trocitos del tamaño de un bocado.
  2. En un bol ponemos 6 cucharadas de aceite de oliva y 2 cucharadas de Ras el Hanout y mezclamos bien. Añadimos el pollo cortado, lo salpimentamos y espolvoreamos dos cucharaditas de ajo en polvo.
  3. Mezclamos bien para que toda la carne quede bien impregnada y dejamos marinar al menos 1 hora en la nevera (cuanto más tiempo lo dejemos más sabor cogerá la carne).
  4. Repetimos los pasos 2 y 3 con la carne troceada de cordero.
  5. Aprovechando el tiempo de reposo de la carne vamos a preparar la salsa de yogur. Para ello, mezclamos el yogur con la mayonesa. Después añadimos el ajo previamente machacado, el azúcar, el comino, la sal, la pimienta y, por último, el limón y el perejil fresco picado. Mezclamos todo muy bien (no es necesaria la batidora) y reservamos en la nevera hasta que la utilicemos.
  6. Después de haber dejado el tiempo suficiente para marinar la carne, tenemos dos opciones: bien cocinarla en el horno o bien en la sartén o plancha.
    a) Para la primera opción, ponemos papel de horno sobre la bandeja del horno y extendemos los trozos de carne separados. Los horneamos a 200º hasta que los veamos dorados. Al sacar la carne de la bandeja, retiramos el exceso de aceite.
    b) Si preferimos podemos saltearlos en una sartén o hacerlos a la plancha. No es necesario añadir aceite ya que con el marinado tiene suficiente. Esta opción es más rápida ya que no requiere precalentado del horno y la cocción es más rápida.
  7. Ya solo nos queda montar nuestros kebabs. En un pan de pita alternamos carne, lechuga, tomate, cebolla y salsa de yogur al gusto.

Pics and Cakes

Consejos:

– La salsa de yogur podéis rectificarla al gusto pero es preferible quedarnos cortos que excedernos en el uso de algún ingrediente, especialmente con el ajo y la sal que tienen difícil arreglo. Os recomiendo que lo echéis poco a poco y lo vayáis probando.

– Es preferible que hagáis las carnes por separado para que la gente pueda elegir si quiere su kebab solo de un tipo de carne o mixto. Además la carne de cordero suele tener un sabor bastante fuerte comparado con el pollo, que puede no gustar a todo el mundo.

– Las cantidades de la carne son orientativas. Las podéis adaptar según el número de kebabs que queráis preparar.

 
11 de junio de 2015 · 3 min · Palstelera

Crispy Chicken Burger

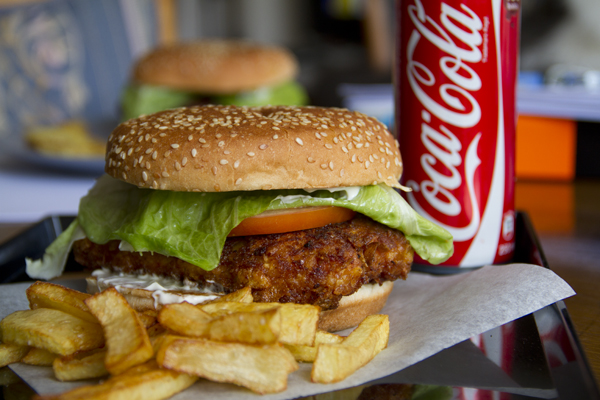
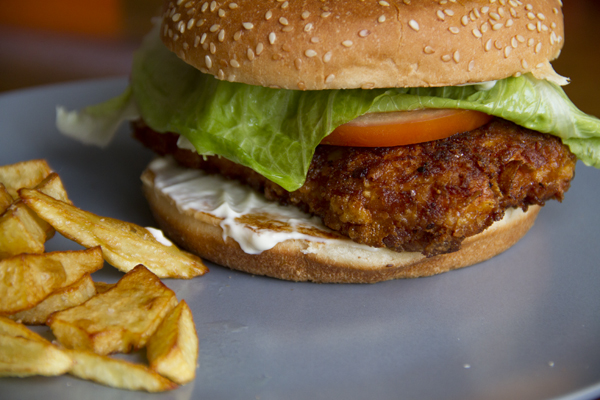
Believe it or not: we’re back! After months (literally) with our blog in some kind of hibernation, we’re back at it and hoping that this time our willpower won’t fade so fast. We’re returning with that recipe that’s been sitting at the top of the blog for so many days now, the one we know plenty of you have been dying to make: the Crispy Chicken. For lovers (or at least, frequenters) of fast food joints, the Crispy Chicken is a Burger King staple, a chicken burger with a spicy kick. But here we’re sharing the upgraded version. Meaning, the one we make with an actual chicken fillet and not some suspicious mystery patty pretending to be one.

Pics and Cakes

What do we need?

  • 4 tablespoons of flour

  • 1 tablespoon of onion powder

  • 1 tablespoon of garlic powder

  • 1/2 tablespoon of paprika

  • Salt

  • Black pepper

  • 2 eggs

  • Cornflakes

  • A splash of white wine

  • 2 chicken breast fillets (not too thin)

  • 2 burger buns

  • 2 tomato slices

  • 2 lettuce leaves

  • Mayonnaise

How do we make it?

  • First, we’ll prep the breading for the chicken. Mix the flour with the onion and garlic powder, paprika, salt and pepper.

  • In another bowl, beat the eggs with a splash of white wine.

  • In a third bowl, add the cornflakes and crush them with your hand. Grab fistfuls and squeeze them little by little. We don’t want the pieces too small, so it won’t take much time.

  • Take your chicken fillets and bread them in the same order as the bowls you prepared: flour, egg, and cornflakes. Let them rest while the oil heats up in a frying pan (or deep fryer).

  • Fry the breaded fillets until golden and transfer them to a plate lined with paper towels to soak up the excess oil.

  • Now all that’s left is to assemble our ‘burger’. Spread a bit of mayo on each half of the bun, add a fillet, a tomato slice, and a lettuce leaf. Ready to eat.

Pics and Cakes

Tips:

  • Instead of onion powder, we used a packet of onion soup mix. A pretty curious ingredient that we’ll use in other recipes like COCA-COLA CHICKEN.

  • The fillets should be a bit thick so they stay juicy, but you have to be careful when frying them to nail the perfect point: golden on the outside and fully cooked on the inside. We recommend cranking up the heat at first and then turning it down a bit to make sure they cook through properly.

3 de septiembre de 2014 · 2 min · Palstelera

Hamburguesa crispy chicken

Increíble pero cierto: ¡hemos vuelto! Después de meses (literalmente hablando) con nuestro blog en una especie de hibernación, volvemos a la carga y esperamos que esta vez las fuerzas no nos flaqueen tan rápido.  Volvemos con esa receta que lleva ocupando la cabecera del blog tantos días y que sabemos que más de uno estáis deseando hacer: la Crispy Chicken. Para los amantes (o al menos, conocedores) de los restaurantes de comida rápida, la Crispy Chicken es un básico del Burger King, una hamburguesa de pollo con un toque picante. Sin embargo os revelamos la versión mejorada. Es decir, la que hacemos con un filete de pollo de verdad y no con un sospechoso conglomerado que finge serlo.

Pics and Cakes


¿Qué necesitamos?

  • 4 cucharadas de harina

  • 1 cucharada de cebolla en polvo

  • 1 cucharada de ajo en polvo

  • 1/2 cucharada de pimentón

  • Sal

  • Pimienta negra

  • **2 huevos

  • Copos de maíz (cereales tipo cornflakes)

  • 1 chorrito de vino blanco

  • 2 filetes de pechuga de pollo (no muy finos)

  • 2 panes de hamburguesa

  • 2 rodajas de tomate

  • 2 hojas de lechuga

  • Mayonesa


¿Cómo lo hacemos?

  • En primer lugar, vamos a preparar el rebozado del pollo. Para ello, mezclamos la harina con la cebolla y el ajo en polvo, el pimentón, sal y pimienta.

  • En otro bol, batimos los huevos con un chorrito de vino blanco.

  • En un tercer bol, pondremos los cereales y con la mano los trituraremos. Podemos ir cogiendo puñados y estrujándolos poco a poco. No queremos que queden trozos demasiado pequeños, así que no nos llevará apenas tiempo.

  • Cogemos nuestros filetes de pollo y los rebozamos en el mismo orden en el que hemos preparado los tres boles: harina, huevo y cereales. Los dejamos reposar mientras se calienta el aceite en una sartén (o freidora).

  • Freímos los filetes rebozados hasta que estén dorados y los sacamos sobre un plato con papel de cocina para absorber el exceso de aceite.

  • Ahora sólo nos queda montar nuestra ‘hamburguesa’. Untamos un poquito de mayonesa en cada una de las mitades del pan de hamburguesa, ponemos un filete, una rodaja de tomate y una hoja de lechuga. Y listo para comer.

Pics and Cakes

Consejos:

  • En vez de cebolla en polvo, nosotros hemos utilizado sopa de cebolla en sobre. Un ingrediente muy curioso que utilizaremos en otras recetas como el POLLO A LA COCA-COLA.

  • Los filetes tienen que ser un poco gruesos para que estén jugosos pero hay que tener cuidado a la hora de freírlos para encontrar el punto perfecto: dorado por fuera y bien hecho por dentro. Os aconsejamos poner el fuego fuerte al principio y bajarlo un poquito después para asegurarnos de que quedan bien cocinados.

3 de septiembre de 2014 · 3 min · Palstelera

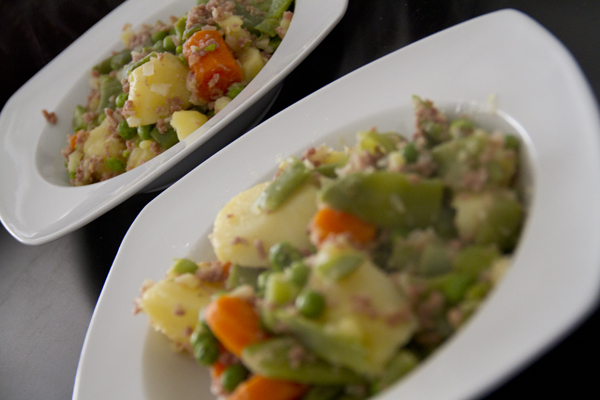
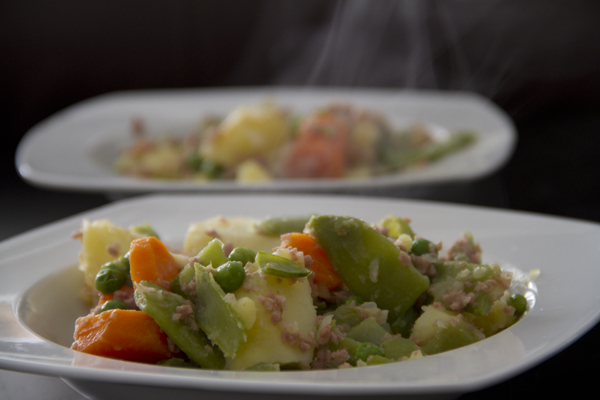
Menestra de verduras con carne

Sé que no nos lo decís pero seguro que lo pensáis “¡¡¡Dios mío, qué ha pasado con el mejor blog de cocina que conozco!!! ¡Hace demasiado tiempo que no actualizan y ya no sé qué preparar para comer!” :p

Pues para que no desesperéis aquí estamos de vuelta y con propósito de enmienda para que esto no nos vuelva a pasar. Después de haber escrito cien veces en la pizarra “No dejaré el blog sin actualizar más de 5 días” y  para que la vuelta al “trabajo” sea más llevadera hoy os presentamos una receta sencilla. A disfrutar.

Pics and Cakes


¿Qué necesitamos?

  • Judías verdes

  • Guisantes

  • Zanahorias

  • Carne picada

  • Sal


¿Cómo lo hacemos?

  • Pelamos, lavamos y cortamos las patatas y las ponemos a cocer en una olla con sal.

  • Cuando lleven 5 minutos cociendo, depende de lo grandes/pequeñas que las hayáis partido, agregamos la zanahoria, las judías y los guisantes.

  • Dejamos cocer hasta que esté a nuestro punto. Os lo digo así porque a mí siempre me gusta que todo esté casi un puntito pasado para que esté más blando.

  • Mientras retiramos del fuego y escurrimos en un colador ponemos una sartén con un chorrito de aceite.

  • Incorporamos la carne picada.

  • Cuando la carne esté hecha agregamos todos los ingredientes bien escurridos y rehogamos todo junto.

  • Servir y saborear.

Pics and Cakes

Consejos:

  • Dependiendo de a qué tamaño cortes los ingredientes (patatas y zanahorias) tardarán un poco más o menos en hacerse. Tenlo en cuenta.

  • Nosotros utilizamos judías y guisantes congelados. Si son frescos igual tardan un poco más en hacerse.


[English version]  VEGETABLE CASSEROLE WITH MINCED MEATIngredients:-*

  • Green beans

  • Carrots

  • Peas

  • Minced meat

  • Salt

* *

  • *Peal, wash and cut the potatoes. Boil them in water with a bit of salt. *

  • *5 minutes later add the chopped carrot, the green beans and the peas. *

  • Leave boil until you consider is already cooked (it’s a matter of taste).

  • *Drain the vegetables and add some olive oil in a frying pan. *

  • Add minced meat and stir fry.

  • When it’s ready, add the vegetables and stir fry all together.

  • *Serve and enjoy! *

* *

Tips:

- Cooking time will depend on the amount of ingredients as well as the size of the chopped vegetables. - We usually prepare it with frozen green beans and peas. If you use fresh ingredients, cooking time may differ.

12 de febrero de 2014 · 2 min · Cesmm

Vegetable Stew with Minced Meat

I know you’re not telling us, but I’m sure you’re thinking “OMG, what happened to the best cooking blog I know?! It’s been too long since they updated and now I don’t know what to make for lunch!” :p

Well, so you don’t despair, here we are, back and with every intention of making sure this doesn’t happen again. After writing “I will not leave the blog without updating for more than 5 days” a hundred times on the blackboard, and to make the return to “work” easier, today we’re bringing you a simple recipe. Enjoy.

Pics and Cakes

What do we need?

  • Green beans

  • Peas

  • Carrots

  • Minced meat

  • Salt

How do we make it?

  • Peel, wash, and cut the potatoes, then put them in a pot to boil with salt.

  • After they’ve been boiling for 5 minutes — depending on how big or small you cut them — add the carrots, green beans, and peas.

  • Let them cook until they’re done to your liking. I say it like this because I always prefer everything a touch overcooked so it’s softer.

  • While we take them off the heat and drain them in a colander, we heat a frying pan with a splash of oil.

  • Add the minced meat.

  • Once the meat is cooked, add all the well-drained ingredients and sauté everything together.

  • Serve and savor.

Pics and Cakes

Tips:

  • Depending on the size you cut the ingredients (potatoes and carrots), they’ll take a bit more or less time to cook. Keep that in mind.

  • We use frozen green beans and peas. If they’re fresh, they may take a little longer to cook.

12 de febrero de 2014 · 2 min · Cesmm

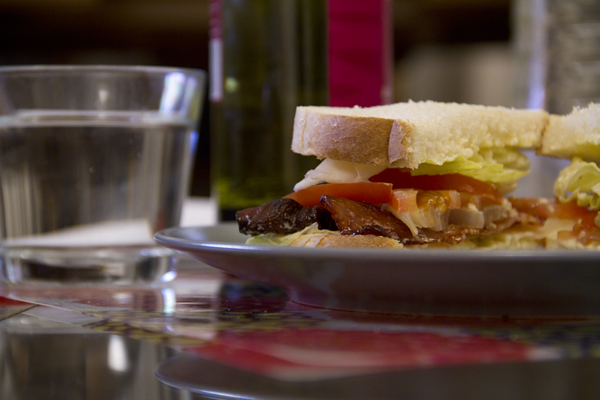
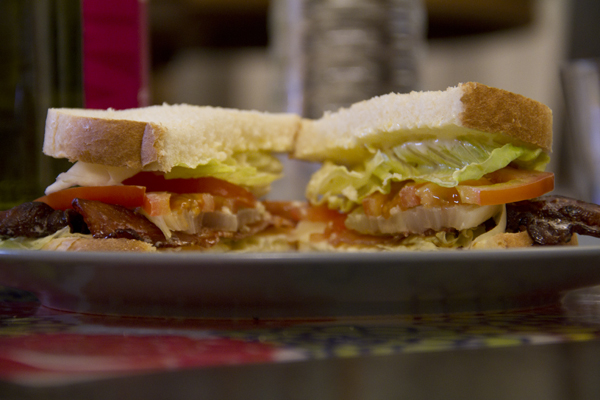
BLT

BLT stands for Bacon Lettuce Tomato, which translates to a spectacular combo. Especially if you make the bacon the way we did. Want to know the secret? Keep reading.

Pics and Cakes

What do we need?

  • 4 slices of bacon

  • 4 slices of bread

  • 2 tomatoes

  • A couple of lettuce leaves

  • 2 tablespoons of sugar

  • Cayenne pepper

  • Mayonnaise

How do we make it?

  • Preheat the oven to 200°C (390°F).

  • Meanwhile, wash the lettuce and tomato.

  • On a baking tray, lay out the bacon in a single layer on parchment paper. Grind the cayenne and sprinkle it over the bacon. Sprinkle the sugar on top too, and put it in the oven once it reaches temperature.

  • Let it cook for about 15 minutes, until crispy and quite dark.

  • While the bacon is cooking, slice the tomatoes into rounds and leave the lettuce in big leaves.

  • Toast the bread. Once it’s done to your liking, spread a bit of mayonnaise on it and assemble the sandwich.

Tips:

  • You can add lots of things, even switch up the sauce. The base is the BLT trio. We added onion, but avocado works really well too.

  • You can make it with regular sandwich bread, but we recommend “long-life” bread (long live the king!!!!!). I think you can usually find it in supermarkets labeled as rustic bread (already sliced).

Pics and Cakes [English version] BLT* *Ingredients:

  • 4 bacon slices

  • 4 bread slices

  • 2 tomatoes

  • 2 lettuce leaves

  • 2 tbsp sugar

  • *Chili powder *

  • Mayonnaise

  • Preheat oven at 200º C.

  • *Wash lettuce and tomato. *

  • *In a baking tray, place some baking paper and the bacon (in one layer). Sprinkle with sugar and chili powder. *

  • *Bake for 15-20 minutes until golden and crispy. *

  • *In the meanwhile, cut tomato into slices. *

  • *Toast bread, spread some mayonnaise in each slice and make your sandwich with all the ingredients (tomato, lettuce and bacon). *

  • Tips:- You can add any other ingredient or sauce that you like. The essentials are Bacon Lettuce and Tomato. We added some fresh onion but avocado is also a perfect choice. **- You can prepare the sandwich with any kind of white sandwich bread but we like to prepare it with sliced bread. *

17 de mayo de 2013 · 2 min · Cesmm

BLT

BLT son las siglas de Bacon Lechuga Tomate, o lo que es lo mismo que una mezcla espectacular. Sobre todo si hacéis el bacon como lo hicimos nosotros. ¿Queréis descubrir cuál es el truco del almendruco? Pues continuad leyendo.

Pics and Cakes


¿Qué necesitamos?

  • 4 lonchas de bacon

  • 4 rebanadas de pan

  • 2 tomates

  • Un par de hojas de lechuga

  • 2 cucharadas de azúcar

  • Cayena

  • Mayonesa


¿Cómo lo hacemos?

  • Ponemos a precalentar el horno a 200º C.

  • Mientras vamos lavando la lechuga y el tomate.

  • En una bandeja de horno ponemos el bacon bien extendido sobre papel vegetal. Molemos la cayena y se la echamos por encima al bacon. Espolvoreamos también el azúcar encima e introducimos en el horno cuando este alcance la temperatura.

  • Dejamos que se haga durante unos 15 minutos, hasta que esté crujiente y bastante oscuro.

  • Mientras se va haciendo el bacon cortamos los tomates en rodajas y dejamos la lechuga en hojas grandes.

  • Tostamos el pan. Cuando esté a nuestro gusto untamos un poco de mayonesa y montamos el sandwich.


Consejos:

  • Se pueden añadir muchas cosas, incluso cambiar la salsa. La base es el trinomio BLT. Nosotros le pusimos cebolla, pero también le queda muy bien el aguacate.

  • Puedes hacerlo con pan de molde normal pero nosotros recomendamos el pan “larga vida” (al rey!!!!!). Creo que normalmente se encuentra en los supermercados bajo la denominación de pan rústico (ya hecho rebanadas).

 Pics and Cakes  [English version] BLT* *Ingredients:

  • 4 bacon slices

  • 4 bread slices

  • 2 tomatoes

  • 2 lettuce leaves

  • 2 tbsp sugar

  • *Chili powder *

  • Mayonnaise

* *

  • Preheat oven at 200º C.

  • *Wash lettuce and tomato. *

  • *In a baking tray, place some baking paper and the bacon (in one layer). Sprinkle with sugar and chili powder. *

  • *Bake for 15-20 minutes until golden and crispy. *

  • *In the meanwhile, cut tomato into slices. *

  • *Toast bread, spread some mayonnaise in each slice and make your sandwich with all the ingredients (tomato, lettuce and bacon). *

Tips:- You can add any other ingredient or sauce that you like. The essentials are Bacon Lettuce and Tomato. We added some fresh onion but avocado is also a perfect choice. **- You can prepare the sandwich with any kind of white sandwich bread but we like to prepare it with sliced bread. *


17 de mayo de 2013 · 2 min · Cesmm

Arroz con pollo al curry

Tras una aplastante victoria por cuatro votos, frente a los dos de la Crispy Chicken, (modo ironic on) hoy os traemos una riquísima receta que llevamos haciendo mucho tiempo y que desde que la probamos quedamos enamorados de ella.

Pics and Cakes


¿Qué necesitamos?

  • Una pechuga de pollo

  • Una taza de arroz

  • Media cebolla

  • 200 ml de nata

  • Curry al gusto

  • Sal

  • 2 dientes de ajo


¿Cómo lo hacemos?

  • Ponemos en una cazuela pequeña un poco de aceite. Picamos un ajo y lo añadimos. Cuando el ajo esté un poco dorado añadimos el arroz.

  • Rehogamos un poco el arroz y añadimos el doble de agua que de arroz. Echamos la sal.

  • Cuando empiece a hervir bajamos a fuego medio-bajo y tapamos. En 15-20 minutos estará listo.

  • Mientras se va haciendo el arroz, cortamos la cebolla en juliana.

  • Ponemos una sartén con un chorrito de aceite y añadimos la cebolla.

  • Cortamos el pollo en tiras y lo echamos en la sartén.

  • Cuando el pollo esté un poco hecho añadimos un par de cucharadas de curry.

  • Dejamos que se haga un poco todo junto e incorporamos la nata.

  • Llevamos a ebullición y añadimos más curry y sal al gusto. Hay que ir probando.


Consejos:

  • Si queréis hacer una bonita presentación podéis llenar medio vaso con el arroz ya hecho. Aplastáis un poco con una cuchara para que se compacte. Le dais la vuelta en el plato y os quedará una pequeña torre de arroz.

  • La primera vez que Palstelera lo probó estaba acompañado por melocotón en almíbar a la plancha. Podéis probar.

Pics and Cakes

[English version] CURRY CHICKEN WITH RICE* *Ingredients:

  • 1 chicken breast

  • 1 cup of rice

  • 1/2 onion

  • 200 ml cream

  • *Curry *

  • Salt

  • 2 garlic cloves

* *

  • *First prepare the rice. In a cooking pot, pour a bit of olive. Peel and chop the garlic cloves and stir fry. When it’s slightly golden brown, add the rice. *

  • *Stir fry the rice and add 2 cups of water. Add some salt. *

  • When the water boils, turn the heat down and cover with the lid. It will be ready in 15-20 minutes.

  • *Now, slice the onion. *

  • *Pour some olive into a frying pan and add the onion. *

  • *Cut chicken breast into strips and add to the frying pan. *

  • *After a few minutes, add a couple of tsp of curry. *

  • Stir fry again and add the cream.

  • *Simmer for a while and add more curry and salt if needed. *

* *

Tips:

- You can have an easy and nice presentation just using a cup to create a rice tower. Fill a cup with cooked rice, press with a spoon and turn the cup upside down over the dish.

- You can serve it with some canned peaches. Just grill them a bit and serve them as a garnish.

7 de mayo de 2013 · 3 min · Cesmm

Curry Chicken with Rice

After a crushing victory by four votes, against the two for the Crispy Chicken (irony mode on), today we bring you a delicious recipe we’ve been making for a long time and that we’ve been in love with ever since we first tried it.

Pics and Cakes

What do we need?

  • One chicken breast

  • One cup of rice

  • Half an onion

  • 200 ml (3/4 cup) heavy cream

  • Curry powder to taste

  • Salt

  • 2 garlic cloves

How do we make it?

  • Pour a bit of oil into a small pot. Chop a garlic clove and add it. When the garlic is slightly golden, add the rice.

  • Stir-fry the rice for a moment and add twice as much water as rice. Add salt.

  • When it starts to boil, lower the heat to medium-low and cover. It’ll be ready in 15-20 minutes.

  • While the rice cooks, slice the onion into thin strips.

  • Place a frying pan with a splash of oil over the heat and add the onion.

  • Cut the chicken into strips and toss it into the pan.

  • When the chicken is partly cooked, add a couple of tablespoons of curry powder.

  • Let everything cook together for a bit and stir in the cream.

  • Bring to a boil and add more curry and salt to taste. You’ll have to keep tasting as you go.

Tips:

  • If you want a nice presentation, you can fill half a glass with the cooked rice. Press it down a bit with a spoon so it packs together. Flip it onto the plate and you’ll have a little rice tower.

  • The first time Pastelera tried it, it was served with grilled peaches in syrup. Give it a try.

Pics and Cakes

[English version] CURRY CHICKEN WITH RICE* *Ingredients:

  • 1 chicken breast

  • 1 cup of rice

  • 1/2 onion

  • 200 ml cream

  • *Curry *

  • Salt

  • 2 garlic cloves

  • *First prepare the rice. In a cooking pot, pour a bit of olive. Peel and chop the garlic cloves and stir fry. When it’s slightly golden brown, add the rice. *

  • *Stir fry the rice and add 2 cups of water. Add some salt. *

  • When the water boils, turn the heat down and cover with the lid. It will be ready in 15-20 minutes.

  • *Now, slice the onion. *

  • *Pour some olive into a frying pan and add the onion. *

  • *Cut chicken breast into strips and add to the frying pan. *

  • *After a few minutes, add a couple of tsp of curry. *

  • Stir fry again and add the cream.

  • *Simmer for a while and add more curry and salt if needed. *

Tips:

- You can have an easy and nice presentation just using a cup to create a rice tower. Fill a cup with cooked rice, press with a spoon and turn the cup upside down over the dish.

- You can serve it with some canned peaches. Just grill them a bit and serve them as a garnish.

7 de mayo de 2013 · 3 min · Cesmm