Pseudo quiche de batata

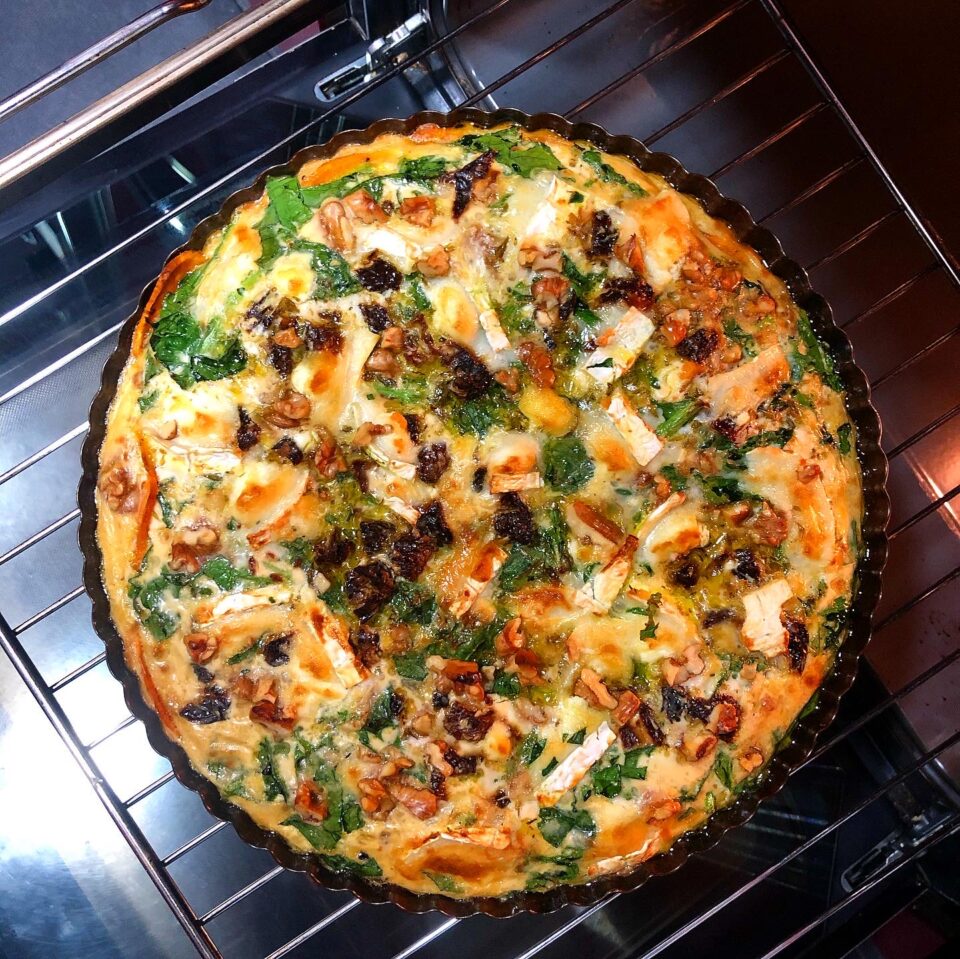
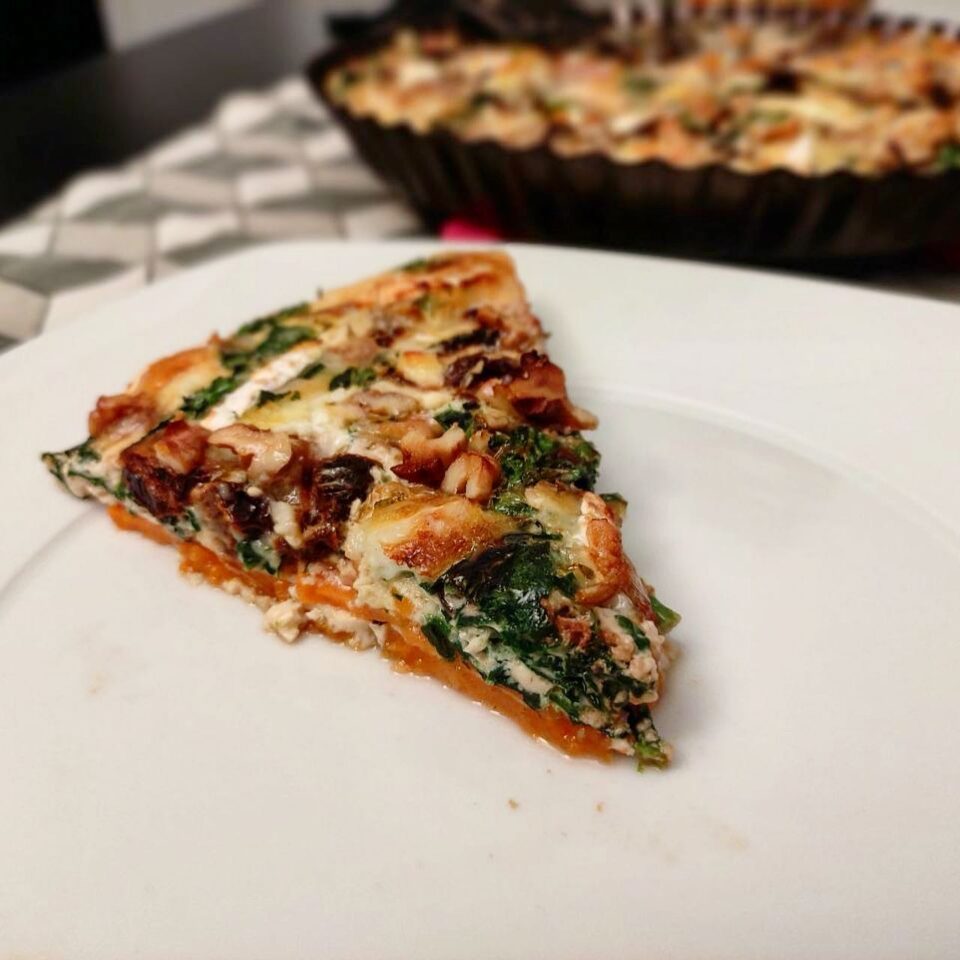
Esta es una forma diferente de hacer una pseudo quiche o una tarta salada que además supone una gran alternativa para aquellos que no pueden o no quieren tomar gluten. Respecto a una quiche tradicional le falta el crujiente de la masa quebrada pero como ventaja es que se trata de algo menos calórico y aporta un punto dulce bastante agradable.
Pics and Cakes

Ingredientes

  • 1 batata grande
  • 4 huevos
  • 350 ml de leche
  • 85 g de espinacas frescas
  • 100 g de tomates secos
  • 110 g de queso de cabra
  • Un puñado de nueces troceadas
  • 2 cucharadas de queso crema (yo usé Skyr)
  • Sal, pimienta y AOVE

Elaboración

  1. Precalentamos el horno a 190ºC.
  2. Lavamos la batata, le hacemos unas incisiones en la piel y metemos al microondas durante un par de minutos (os podéis saltar este paso pero así la ablandamos un poco y resulta más fácil cortarla).
  3. Sacamos la batata con cuidado de no quemarnos, la pelamos y la cortamos en rodajas muy finas (de unos 3 mm).
  4. En un bol mezclamos las láminas de batata con sal, pimienta y aceite de oliva y las colocamos solapadas sobre un molde redondo apto para horno cubriendo el fondo y las paredes.
  5. Horneamos durante 20 minutos aproximadamente.
  6. Mientras tanto, batimos los huevos en un bol, salpimentamos, añadimos el queso crema, la leche y los tomates secos y mezclamos bien.
  7. Cuando haya pasado el tiempo de horneado y la batata esté blandita, sacamos el molde, colocamos las espinacas crudas ligeramente troceadas sobre la base de batata y añadimos la mezcla de leche y huevos.
  8. Por último, repartimos por toda la superficie el queso de cabra cortado en trozos y las nueces.
  9. Horneamos unos 30 minutos y ya lo tenemos listo para disfrutar.
Pics and Cakes

Consejos PiC

  • El queso crema no es necesario, lo eché por aprovecharlo ya que llevaba rondando en nuestra nevera unos días. Si en vez de leche quieres usar nata como las quiches tradicionales puedes hacerlo sin ningún problema, quedará algo más sabroso y cremoso.
  • Cuando hablo de tomates secos son aquellos que están deshidratados pero ya han sido rehidratados y suelen estar en aceite aliñados. Si tienes tomates deshidratados sin más pero los quieres «revivir» y aliñar tú mismo para usar en cualquier receta es muy fácil. Pon a hervir 700 ml de agua y cuando empiece a hervir, apaga el fuego, añade 50 ml de vinagre blanco y los tomates deshidratados. Deja reposar media hora. Pasado el tiempo, saca los tomates y sécalos bien con papel de cocina. Luego pásalos a un bote con aceite de oliva, ajo y hierbas aromáticas a tu gusto y en un par de días todo habrá cogido un sabor delicioso.
8 de octubre de 2020 · 3 min · Palstelera

Sweet Potato Pseudo-Quiche

This is a different way to make a pseudo quiche or savory tart, and it's also a great alternative for those who can't or don't want to eat gluten. Compared to a traditional quiche, it's missing the crunch of the shortcrust pastry, but on the upside it's less calorie-dense and adds a really pleasant hint of sweetness.

Pics and Cakes

Ingredients

  • 1 large sweet potato
  • 4 eggs
  • 350 ml (1.5 cups) milk
  • 85 g (3 oz) fresh spinach
  • 100 g (3.5 oz) sun-dried tomatoes
  • 110 g (4 oz) goat cheese
  • A handful of chopped walnuts
  • 2 tablespoons cream cheese (I used Skyr)
  • Salt, pepper, and extra virgin olive oil

Method

  1. Preheat the oven to 190°C (375°F).
  2. Wash the sweet potato, make a few slits in the skin, and microwave it for a couple of minutes (you can skip this step, but it softens it up a bit and makes it easier to slice).
  3. Take the sweet potato out, careful not to burn yourself, peel it, and cut it into very thin slices (about 3 mm / 1/8 inch).
  4. In a bowl, toss the sweet potato slices with salt, pepper, and olive oil, then arrange them in an overlapping pattern in a round oven-safe pan, covering the bottom and the sides.
  5. Bake for about 20 minutes.
  6. Meanwhile, beat the eggs in a bowl, season with salt and pepper, add the cream cheese, milk, and sun-dried tomatoes, and mix well.
  7. Once the baking time is up and the sweet potato is soft, take the pan out, place the lightly chopped raw spinach over the sweet potato base, and pour the milk and egg mixture on top.
  8. Finally, scatter the chopped goat cheese and walnuts evenly across the surface.
  9. Bake for about 30 minutes and it's ready to enjoy.
Pics and Cakes

PiC Tips

  • The cream cheese isn't necessary — I threw it in to use up some that had been sitting in the fridge for a few days. If you want to use cream instead of milk like in traditional quiches, go for it; it'll come out a bit richer and creamier.
  • When I say sun-dried tomatoes, I mean the ones that have been dehydrated and then rehydrated, usually packed in seasoned oil. If you only have plain dehydrated tomatoes and want to "revive" and season them yourself for any recipe, it's super easy. Bring 700 ml (3 cups) of water to a boil, then turn off the heat, add 50 ml (3.5 tablespoons) of white vinegar and the dehydrated tomatoes. Let them sit for half an hour. Then take the tomatoes out and pat them dry with paper towels. Transfer them to a jar with olive oil, garlic, and whatever herbs you like, and in a couple of days everything will have soaked up a delicious flavor.
8 de octubre de 2020 · 3 min · Palstelera

Poke de atún y aguacate con huancaína de mango

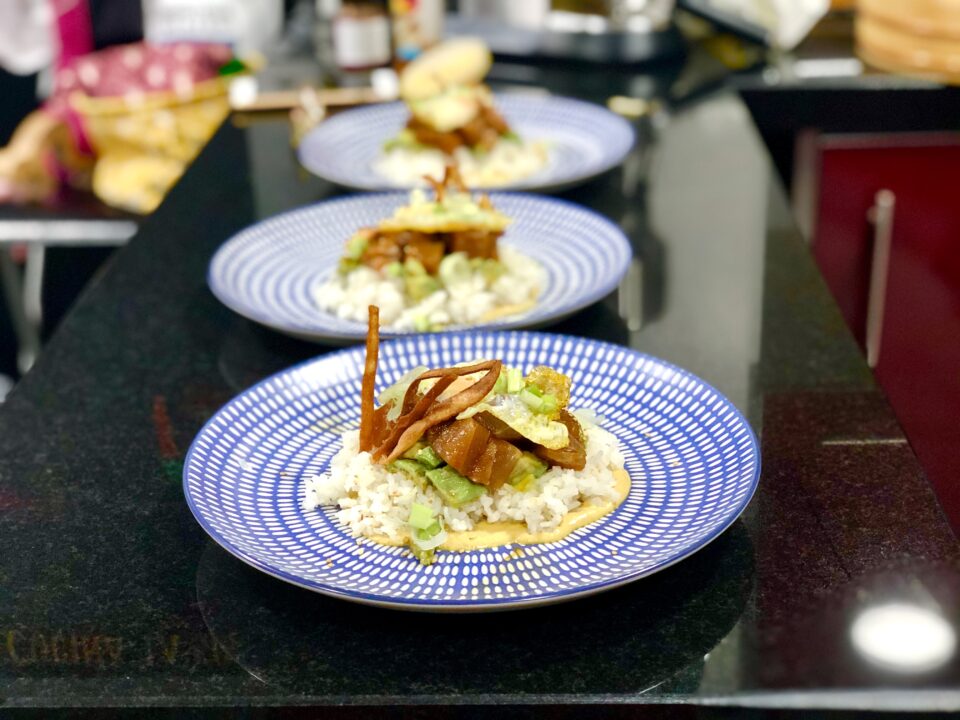
Esta receta la hice siguiendo los pasos exactos de Kitchen Club y la verdad es que si los ingredientes prometían ser una bomba de sabor, el resultado fue incluso mejor de lo esperado. Muchos sabores que combinaban a la perfección. Si acaso, el huevito frito sería un elemento prescindible pero la salsa estaba deliciosa y nos hizo repetir a todos los catadores. De presentación no me quedó ni de lejos tan espectacular como la receta original pero el sabor estuvo a la altura.

Pics and Cakes

Ingredientes

(Para 6 personas)

Salsa huancaína de mango

  • 80 g queso fresco (tipo burgos)
  • 100 ml leche evaporada
  • 60 ml puré de mango
  • 3 galletas tipo cracker o de soda
  • 1 rebanada de pan de molde remojada en leche
  • 2 cdas de cebolla picada
  • 40 g de nueces
  • 3 cdas pasta de ají amarillo (o al gusto)
  • ½ cdta comino
  • sal

Tartar de atún

  • 300 g de atún
  • Ralladura de 1 lima
  • 1 cdta shichimi togarashi (yo no tenía y usé pasta harissa)
  • 1 cda aceite sésamo
  • 30 ml salsa soja
  • 50 ml aceite oliva

Resto de la receta

  • 400 g de arroz sushi
  • 2 aguacates maduros
  • 6 huevos de codorniz
  • 2 tortillas de maíz
  • Sal, aceite y sésamo

Elaboración

  1. Empezamos preparando la salsa huancaína. Salteamos la cebolla en una sartén con un poco de aceite de oliva a fuego fuerte, debe estar dorada pero crujiente.
  2. En un robot de cocina agregamos la cebolla y el resto de ingredientes, trituramos hasta conseguir una crema.
  3. Corregimos el punto de sal. Reservamos.
  4. Picamos el atún en dados medianos y lo aliñamos con ralladura de lima, harissa, aceite de sésamo, salsa de soja y aceite de oliva. Removemos con cuidado y reservamos.
  5. Cortamos los aguacates en dados medianos y aliñamos con sal y aceite de oliva (les podemos dejar los huesos hasta el momento de emplatar para que no se oxiden o echar un poquito de zumo de lima).
  6. Cortamos las tortillas de maíz en tiras y freímos hasta que queden crujientes pero que no se nos quemen (se doran bastante rápido y al enfriar quedan más duras). Reservamos.
  7. Freímos los huevos de codorniz con puntilla.
  8. Llegada la hora de emplatar, ponemos una buena cantidad de salsa en cada plato, luego colocamos el arroz sushi sin aplastar, añadimos el aguacate aliñado, el tartar de atún y terminamos con el huevo de codorniz y las tiras de tortillas de maíz.
  9. Decoramos con cebolleta fresca y sésamo.

Consejos PiC

  • La pasta de ají amarillo la puedes encontrar fácilmente en tiendas de alimentación de productos latinos. Lo mismo para el puré de mango que lo suelen tener congelado (muy buena opción si no es época de mangos o no los encontramos maduros).
  • No he puesto cómo hice el arroz tipo sushi porque lo hice en la arrocera y después un poco de «trampa» porque usé unos polvos de un preparado que ya vienen con la sal, azúcar y vinagre correspondientes. Yo me los traje de Japón pero en tiendas de productos asiáticos seguramente los puedas encontrar.
  • Recuerda congelar el pescado al menos 24 horas para evitar problemas con el anisaki.
29 de septiembre de 2020 · 3 min · Palstelera

Tuna and Avocado Poke with Mango Huancaína

I made this recipe following the exact steps from Kitchen Club, and honestly, if the ingredients promised to be a flavor bomb, the result was even better than expected. So many flavors that combined perfectly. If anything, the little fried egg would be a dispensable element, but the sauce was delicious and made all the tasters go back for seconds. Presentation-wise it didn't turn out anywhere near as spectacular as the original recipe, but the flavor was up to par.

Pics and Cakes

Ingredients

(Serves 6)

Mango huancaína sauce

  • 80 g (2.8 oz) fresh cheese (burgos-style)
  • 100 ml (scant ½ cup) evaporated milk
  • 60 ml (¼ cup) mango purée
  • 3 cracker or soda-style biscuits
  • 1 slice of sandwich bread soaked in milk
  • 2 tbsp chopped onion
  • 40 g (1.4 oz) walnuts
  • 3 tbsp ají amarillo paste (or to taste)
  • ½ tsp cumin
  • salt

Tuna tartare

  • 300 g (10.5 oz) tuna
  • Zest of 1 lime
  • 1 tsp shichimi togarashi (I didn't have any and used harissa paste)
  • 1 tbsp sesame oil
  • 30 ml (2 tbsp) soy sauce
  • 50 ml (3.5 tbsp) olive oil

Rest of the recipe

  • 400 g (14 oz) sushi rice
  • 2 ripe avocados
  • 6 quail eggs
  • 2 corn tortillas
  • Salt, oil and sesame seeds

Method

  1. Start by making the huancaína sauce. Sauté the onion in a pan with a little olive oil over high heat — it should be golden but still crunchy.
  2. In a food processor, add the onion and the rest of the ingredients, and blitz until you get a creamy sauce.
  3. Adjust the salt. Set aside.
  4. Chop the tuna into medium dice and dress it with lime zest, harissa, sesame oil, soy sauce and olive oil. Stir gently and set aside.
  5. Cut the avocados into medium dice and dress with salt and olive oil (you can leave the pits in until plating so they don't oxidize, or add a little lime juice).
  6. Cut the corn tortillas into strips and fry until crispy but not burnt (they brown pretty quickly and harden as they cool). Set aside.
  7. Fry the quail eggs with crispy edges.
  8. When it's time to plate, spoon a generous amount of sauce on each plate, then place the sushi rice on top without packing it down, add the dressed avocado, the tuna tartare, and finish with the quail egg and the corn tortilla strips.
  9. Garnish with fresh spring onion and sesame seeds.

PiC Tips

  • You can easily find ají amarillo paste at Latin grocery stores. Same goes for mango purée, which they usually have frozen (a great option if it's not mango season or you can't find ripe ones).
  • I haven't included how I made the sushi rice because I used the rice cooker and then cheated a bit by using a powdered mix that already comes with the salt, sugar and vinegar. I brought mine from Japan, but you can probably find something similar at Asian grocery stores.
  • Remember to freeze the fish for at least 24 hours to avoid anisakis problems.
29 de septiembre de 2020 · 3 min · Palstelera

Albóndigas en salsa

Volvemos a las andadas tras un largo periodo sin actividad. No significa que en todos estos meses hayamos dejado de cocinar cosas ricas pero la pereza a veces hace estragos… Pero, como una buena amiga dijo, hay que vencer a la pereza. Por ello, con intención de retomar este pequeño compendio de recetas, Pics&Cakes vuelve a la carga. Eso sí, como al fotógrafo oficial lo tenemos bastante atareado puede que las fotos no hagan justicia a las delicias que prepararemos. Disculpas por adelantado.

Y sin más, hoy una receta tradicional y sencilla de albóndigas caseras.


¿Qué necesitamos?

  • 500 gr de carne de ternera picada
  • 1 huevo
  • 2 dientes de ajo
  • 2 rebanadas de pan de molde integral
  • 100 ml de leche
  • Sal
  • 1 cucharada de aceite de oliva
  • Harina y aceite de oliva (para rebozar y freír, respectivamente)
  • 2 cebollas
  • 4 zanahorias
  • 1/2 vaso de vino blanco
  • 1 cucharada de harina
  • Sal y hierbas provenzales

 ¿Cómo lo hacemos?

  1. Ponemos la carne picada en un bol y añadimos el pan remojado previamente en leche, el huevo, el aceite de oliva, los ajos machacados y sal al gusto. Mezclamos bien con las manos.
  2. Formamos bolas del tamaño de una pelota de ping pong o del que prefiramos. Enharinamos ligeramente y reservamos en una fuente.
  3. Para la salsa picamos las cebollas y las zanahorias y las sofreímos en una sartén con un poco de aceite de oliva y sal.
  4. Cuando adquieran un poquito de color, añadimos la harina y el vino blanco. Removemos y bajamos la temperatura. Dejamos cocinar unos 20 minutos y añadimos agua si fuera necesario.
  5. Preparamos una sartén con aceite y vamos friendo las albóndigas hasta que estén doradas por fuera. No es necesario que se cocinen completamente por dentro porque terminaremos de cocinarlas después con la salsa.  Las sacamos en un plato con papel de cocina y reservamos.
  6. Para terminar, trituramos las verduras sofritas con una batidora o robot de cocina para que quede ligada como una salsa. Añadimos las albóndigas y cocinamos a fuego suave durante unos 10 minutos aproximadamente.
  7. Echamos hierbas provenzales al gusto y rectificamos de sal.

Consejos:

– La salsa se puede hacer con cualquier verdura que os apetezca y tengáis por la nevera. En nuestro caso, teníamos excedente de zanahorias…

– Podéis acompañarlas de patatas fritas. Para ello, os recomiendo que las friáis en dos tiempos. Primero a fuego suave hasta que estén blanditas por dentro (pinchadlas con una aguja de cocina) y sacadlas a un plato. Las reserváis hasta que tengáis las albóndigas y la salsa hechas. Entonces, volvéis a calentar el aceite de las patatas y las doráis a fuego fuerte durante un par de minutos. Se os quedarán crujientes por fuera y blandas por dentro.


9 de noviembre de 2017 · 3 min · Palstelera

Meatballs in Sauce

We're back at it after a long stretch of inactivity. It doesn't mean we stopped cooking tasty things during all those months, but laziness sometimes wreaks havoc... However, as a good friend once said, you have to defeat laziness. So, with the intention of picking up this little recipe collection again, Pics&Cakes is back in action. That said, since our official photographer is pretty busy these days, the photos might not do justice to the delicious things we'll be making. Apologies in advance.

And without further ado, today a traditional and simple recipe for homemade meatballs.

What do we need?

  • 500 g (1.1 lb) ground beef
  • 1 egg
  • 2 garlic cloves
  • 2 slices of whole wheat sandwich bread
  • 100 ml (about 1/2 cup) milk
  • Salt
  • 1 tablespoon olive oil
  • Flour and olive oil (for coating and frying, respectively)
  • 2 onions
  • 4 carrots
  • 1/2 glass (about 120 ml / 1/2 cup) white wine
  • 1 tablespoon flour
  • Salt and Provençal herbs

How do we make it?

  1. Place the ground beef in a bowl and add the bread (previously soaked in milk), the egg, the olive oil, the crushed garlic, and salt to taste. Mix well with your hands.
  2. Shape into balls the size of a ping-pong ball, or whatever size you prefer. Lightly coat with flour and set aside on a plate.
  3. For the sauce, chop the onions and carrots and sauté them in a pan with a little olive oil and salt.
  4. Once they get a bit of color, add the flour and the white wine. Stir and lower the heat. Let cook for about 20 minutes, adding water if needed.
  5. Heat oil in a pan and fry the meatballs until they're golden on the outside. They don't need to be fully cooked through, because we'll finish cooking them later in the sauce. Transfer them to a plate lined with paper towels and set aside.
  6. To finish, blend the sautéed vegetables with a hand blender or food processor so it comes together as a sauce. Add the meatballs and cook over low heat for about 10 minutes.
  7. Sprinkle in Provençal herbs to taste and adjust the salt.

Tips:

– You can make the sauce with any vegetables you like and have around in the fridge. In our case, we had a surplus of carrots...

– You can serve them with French fries. For those, I recommend frying them in two stages. First over low heat until they're soft on the inside (poke them with a kitchen needle) and transfer them to a plate. Set them aside until your meatballs and sauce are ready. Then, reheat the oil from the fries and brown them over high heat for a couple of minutes. They'll come out crispy on the outside and soft on the inside.

9 de noviembre de 2017 · 3 min · Palstelera

Chickpea Salad with Mustard Vinaigrette

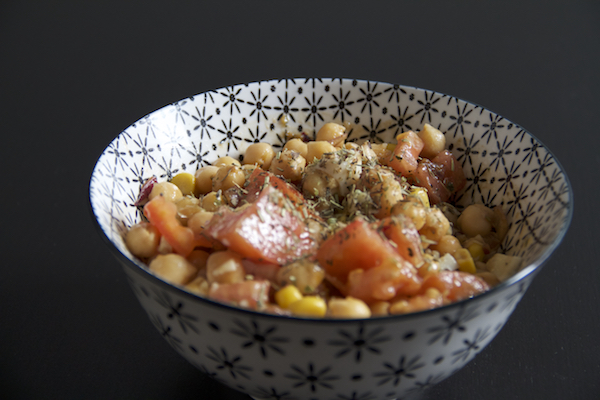
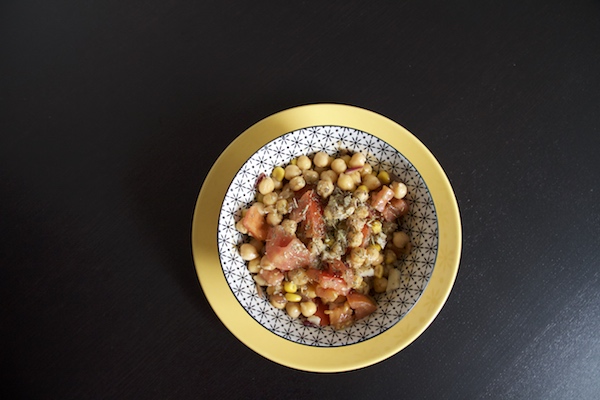
Just because summer is over doesn't mean we have to say goodbye to salads. Today, a super simple and quick recipe for a tasty, healthy chickpea salad. Since we're using pre-cooked chickpeas, it takes no more than 5 minutes to put together, so there's no excuse. Enjoy!

ensalada garbanzos

What do we need?

  • 1 can of cooked chickpeas
  • 2 tomatoes
  • 1/2 onion
  • 1 small can of corn
  • Mustard
  • Herbes de Provence
  • Salt and pepper
  • Oil and vinegar

How do we make it?

  1. First, drain the canned chickpeas and rinse them with cold water to get rid of that characteristic canned taste. Place them in a large bowl.
  2. Dice the tomatoes and onion and add them to the bowl with the chickpeas.
  3. Add the corn.
  4. In a glass jar, make a vinaigrette. The usual ratio is three parts oil to one part vinegar. For this salad, you can pour about two finger-widths of oil into the jar, a third of that in vinegar, 1 teaspoon of mustard, 1 teaspoon of herbes de Provence, and a pinch of salt. Close the jar tightly and shake vigorously until the mixture has emulsified. Taste and adjust with whatever ingredient suits your liking.

Tips:

– As with all salads, more than a recipe, this is a suggestion. Feel free to add other ingredients or seasonings you have in the fridge.

img_7702

23 de septiembre de 2016 · 2 min · Palstelera

Ensalada de garbanzos con vinagreta de mostaza

Que el verano se haya acabado no significa que tengamos que despedirnos de las ensaladas. Hoy una receta muy sencilla y rápida para preparar una rica y sana ensalada de garbanzos. Como usamos garbanzos ya cocidos no se tarda más de 5 minutos en hacerla así que no hay excusa. ¡Que aproveche!

ensalada garbanzos

¿Qué necesitamos?

  • 1 bote de garbanzos cocidos
  • 2 tomates
  • 1/2 cebolla
  • 1 lata pequeña de maíz
  • Mostaza
  • Hierbas provenzales
  • Sal y pimienta
  • Aceite y vinagre

 ¿Cómo lo hacemos?

  1. En primer lugar, escurrimos los garbanzos de bote y los aclaramos con agua fría para quitarle ese sabor característico a conserva. Colocamos en un bol amplio.
  2. Cortamos los tomates y la cebolla en dados y los añadimos al bol de los garbanzos.
  3. Añadimos el maíz.
  4. En un bote de cristal hacemos una vinagreta. La proporción habitual es tres medidas de aceite por cada una de vinagre. Para esta ensalada, podemos poner dos dedos de aceite en el bote, una tercera parte de vinagre, 1 cucharadita de mostaza, 1 cucharadita de hierbas provenzales y una pizca de sal. Cerramos el bote bien y agitamos enérgicamente hasta que se haya emulsionado la mezcla. Probamos y rectificamos con algún ingrediente según nuestro gusto.

Consejos:

– Como en todas las ensaladas, más que una receta, esto es una sugerencia. Podéis añadir otros ingredientes o condimentos que tengáis por la nevera.

img_7702

 
23 de septiembre de 2016 · 2 min · Palstelera

Black Garlic Burger

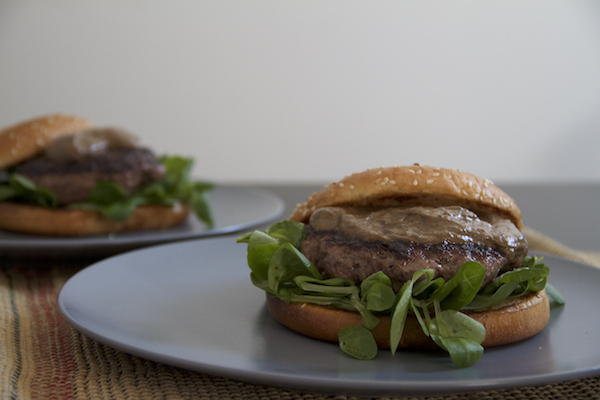
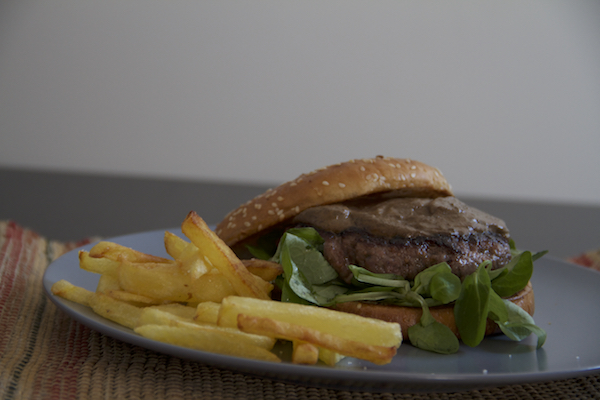
A really simple recipe where all the originality comes down to a single ingredient: black garlic. Black garlic is just regular garlic that has gone through a specific slow-fermentation process, which transforms its look and texture and boosts its nutritional properties. For this burger we'll use it both to season the ground beef and for the accompanying sauce. The flavor is a little peculiar — feel like giving it a try?

ajo negro

What do we need?

  • 300 g (10.5 oz) ground beef
  • 2 burger buns
  • Lamb's lettuce (mâche)
  • 1 head of black garlic
  • 125 ml (1/2 cup) heavy cream
  • Salt and pepper
  • Butter (optional, for toasting the buns)

How do we make it?

  1. Crush two cloves of black garlic and mix them into the ground beef. Season with salt and pepper to taste.
  2. Divide the meat in two and shape the patties, then let them rest for about 30 minutes.
  3. Meanwhile, get the black garlic sauce going. Put the cream in a small saucepan with 5 or 6 peeled black garlic cloves. Let it simmer for about 8 minutes, stirring occasionally.
  4. You can blend the sauce with an immersion blender to make it perfectly smooth and uniform, or just use a fork or whisk and stir vigorously. Black garlic cloves are very soft and after cooking they break down with no trouble at all. Add salt to taste.
  5. Cook the patties in a pan to your liking.
  6. Toast the buns in a pan with a little butter and assemble the burger with a layer of lamb's lettuce, the patty, and the black garlic sauce.

Tips:

– You can make some fries on the side — they always go great with any burger.

img_7725

8 de septiembre de 2016 · 2 min · Palstelera

Hamburguesa con ajo negro

Una receta muy sencilla donde la originalidad se la lleva un único ingrediente: el ajo negro. El ajo negro no es más que un ajo normal que ha sido sometido a un proceso específico de lenta fermentación, el cual transforma su aspecto y textura y ensalza sus propiedades nutritivas. Para esta hamburguesa lo utilizaremos tanto para condimentar la carne picada como para la salsa de acompañamiento. Su sabor es un tanto particular, ¿te animas a probarlo?

ajo negro

¿Qué necesitamos?

  • 300 g de carne de ternera picada
  • 2 panes de hamburguesa
  • Canónigos
  • 1 cabeza de ajo negro
  • 125 ml de nata
  • Sal y pimienta
  • Mantequilla (opcional, para tostar los panes)

 ¿Cómo lo hacemos?

  1. Machacamos dos dientes de ajo negro y los mezclamos con la carne picada. Salpimentamos al gusto.
  2. Dividimos la carne en dos y formamos las hamburguesas que dejamos reposar unos 30 minutos aproximadamente.
  3. Mientras tanto, vamos preparando la salsa de ajo negro. Para ello ponemos en un cazo la nata con 5 o 6 dientes de ajo negro pelados. Dejamos cocer 8 minutos aproximadamente, removiendo de vez en cuando.
  4. Podemos triturar la salsa con una batidora para que quede completamente homogénea  y suave o simplemente con ayuda de un tenedor o unas varillas podemos remover bien y de forma enérgica. Los ajos negros son muy blanditos y tras la cocción no nos costará deshacerlos. Echamos sal al gusto.
  5. Cocinamos las hamburguesas en una sartén según nuestro gusto.
  6. Tostamos los panes en una sartén con un poco de mantequilla y montamos la hamburguesa con una capa de canónigos, la carne y salsa de ajo negro.

Consejos:

– Podéis hacer unas patatas fritas de acompañamiento que siempre le van muy bien a cualquier hamburguesa.

img_7725


8 de septiembre de 2016 · 2 min · Palstelera