Mejillones en escabeche

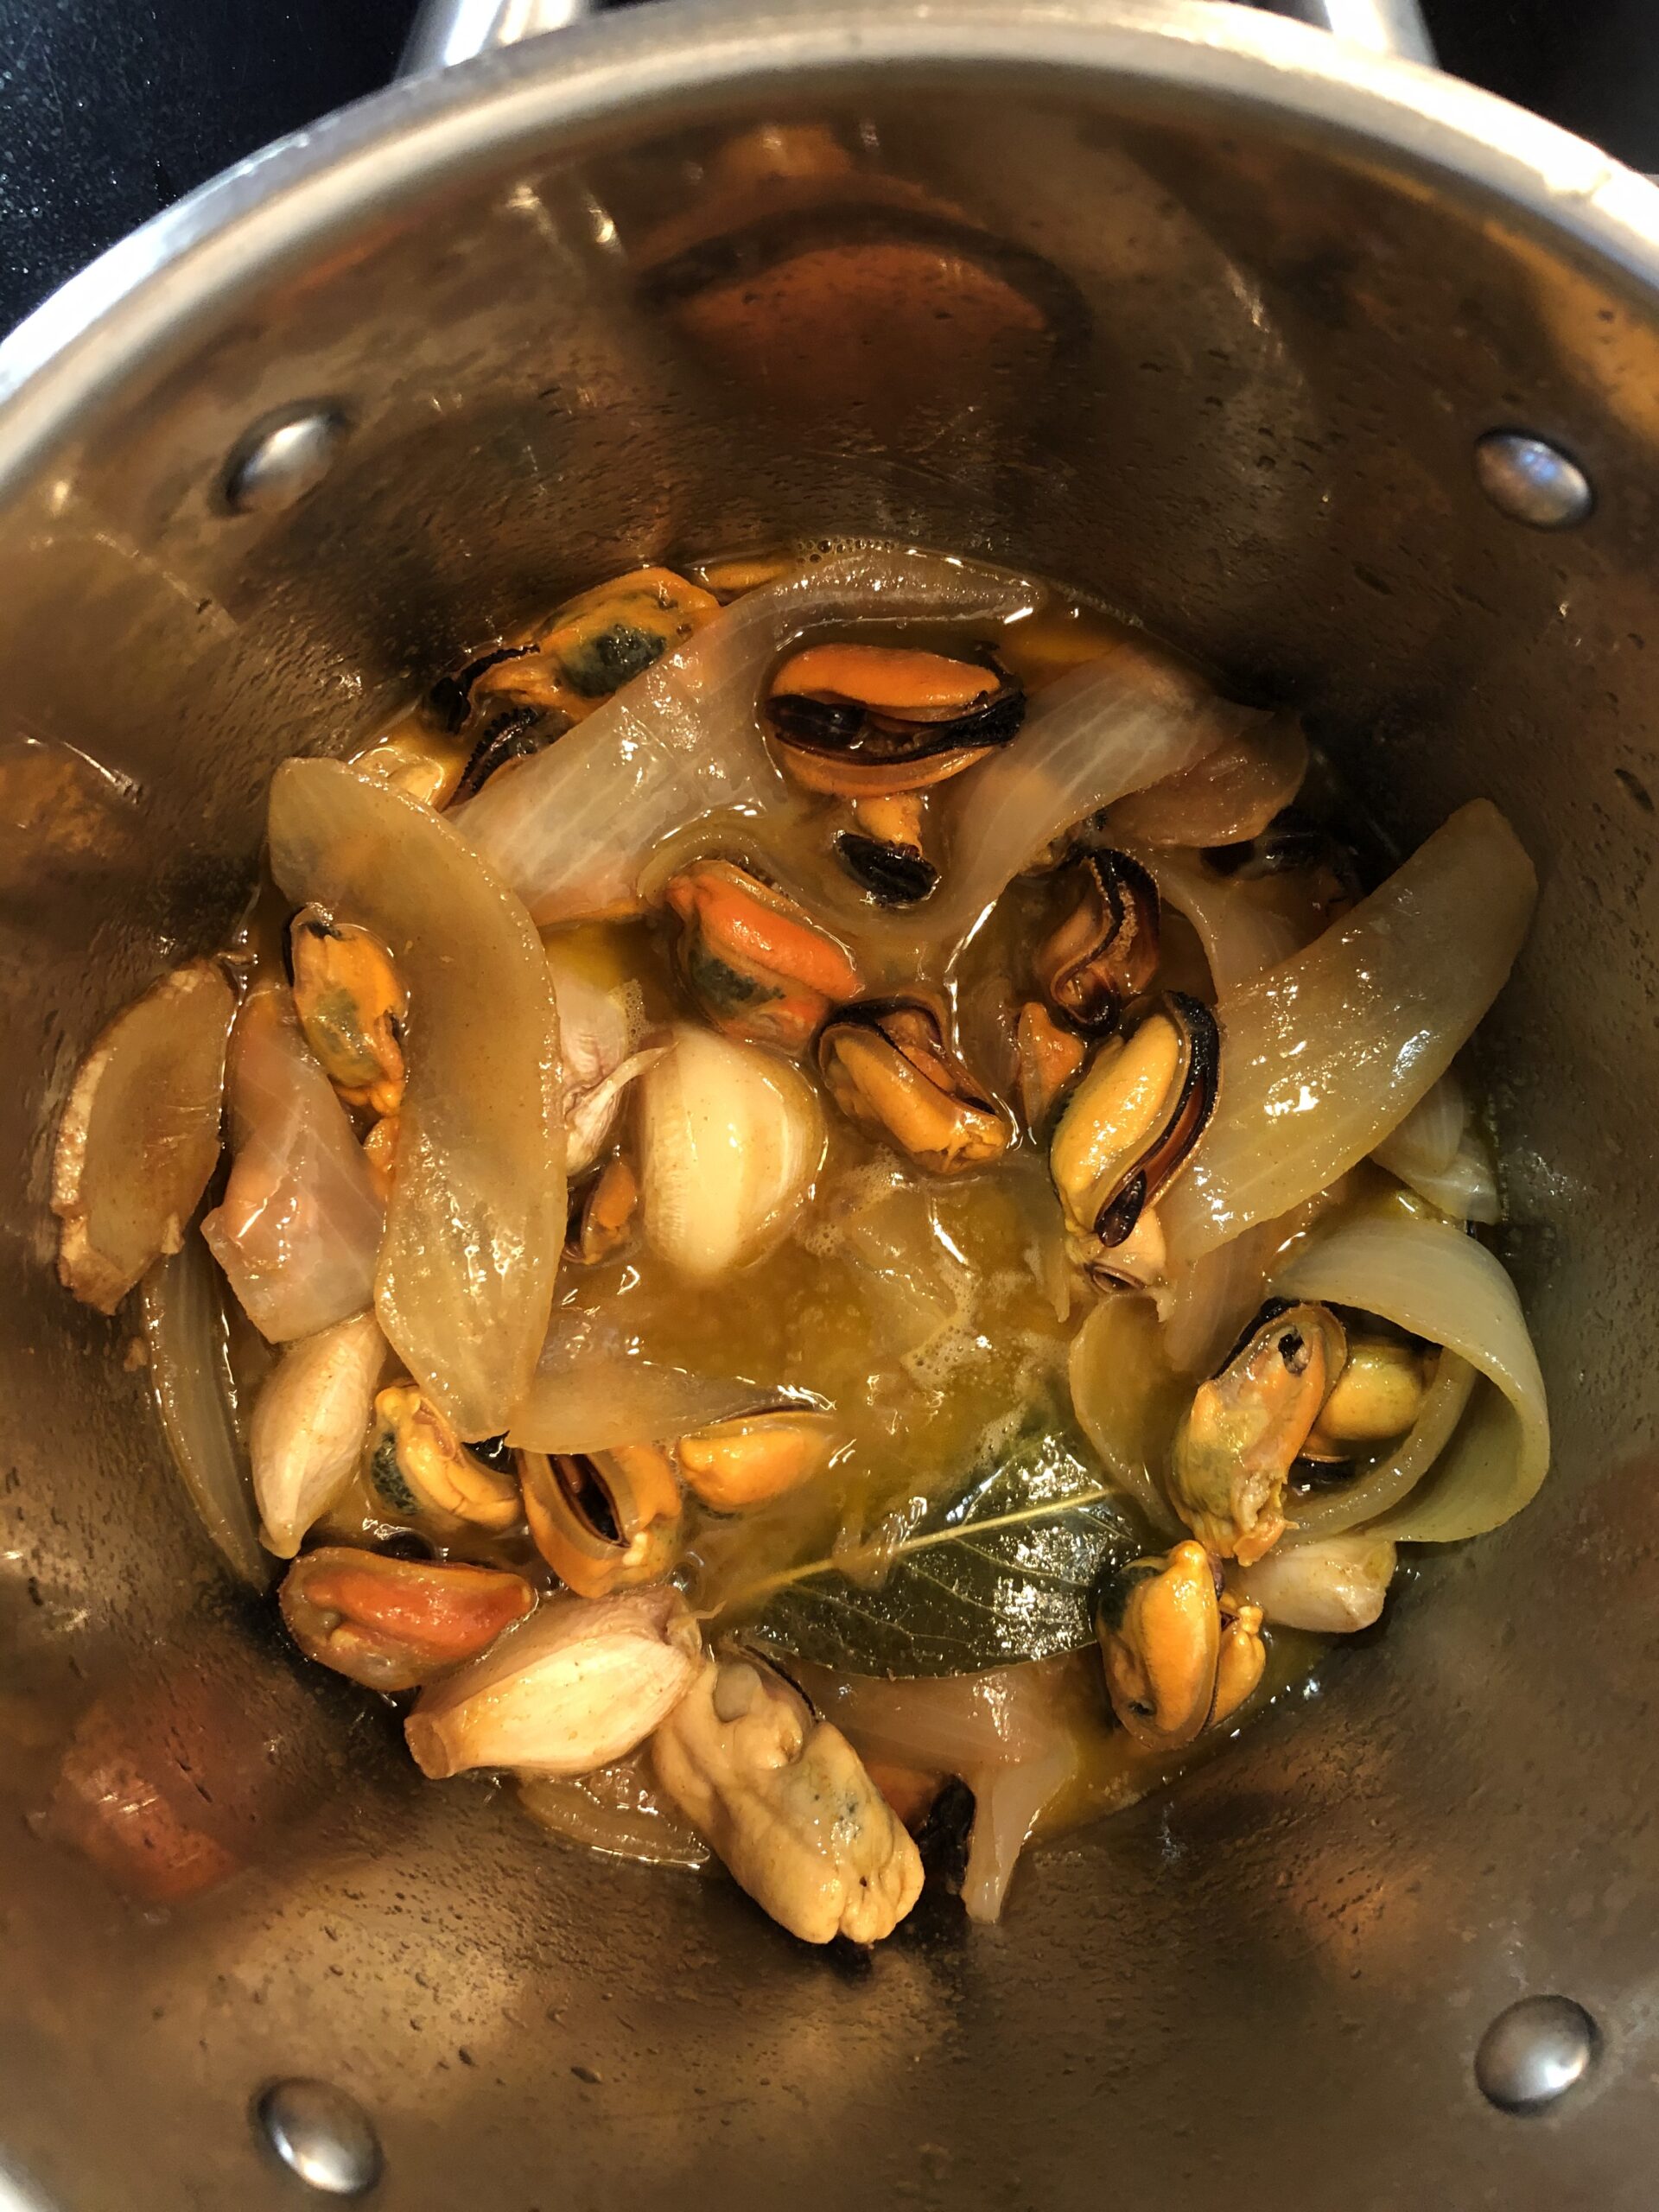
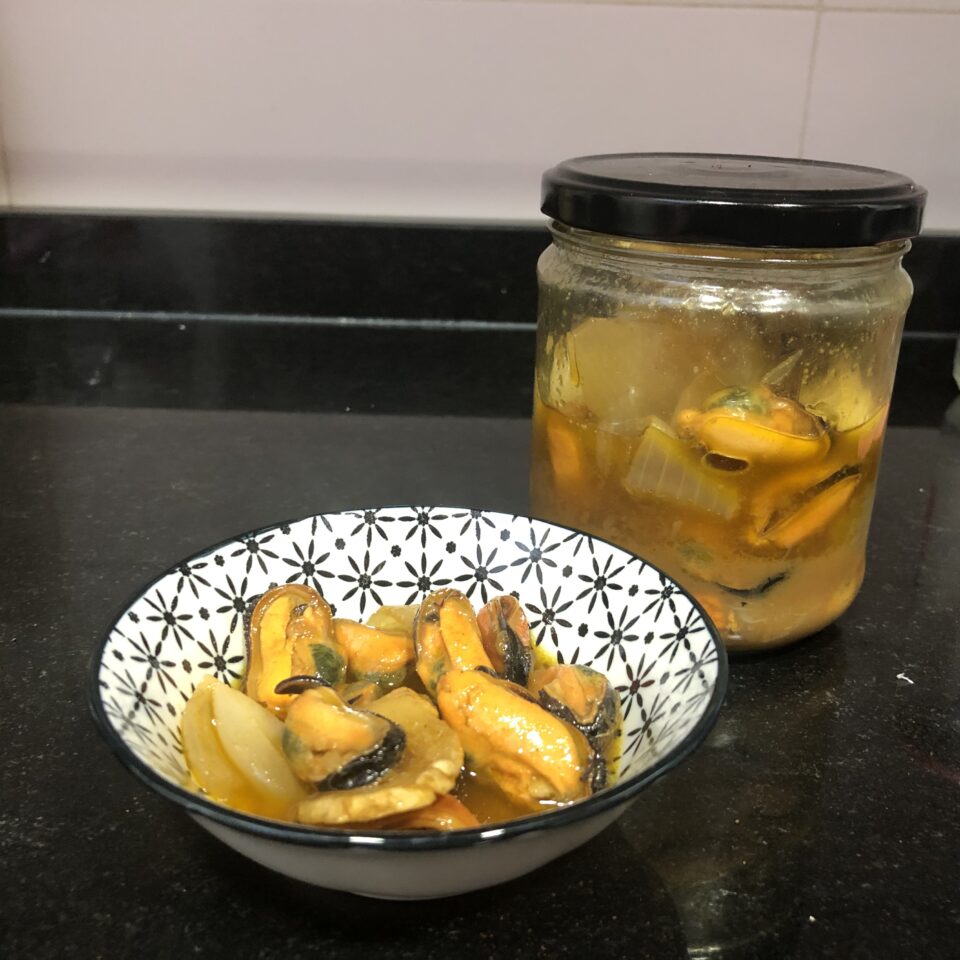
A priori pensé que sería una de esas recetas que no merecería la pena hacerlas caseras pero cuán equivocada estaba. Me apetecía hacer el escabeche, ver el método y comprobar si conseguía ese sabor tan característico. Tanto me gustó que he repetido el proceso unas tres veces este verano. Cunden mucho y aguantan varios días en la nevera así que no hay excusa para tener un aperitivo bien rico en casa y hecho por uno mismo.

Ingredientes

  • 1 kg mejillones
  • 300 ml aceite oliva
  • 100 ml vinagre Jerez
  • 50 ml vinagre blanco (yo usé de arroz)
  • 100 ml vino blanco
  • 1 cabeza de ajos (dientes separados sin pelar)
  • 1 cebolla en juliana grande
  • 3 rodajas de jengibre fresco
  • Pimienta en grano (yo usé de Jamaica)
  • 2-3 cayenas
  • 3 hojas de laurel
  • Sal
  • 2 cucharaditas de pimentón (dulce, picante o mezcla)
Pics and Cakes

Elaboración

  1. Cocemos los mejillones al vapor para que se abran pero queden tiernos. Les quitamos las conchas y las barbas. Reservamos.
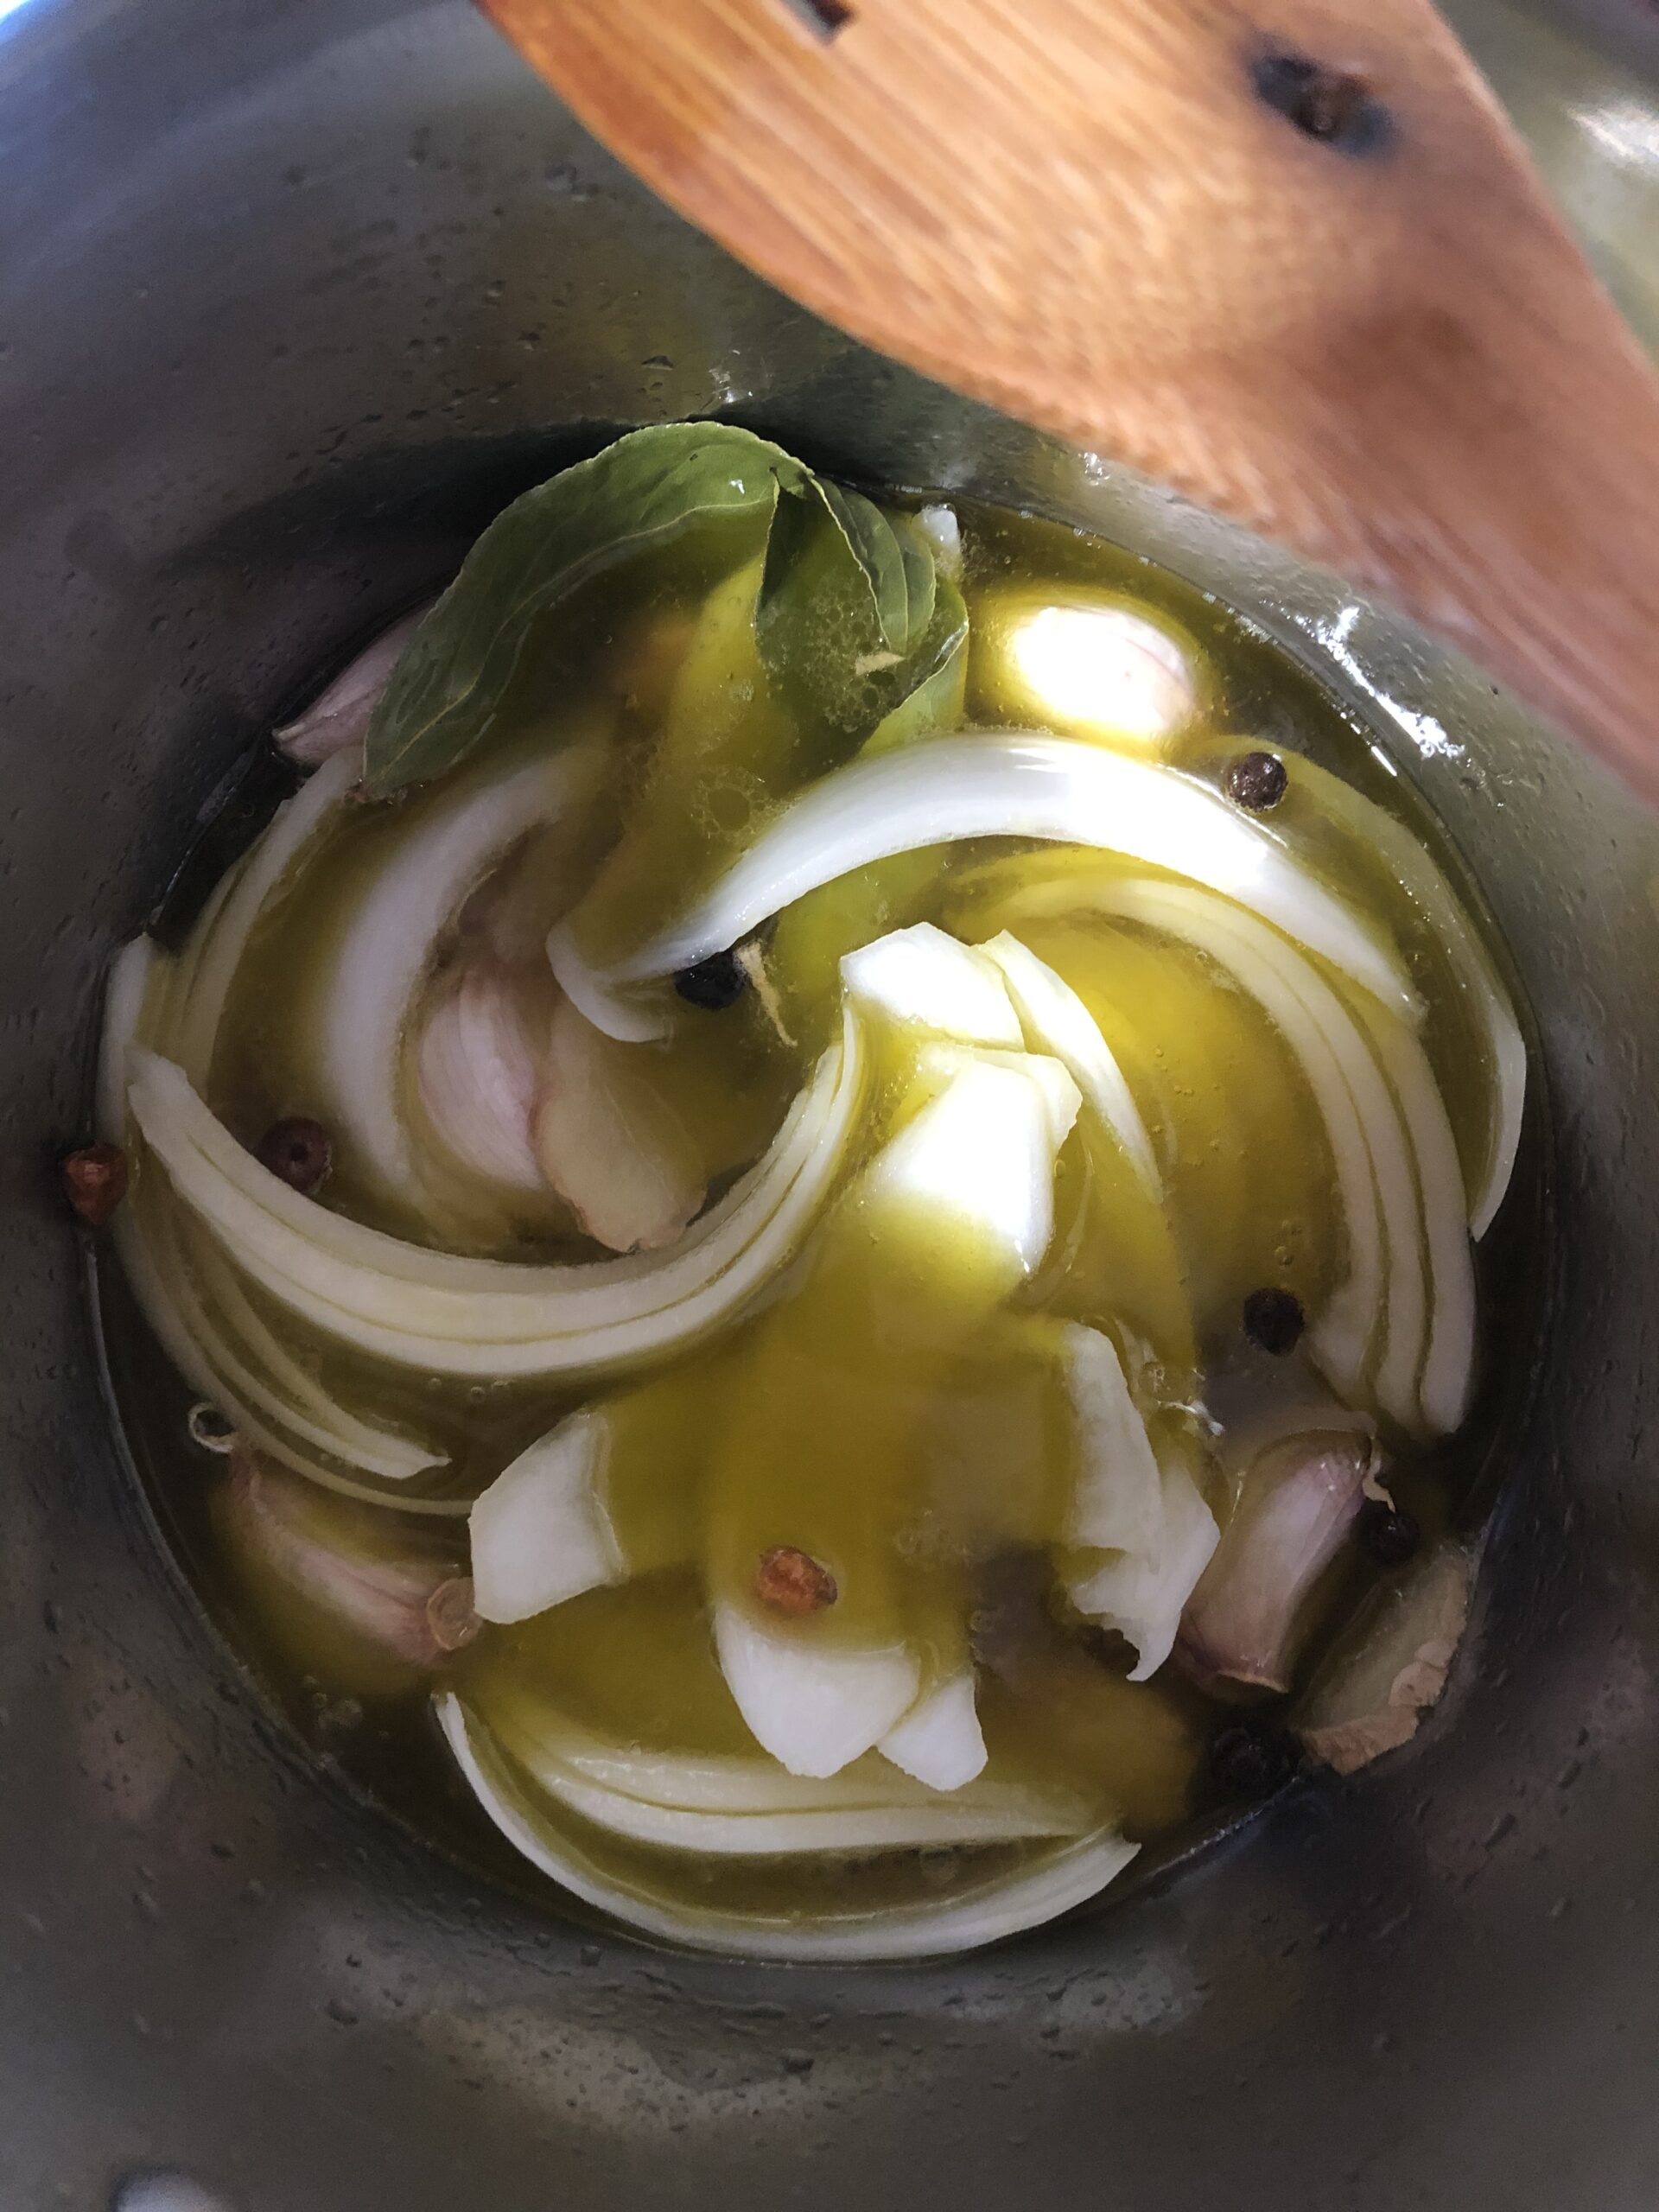
  2. Ponemos en una cazuela el aceite a calentar y añadimos todos los ingredientes excepto los mejillones cocidos y el pimentón.
  3. Dejamos cocer a fuego medio durante 30 min.
  4. Pasado el tiempo, apartamos del fuego y echamos el pimentón. Removemos bien y añadimos los mejillones.
  5. Volvemos a poner al fuego para darle un calentón a los mejillones durante unos segundos.
  6. Solo queda pasarlo a botes y listo para degustar. Aunque mejor dejarlos unas horas para que se asienten bien los sabores.

Consejos PiC

  • Puedes esterilizar previamente los botes que vayas a utilizar hirviéndolos en agua durante 15-20 minutos.
  • Con esta receta no estamos creando una conserva porque no hemos hecho el vacío ni los hemos hervido después por lo que te recomiendo guardarlos en la nevera. Cuando quieras disfrutarlos, te recomiendo que los saques un poco antes de la nevera para que se atemperen y el aceite no esté tan sólido.
  • Puedes añadir otras hierbas aromáticas o especias según tus gustos y tu despensa.
Pics and Cakes
Pics and Cakes

30 de septiembre de 2020 · 2 min · Palstelera

Pickled Mussels

At first I thought this would be one of those recipes that wasn't worth making at home, but how wrong I was. I felt like making the escabeche, seeing the method, and checking whether I could pull off that characteristic flavor. I liked it so much that I've repeated the process about three times this summer. They go a long way and keep for several days in the fridge, so there's no excuse not to have a really tasty homemade appetizer on hand.

Ingredients

  • 1 kg (2.2 lb) mussels
  • 300 ml (1.25 cups) olive oil
  • 100 ml (scant ½ cup) sherry vinegar
  • 50 ml (3 tbsp + 1 tsp) white vinegar (I used rice vinegar)
  • 100 ml (scant ½ cup) white wine
  • 1 head of garlic (cloves separated, unpeeled)
  • 1 large onion, julienned
  • 3 slices of fresh ginger
  • Whole peppercorns (I used allspice)
  • 2-3 dried chili peppers
  • 3 bay leaves
  • Salt
  • 2 teaspoons paprika (sweet, hot, or a mix)
Pics and Cakes

Method

  1. Steam the mussels just until they open but stay tender. Remove the shells and beards. Set aside.
  2. Heat the oil in a saucepan and add all the ingredients except the cooked mussels and the paprika.
  3. Let it simmer over medium heat for 30 minutes.
  4. Once the time is up, take it off the heat and add the paprika. Stir well and add the mussels.
  5. Put it back on the heat for a few seconds just to warm the mussels through.
  6. All that's left is to transfer everything to jars and they're ready to enjoy. Although it's better to leave them for a few hours so the flavors settle in nicely.

PiC Tips

  • You can sterilize the jars beforehand by boiling them in water for 15-20 minutes.
  • With this recipe we're not creating a true preserve since we haven't vacuum-sealed them or boiled them afterwards, so I recommend keeping them in the fridge. When you want to enjoy them, take them out of the fridge a bit ahead of time so they come to room temperature and the oil isn't so solid.
  • You can add other herbs or spices to taste, depending on what you have in your pantry.
Pics and Cakes
Pics and Cakes

30 de septiembre de 2020 · 2 min · Palstelera

Camembert con caramelo y nueces

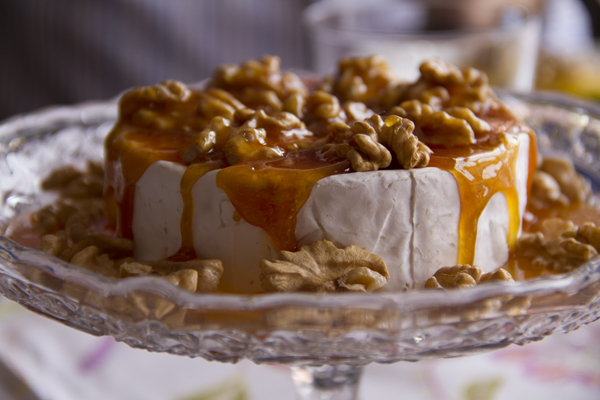
Dicen que todo lo bueno se hace esperar y parece que esto es lo que hemos querido hacer con esta nueva receta. Pero bueno, por fin, volvemos a publicar y traemos una sugerencia de aperitivo fácil, rápida y exquisita, una vez más sacada de La Receta de la Felicidad, quien nos invita a utilizarlo como regalo navideño. Pero vamos, que para disfrutar un buen queso nos da igual que sea Navidad, Semana Santa o pleno mes de agosto, ¿verdad?

Pics and Cakes


¿Qué necesitamos?

  • 1 queso camembert

  • Varias nueces peladas

  • 100 g de azúcar

  • 2 cucharadas de mantequilla


¿Cómo lo hacemos?

  • Ponemos el queso camembert entero sobre un plato y colocamos las nueces encima.

  • Ponemos en un cazo o sartén el azúcar a fuego medio y dejamos que se vaya derritiendo poco a poco sin remover (aunque sintamos la tentación de hacerlo).

  • Cuando veamos que se ha derretido el azúcar y que tenemos una especie de sirope muy espeso y claro, podemos remover y lo dejaremos cocinar un poco más hasta que alcance el tono dorado del caramelo.

  • Apagamos el fuego, añadimos las dos cucharadas de mantequilla y removemos bien.

  • Vertemos inmediatamente el caramelo sobre el camembert con nueces, intentando hacer una capa fina o incluso hilos con el caramelo.


Consejos:

  • Hay que tener cuidado y evitar dejar demasiado tiempo el caramelo en el fuego ya que se nos podría quemar y el resultado sería un caramelo muy oscuro y amargo.

  • Se pueden cortar las porciones de queso en cuanto hayamos echado el caramelo. Si no, al solidificarse podría resultarnos muy complicado (por eso también es importante que la capa de caramelo sea fina).

________________ [English version] CAMEMBERT CHEESE WITH NUTS AND CARAMEL* *Ingredients: 

  • 1 Camembert cheese

  • Several nuts

  • 100 g sugar

  • 2 tbsp butter

* *

  • Place the cheese into a dish and put the nuts over it.

  • Place the sugar into a sauce pan and cook over medium low heat. Let it melt slowly.

  • When the sugar is totally melt you can use a spoon to stir.

  • Keep cooking until golden brown. Add the butter and stir well.

  • Pour immediately over the cheese with the nuts. Try to create a thin layer.

Tips:- Do not overcook the sugar or you’ll get a dark and bitter caramel.* - Cut the cheese into portions right after pouring the caramel. Otherwise, when caramel is hard it could be very difficult (that’s why you have to try to make a thin layer).


20 de junio de 2013 · 3 min · Palstelera

Camembert with Caramel and Walnuts

They say good things come to those who wait, and it seems that’s exactly what we’ve been trying to do with this new recipe. But anyway, we’re finally back to posting, and we’re bringing you an easy, quick, and delicious appetizer suggestion, once again borrowed from La Receta de la Felicidad, who recommends it as a Christmas gift. But hey, when it comes to enjoying a good cheese, who cares if it’s Christmas, Easter, or the middle of August, right?

Pics and Cakes

What do we need?

  • 1 Camembert cheese

  • A handful of shelled walnuts

  • 100 g (1/2 cup) sugar

  • 2 tablespoons butter

How do we make it?

  • Place the whole Camembert cheese on a plate and arrange the walnuts on top.

  • In a small saucepan or skillet, heat the sugar over medium heat and let it melt slowly without stirring (even if you feel tempted to).

  • Once the sugar has melted into a kind of thick, pale syrup, you can stir it and let it cook a little longer until it reaches a golden caramel color.

  • Turn off the heat, add the two tablespoons of butter, and stir well.

  • Immediately pour the caramel over the Camembert with walnuts, trying to make a thin layer or even caramel threads.

Tips:

  • Be careful not to leave the caramel on the heat for too long, as it could burn and result in a very dark, bitter caramel.

  • You can cut the cheese into portions right after pouring on the caramel. Otherwise, once it solidifies it can get tricky (that’s another reason why the caramel layer should be thin).

________________ [English version] CAMEMBERT CHEESE WITH NUTS AND CARAMEL* *Ingredients:

  • 1 Camembert cheese

  • Several nuts

  • 100 g sugar

  • 2 tbsp butter

  • Place the cheese into a dish and put the nuts over it.

  • Place the sugar into a sauce pan and cook over medium low heat. Let it melt slowly.

  • When the sugar is totally melt you can use a spoon to stir.

  • Keep cooking until golden brown. Add the butter and stir well.

  • Pour immediately over the cheese with the nuts. Try to create a thin layer.

  • Tips:- Do not overcook the sugar or you’ll get a dark and bitter caramel.* - Cut the cheese into portions right after pouring the caramel. Otherwise, when caramel is hard it could be very difficult (that’s why you have to try to make a thin layer).

20 de junio de 2013 · 3 min · Palstelera

Croquetas de gorgonzola y muesli

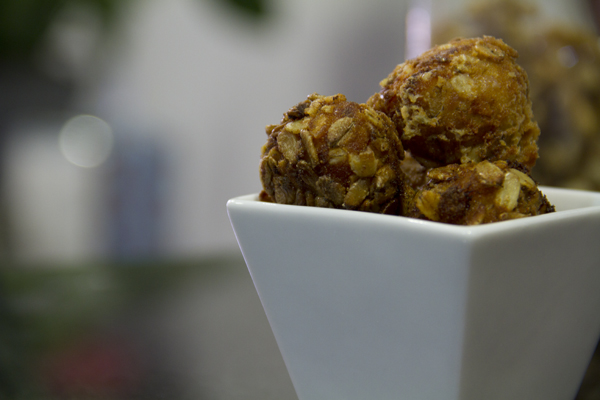
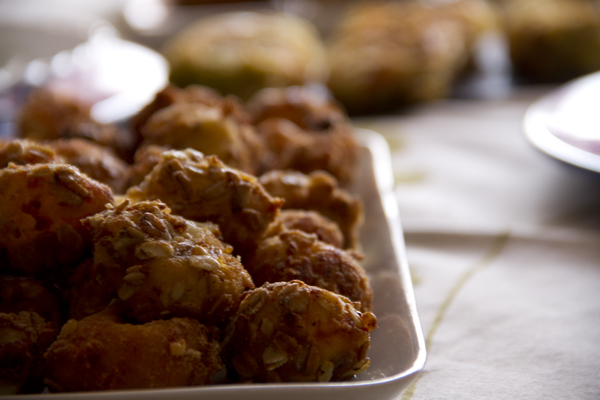
Estas croquetas las preparé por primera vez como aperitivo de una Nochevieja y la verdad es que encantaron a todo el mundo. Incluso a aquellos que torcían un poco la nariz al ver que llevaban muesli por fuera, les gustó el contraste tan fuerte entre el exterior crujiente y el relleno cremoso. Ya sea para estas fechas o para un día cualquiera, os animamos a que las preparéis porque es una receta que merece la pena.

Pics and Cakes


¿Qué necesitamos?

  • 4 cucharas de harina

  • Medio litro de leche

  • 100g de queso gorgonzola

  • 2 cucharadas de aceite de oliva

  • 2 cucharadas de mantequilla

  • Sal

  • Pimienta negra

  • **2 huevos

  • Pan rallado

  • Muesli sin frutas

  • Aceite de oliva para freír


¿Cómo lo hacemos?

  • En primer lugar, preparamos la bechamel. Para ello ponemos el aceite y la mantequilla en una sartén.

  • Cuando se haya disuelto la mantequilla y esté bien caliente, añadimos la harina. Removemos bien y dejamos que se cocine un poco (para que luego no sepa a a crudo).

  • A continuación vamos añadiendo la leche poquito a poco y removiendo constantemente de forma enérgica para evitar que se formen grumos. La bechamel que queremos hacer es bastante espesa ya que la utilizaremos para croquetas y además va a llevar un queso muy cremoso.

  • Echamos el queso cortado en trozos y seguimos removiendo hasta que se disuelva por completo y salpimentamos.

  • Vertemos la bechamel en una fuente amplia para que quede bien extendida. Tiene que enfriar al menos durante dos horas, terminando en la nevera para que endurezca bien.

  • Una vez fría la masa, formamos las bolas. Como es un sabor intenso, intentaremos no hacerlas muy grandes.

  • Rebozamos las bolas en pan rallado.

  • Preparamos tres recipientes: un con los huevos batidos, otro con el muesli y otro con pan rallado. Vamos pasando nuestras bolas por los tres recipientes y siguiendo ese orden (huevo-muesli-pan).

  • Preparamos una sarten con aceite y cuando esté bien caliente, vamos echando nuestras croquetas y las freímos hasta que estén doradas.

  • Al sacarlas las ponemos en un plato con papel de cocina para que absorba el exceso de aceite.


Consejos:

  • Se recomienda freírlas justo antes de comer para que el rebozado esté crujiente y el relleno cremoso. Si queréis podéis prepararlas con antelación y dejarlas en la nevera o incluso congelarlas para freírlas justo cuando las queráis degustar.

  • Si la bechamel se os resiste y finalmente quedan grumos, podéis eliminarlos con ayuda de la batidora antes de añadir el queso. No es el método apropiado pero qué se le va a hacer, a veces pasan estas cosas y una batidora a tiempo nos ahorrará muchos problemas :-)

Pics and Cakes

[English version] GORGONZOLA CROQUETTES WITH MUESLIIngredients:-*

  • 4 tbsp flour

  • 1/2 l milk

  • 100g gorgonzola cheese

  • 2 tbsp olive oil

  • 2 tbsp butter

  • Salt

  • Black pepper

  • 2 egg

  • Breadcrumbs

  • Fruitless muesli

  • Olive oil (for frying)

* *

  • *First step, prepare the bechamel sauce. Add butter and oil into a sauce pan. *

  • When butter is melted and hot, add the flour. Mix well and cook for a while to avoid the taste of uncooked flour.

  • Add the milk little by little. Keep stiring to avoid lumps. We need to have quite a thick bechamel given that it will be used to form croquettes.

  • Add cheese, salt and pepper. Keep stiring until completely disolved.

  • Pour the bechamel into a big plate and leave cool for at least 2 hours (at the end, in the fridge).

  • When the dough is cold and solid, create small balls.

  • Coat in breadcrumbs.

  • Prepare three different bowls: one with whisked eggs, other with muesli and other with breadcrumbs. Coat the balls in three of them in this order: eggs-muesli-breadcrumbs.

  • Prepare the fryingpan with the olive oil and when it is very hot, add the croquettes and deep fry them until golden brown.

  • Take them out and place them into a plate covered by kitchen paper (it will absorb the remaining oil).

* *

Consejos:

*- Fry the croquettes just before serving so the muesli will be crusty and the bechamel creamy.  You can prepare them in advance and leave in the fridge or even in the freezer. *- If you have some problems when preparing the bechamel and some lumps unfortunately appear, you can use a mixer. It’s not the proper way but it’s better than having disgusting lumps in our wonderful croquettes.


30 de diciembre de 2012 · 4 min · Palstelera

Gorgonzola and Muesli Croquettes

I made these croquettes for the first time as an appetizer for a New Year’s Eve dinner, and honestly, everyone loved them. Even the ones who wrinkled their noses a bit when they saw the muesli coating ended up enjoying the strong contrast between the crispy outside and the creamy filling. Whether for the holidays or any random day, we encourage you to give these a try because the recipe is absolutely worth it.

Pics and Cakes

What do we need?

  • 4 tablespoons of flour

  • Half a liter of milk (about 2 cups)

  • 100g (3.5 oz) of gorgonzola cheese

  • 2 tablespoons of olive oil

  • 2 tablespoons of butter

  • Salt

  • Black pepper

  • 2 eggs

  • Breadcrumbs

  • Muesli without fruit

  • Olive oil for frying

How do we make it?

  • First, we make the béchamel. To do this, put the oil and butter in a frying pan.

  • Once the butter has melted and the pan is good and hot, add the flour. Stir well and let it cook for a moment (so it doesn’t taste raw later).

  • Next, gradually pour in the milk little by little, stirring constantly and energetically to prevent lumps from forming. We want a fairly thick béchamel since it’s going to be used for croquettes and will also have a very creamy cheese mixed in.

  • Toss in the cheese cut into chunks and keep stirring until it’s fully melted, then season with salt and pepper.

  • Pour the béchamel into a wide dish so it spreads out nicely. It needs to cool for at least two hours, finishing in the fridge so it firms up properly.

  • Once the mixture is cold, shape it into balls. Since the flavor is intense, try not to make them too big.

  • Roll the balls in breadcrumbs.

  • Set up three bowls: one with the beaten eggs, another with the muesli, and another with breadcrumbs. Pass each ball through the three bowls in this order (egg-muesli-breadcrumbs).

  • Heat a frying pan with oil, and once it’s nice and hot, drop the croquettes in and fry them until golden brown.

  • Once they’re out, place them on a plate lined with paper towel to soak up the excess oil.

Tips:

  • It’s best to fry them right before serving so the coating stays crispy and the filling stays creamy. If you want, you can prep them ahead of time and leave them in the fridge, or even freeze them and fry them whenever you fancy a bite.

  • If the béchamel gets the better of you and lumps end up forming, you can blitz them out with a hand blender before adding the cheese. It’s not the proper method, but hey, sometimes these things happen, and a well-timed blender can save you a lot of trouble :-)

Pics and Cakes


30 de diciembre de 2012 · 3 min · Palstelera

Patatas rellenas

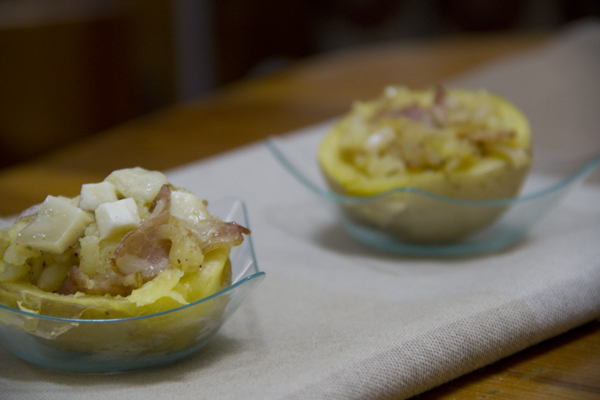
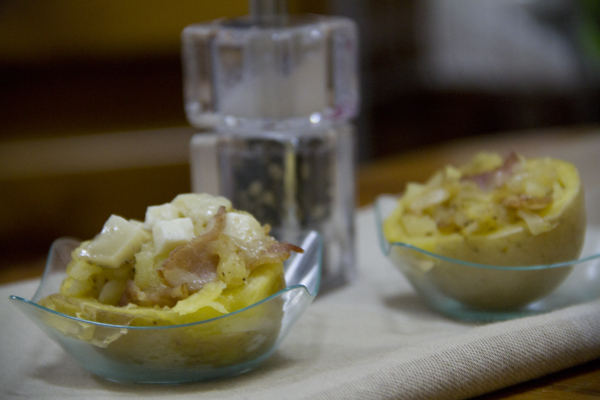
He de reconocer que somos un poco esponjas y todo lo que vemos que nos gusta intentamos hacerlo en casa. Este es el caso de la receta de hoy. Hace ya algunos años nos fuimos los amigos a pasar una Semana Santa a Camposancos, un pueblito bueno de Pontevedra, y allí Ana (con la ayuda de Germán) nos prepararon unas riquísimas patatas rellenas para el regimiento que éramos (bueno, igual no éramos tantos…) El caso es que nos encantó la idea y desde entonces la hemos incorporado a nuestro recetario.

Pics and Cakes


¿Qué necesitamos?

  • 4 patatas medianas

  • 5 lonchas de beicon

  • 1 cebolla

  • Queso

  • Sal

  • Pimienta


¿Cómo lo hacemos?

  • Asamos las patatas en el horno. (Podéis mirarlo aquí si no sabéis cómo hacerlo).

  • Mientras tanto cortamos el beicon y la cebolla y la pochamos en la sartén con un poco de aceite.

  • Cuando las patatas estés listas, podemos comprobar con un pincho de cocina, las sacamos del horno y las partimos por la mitad.

  • Con cuidado y con ayuda de una cuchara, vaciamos las mitades, dejando la piel con una capa fina de patata.

  • Mezclamos la patata extraída con el beicon y la cebolla pochados. Salpimentamos.

  • Rellenamos las mitades de patata con la mezcla, añadimos un poco de queso y ponemos en el horno a gratinar.


Consejos:

  • Acepta cualquier tipo de queso. A nosotros nos gusta con emmental (querido Watson).

  • Si no queréis hacer las patatas asadas, podéis cocerlas pero recomendamos que al menos gratinéis con el queso en el horno.

  • Esta es nuestra propuesta para el relleno. Podéis adaptarla a vuestros gustos.

Pics and Cakes

*[English version] STUFFED POTATOES * Ingredients:

  • *4 medium potatoes *

  • *5 bacon slices *

  • *1 onion *

  • Cheese

  • Salt

  • Pepper

* ** *

  • *Bake the potatoes in the oven. *

  • *Chop bacon and onion and stirfry in a frying pan with a bit of olive oil. *

  • *Check if the potatoes are ready and cut them into halves. *

  • *With a spoon empty the potatoes leaving the skin with a thin layer of potato. *

  • *Mix this potato with the onion and bacon. Add salt and pepper. *

  • *Fill the potato halves with this mix, add some cheese and enter into the oven. *


Tips:*- You can use any kind of cheese you like. We usually like to add emmental cheese. **- If you prefer, you can boil the potatoes instead of baking them. But for the final step we advice to keep using the oven. *- This is just a proposal, you can modify the ingredients for the filling according to your preferences.

27 de diciembre de 2012 · 2 min · Cesmm

Stuffed Potatoes

I have to admit we’re a bit like sponges — anything we see and like, we try to make at home. That’s exactly what happened with today’s recipe. A few years ago we went with friends to spend Easter week in Camposancos, a lovely little village in Pontevedra, and there Ana (with Germán’s help) made us some delicious stuffed potatoes that could have fed a regiment (well, maybe we weren’t quite that many…). The thing is, we loved the idea and ever since it’s been part of our recipe book.

Pics and Cakes

What do we need?

  • 4 medium potatoes

  • 5 slices of bacon

  • 1 onion

  • Cheese

  • Salt

  • Pepper

How do we make it?

  • Bake the potatoes in the oven. (You can check here if you’re not sure how to do it.)

  • Meanwhile, chop the bacon and onion and sauté them in a pan with a little olive oil.

  • When the potatoes are ready — you can check by poking them with a kitchen skewer — take them out of the oven and cut them in half.

  • Carefully, with the help of a spoon, scoop out the halves, leaving the skin with a thin layer of potato.

  • Mix the scooped-out potato with the sautéed bacon and onion. Season with salt and pepper.

  • Fill the potato halves with the mixture, add a bit of cheese on top, and put them in the oven to broil.

Tips:

  • Any kind of cheese works. We like it with Emmental (elementary, my dear Watson).

  • If you don’t feel like baking the potatoes, you can boil them instead, but we recommend at least broiling them with the cheese in the oven.

  • This is just our take on the filling. Feel free to adapt it to your taste.

Pics and Cakes

27 de diciembre de 2012 · 2 min · Cesmm

Paté de sardinas

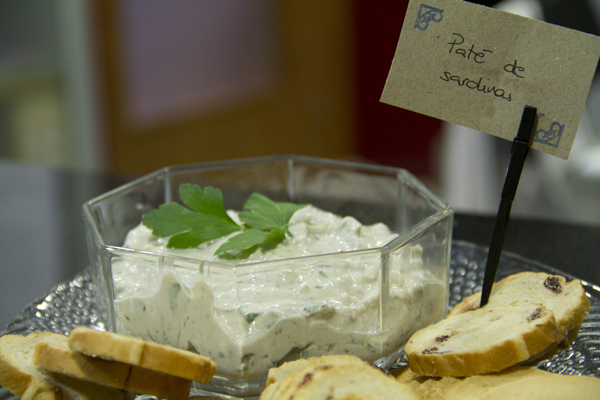
Es una de esas recetas que se hace casi sin pensar, con pocos ingredientes y todos de lo más normalito. Una forma fácil de tomar un aperitivo que sabes exactamente de qué está hecho y que seguro soprenderá a más de uno. Nosotros lo hicimos como parte de un amplio menú de merienda tipo buffet para un cumpleaños. Se puede presentar ya untado, montado en unas tartaletas o, si lo preferimos, en un bonito cuenco para que cada uno se sirva a su antojo.

 Pics and Cakes

¿Qué necesitamos?

  • 1 lata pequeña de sardinas en aceite de oliva

  • 70 g de queso crema

  • ¼ de cebolleta

  • 60 ml de zumo de limón

  • Perejil picado

  • Sal y pimienta negra

¿Cómo lo hacemos?

  • Escurrimos las sardinas y, con ayuda de un cuchillo fino, les retiramos la espina central (si son sardinillas, es posible que no haga falta).

  • Picamos la cebolleta en trocitos pequeños.

  • Ponemos en un bol todos los ingredientes y los mezclamos machacándolos con un tenedor (si queremos que se noten los trozos) o con la batidora (si preferimos un paté más fino y suave).

  • Dejamos refrigerar en la nevera al menos una hora para que se unan sabores y espese.

Consejos:

  • Se puede hacer el día anterior, así cogerá más cuerpo y además adelantaremos trabajo en la cocina.

  • Para aquellos que les guste, pueden sustituir el perejil por cilantro.

*[English version]   SARDINE PÂTÉ * **Ingredients:

  • 1 small tin of sardines in olive oil

  • 70 g cream cheese

  • ¼ spring onion

  • 60 ml fresh lemon juice

  • Chopped parsley

  • Salt and black pepper

  • Drain sardines and remove the central bone with a sharp knive.

  • Finely chop the spring onion.

  • Put all the ingredients together into a bowl and mix smashing them with a fork (if you want to feel the ingredients) or with a mixer (if you prefer a thinner and smoother pâté).

  • Leave cool in the fridge for at least 1 hour. It will unify flavours and become thicker.

Tips:

  • You can prepare it the day before. It will be tastier and you’ll save time in the kitchen.

  • If you like, you can use coriander instead of parsley.


7 de diciembre de 2012 · 2 min · Palstelera

Sardine pâté

This is one of those recipes that comes together almost without thinking, with just a few totally everyday ingredients. An easy way to put out an appetizer where you know exactly what’s in it and that’s bound to surprise more than one guest. We made it as part of a big buffet-style spread for a birthday. You can serve it already spread, piped into little tartlets, or, if you prefer, in a pretty bowl so everyone can help themselves.

Pics and Cakes

What do we need?

  • 1 small tin of sardines in olive oil

  • 70 g (2.5 oz) cream cheese

  • ¼ spring onion

  • 60 ml (¼ cup) lemon juice

  • Chopped parsley

  • Salt and black pepper

How do we make it?

  • Drain the sardines and, with the help of a thin knife, remove the central bone (if they’re baby sardines, you probably won’t need to).

  • Finely chop the spring onion.

  • Put all the ingredients in a bowl and mix, mashing them with a fork (if you want to feel the chunks) or with a blender (if you’d rather have a smoother, finer pâté).

  • Refrigerate for at least an hour so the flavors meld and it thickens up.

Tips:

  • You can make it the day before — it’ll firm up nicely and you’ll get a head start on the kitchen work.

  • For those who like it, you can swap the parsley for cilantro.

*[English version] SARDINE PÂTÉ

  • **Ingredients:
  • 1 small tin of sardines in olive oil

  • 70 g cream cheese

  • ¼ spring onion

  • 60 ml fresh lemon juice

  • Chopped parsley

  • Salt and black pepper

  • Drain sardines and remove the central bone with a sharp knive.

  • Finely chop the spring onion.

  • Put all the ingredients together into a bowl and mix smashing them with a fork (if you want to feel the ingredients) or with a mixer (if you prefer a thinner and smoother pâté).

  • Leave cool in the fridge for at least 1 hour. It will unify flavours and become thicker.

Tips:

  • You can prepare it the day before. It will be tastier and you’ll save time in the kitchen.

  • If you like, you can use coriander instead of parsley.


Comments

cris (2013-01-02 18:27:57):

This pâté is sooooo good! and super easy to make! we made it for New Year’s Eve and it was a hit. Don’t go thinking you’re about to eat a tin of sardines — between the onion, the bit of lemon and the cheese, it’s a super tasty mousse!!

Thanks so much to you both

xx

Palstelera (2013-01-05 00:16:37):

So glad you made it for New Year’s Eve and that you all enjoyed it… :-D

7 de diciembre de 2012 · 3 min · Palstelera